User Pool Migration Guide
ESP RainMaker has two Cognito user pools: rainmaker-user-pool and rainmaker-user-email-mobile-pool. The newer pool, rainmaker-user-email-mobile-pool, supports OTP-based login and phone number-based users in addition to the features of the rainmaker-user-pool. We recommend using the Email & Phone User Pool for third-party and voice assistant integrations, as it is continually maintained. The Email User Pool will be deprecated soon.
If you have already set up RainMaker with the old pool, follow this guide sequentially to migrate to the new pool.
1. Upgrades
1a. Backend
- Upgrade the RainMaker backend by following these steps.
1b. Frontend
- Upgrade the RainMaker frontend by following these steps.
2. Domain Creation
- Create a new domain for your company by following these steps.
3. Manual Third-Party Console Changes
To check if this step applies to you, verify the currently configured identity providers.
-
Log in to the RainMaker dashboard with your admin account. Go to
Deployment Settings.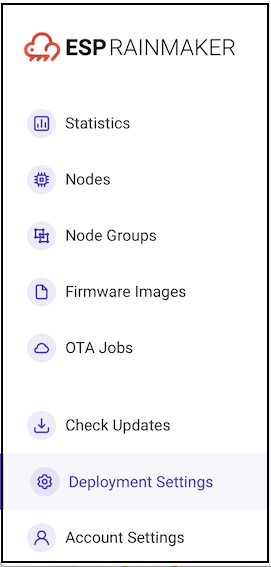
-
Go to the
Identity Providerstab. Toggle the old pool.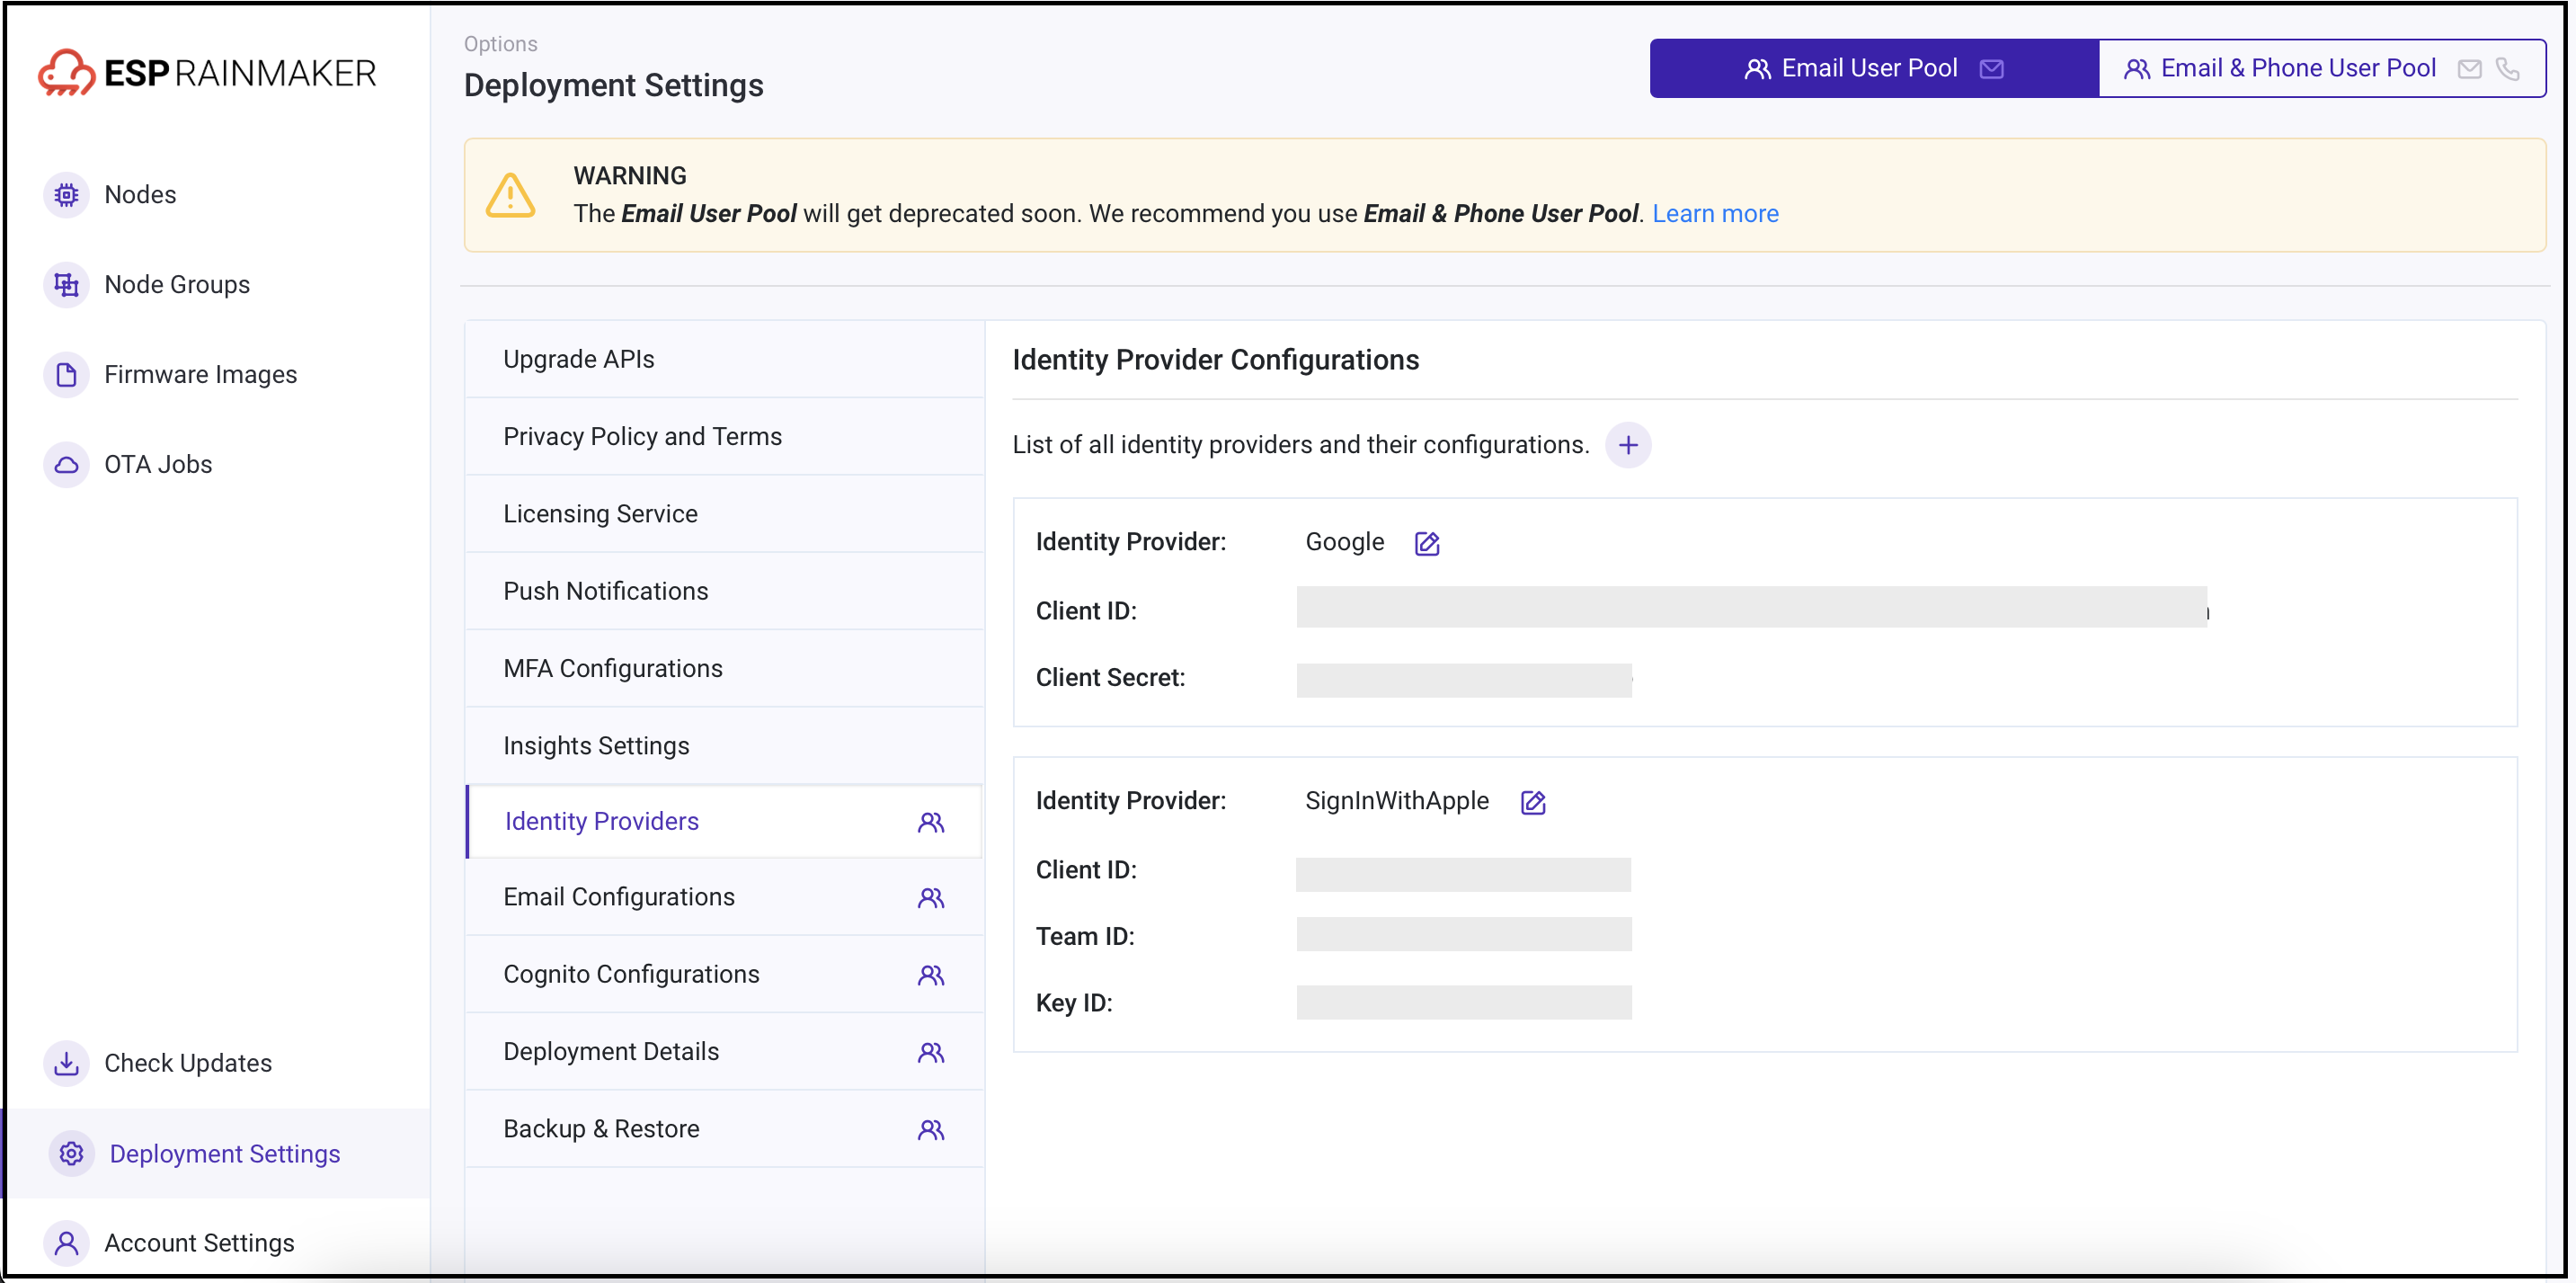
-
Note down the enabled identity providers; you need to perform the next steps only for these providers.
3a. Google
Configurations in the Google Developer Account
-
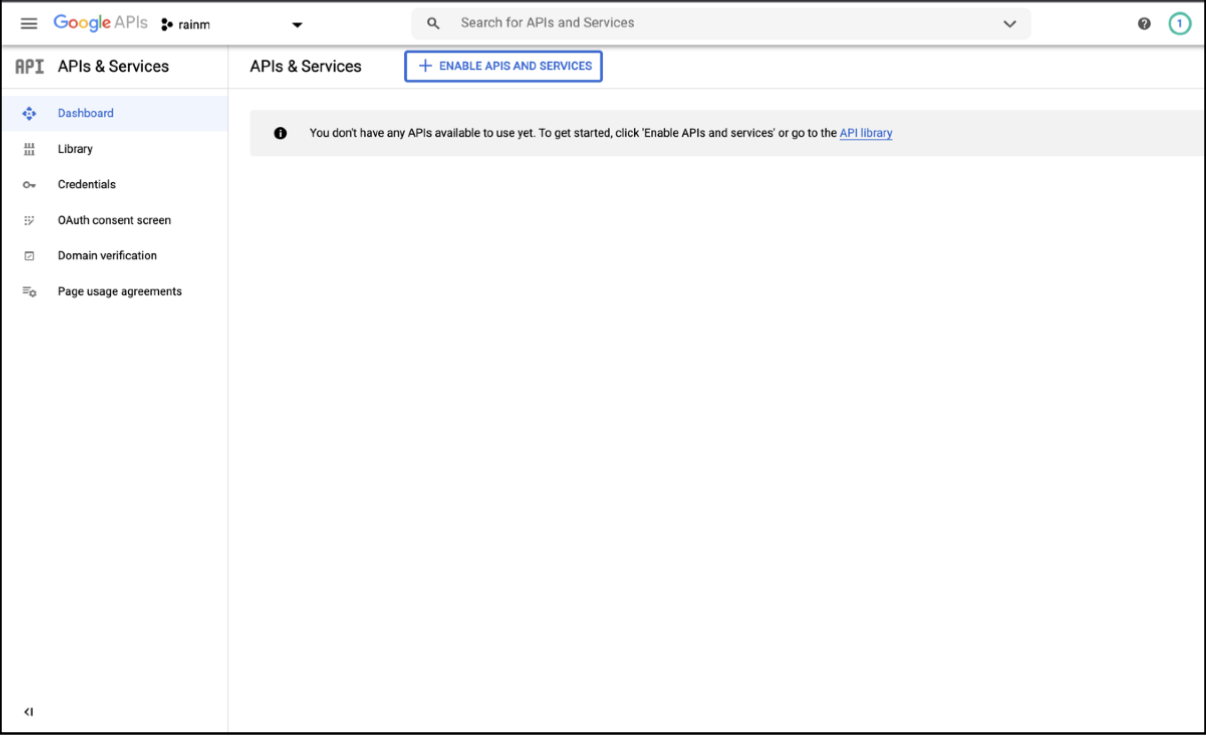
Sign in to the Google API console with your Google developer account credentials at https://console.developers.google.com/.
-
When you log in to the Google developer console, the following interface appears.
-
In the Google API console, click
Credentialsin the left navigation pane.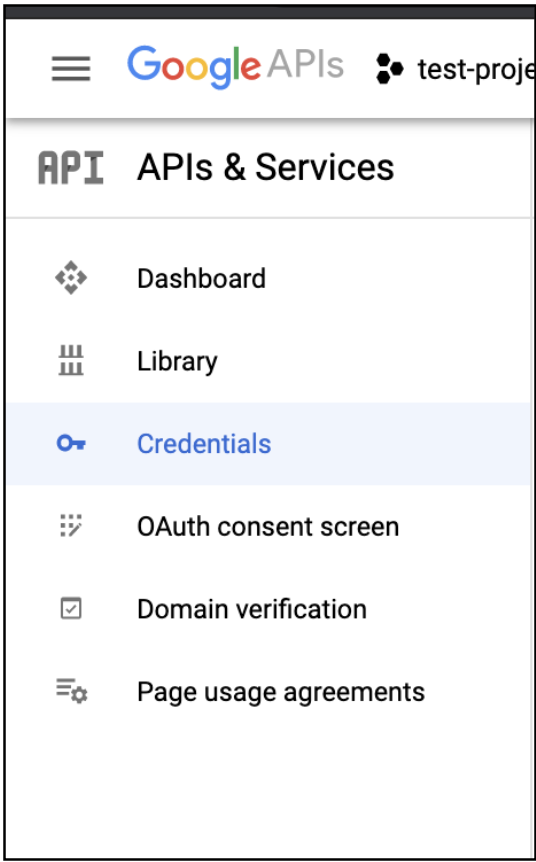
-
You will see a list of
OAuth 2.0 Client IDs.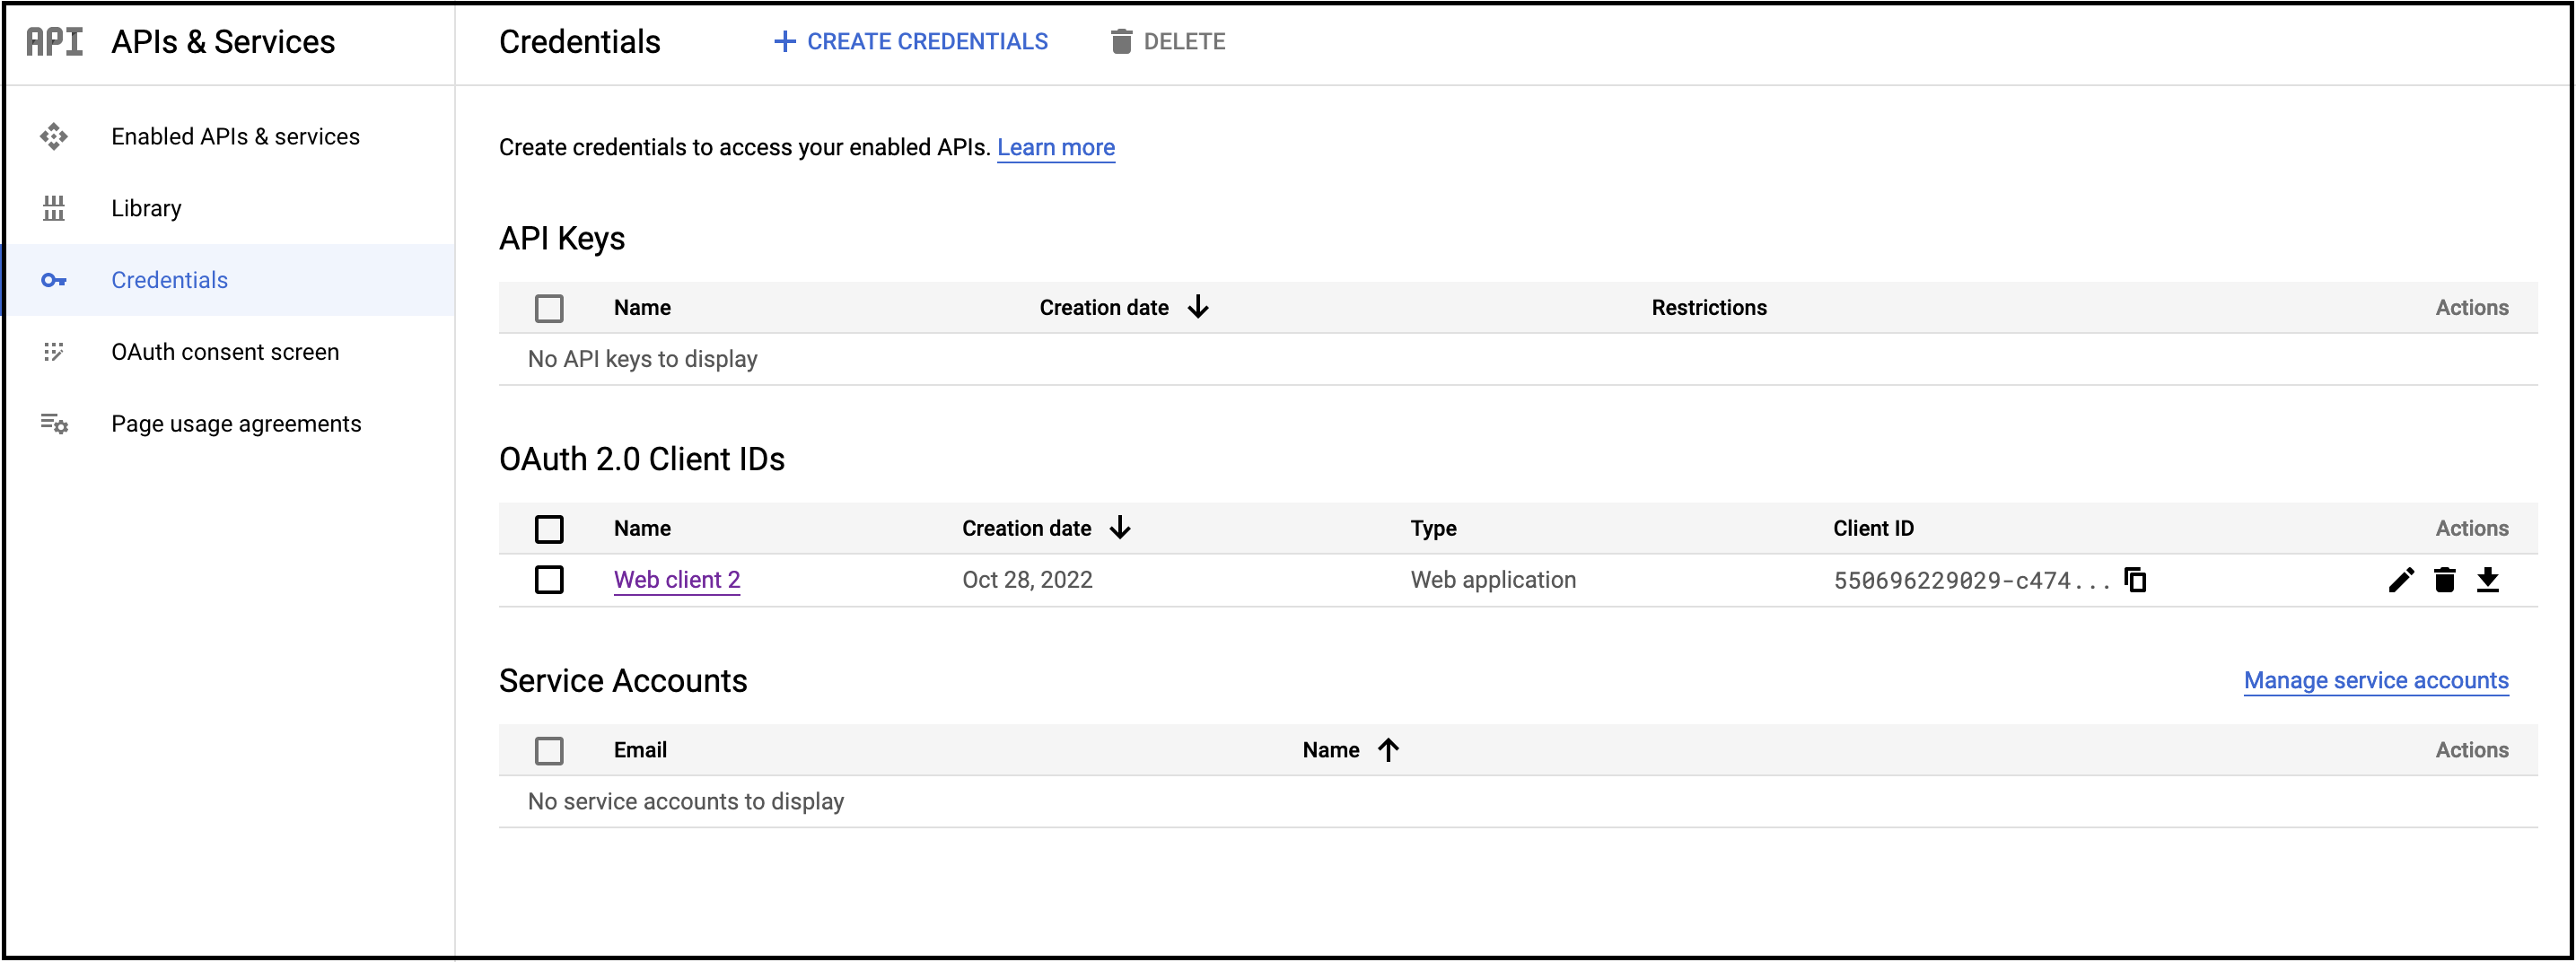
-
Select the client you created while configuring Google sign-in for the first time.
-
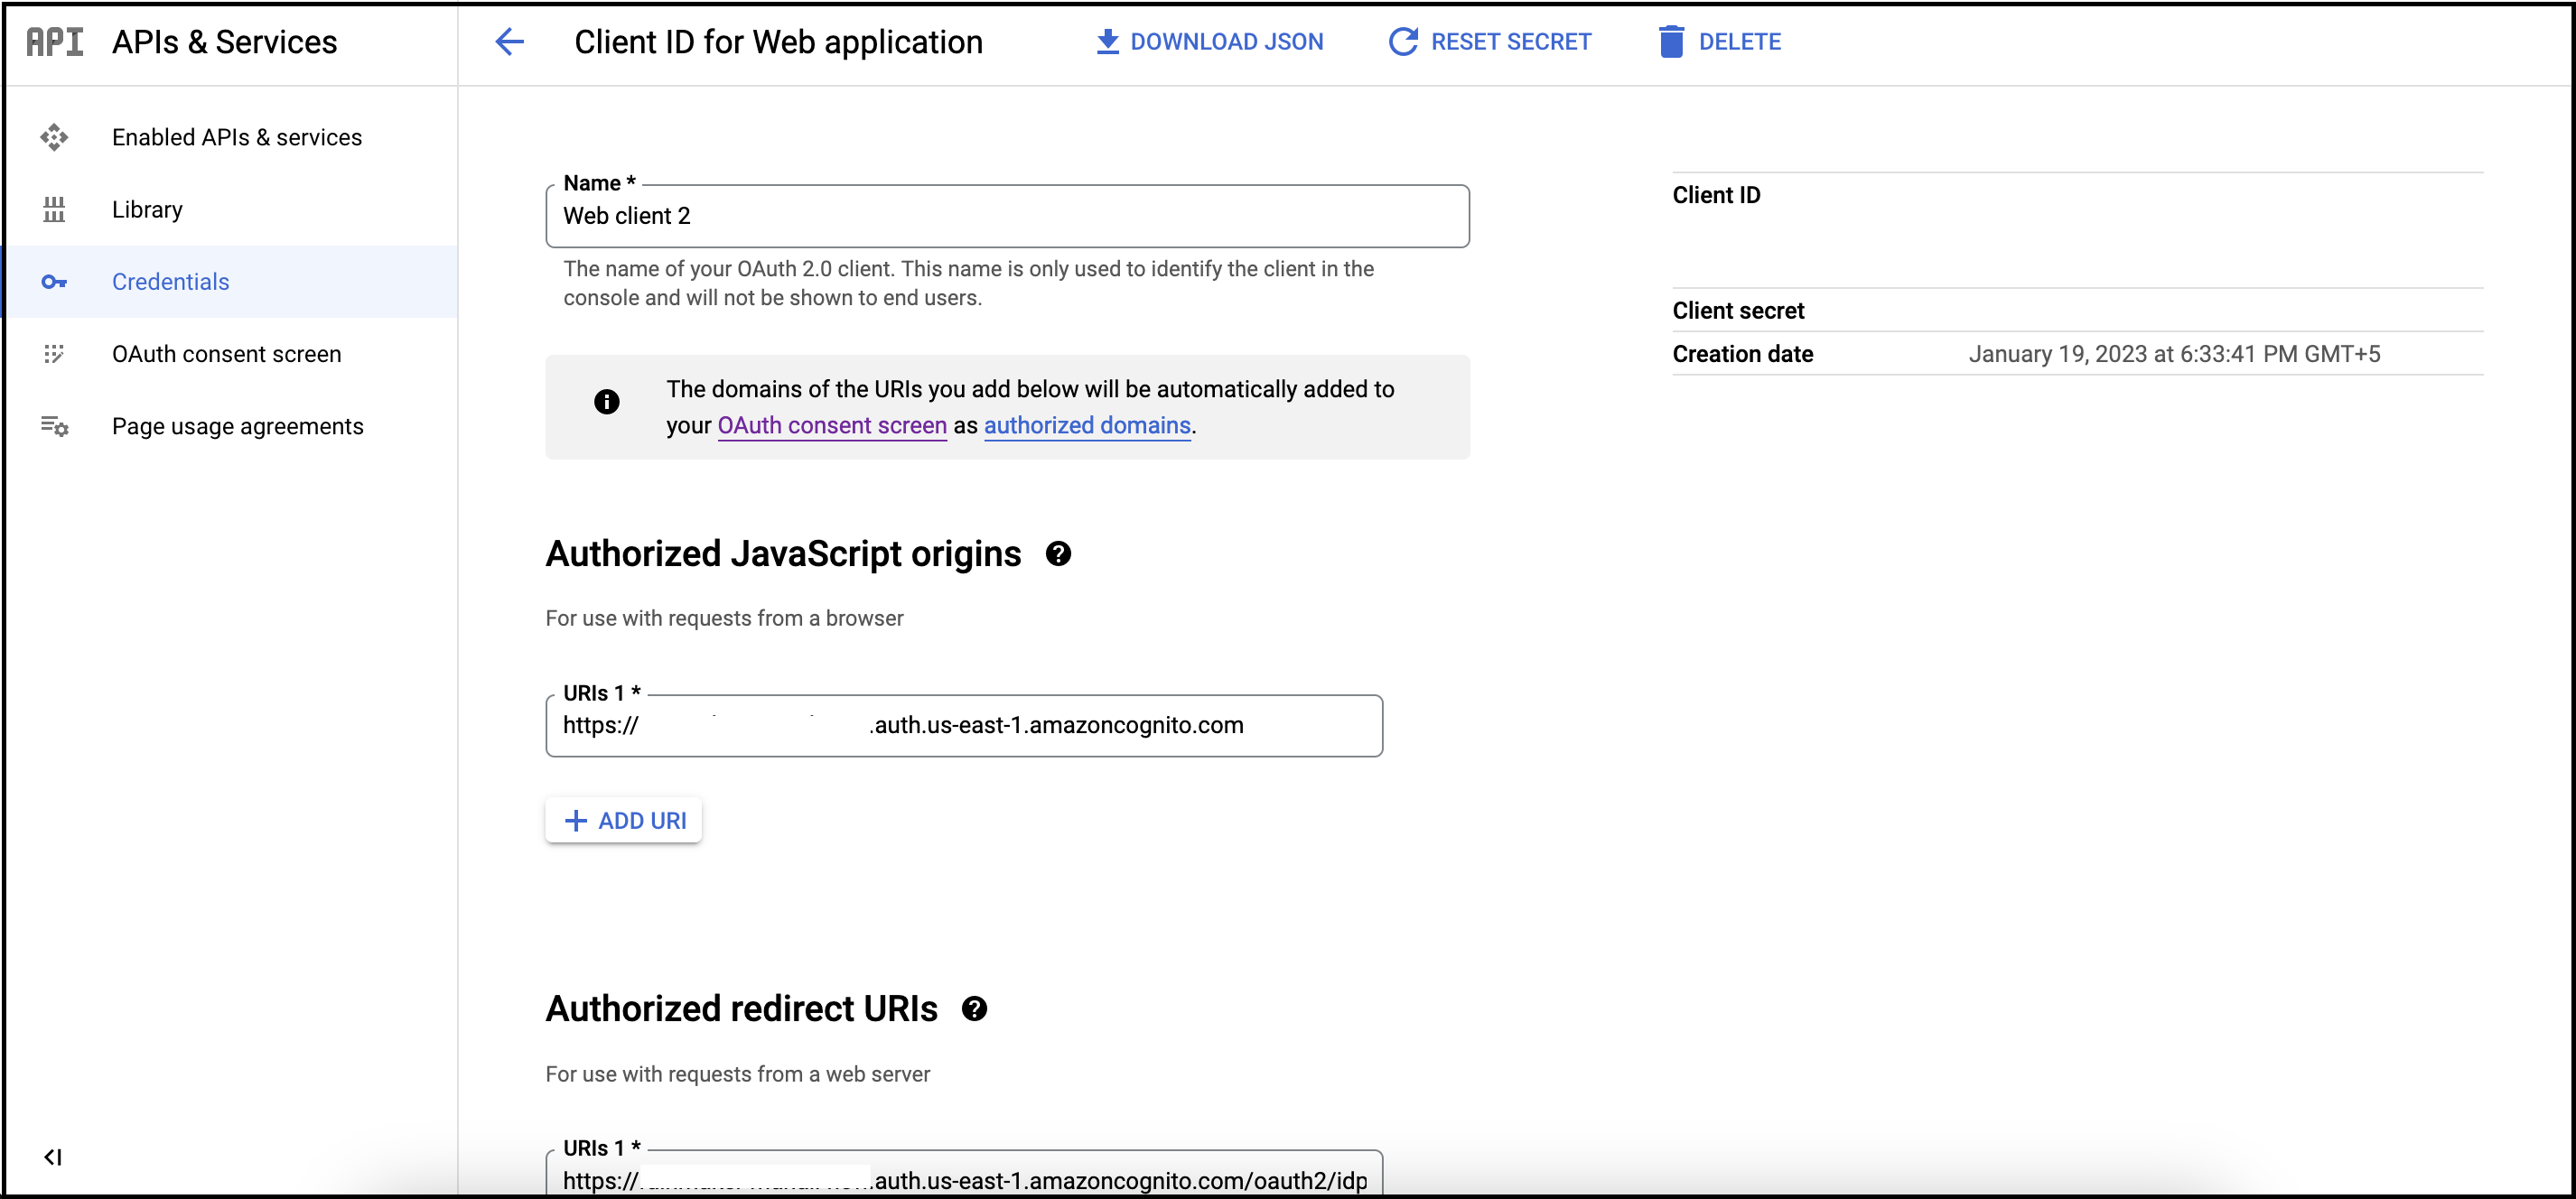
Add new URIs as shown below:
URI Steps to Get the value Authorized JavaScript origins Add <new-company-domain>.auth.<aws-region>.amazoncognito.com, where<new-company-domain>is the newly created domain in step 2.Authorized redirect URIs Add https://<new-company-domain>.auth.<aws-region>.amazoncognito.com/oauth2/idpresponse, where<new-company-domain>is the newly created domain in step 2.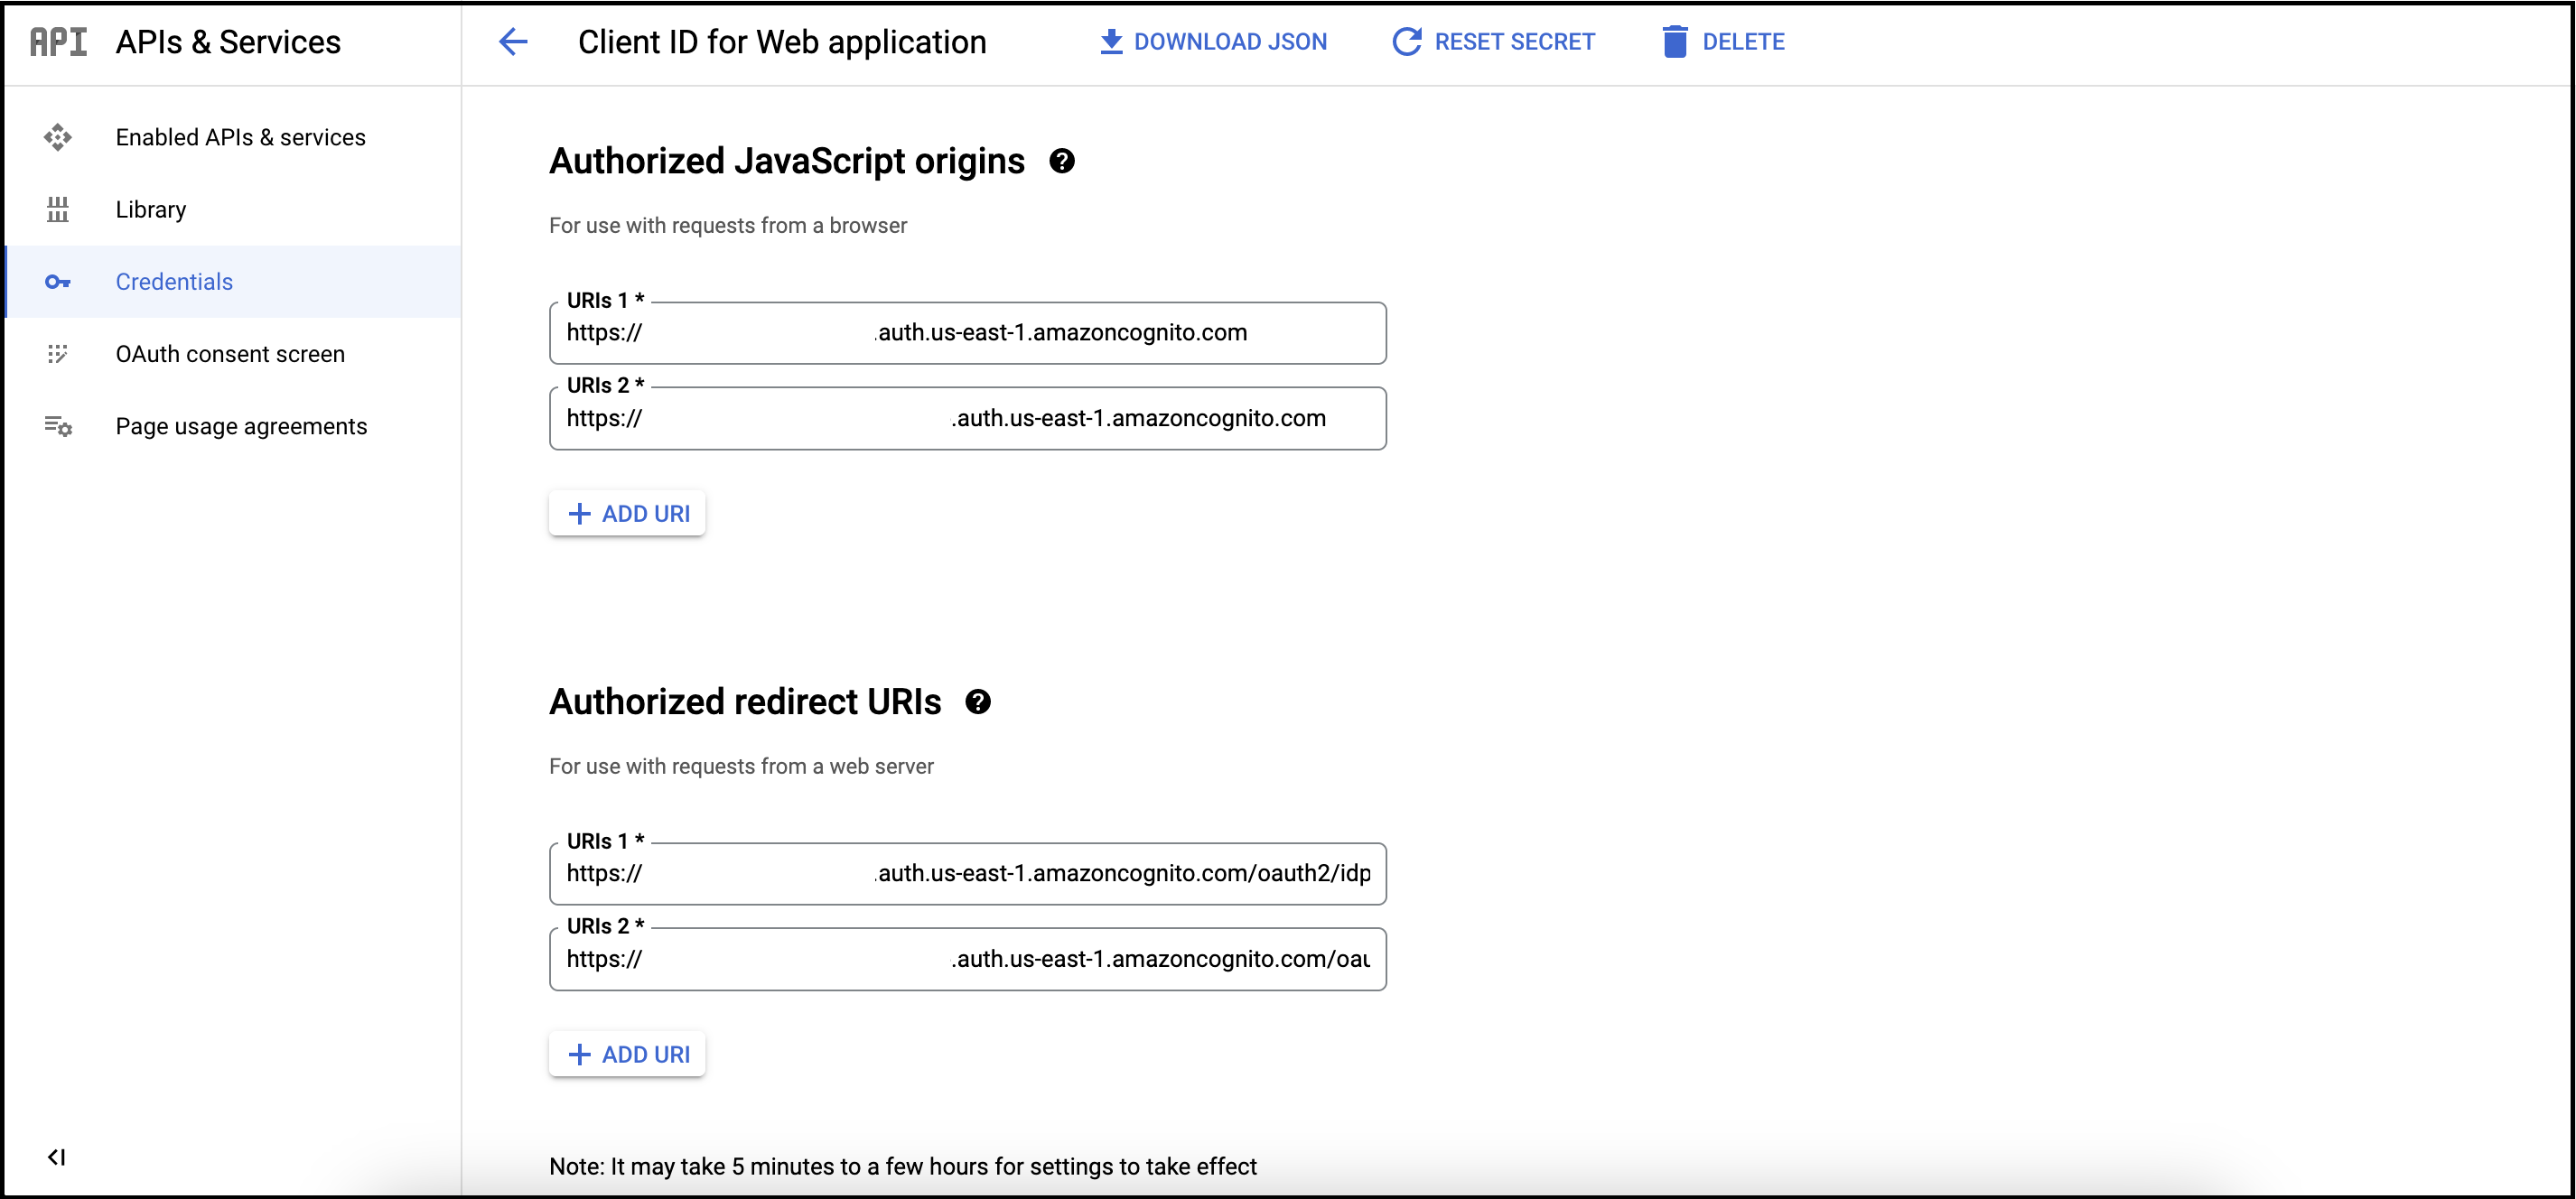
-
Click
Save.
Configure Google as Identity Provider via RainMaker dashboard
-
Log in to the RainMaker dashboard with your admin account. Go to
Deployment Settings. -
Go to the
Identity Providerstab. Toggle to the old pool and note down the values. -
Follow these steps to add the Google provider for the new pool with the noted parameters.
3b. Apple
Configurations in the Apple Developer Account
-
Sign in to the Apple developer console with your Apple developer account credentials at https://developer.apple.com/account/resources/certificates/list.
-
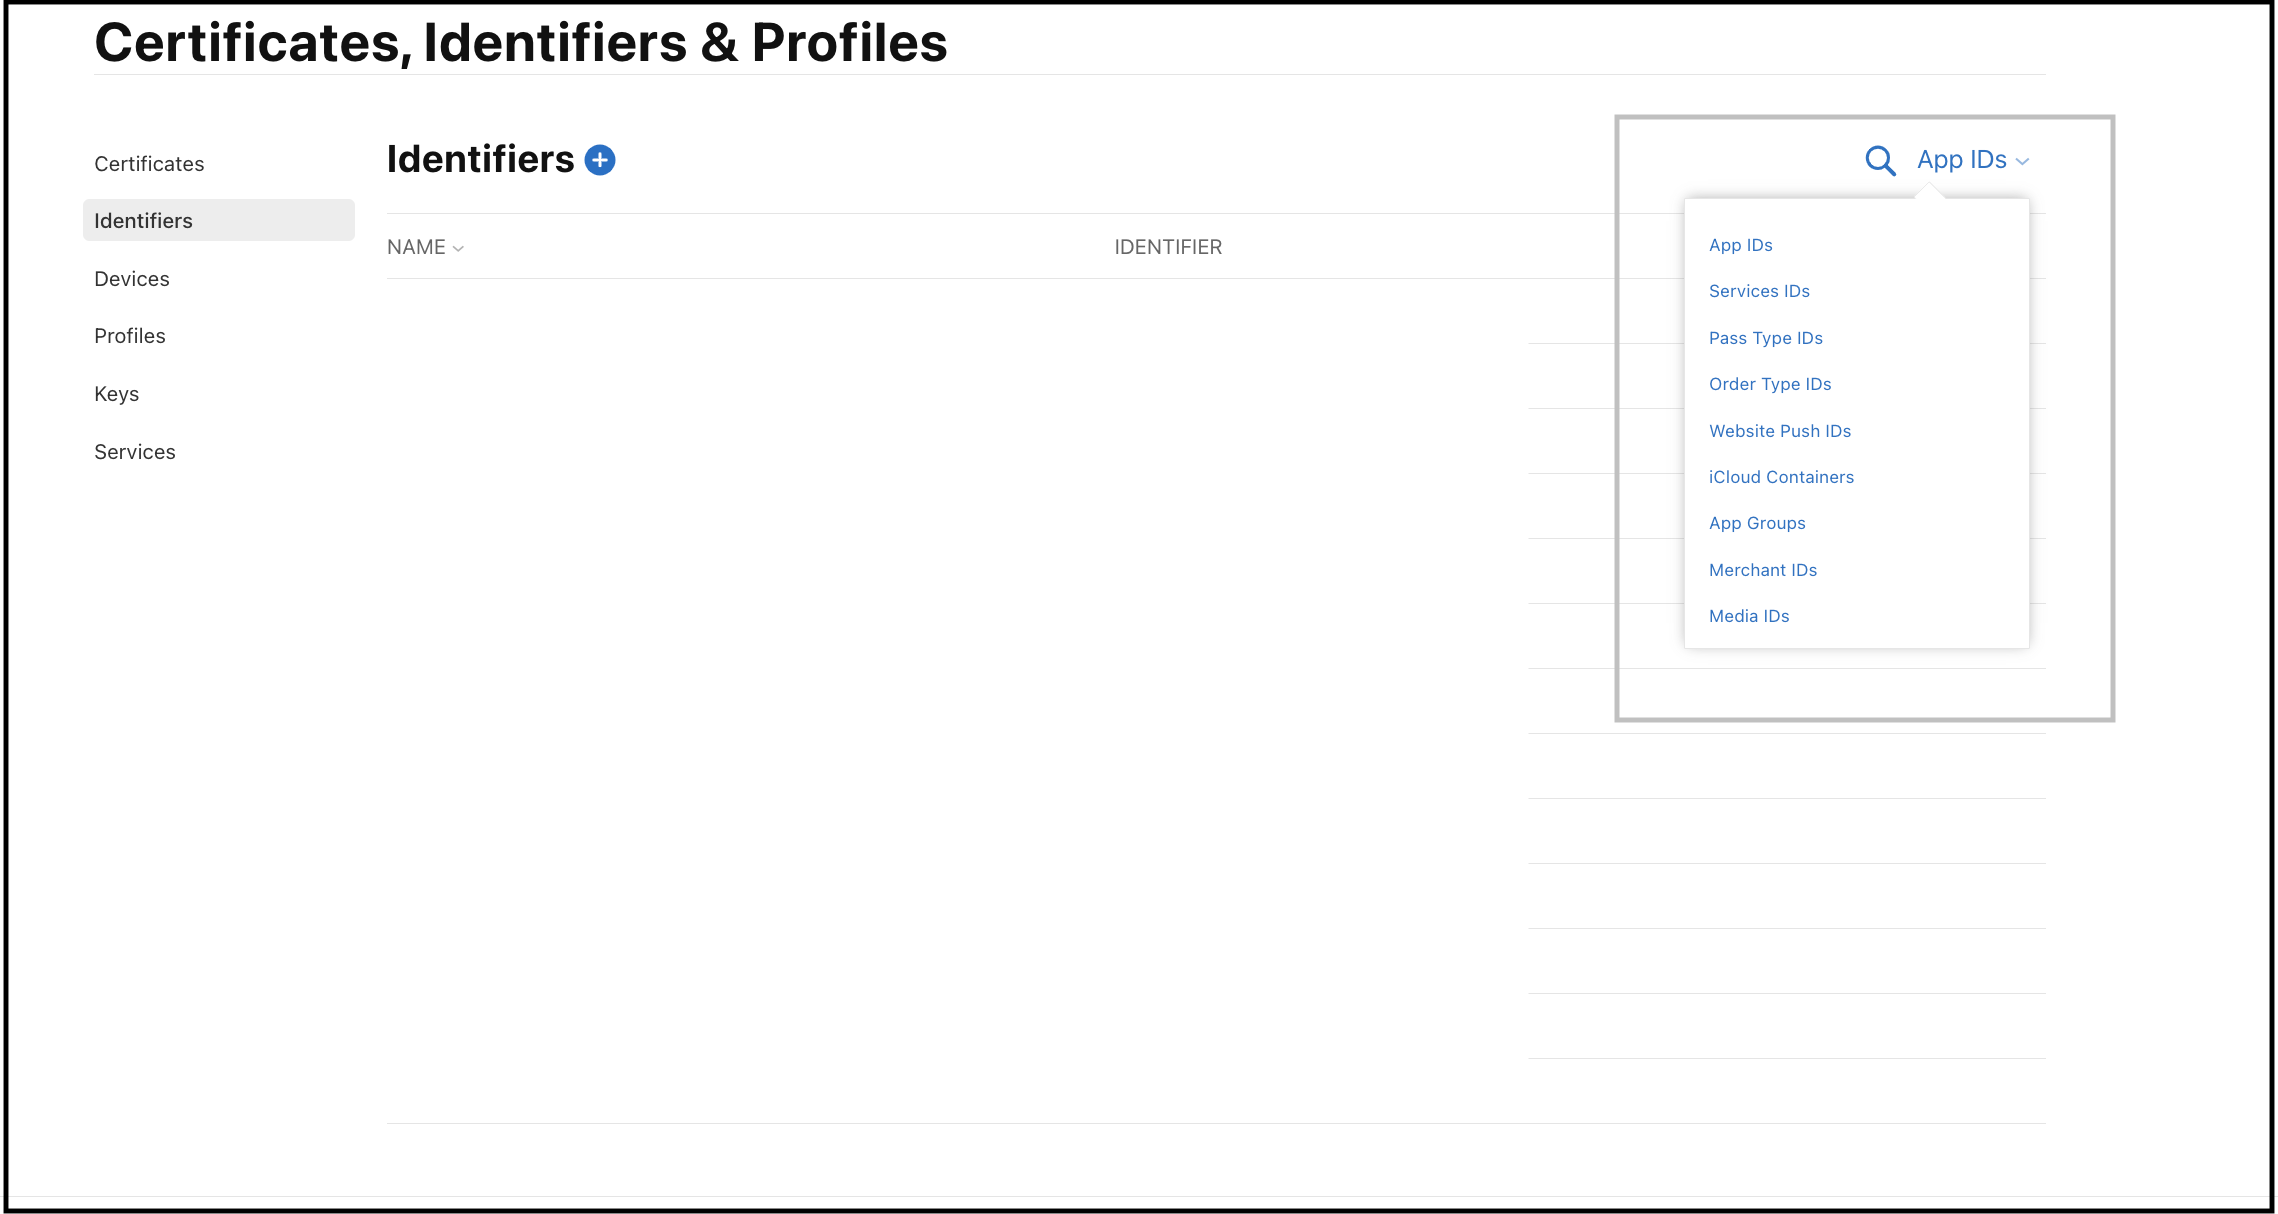
Go to
Identifiersand selectService IDs.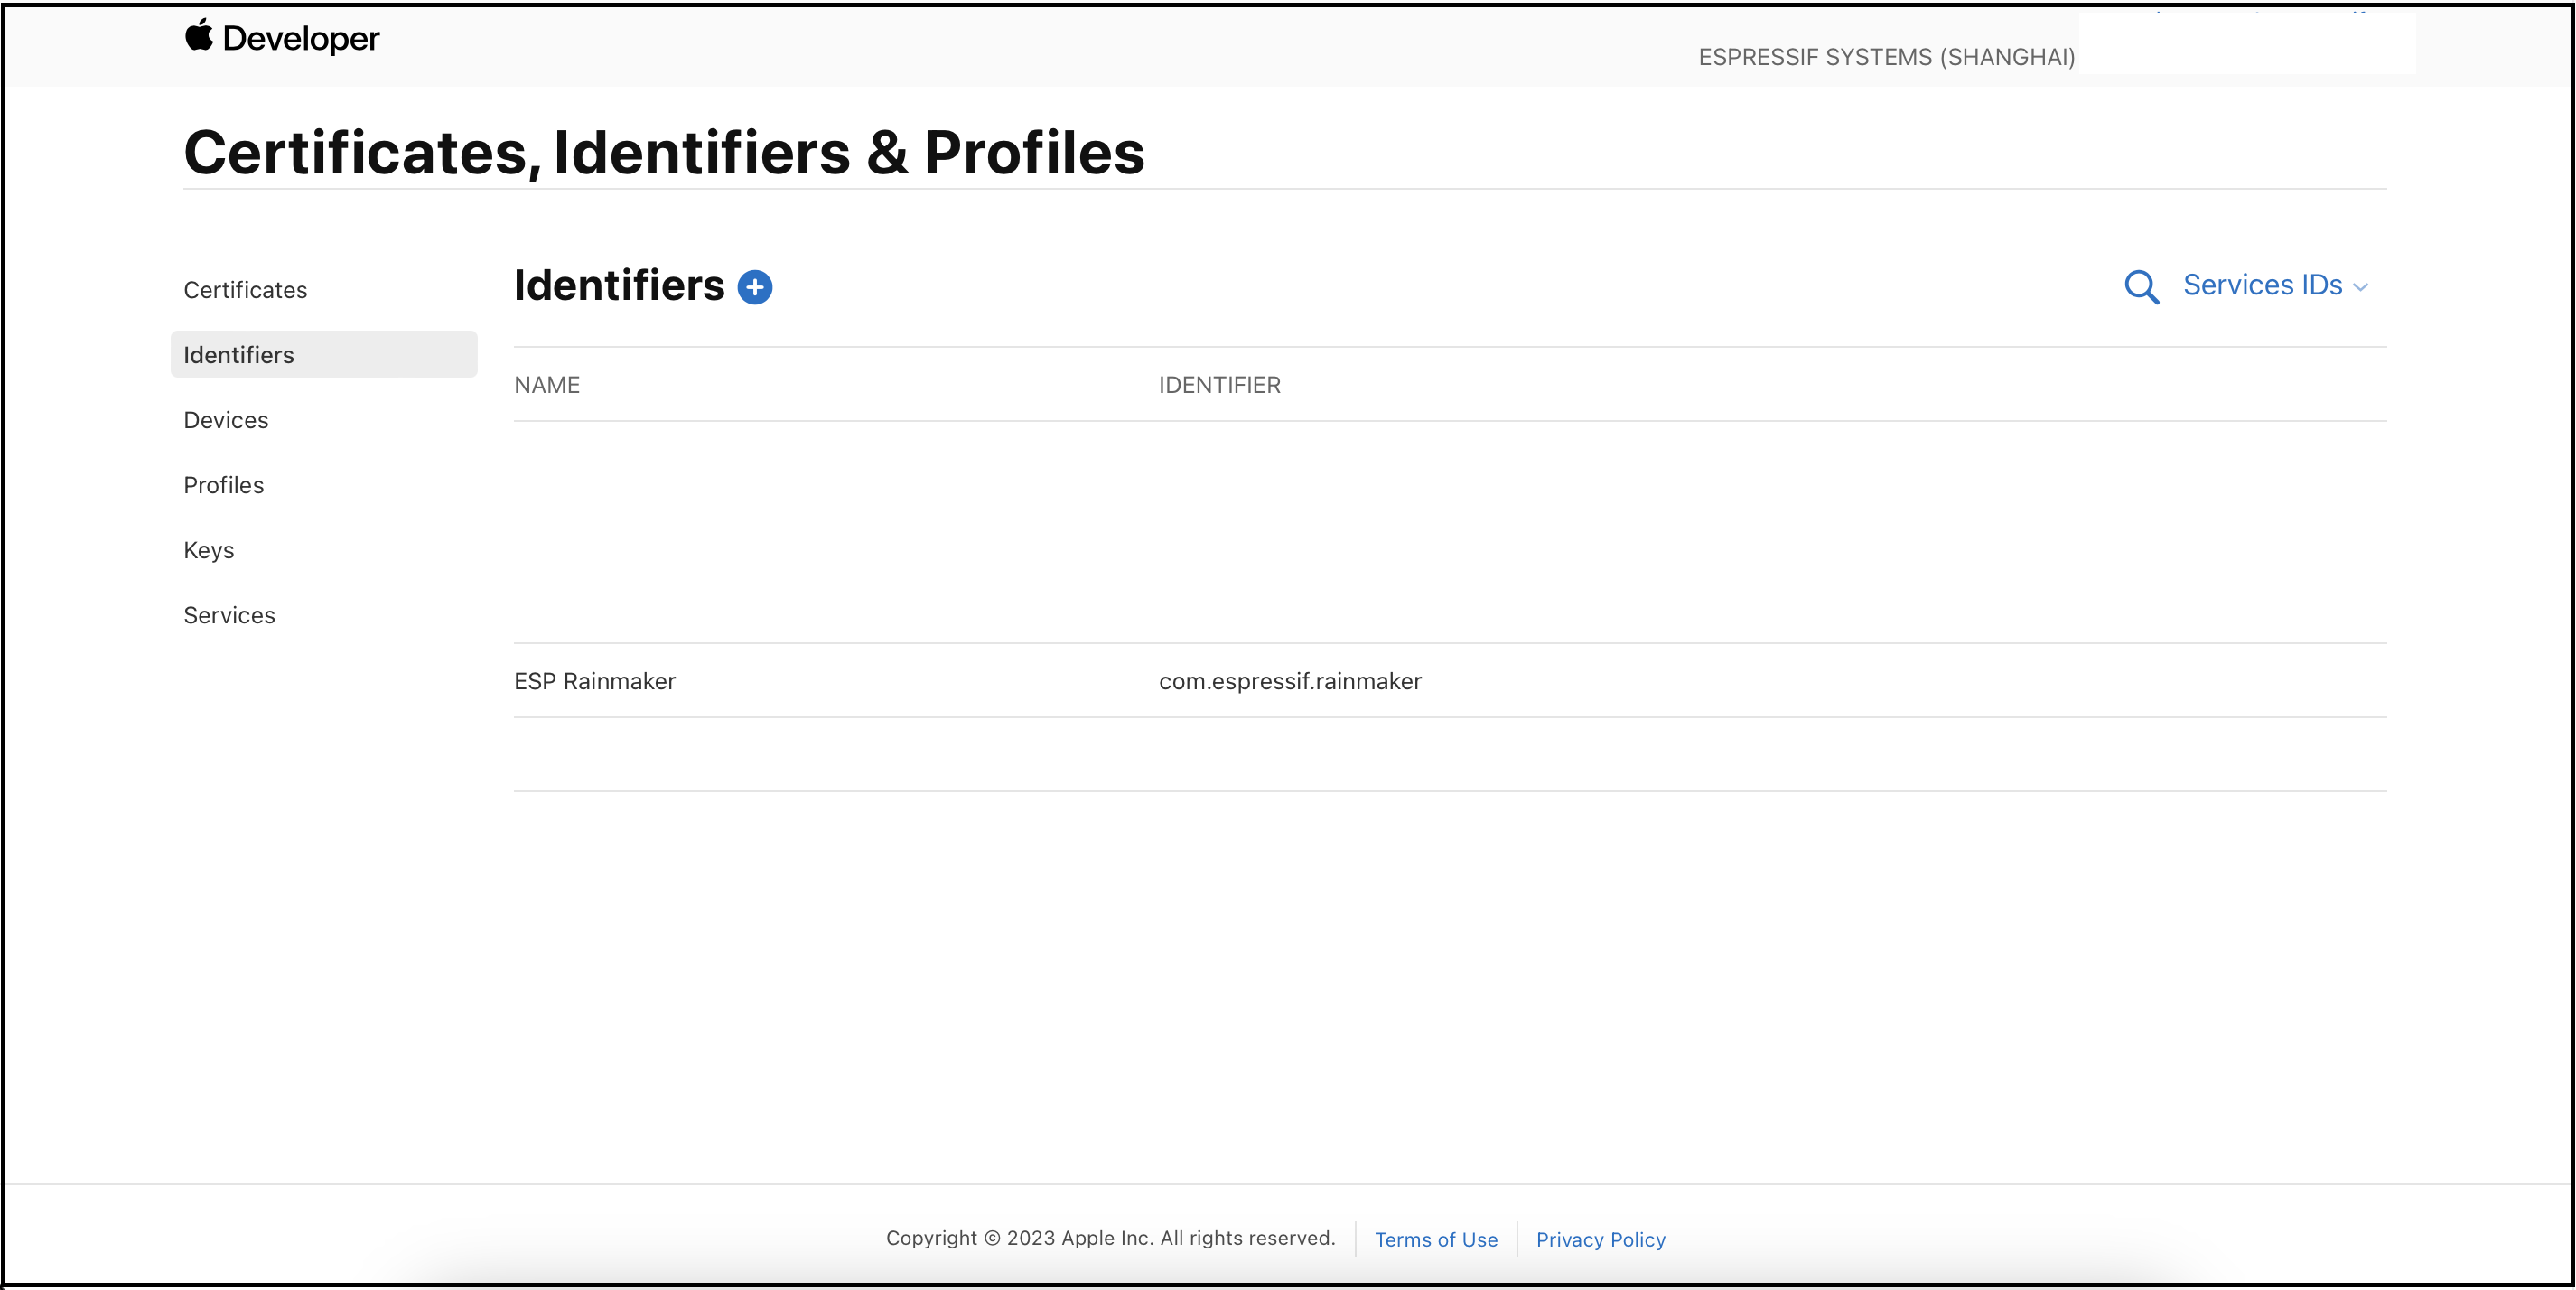
-
Select the previously configured service identifier for your app.
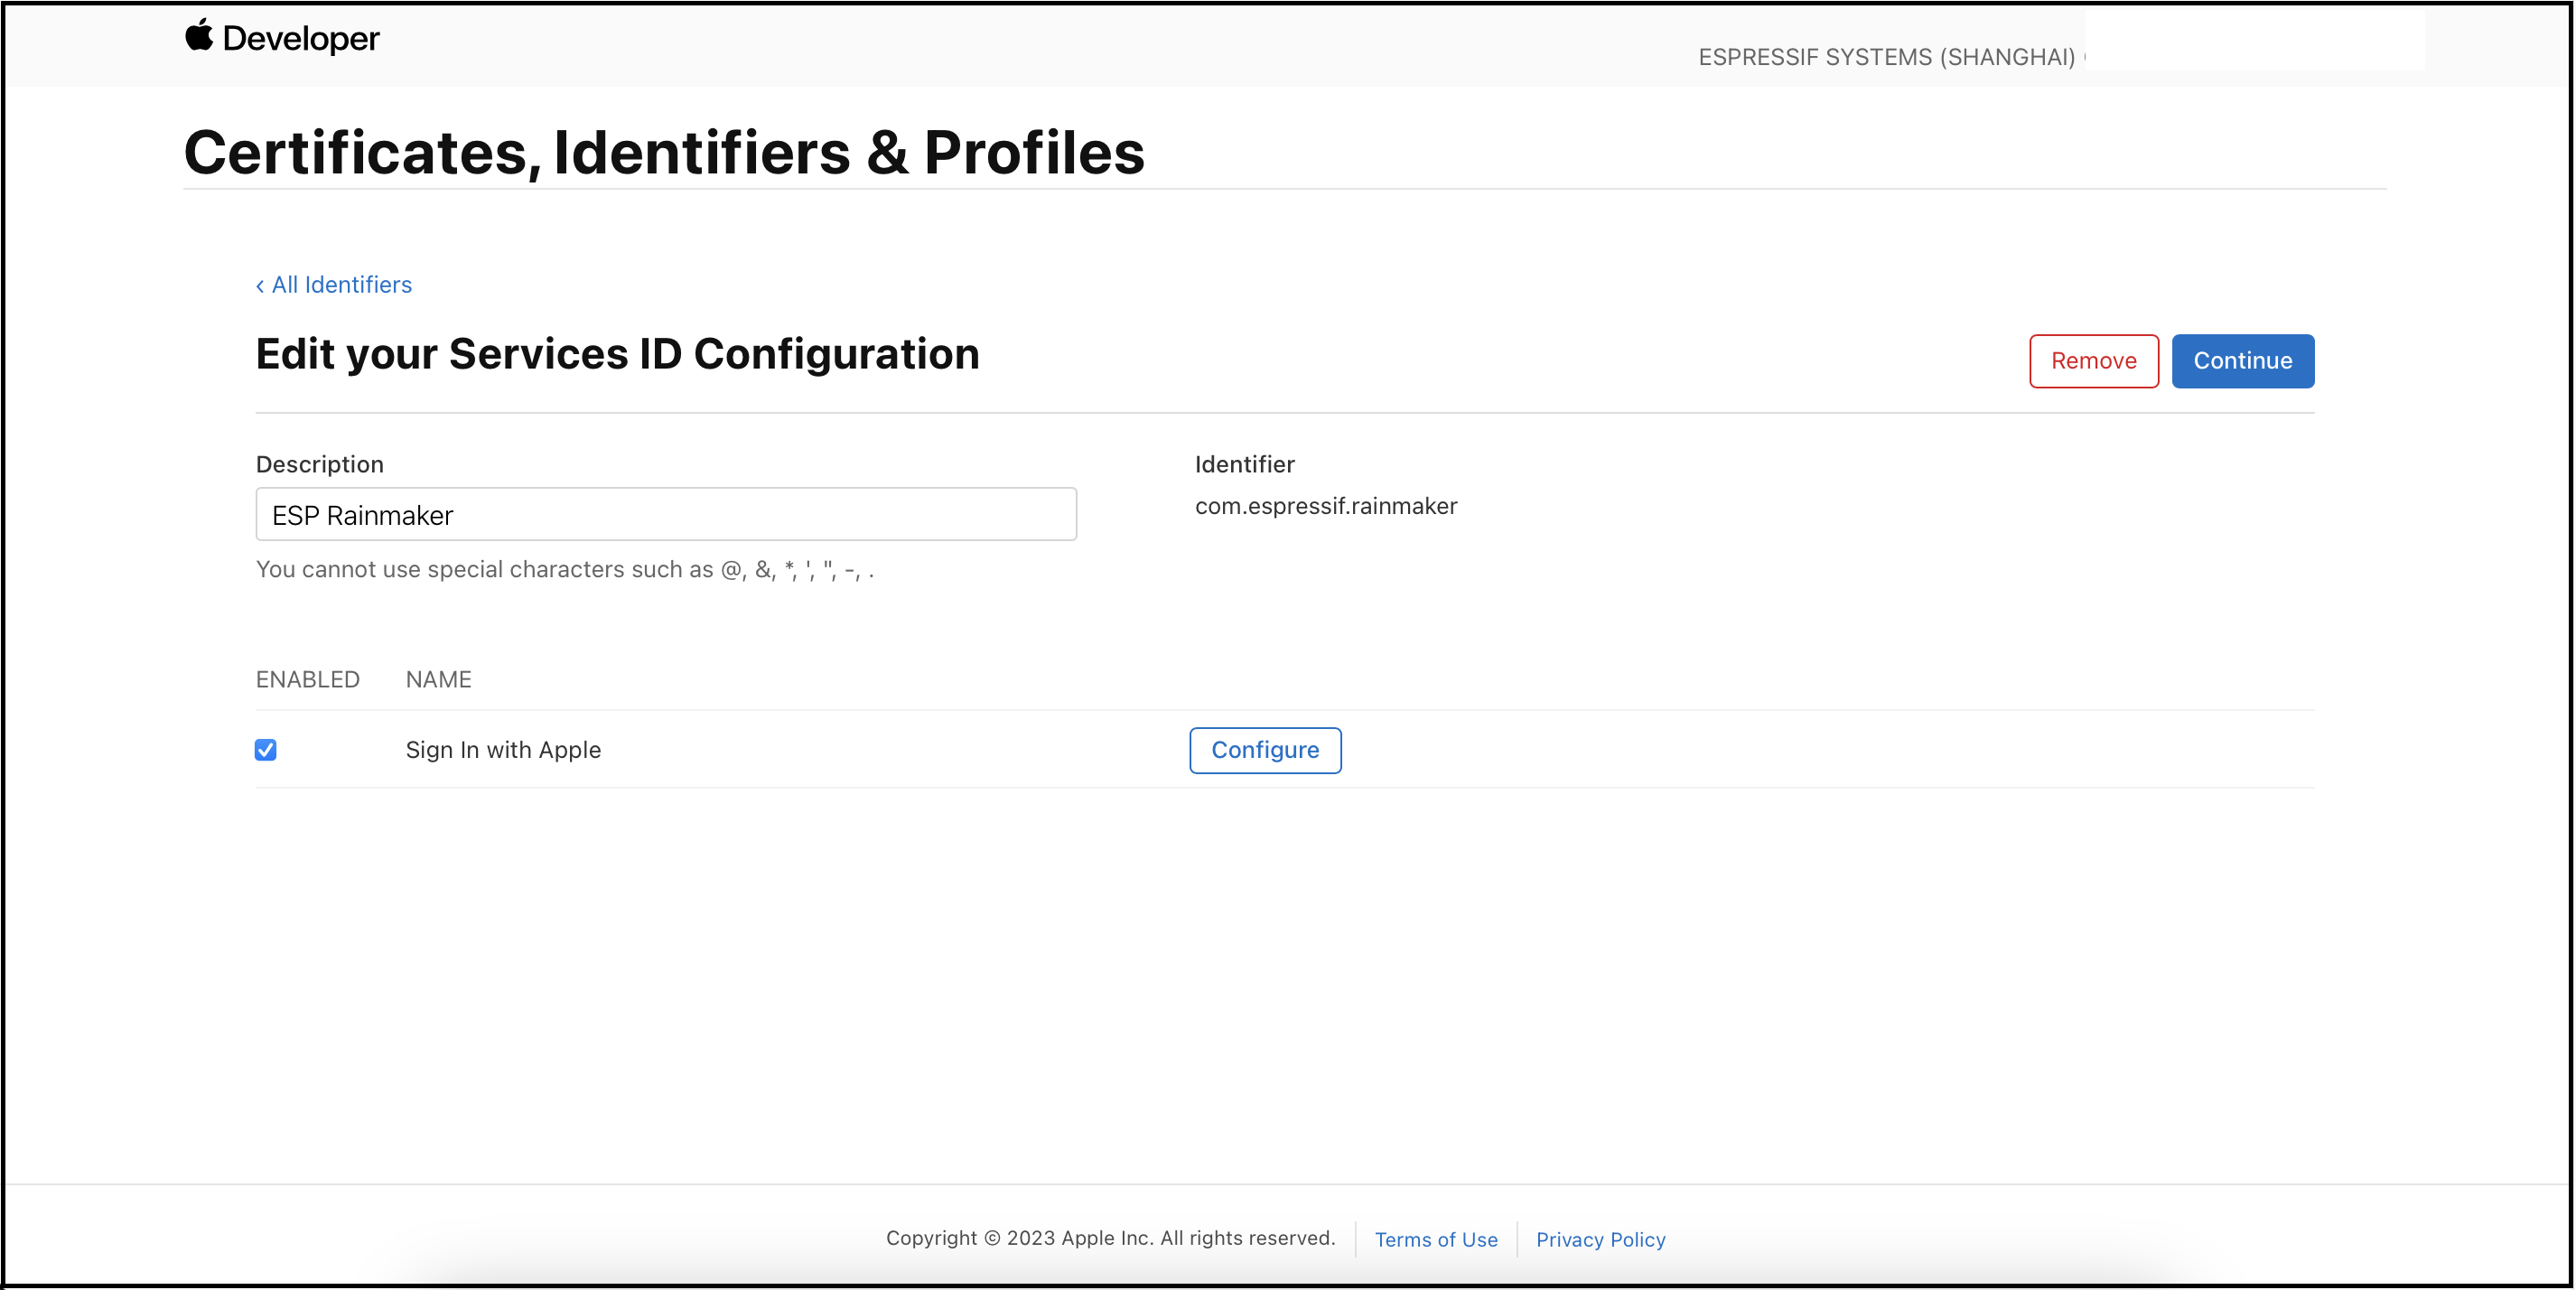
-
Click
Configure.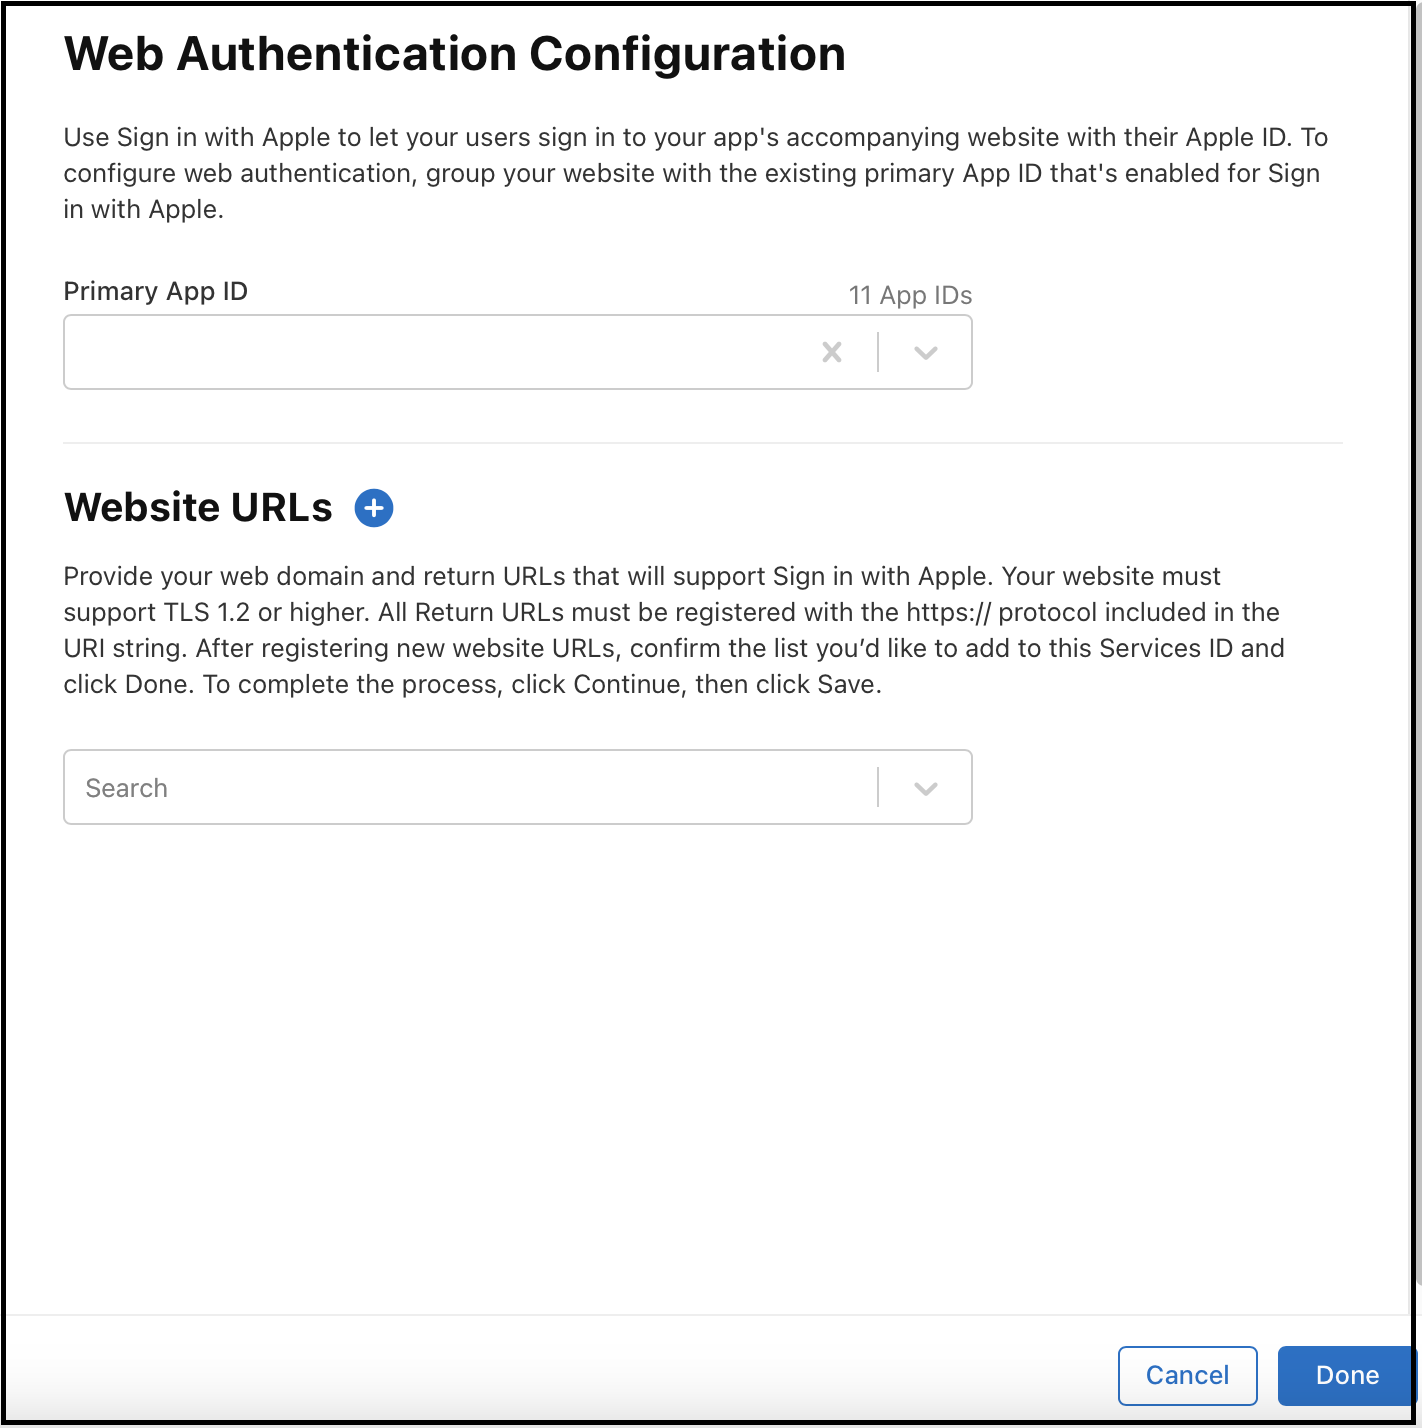
-
Click the
+icon next toWebsite URLs. -
Add new URIs as shown below:
URL Steps to Get the Value Domains and Subdomains Add <new-company-domain>.auth.<aws-region>.amazoncognito.com, where<new-company-domain>is the newly created domain in step 2.Return URLs Add https://<new-company-domain>.auth.<aws-region>.amazoncognito.com/oauth2/idpresponse, where<new-company-domain>is the newly created domain in step 2.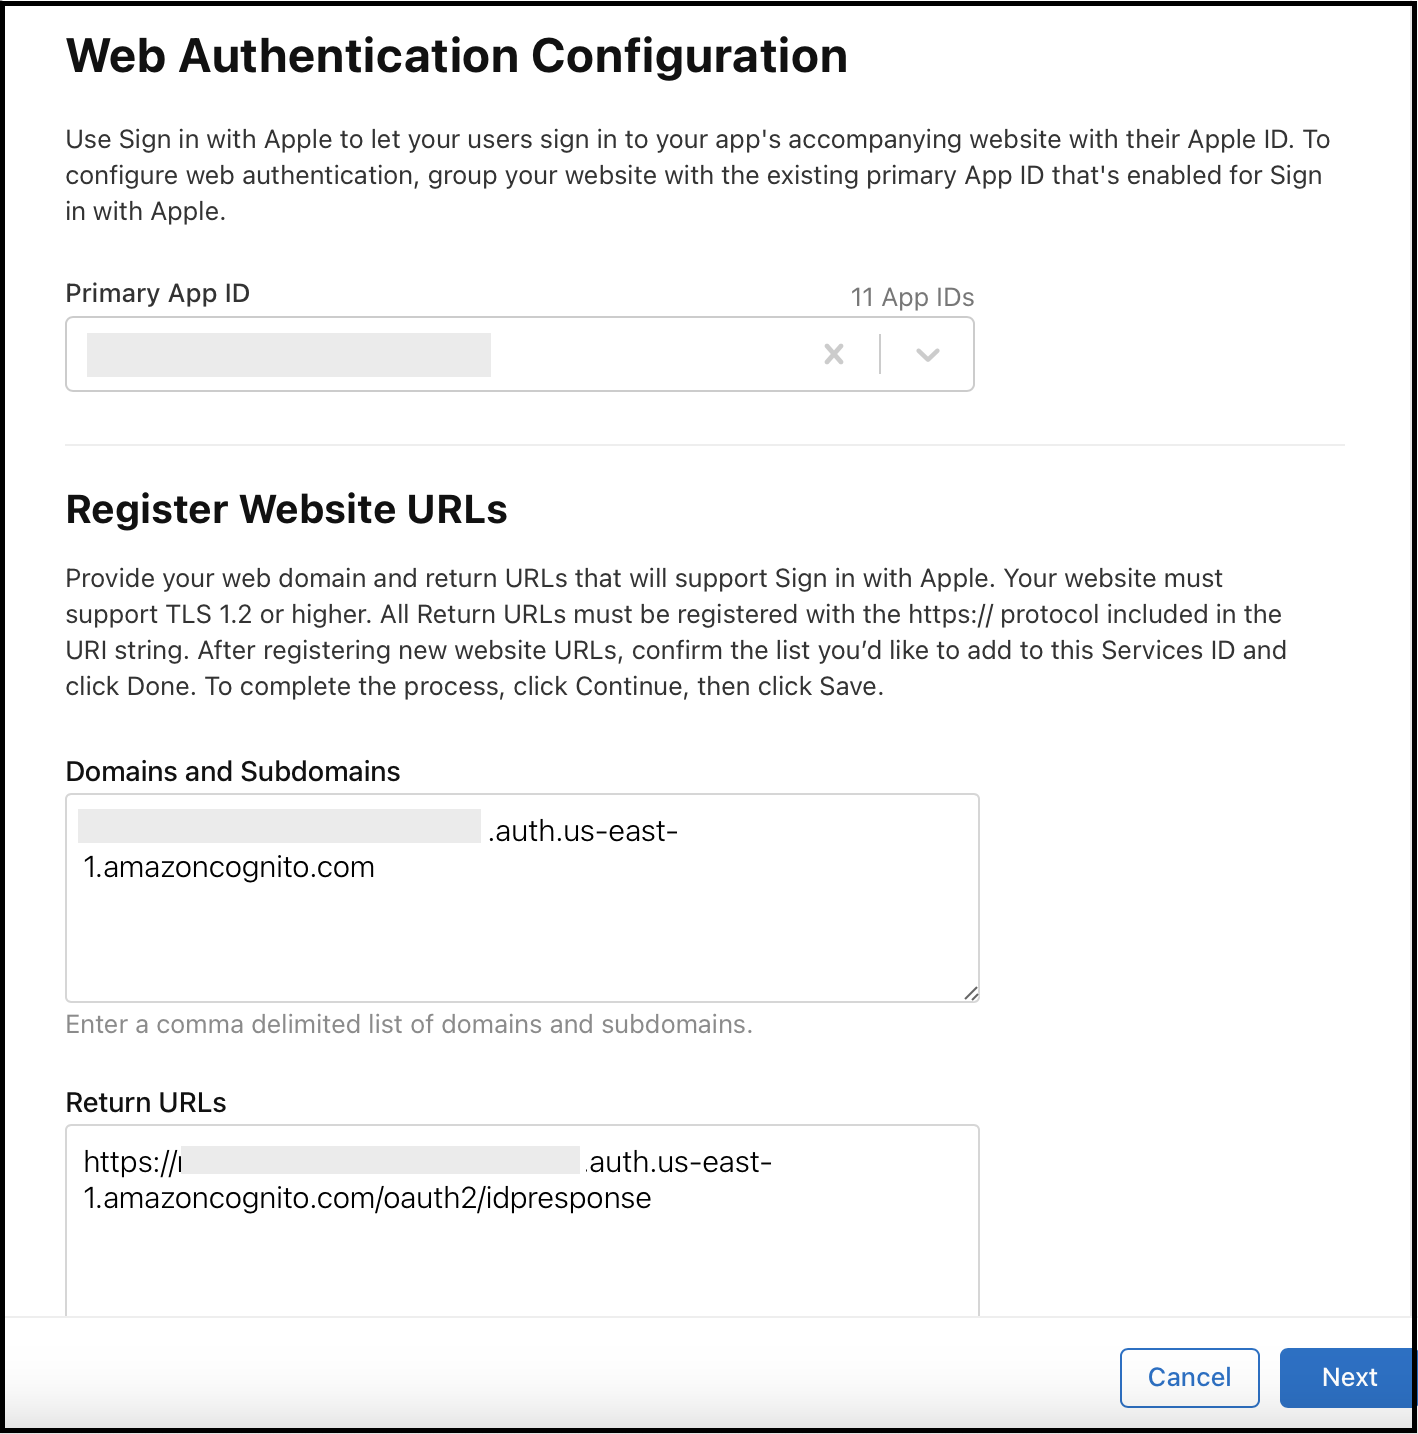
-
Click
NextandDone. -
Click
Continue.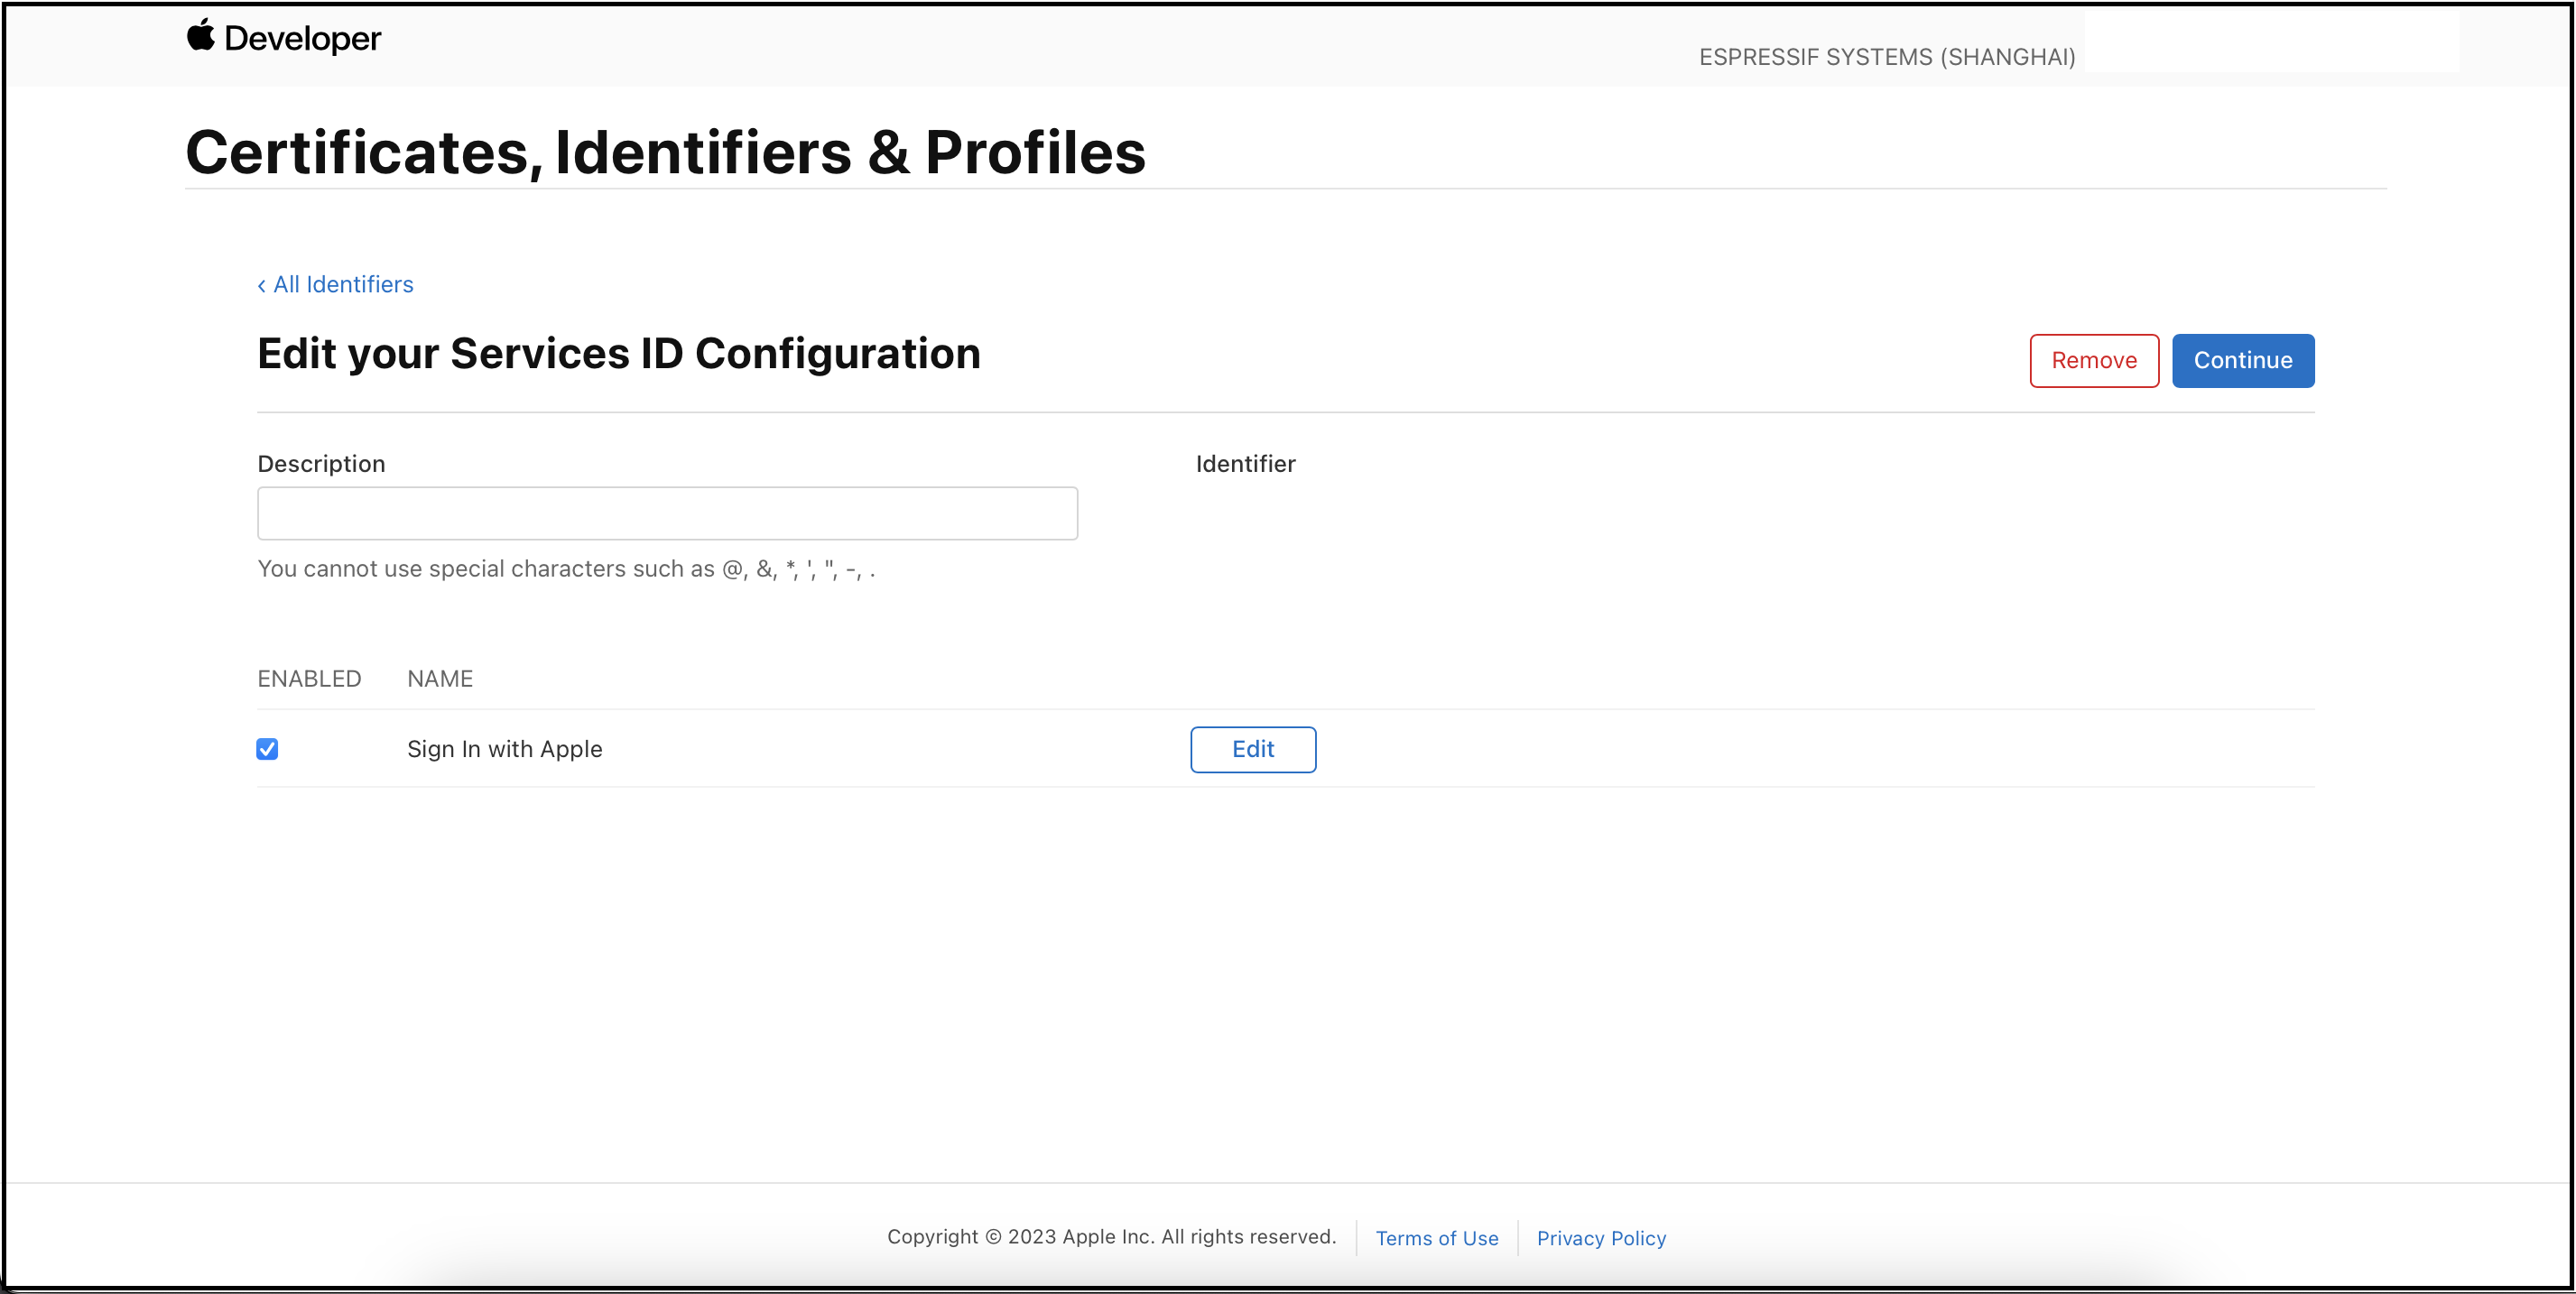
-
Click
Save.
Configure Apple as Identity Provider via RainMaker dashboard
-
Log in to the RainMaker dashboard with your admin account. Go to
Deployment Settings. -
Go to the
Identity Providerstab. Toggle to the old pool and note down the values. -
Follow these steps to add the Apple provider for the new pool with the noted parameters. (Note: You must download the key file from the Apple developer console.)
-
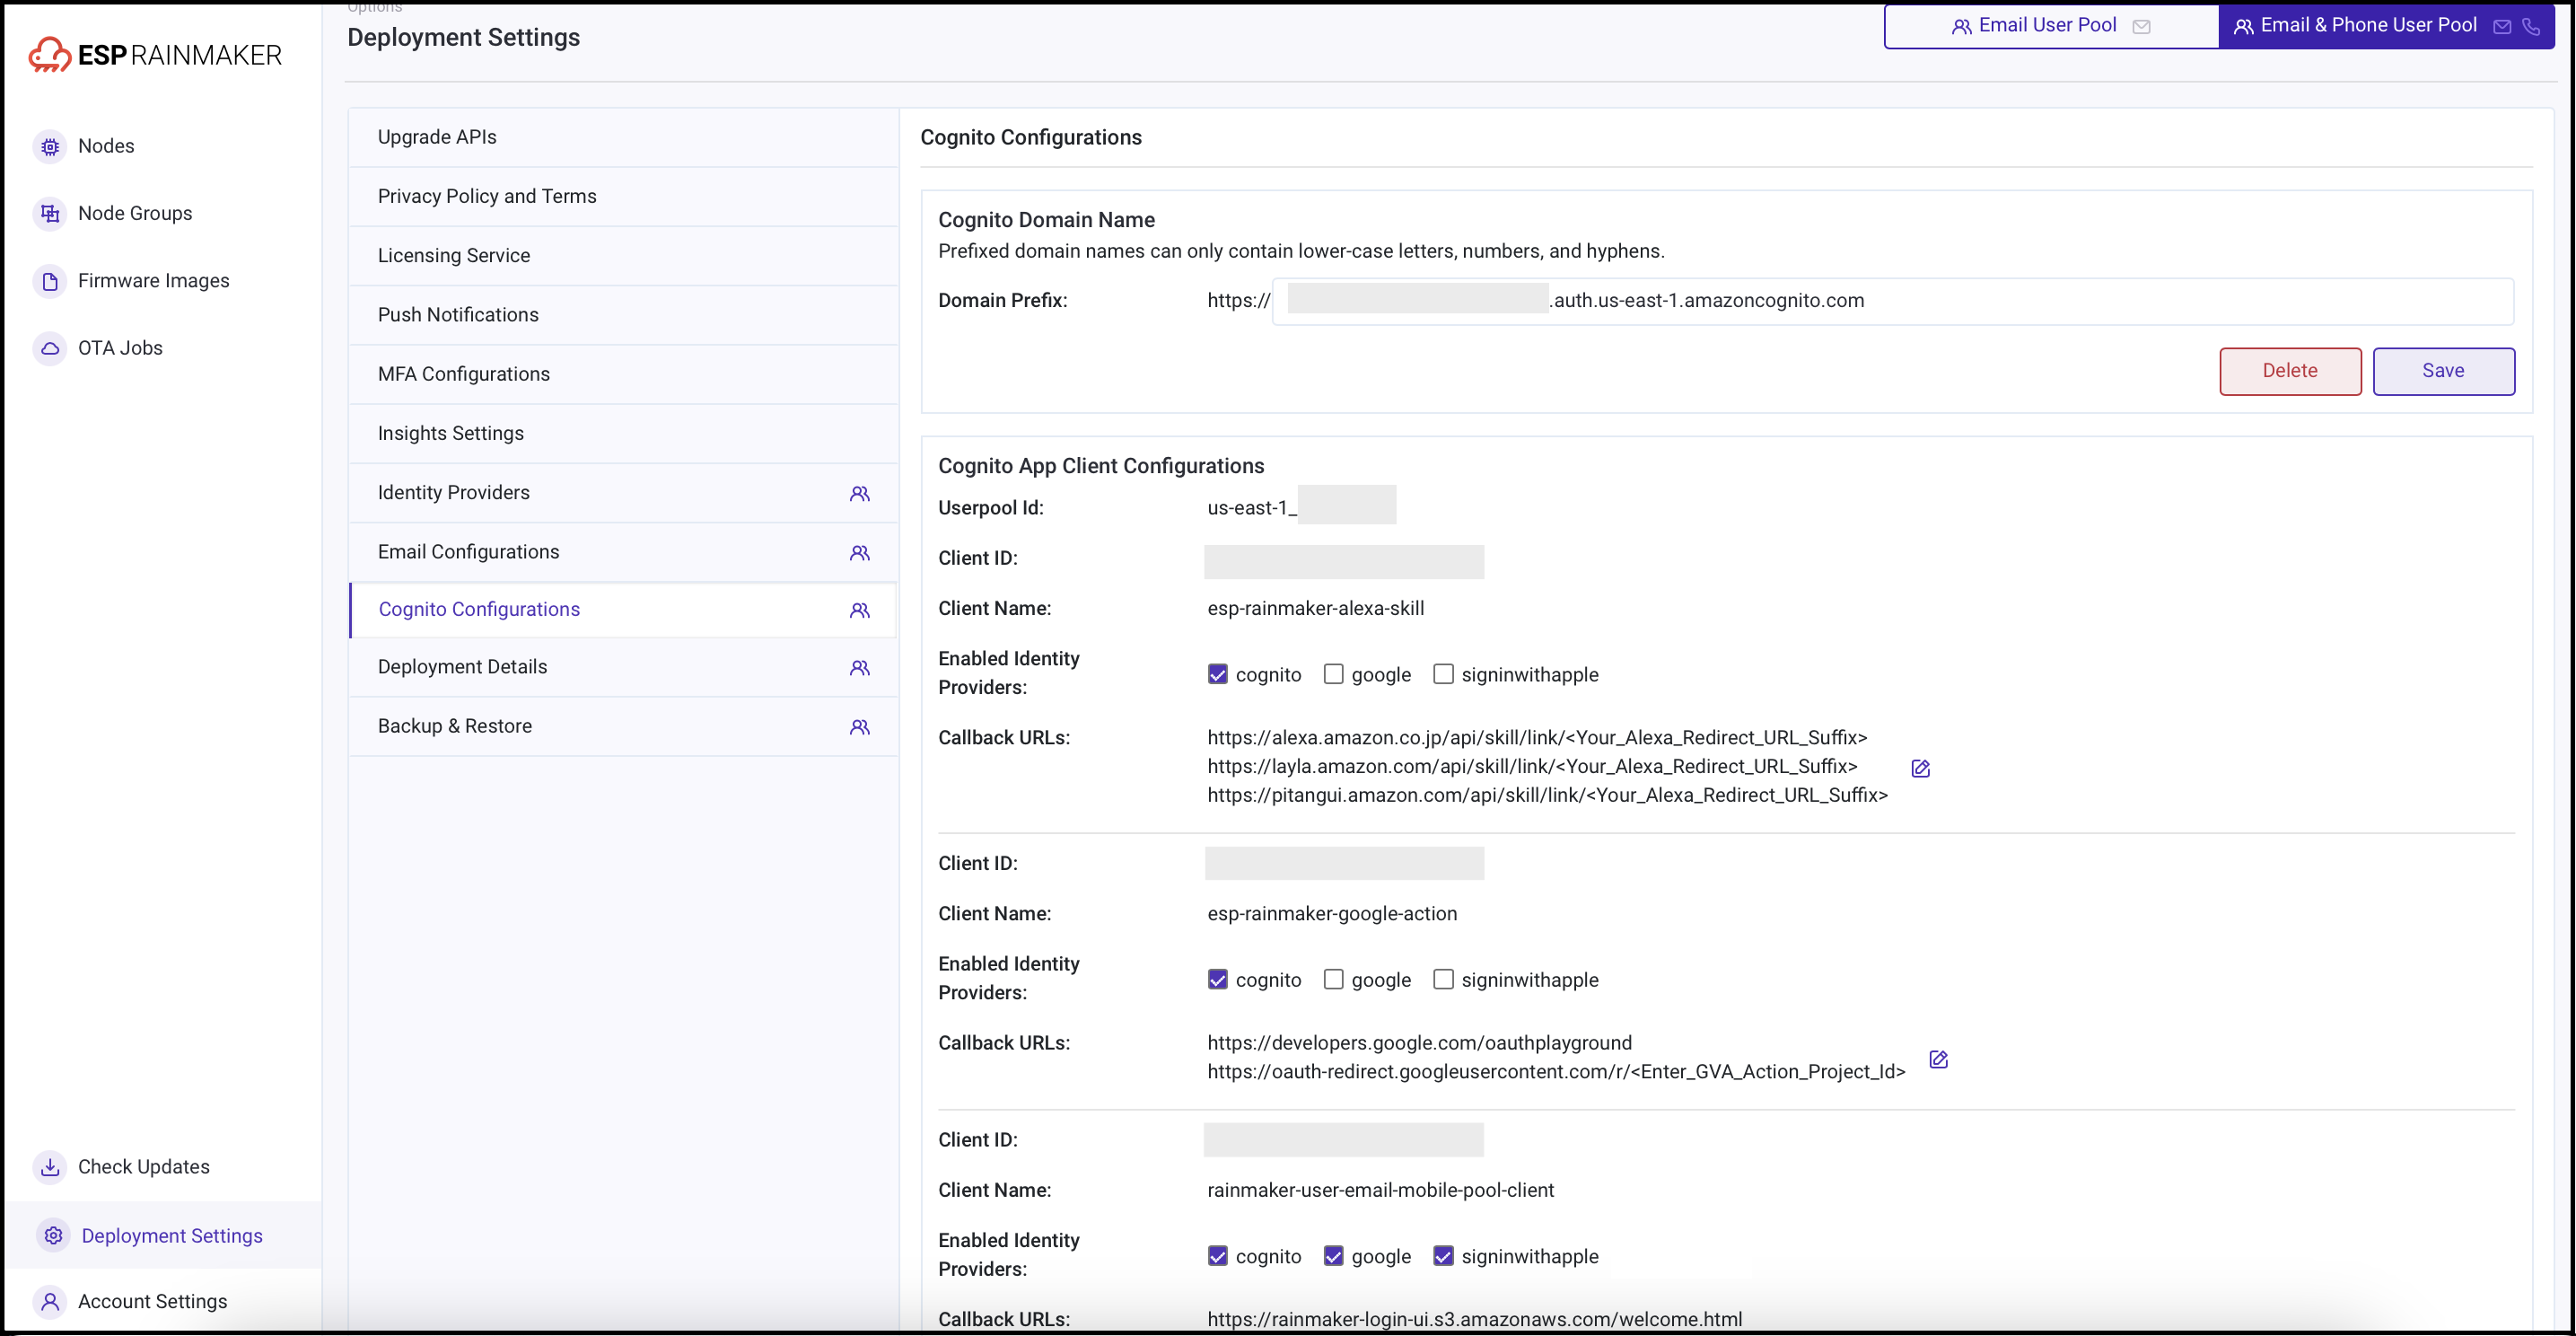
In the RainMaker dashboard, go to
Deployment Settings>Cognito Configurations. -
Confirm that the enabled identity providers and callback URLs are correct. Refer to Android URI and iOS URI.
4. Cognito App Client Configurations
-
Log in to the RainMaker dashboard with your admin account. Go to
Deployment Settings. -
Go to the
Identity Configurationstab. Toggle to the old pool and note down the value ofEnabled Identity ProvidersandCallback URLs.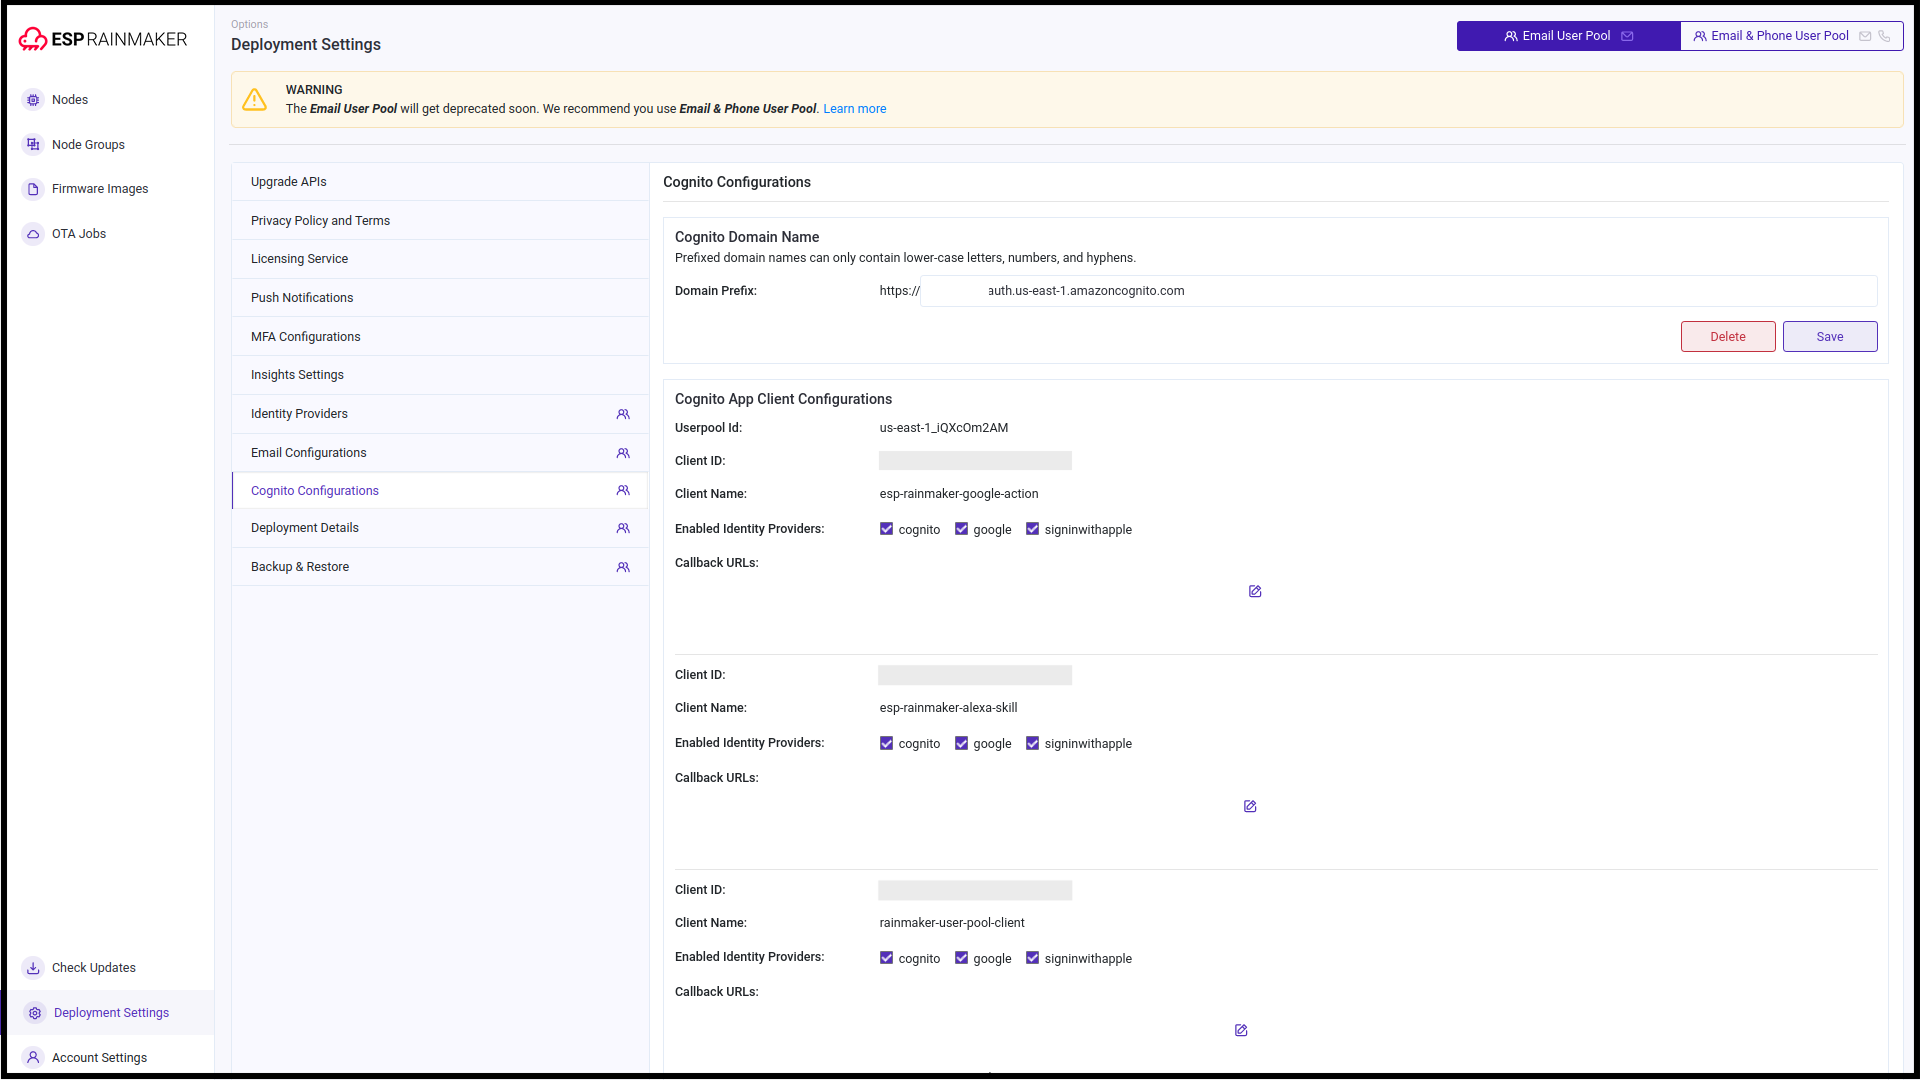
-
Toggle to the
Email & Phone User Pooltab and replicate the noted values for the new pool. -
Done.
5. Email Template Configuration
-
Log in to the RainMaker dashboard with your admin account. Go to
Deployment Settings. -
Go to the
Email Configurationstab. Toggle to the old pool and note down the values.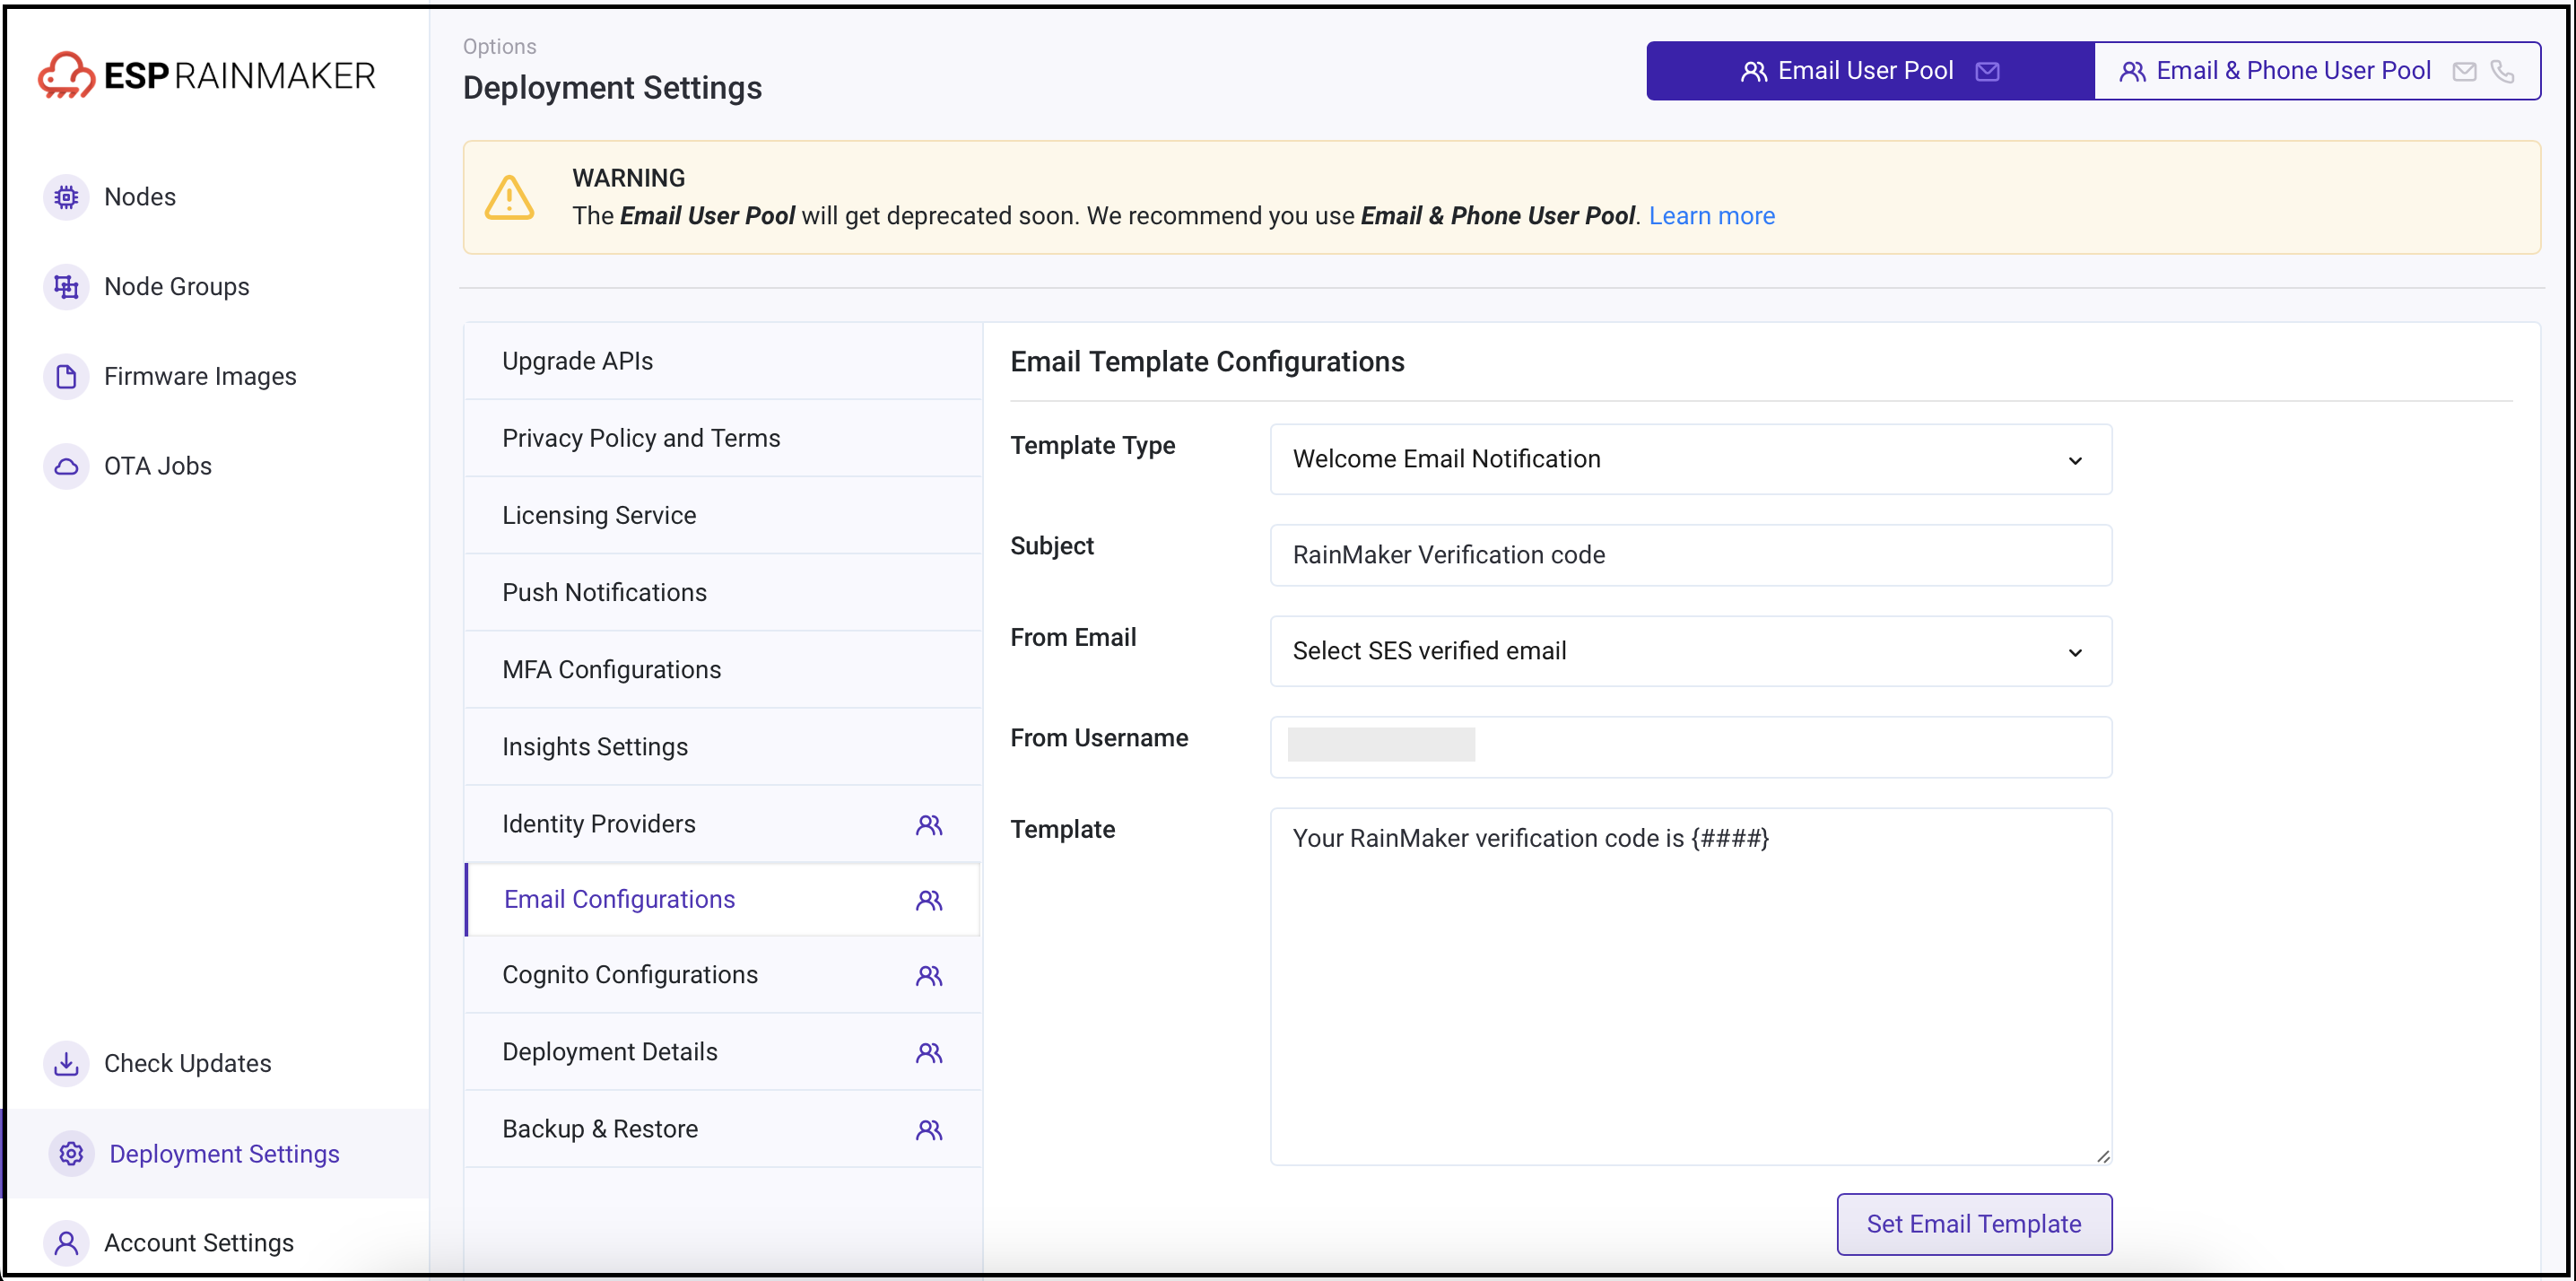
-
Follow these steps to configure the email template for the new pool with the noted parameters.
6. Skills Upgrade
-
Go to the AWS dashboard and search for "Serverless Application Repository" or "SAR".
-
Go to
Private applicationsand select the checkbox -Show apps that create custom IAM roles or resource policies.
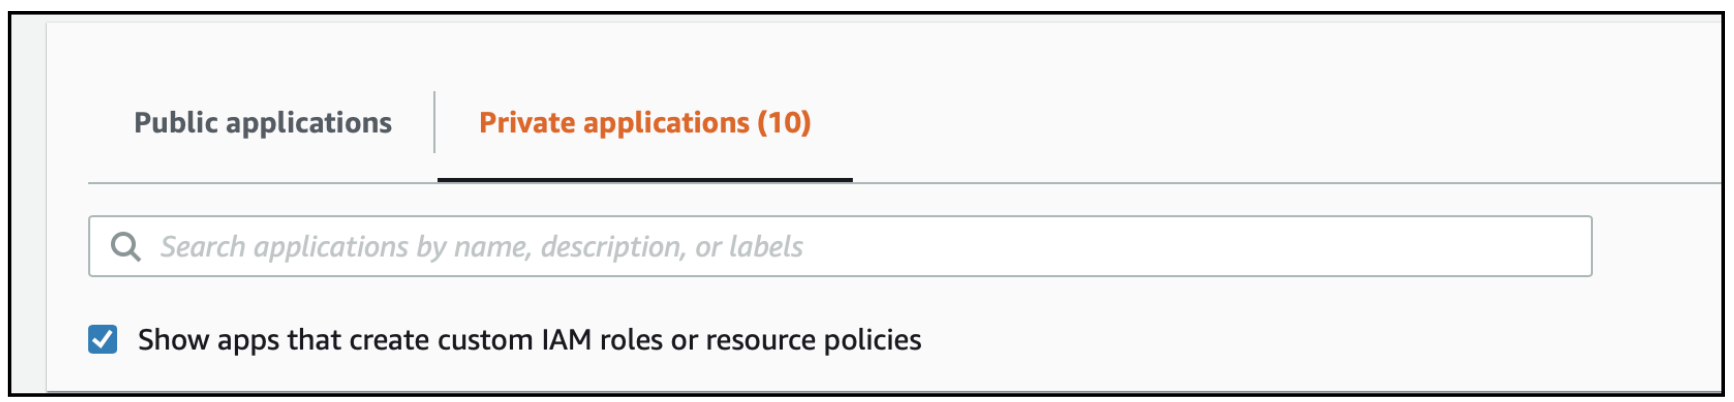
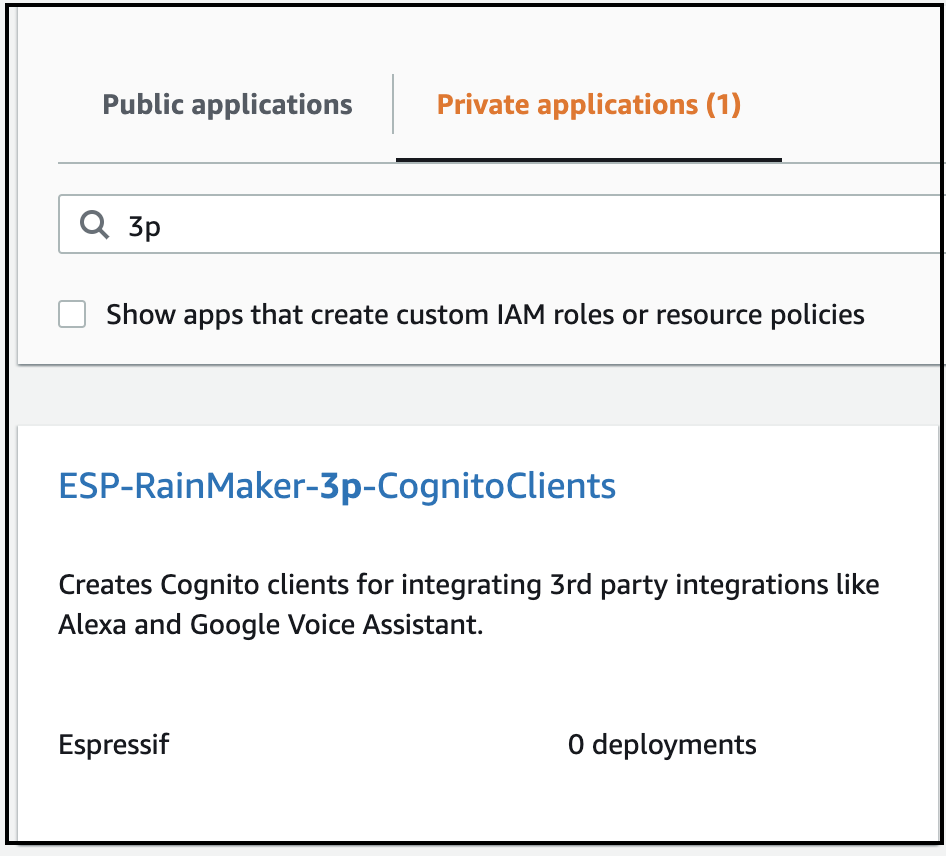
- Search for "ESP-RainMaker-3p-CognitoClients".
-
Open the
CloudFormationservice in a new browser tab. Ensure that the region is us-east-1. -
Toggle the
View Nestedbutton. -
Search for the stack name "serverlessrepo-ESP-RainMaker-3p-CognitoClients".
-
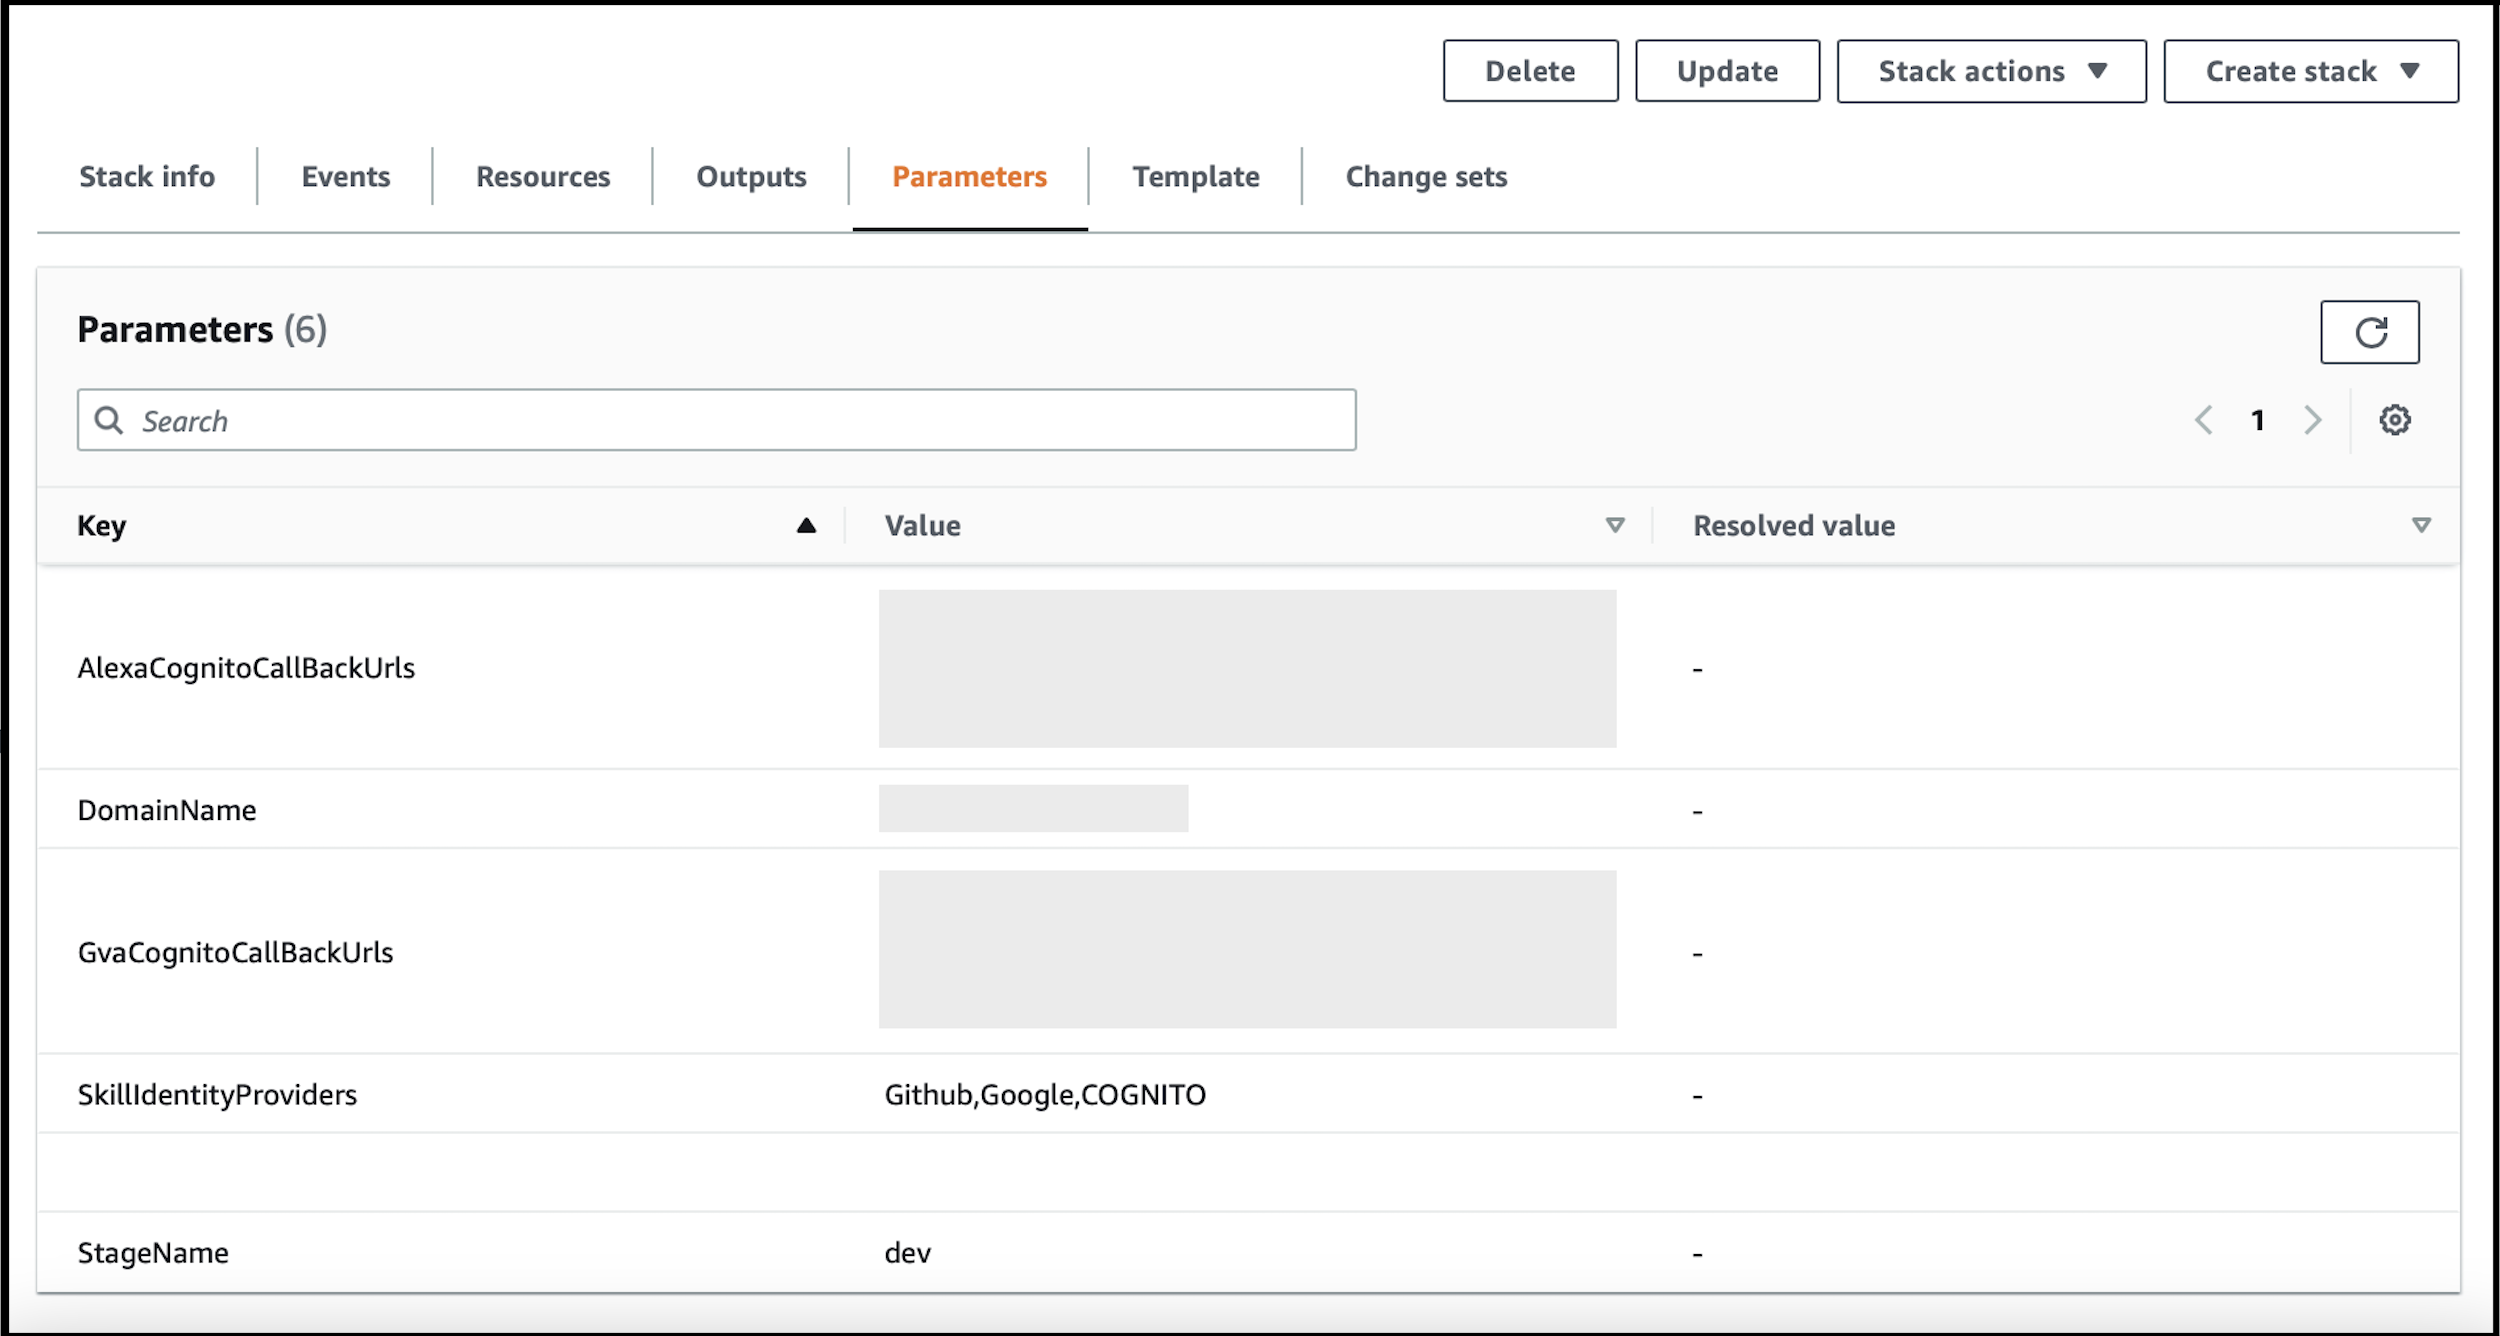
Go to the
Parameterssection of the CloudFormation stack.
-
Return to the SAR service tab and check the values to be filled.
-
Get the value of all the CloudFormation parameters and copy the respective values into the SAR parameters.
-
Add values for the following parameters:
| Parameter | Steps to Get the Value |
|---|---|
| SkillIdentityProvidersNewUserPool | - Log in to the RainMaker dashboard. - Click the Deployment Settings tab in the left navigation bar. - Then click the Identity Providers tab.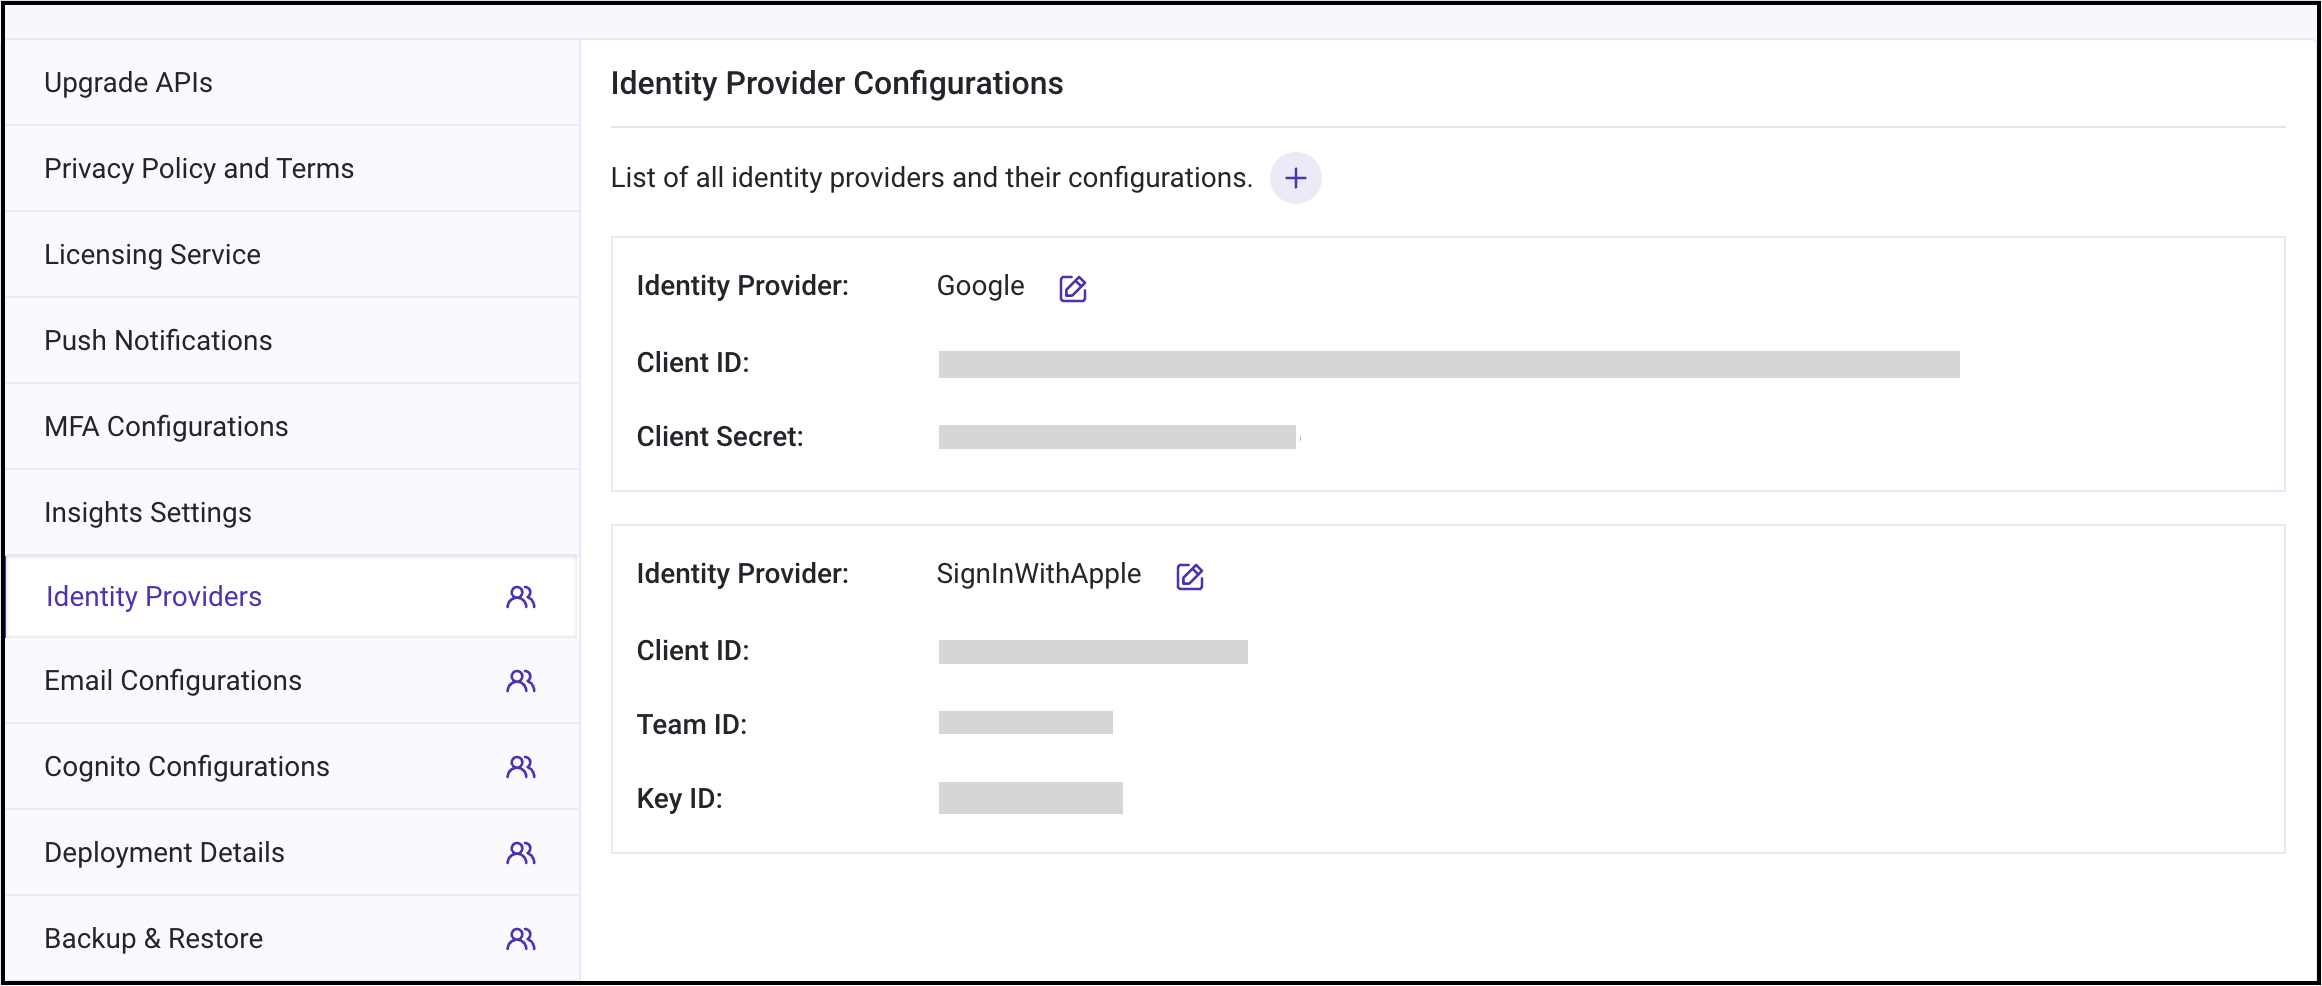 - Note down the value of Identity Providers.- If Google, GitHub, and SignInWithApple are configured, the corresponding values in SkillIdentityProvidersNewUserPool while deploying the ESP-RainMaker-3p-CognitoClients SAM Application will be Google, GitHub, SignInWithApple, COGNITO. If no identity provider is configured, the default value will be COGNITO.- Enter the noted identity providers. |
- Click
Deploy.
7. Manual Skills Console Config Changes and Recertification
7a. Alexa
-
Log in to the Alexa developer console.
-
Select the skill created previously.
-
Click
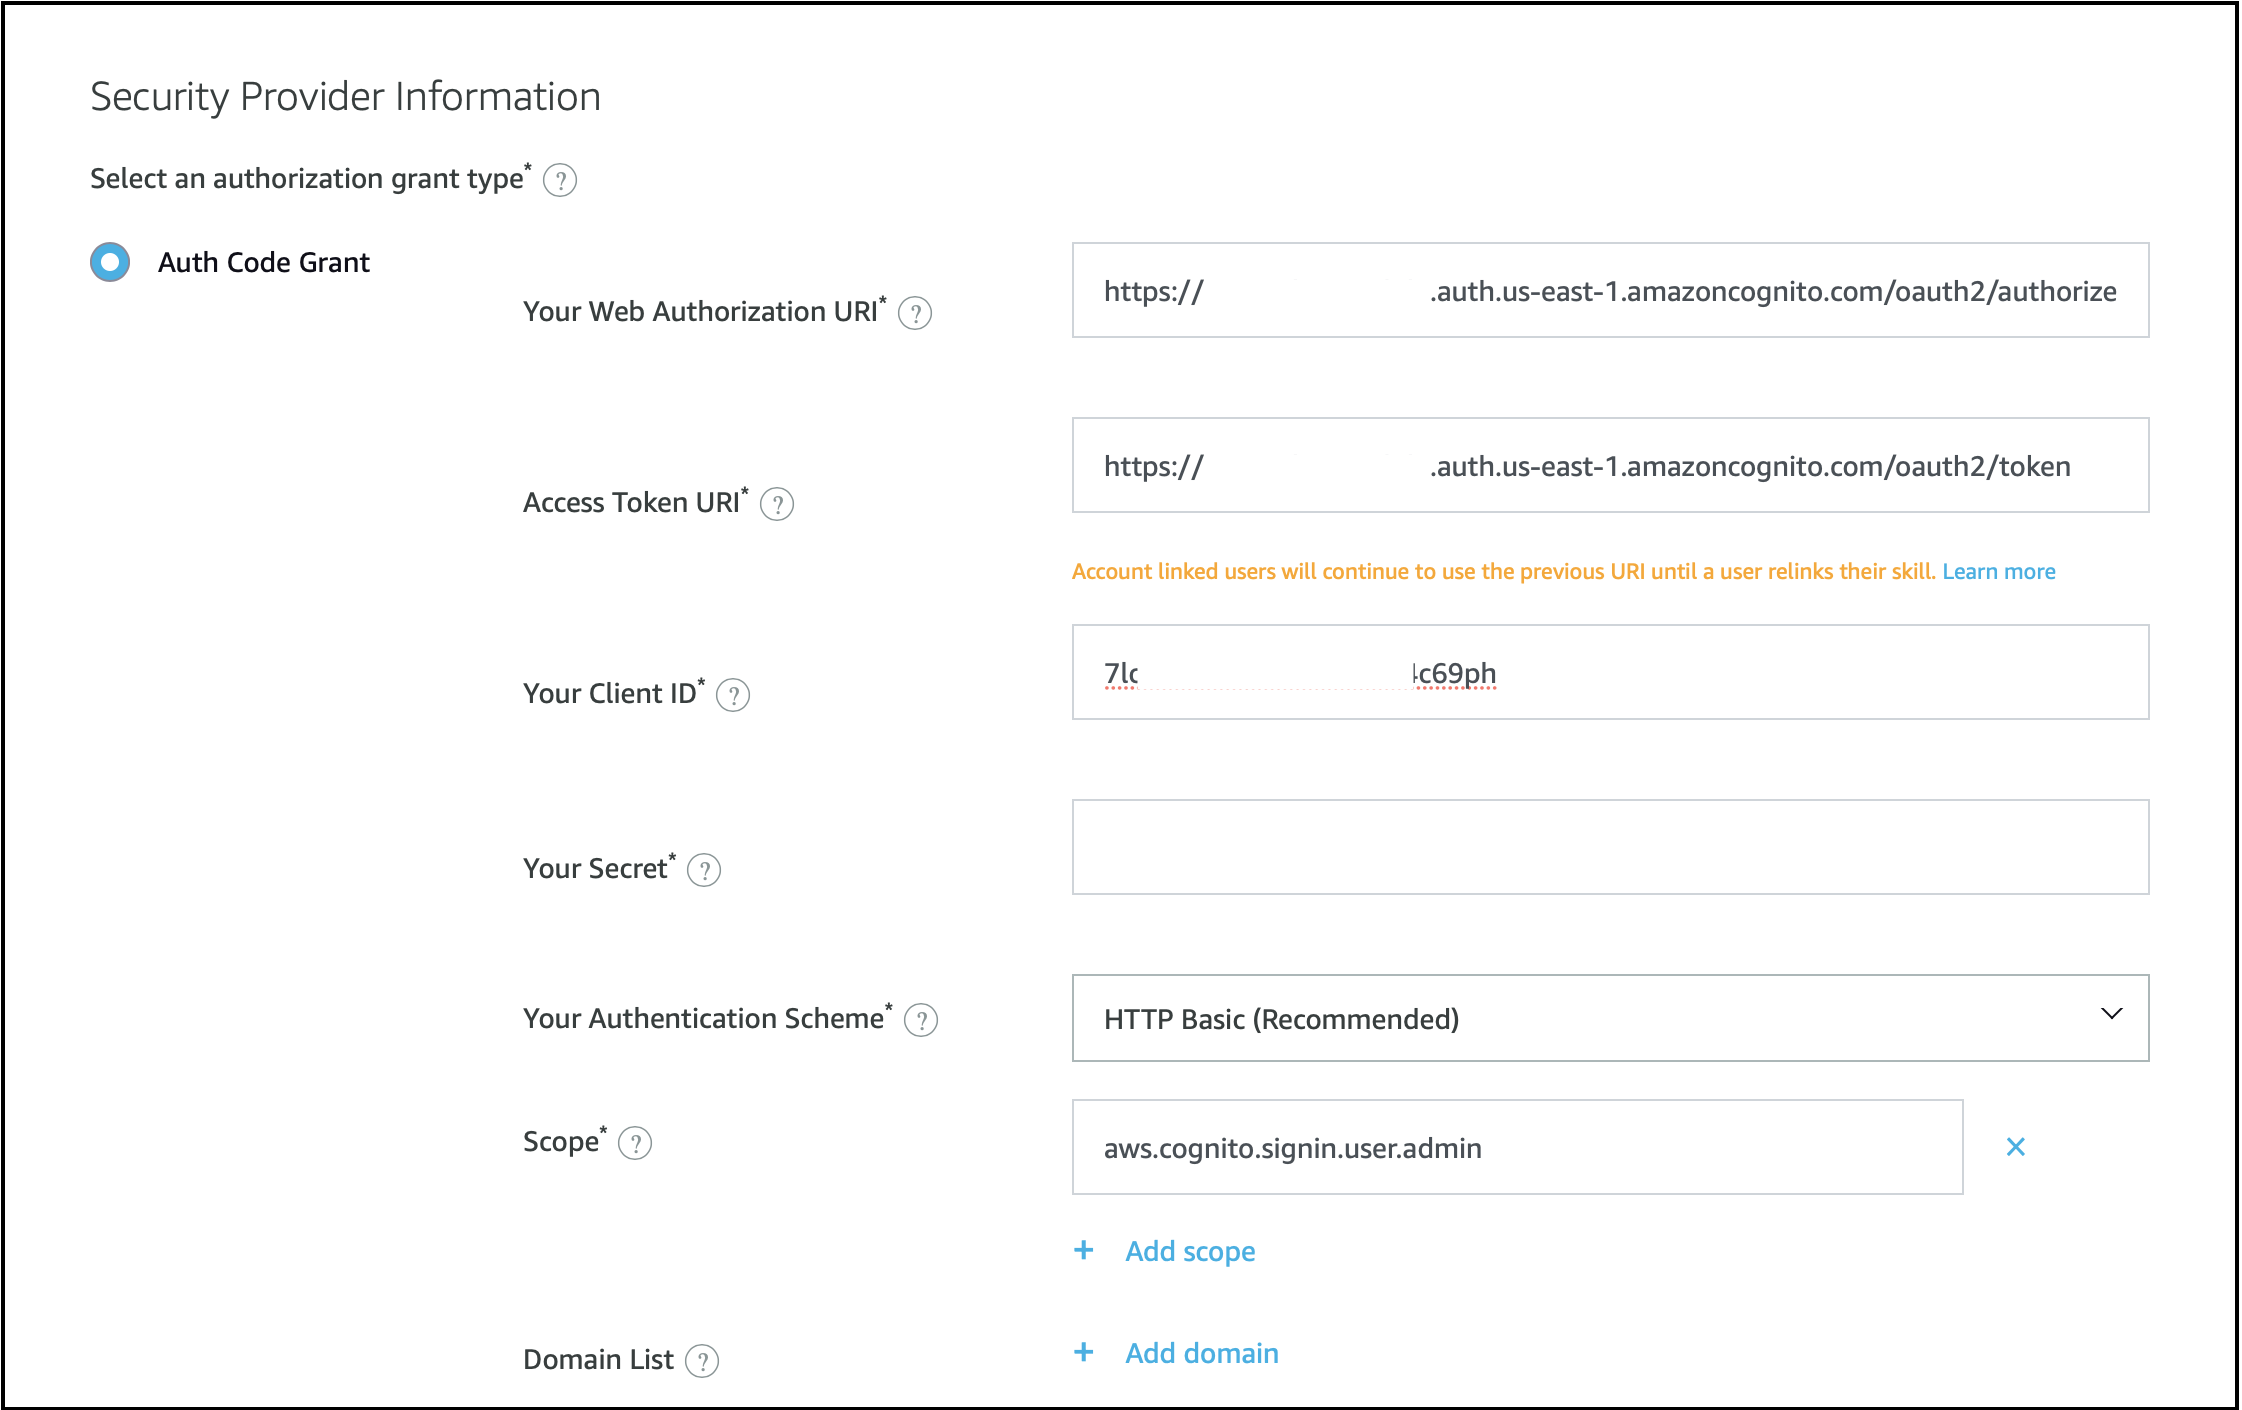
Account Linkingin the left navigation bar. -
Edit values for the following parameters:
| Parameter | Steps to Get the Value |
|---|---|
| Your Web Authorization URI | https://<new-company-domain>.auth.<aws-region>.amazoncognito.com/oauth2/authorize, where <new-company-domain> is the newly created domain in step 2. |
| Access Token URI | https://<new-company-domain>.auth.<aws-region>.amazoncognito.com/oauth2/token, where <new-company-domain> is the newly created domain in step 2. |
| Your Client ID and Your Secret | Get values from the Alexa client esp-rainmaker-alexa-skill by following these steps and copy the esp-rainmaker-alexa-skill client details. |
- After this, you will need to recertify the skill by following this guide.
7b. Google Voice Assistant
-
Log in to Google Actions Console.
-
Go to the
Developtab of your action. -
Go to the
Account linkingsection.
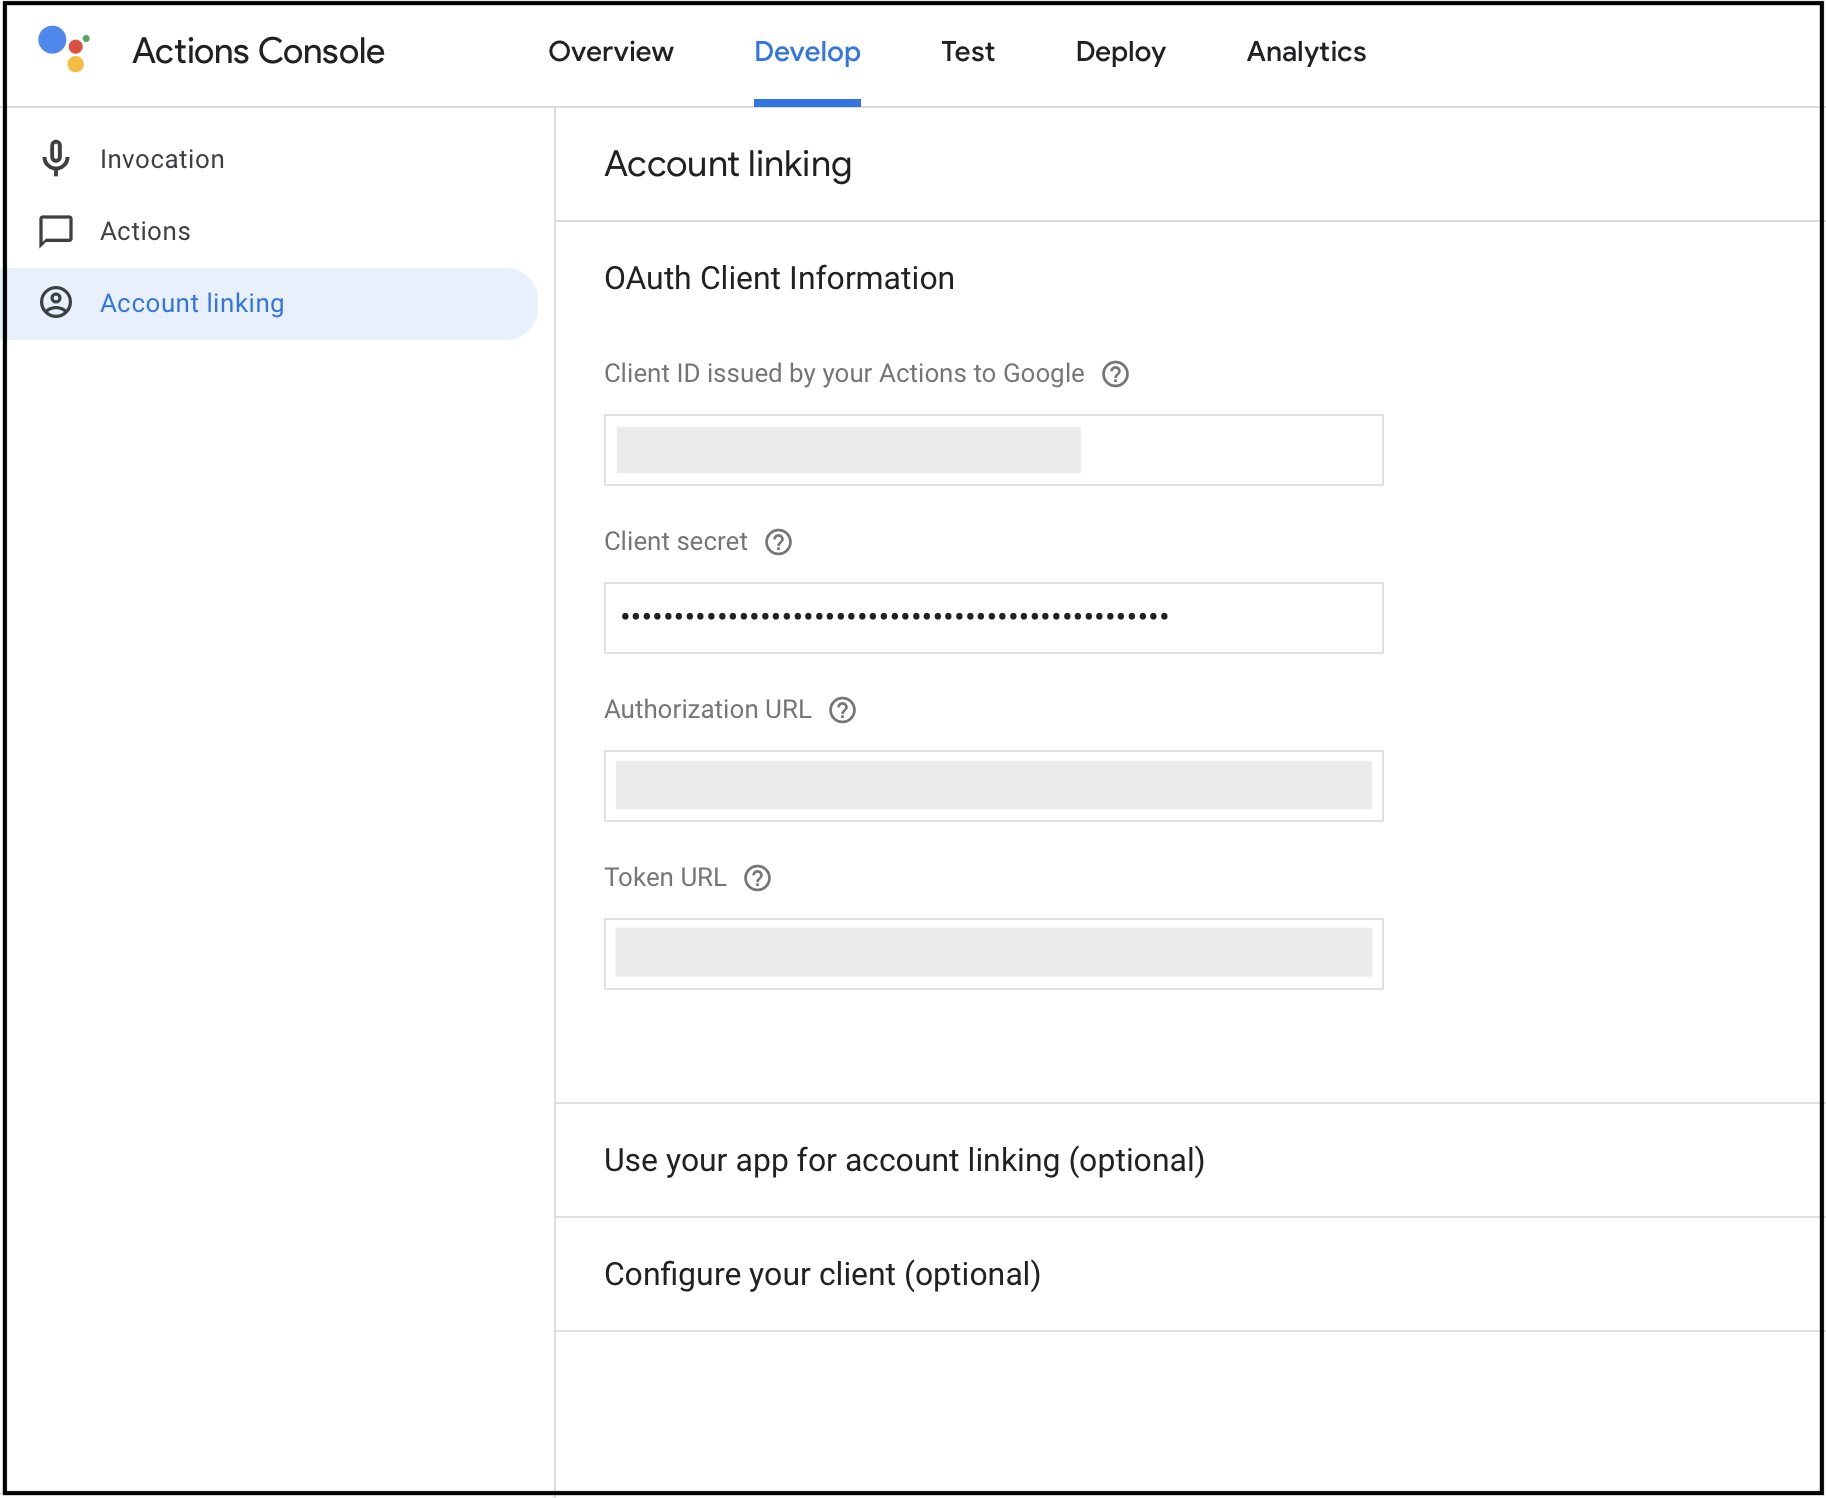
- Edit values for the following parameters:
| Parameter | Steps to Get the Value |
|---|---|
| Client ID and Client secret | Refer to section Getting the Client ID and Client Secret for Alexa Skill and Google Action and copy the esp-rainmaker-google-action client details |
| Authorization URL | Add https://<new-company-domain>.auth.<aws-region>.amazoncognito.com/oauth2/authorize, where <new-company-domain> is the newly created domain in step 2. |
| Token URL | If you are using the new pool already for skills, then use:https://<new-company-domain>.auth.<aws-region>.amazoncognito.com/oauth2/token, where <new-company-domain> is the newly created domain in step 2.Otherwise, for old pool: 1. Open the RainMaker dashboard in a new browser tab. 2. Go to the Deployment Settings tab.3. Go to Deployment Details and copy the value of API Path URI.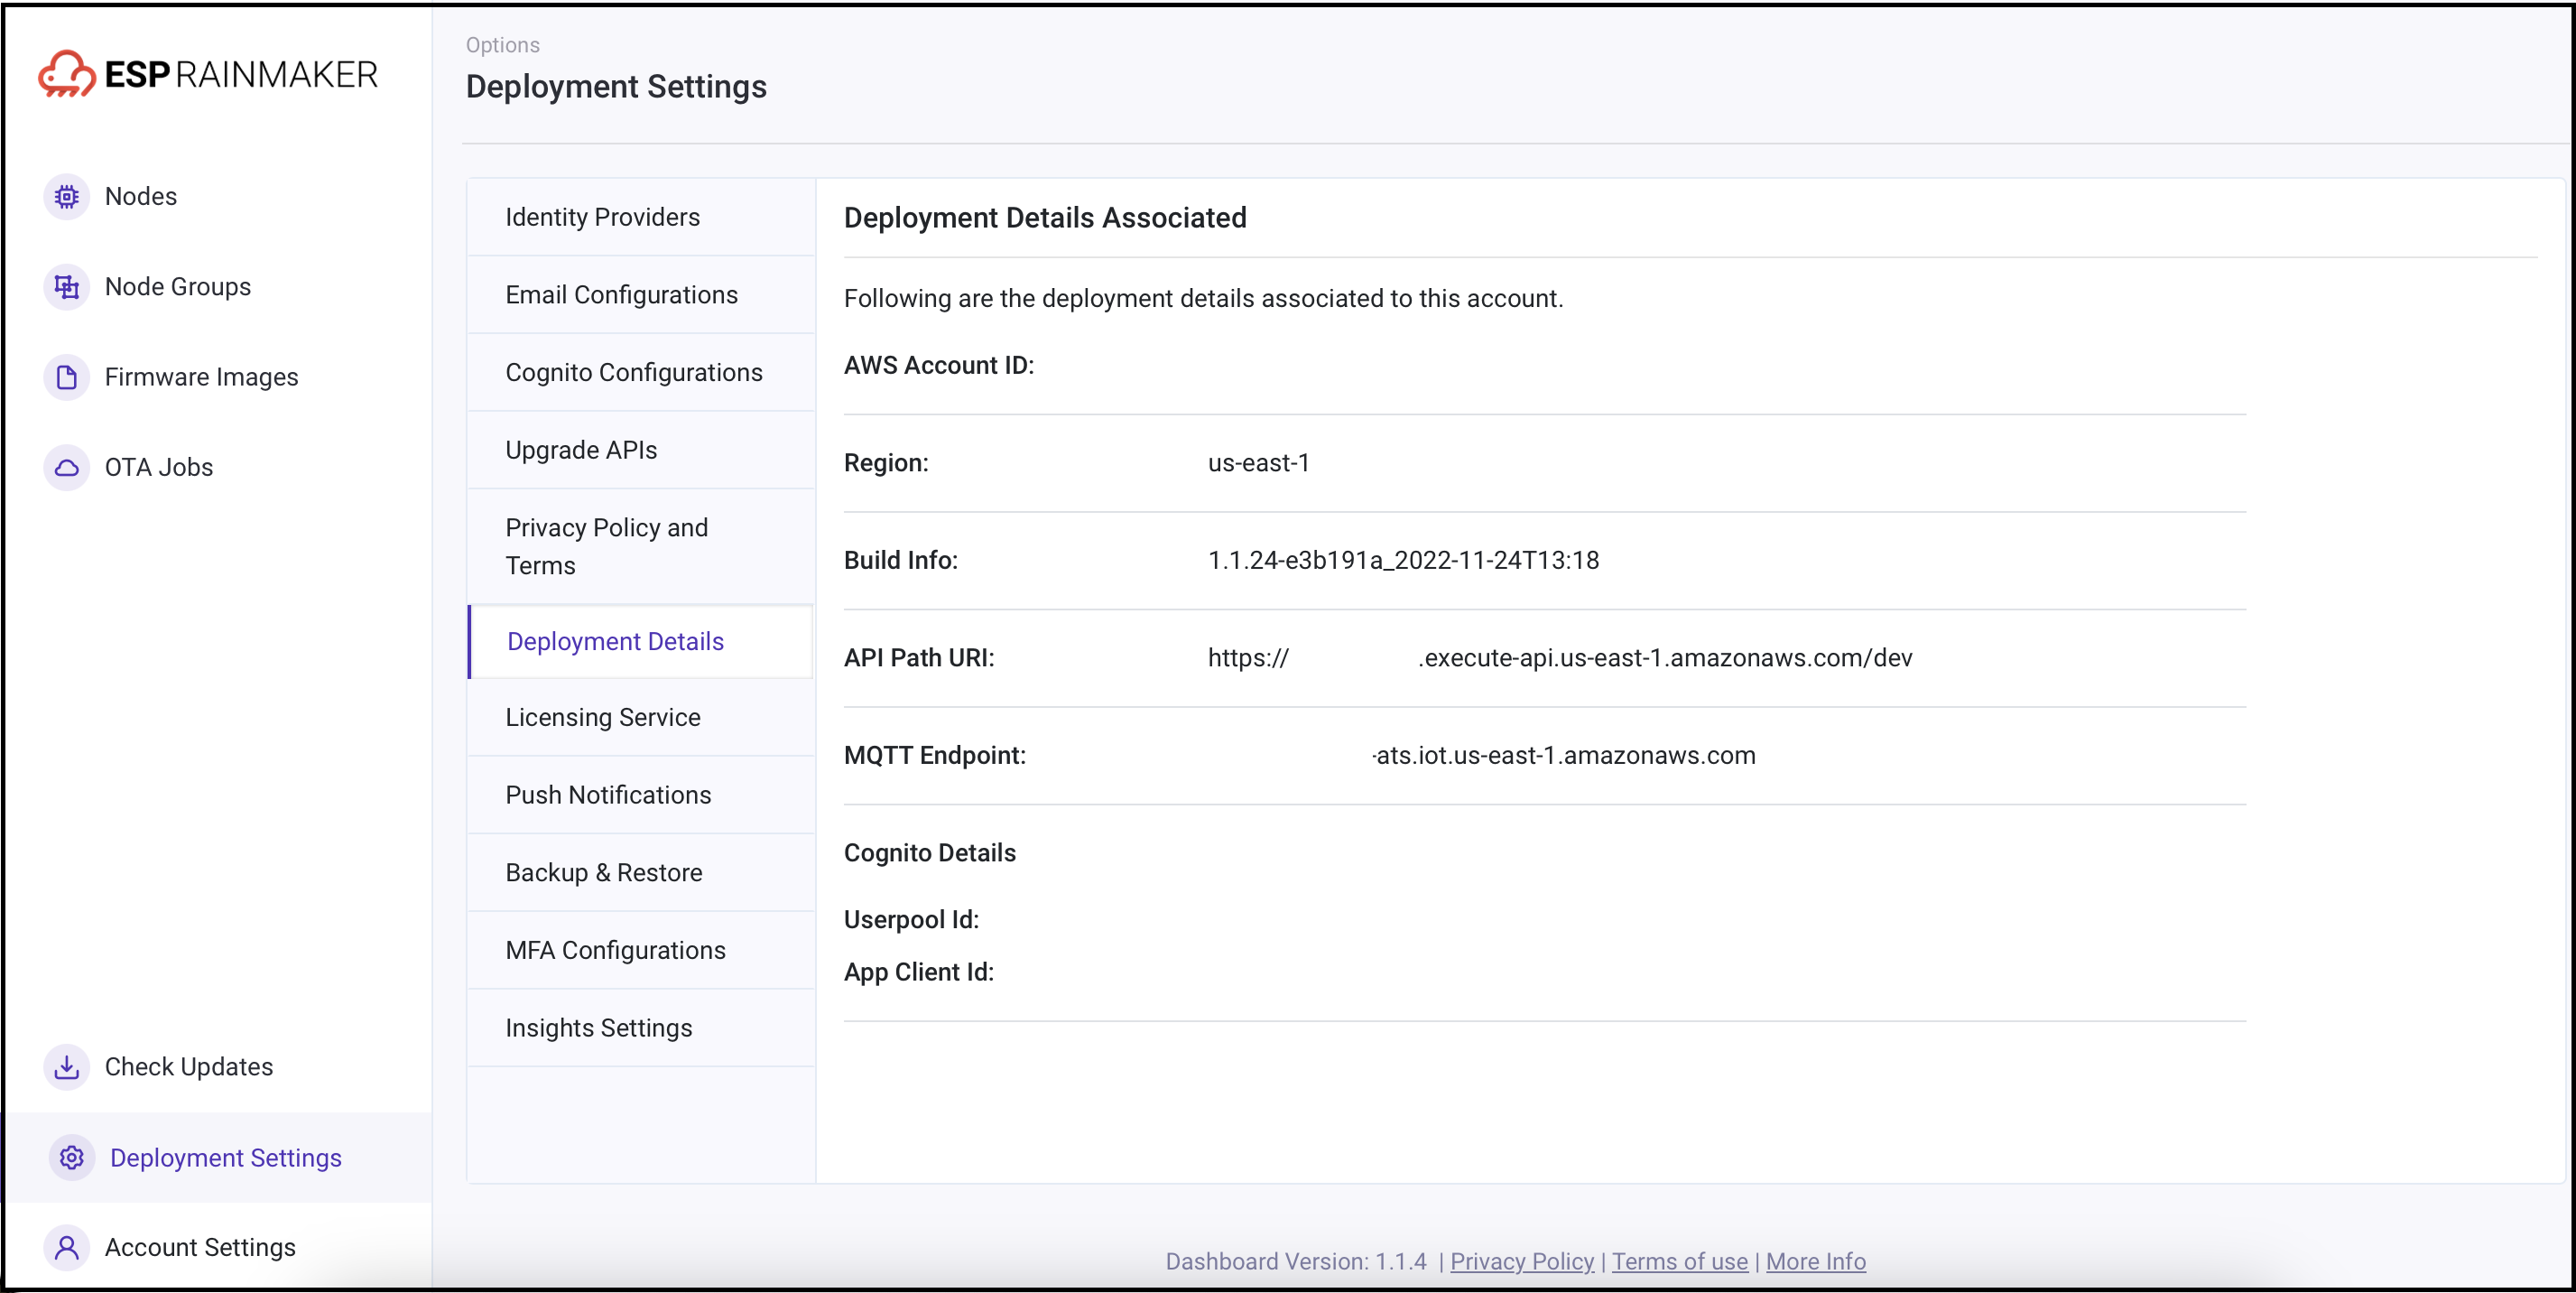 4. Edit the Token URI to: <api_path_uri>/custom_token, where <api_path_uri> is the URL copied in the previous step. |
- After this, you will need to:
8. Mobile Apps Configuration
8a. Android
-
Open your RainMaker project in Android Studio (Pull and rebase with the latest source code - https://github.com/espressif/esp-rainmaker-android).
-
In your
local.propertiesfile, edit the values for the following configuration fields.
| Configuration Key | Type | Steps to Get the Value |
|---|---|---|
| authUrl | String | OAuth URL: https://<new-company-domain>.auth.<aws_region>.amazoncognito.com/oauth2, where <new-company-domain> is the newly created domain in step 2. |
| clientId | String | Uniquely identifies an app in a user pool. Check steps to get the Client ID. |
| alexaRMClientId (If you have Alexa set up) | String | Refer to the section Steps to Get Alexa and GVA Client ID and copy the esp-rainmaker-alexa-skill client ID. |
- After this, republish the app on the Play Store.
8b. iOS
-
Open your RainMaker project in Xcode (Pull and rebase with the latest source code - https://github.com/espressif/esp-rainmaker-ios).
-
In the
Configuration.plistfile, edit the values for the following configuration fields.
| Key | Type | Steps to Get the Value |
|---|---|---|
| App Client ID | String | Uniquely identifies an app in a user pool. Check steps to get the Client ID. |
| Authentication URL | String | OAuth URL: https://<new-company-domain>.auth.<aws_region>.amazoncognito.com/oauth2, where <new-company-domain> is the newly created domain in step 2. |
| Alexa RM Client ID (*If you have Alexa set up) | String | Refer to the section Steps to Get Alexa and GVA Client ID and copy the esp-rainmaker-alexa-skill client ID. |
- After this, republish the app on the App Store.
Effects of Migrating to New User Pool
If you have set up Alexa skill app-to-app account linking using the old user pool, migrating the Alexa skill to the new user pool will be seamless for users who have updated their apps.
However, if users have not updated their apps and are still using older versions with configurations for the old pool, they will experience failures in the app-to-app account linking process. This can be resolved by updating the app to the latest version.
Existing linked accounts will remain linked without any difficulties.
It is recommended to ask all users to update the app to avoid this issue.