RainMaker Deployment Related Issues
I have completed the deployment of RainMaker Services but have not received any email regarding the deployment details. What should I do?
-
Check your junk folder. Verify whether the deployment details email has been filtered into your junk folder.
-
Verify email sending configuration. If the email is not in your junk folder, further investigation is required: Ensure that you have correctly configured the email-sending service for the RainMaker region(s). Refer to the guide: Configure Simple Email Service.
-
Confirm successful deployment. Verify that all required RainMaker components have been successfully deployed using the CloudFormation dashboard, as outlined in the deployment guide: Verification of Backend Deployment.
-
Reset Superadmin password if necessary. If all required stacks are deployed successfully, you can reset the Superadmin password from the RainMaker dashboard.
Steps to Reset the Password:
-
Go to the RainMaker dashboard login page and click
Forgot Password. -
Enter the registered Superadmin email ID. You will receive a verification code via email.
-
Enter the verification code along with a new password.
-
You can now log in to the RainMaker dashboard with your new credentials.
-
Getting the RainMaker API URL (Base URL)
-
Log in to the RainMaker dashboard using your admin credentials.
-
Go to the
Deployment Settingstab.
-
Identify the API Gateway type:
-
REST gateway: The default, legacy gateway used for all deployments.
-
HTTP gateway: A newly introduced, cost-effective gateway (about 70% cheaper).
Note: This requires migrating users to a new pool. Follow the steps in the User Pool Migration Guide.
cautionThe ESP API Rate Limiter add-on is not available when using the HTTP gateway. This may expose your API to intentional overload attacks by malicious users.
For OAuth-only RainMaker, only the HTTP gateway is supported.
-
-
Select your preferred API Endpoint.
-
For any further inquiries, contact ESP RainMaker Support at esp-rainmaker-support@espressif.com.
ESP-RainMaker-Core deployment fails. What should I do?
-
Log in to the AWS console.
-
In the AWS console, search for
CloudFormationand selectserverlessrepo-ESP-RainMaker-Core. -
Navigate to the
Resourcestab, search forespstatsinfoand click the associated stack link.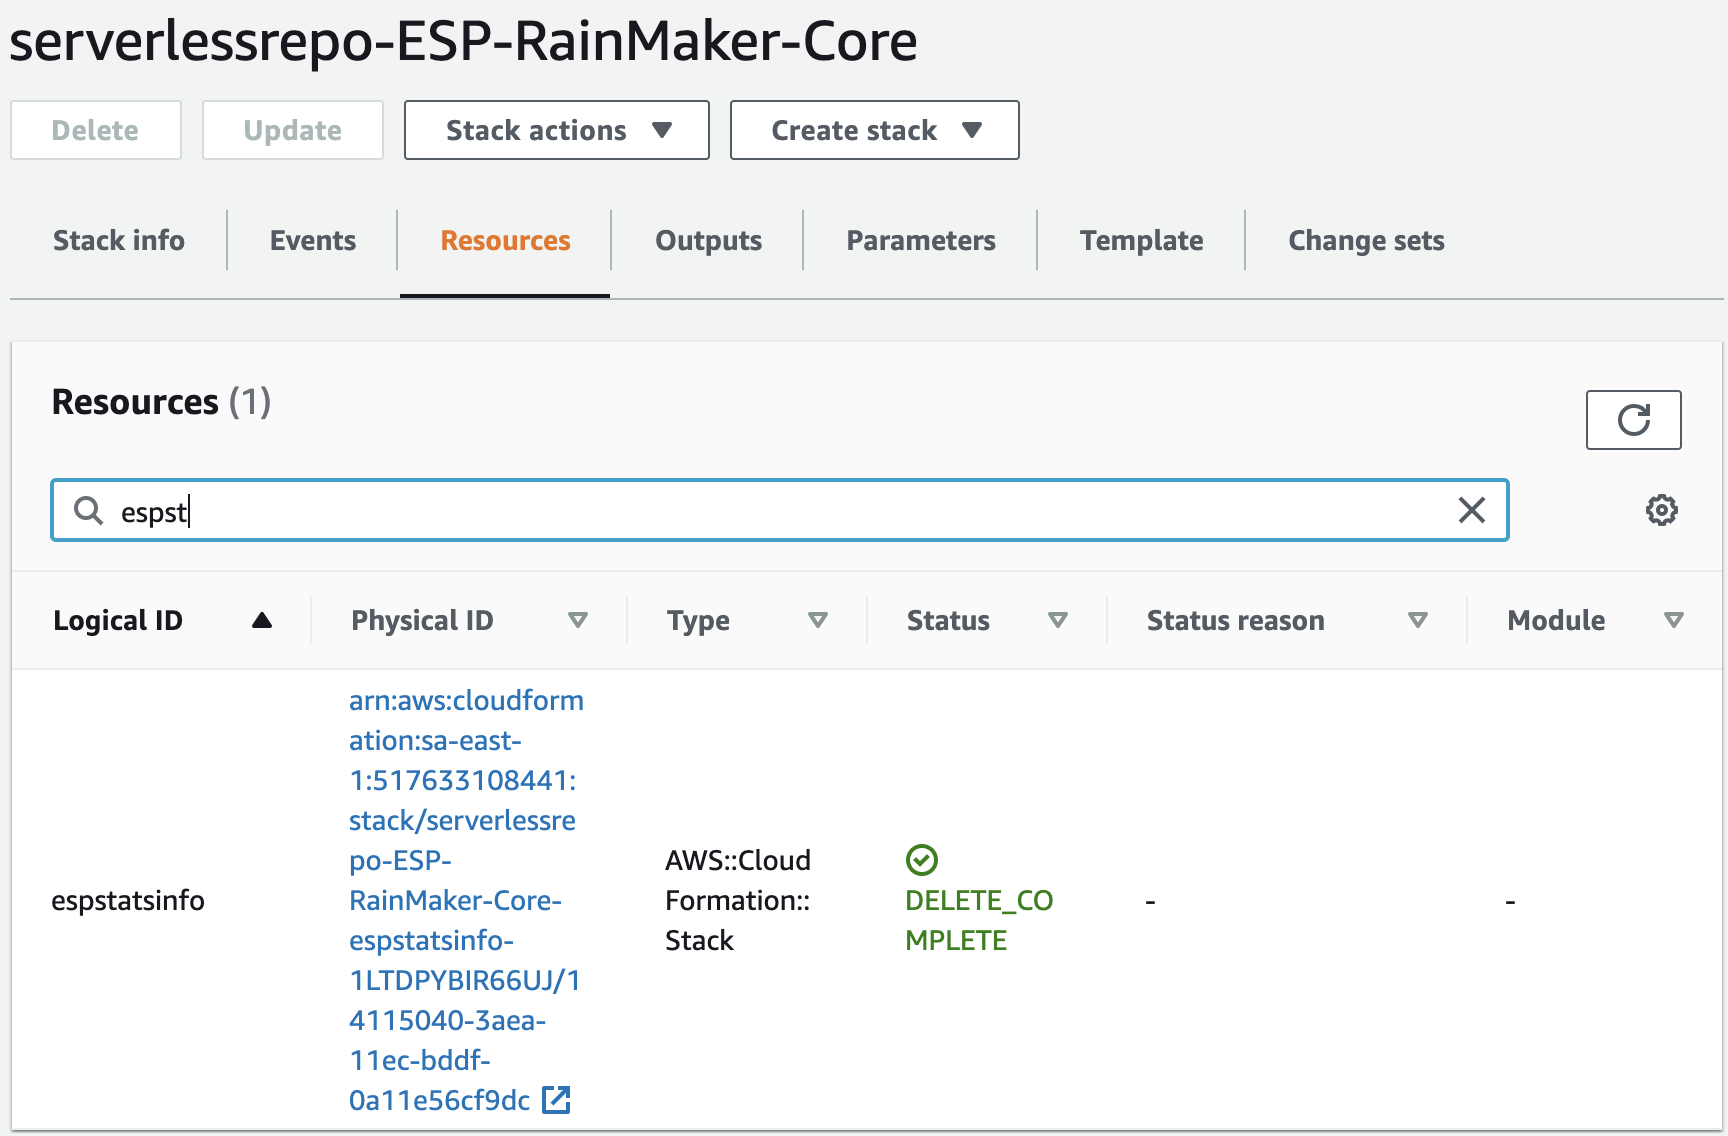
-
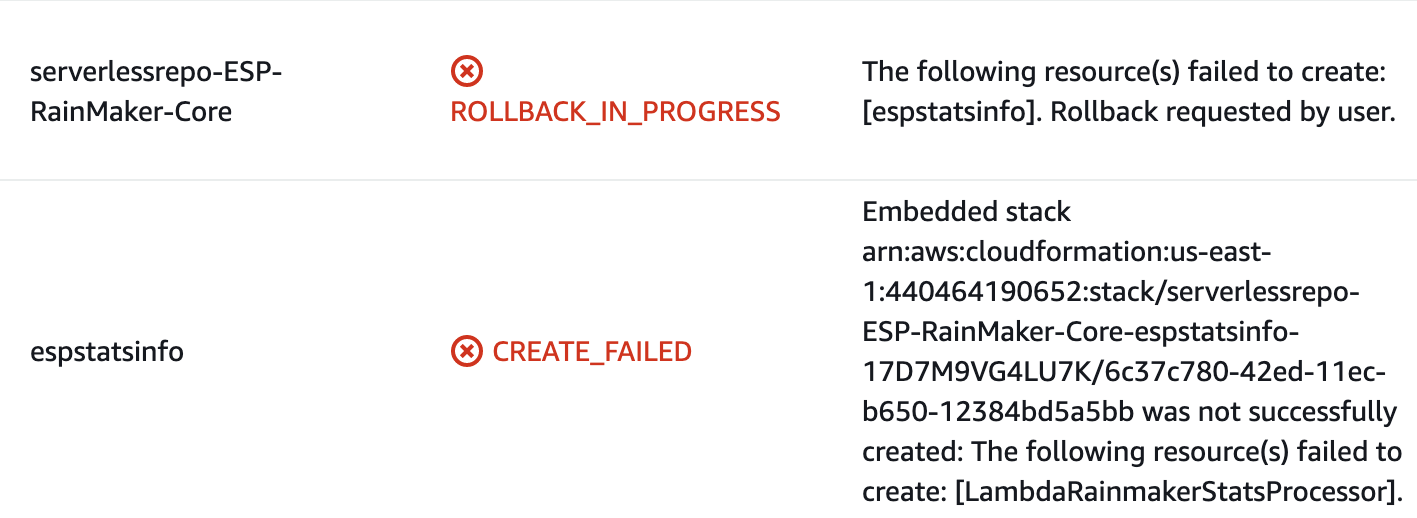
Open the
Eventstab and search forCREATE_FAILEDstatus.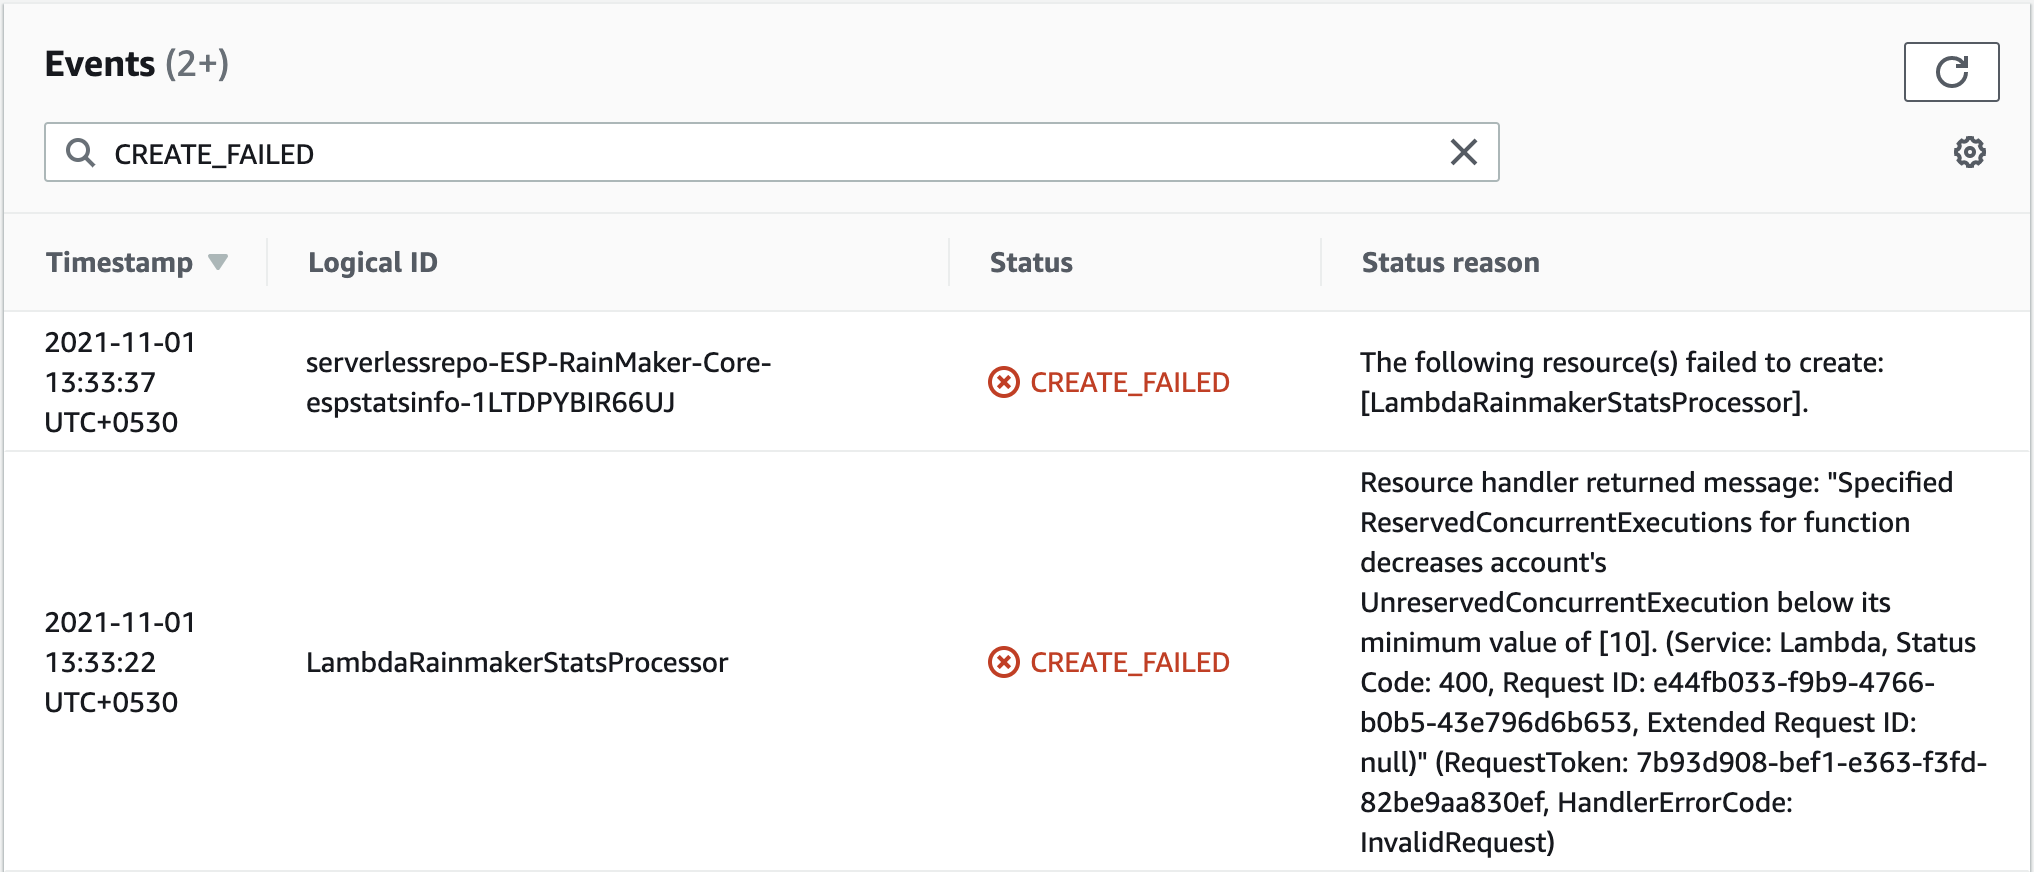
-
If the error matches the example above, the issue is related to lambda concurrency limits. You may need to raise a support ticket with AWS to resolve it.
Below are the steps for raising a Support ticket:
-
Go to your AWS console and search for
Support.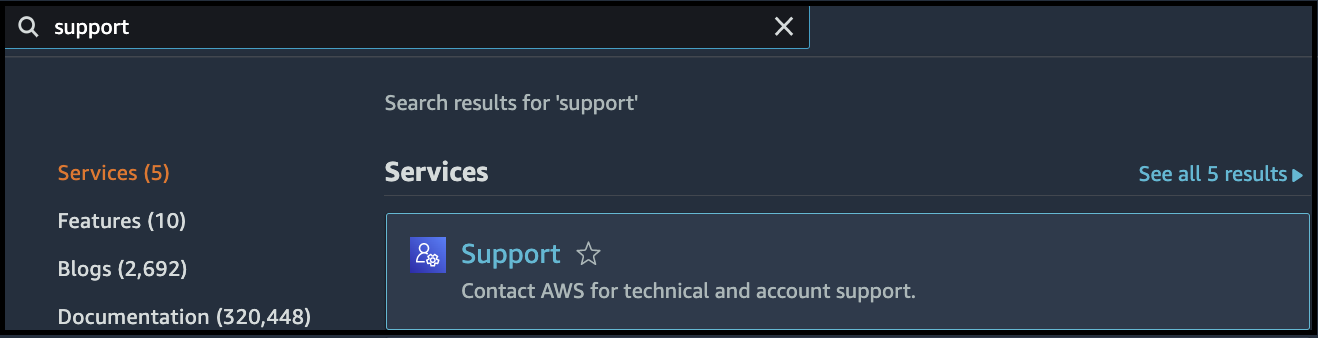
-
Click
Create case.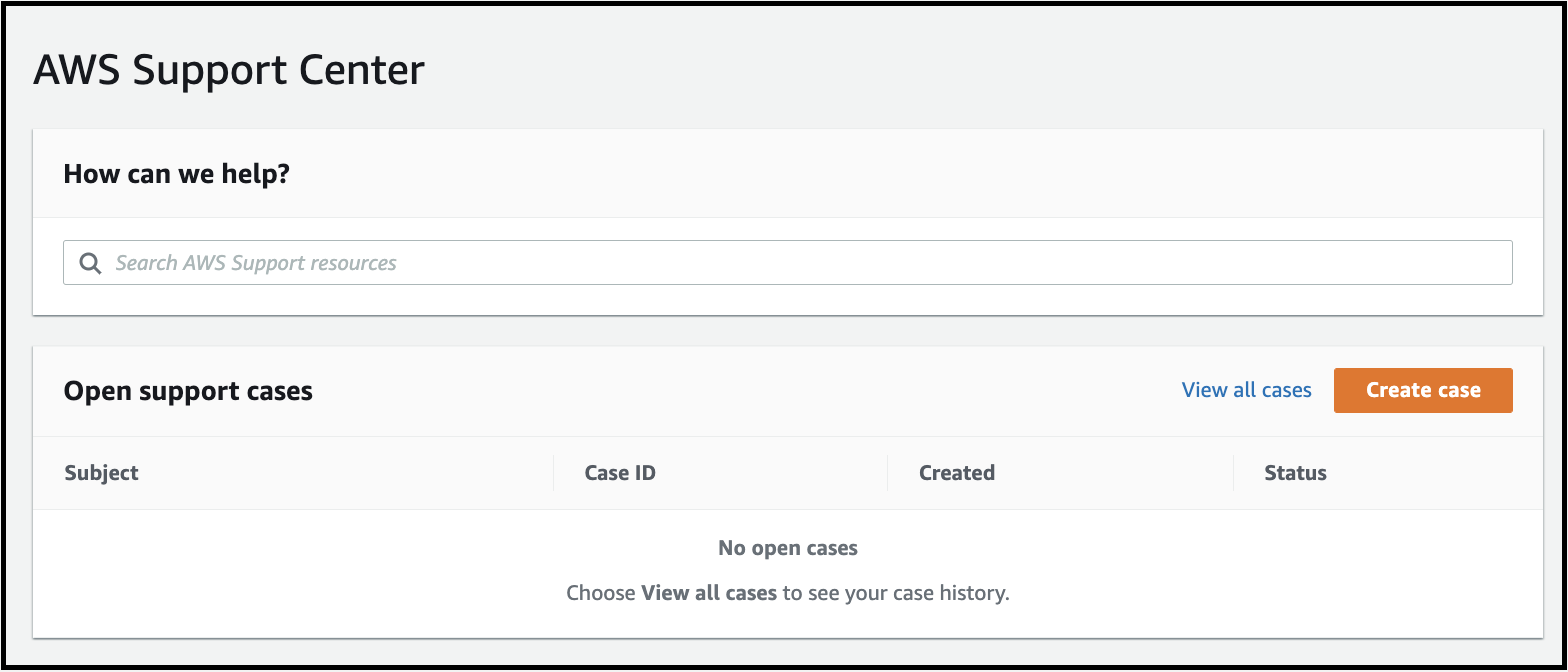
-
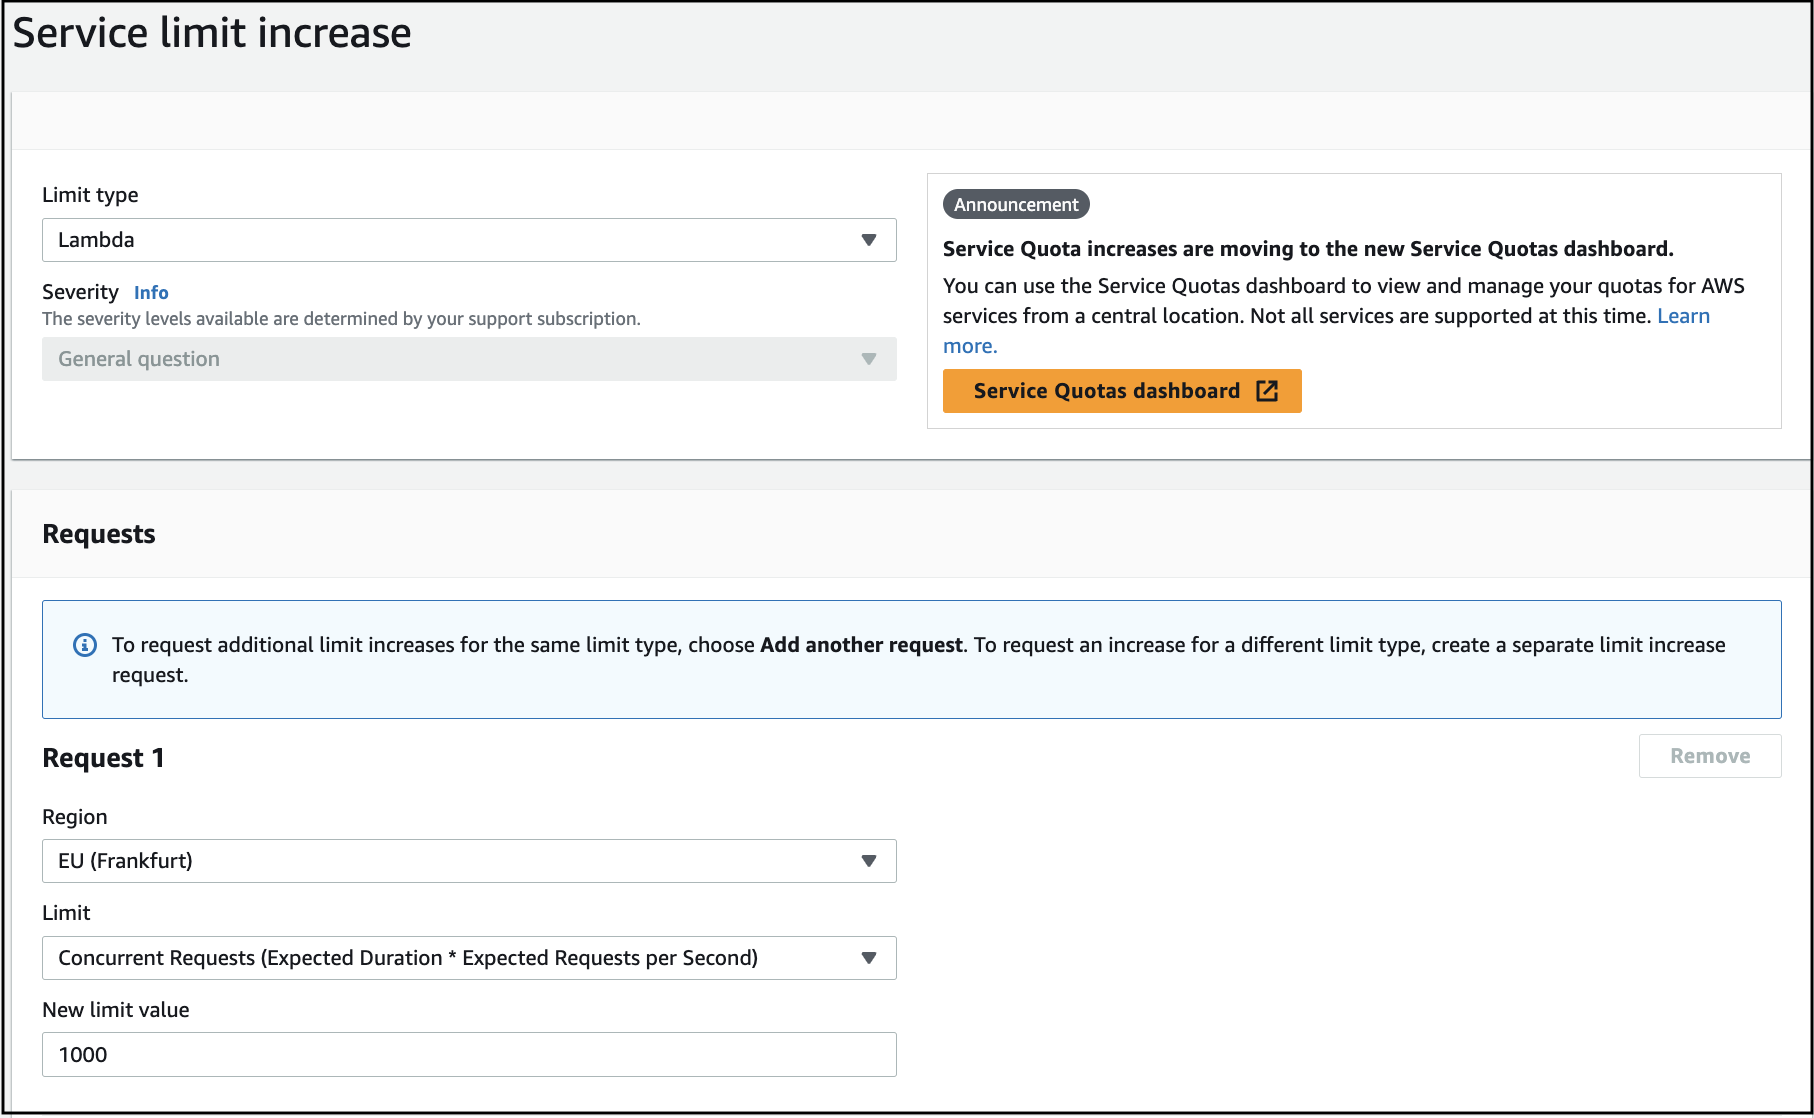
Select
Service limit increaseand then chooseLambdaas Limit type, as shown below: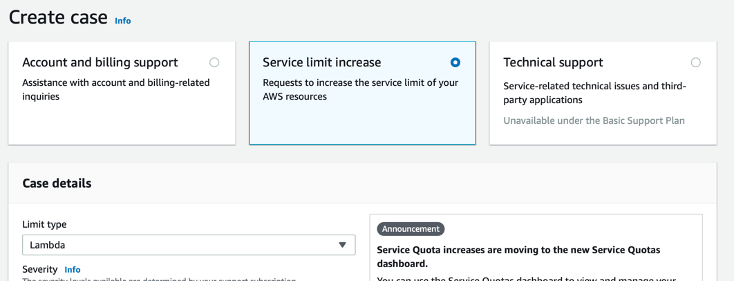
-
Fill in the case details:
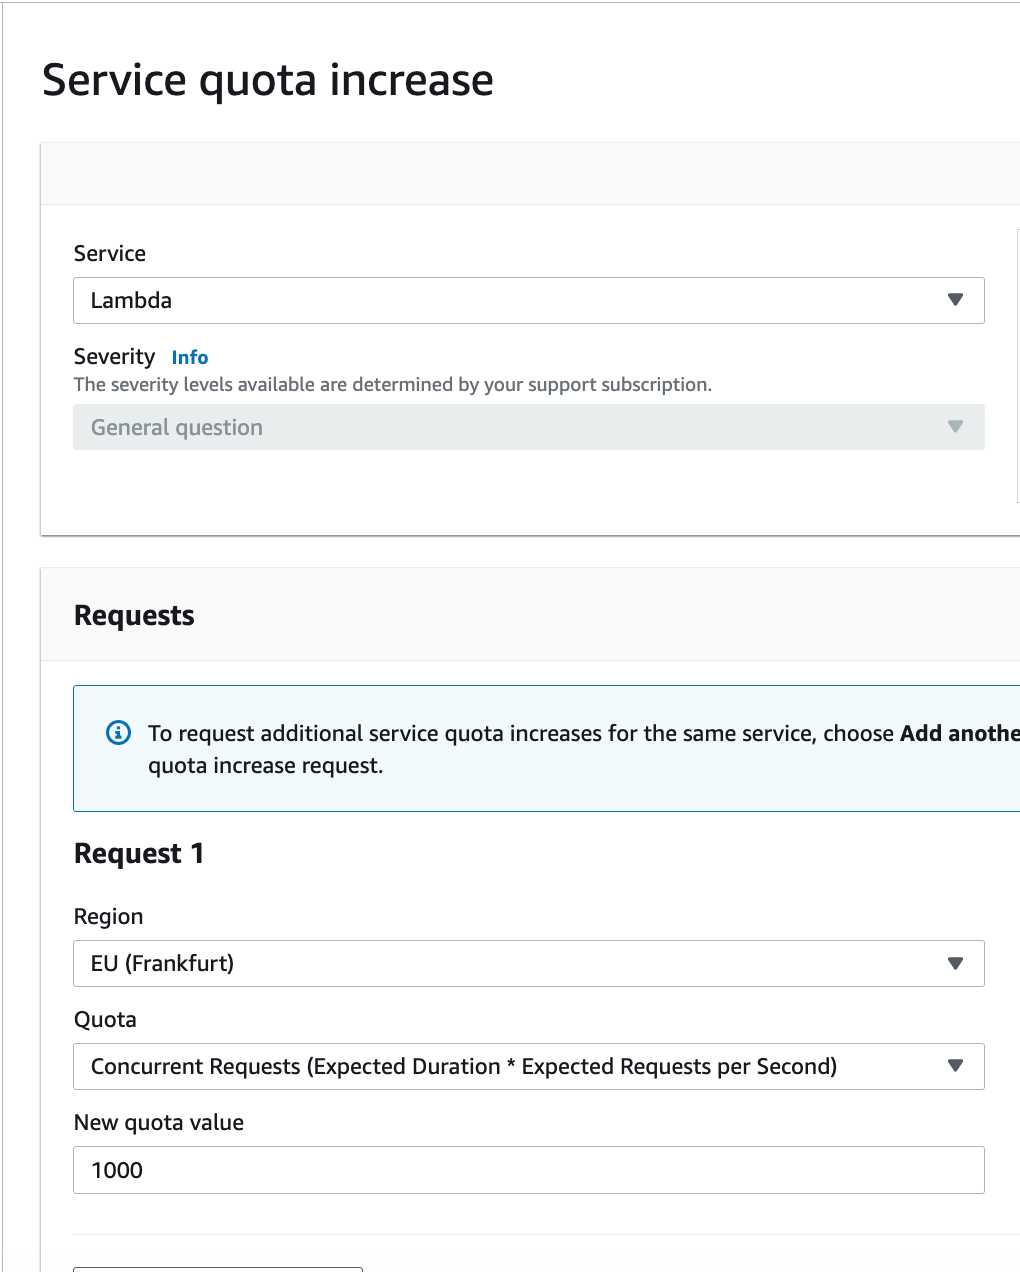
-
Specify the request details:
- Select your deployment region
- Limit: Concurrent Requests (Expected Duration × Expected Requests per Second)
- New Limit Value: 1000
-
Add a Case Description.
We are trying to deploy our product: https://rainmaker.espressif.com/. Since the current limit for concurrency is set to 10, we are not able to proceed with the deployment. Can you please set the concurrency limit to 1000?
-
Submit the request.
I am not able to find the ESP-RainMaker-Base-API stack in CloudFormation.
Answer
- The ESP-RainMaker-Base-API stack is disabled after the initial deployment of RainMaker.
- If you are cleaning up and redeploying the RainMaker, please contact the Espressif RainMaker team at esp-rainmaker-support@espressif.com to request access to the ESP-RainMaker-Base-API stack.
- There is no need to upgrade the ESP-RainMaker-Base-API stack if you are only upgrading Rainmaker.
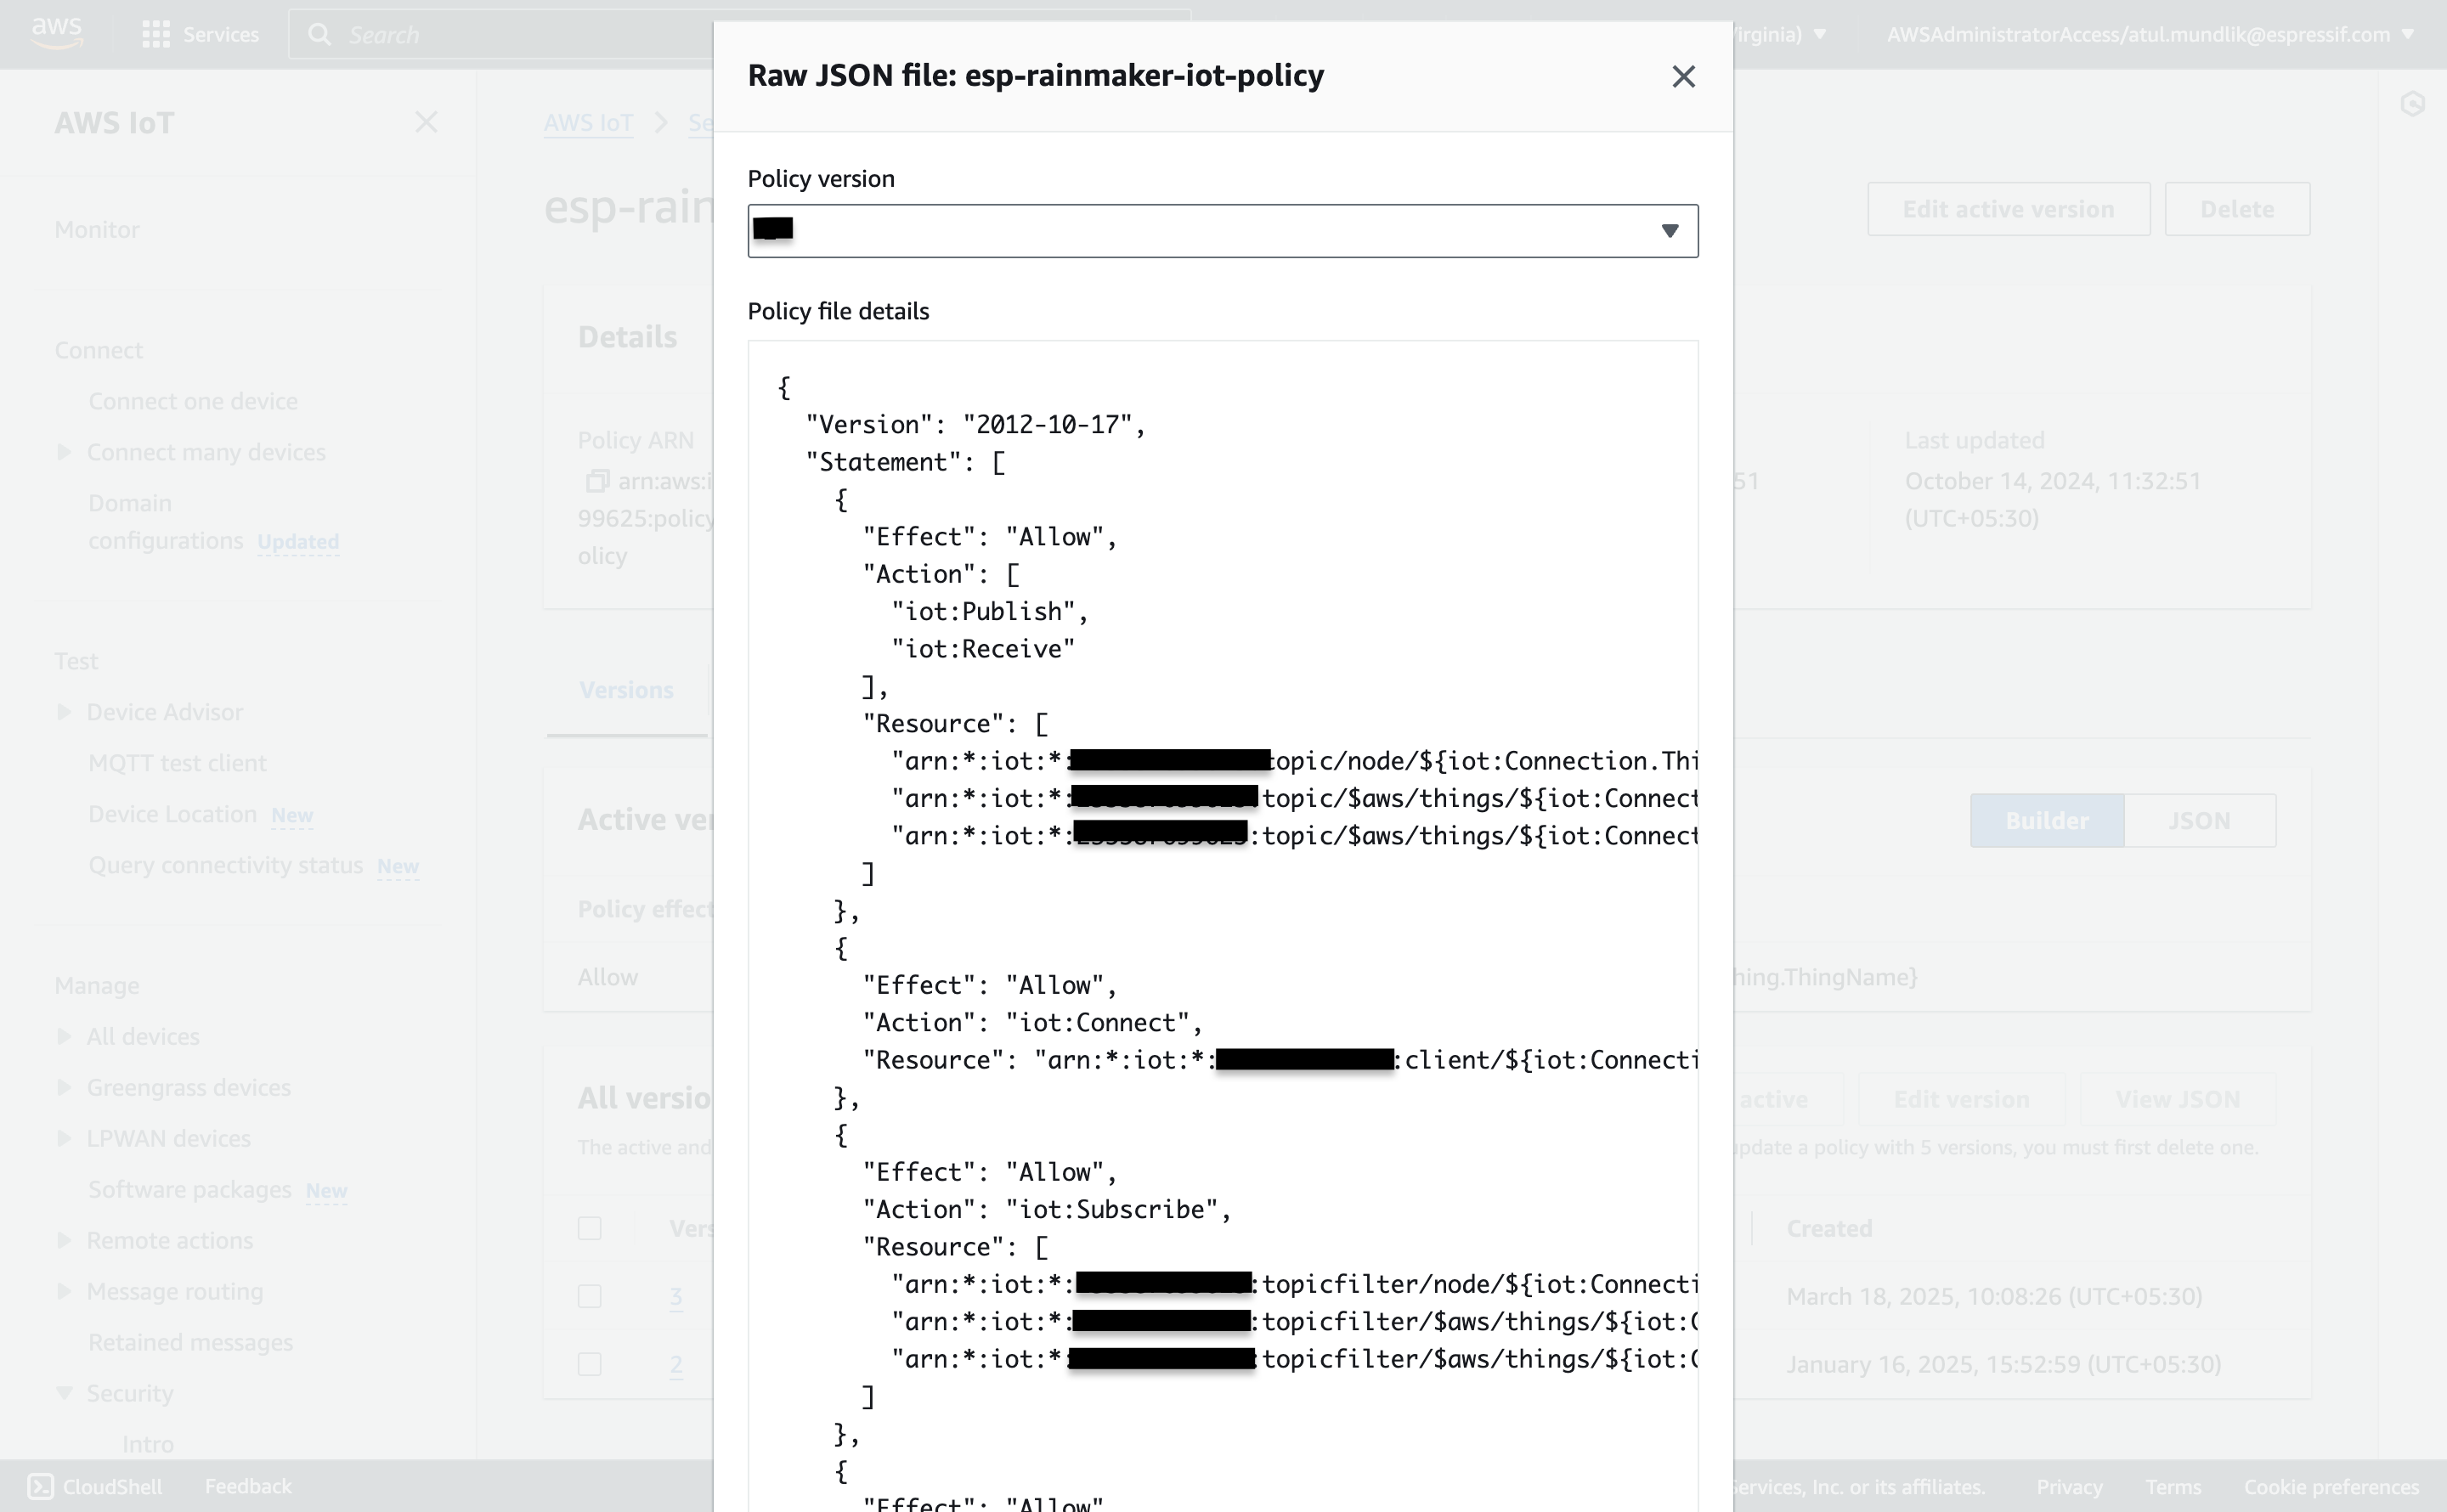
How to confirm if system is functional after the downtime for v3.1.0 upgrade.
Answer
- Login to Aws management console
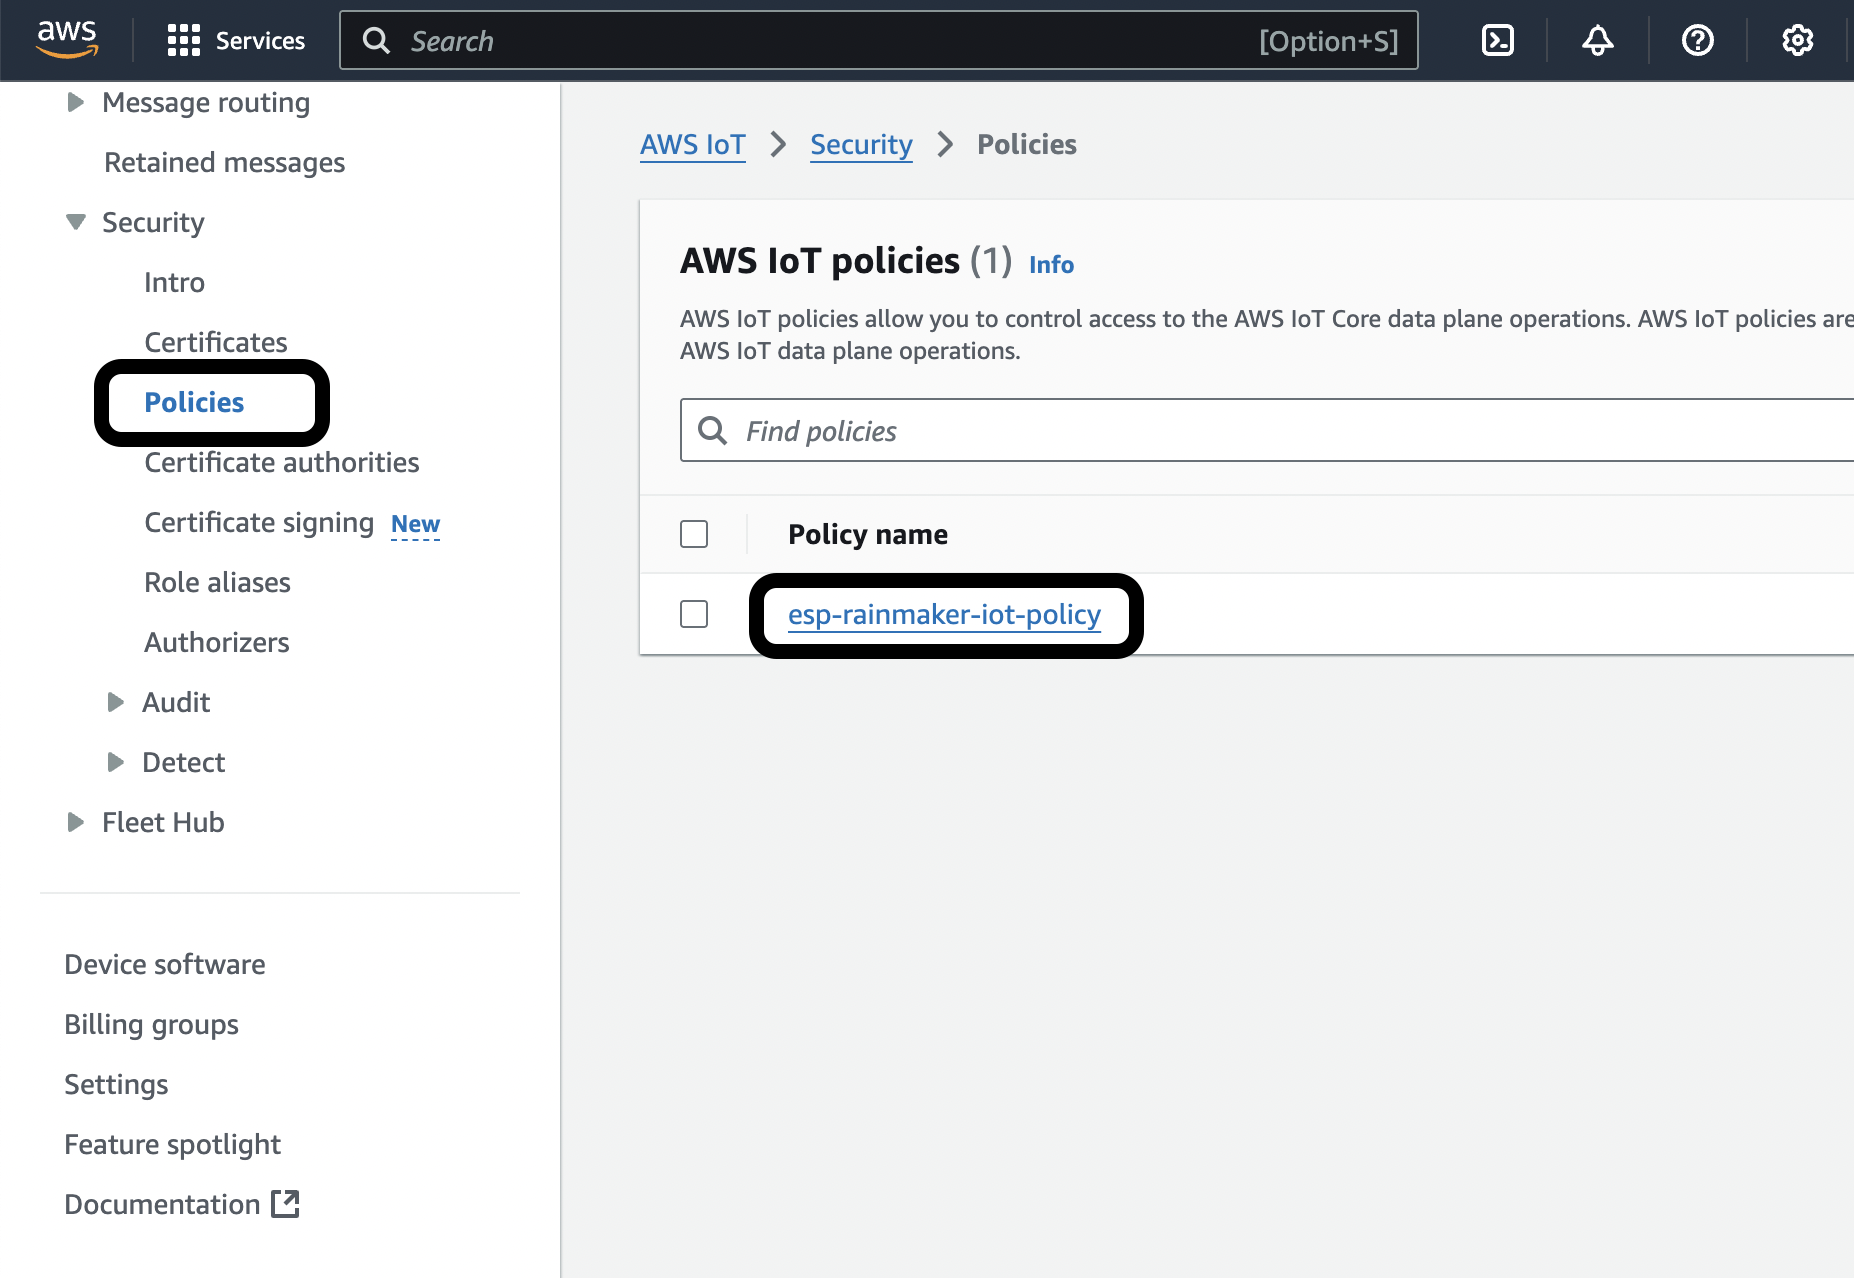
- Navigate to IoT Core AWS service
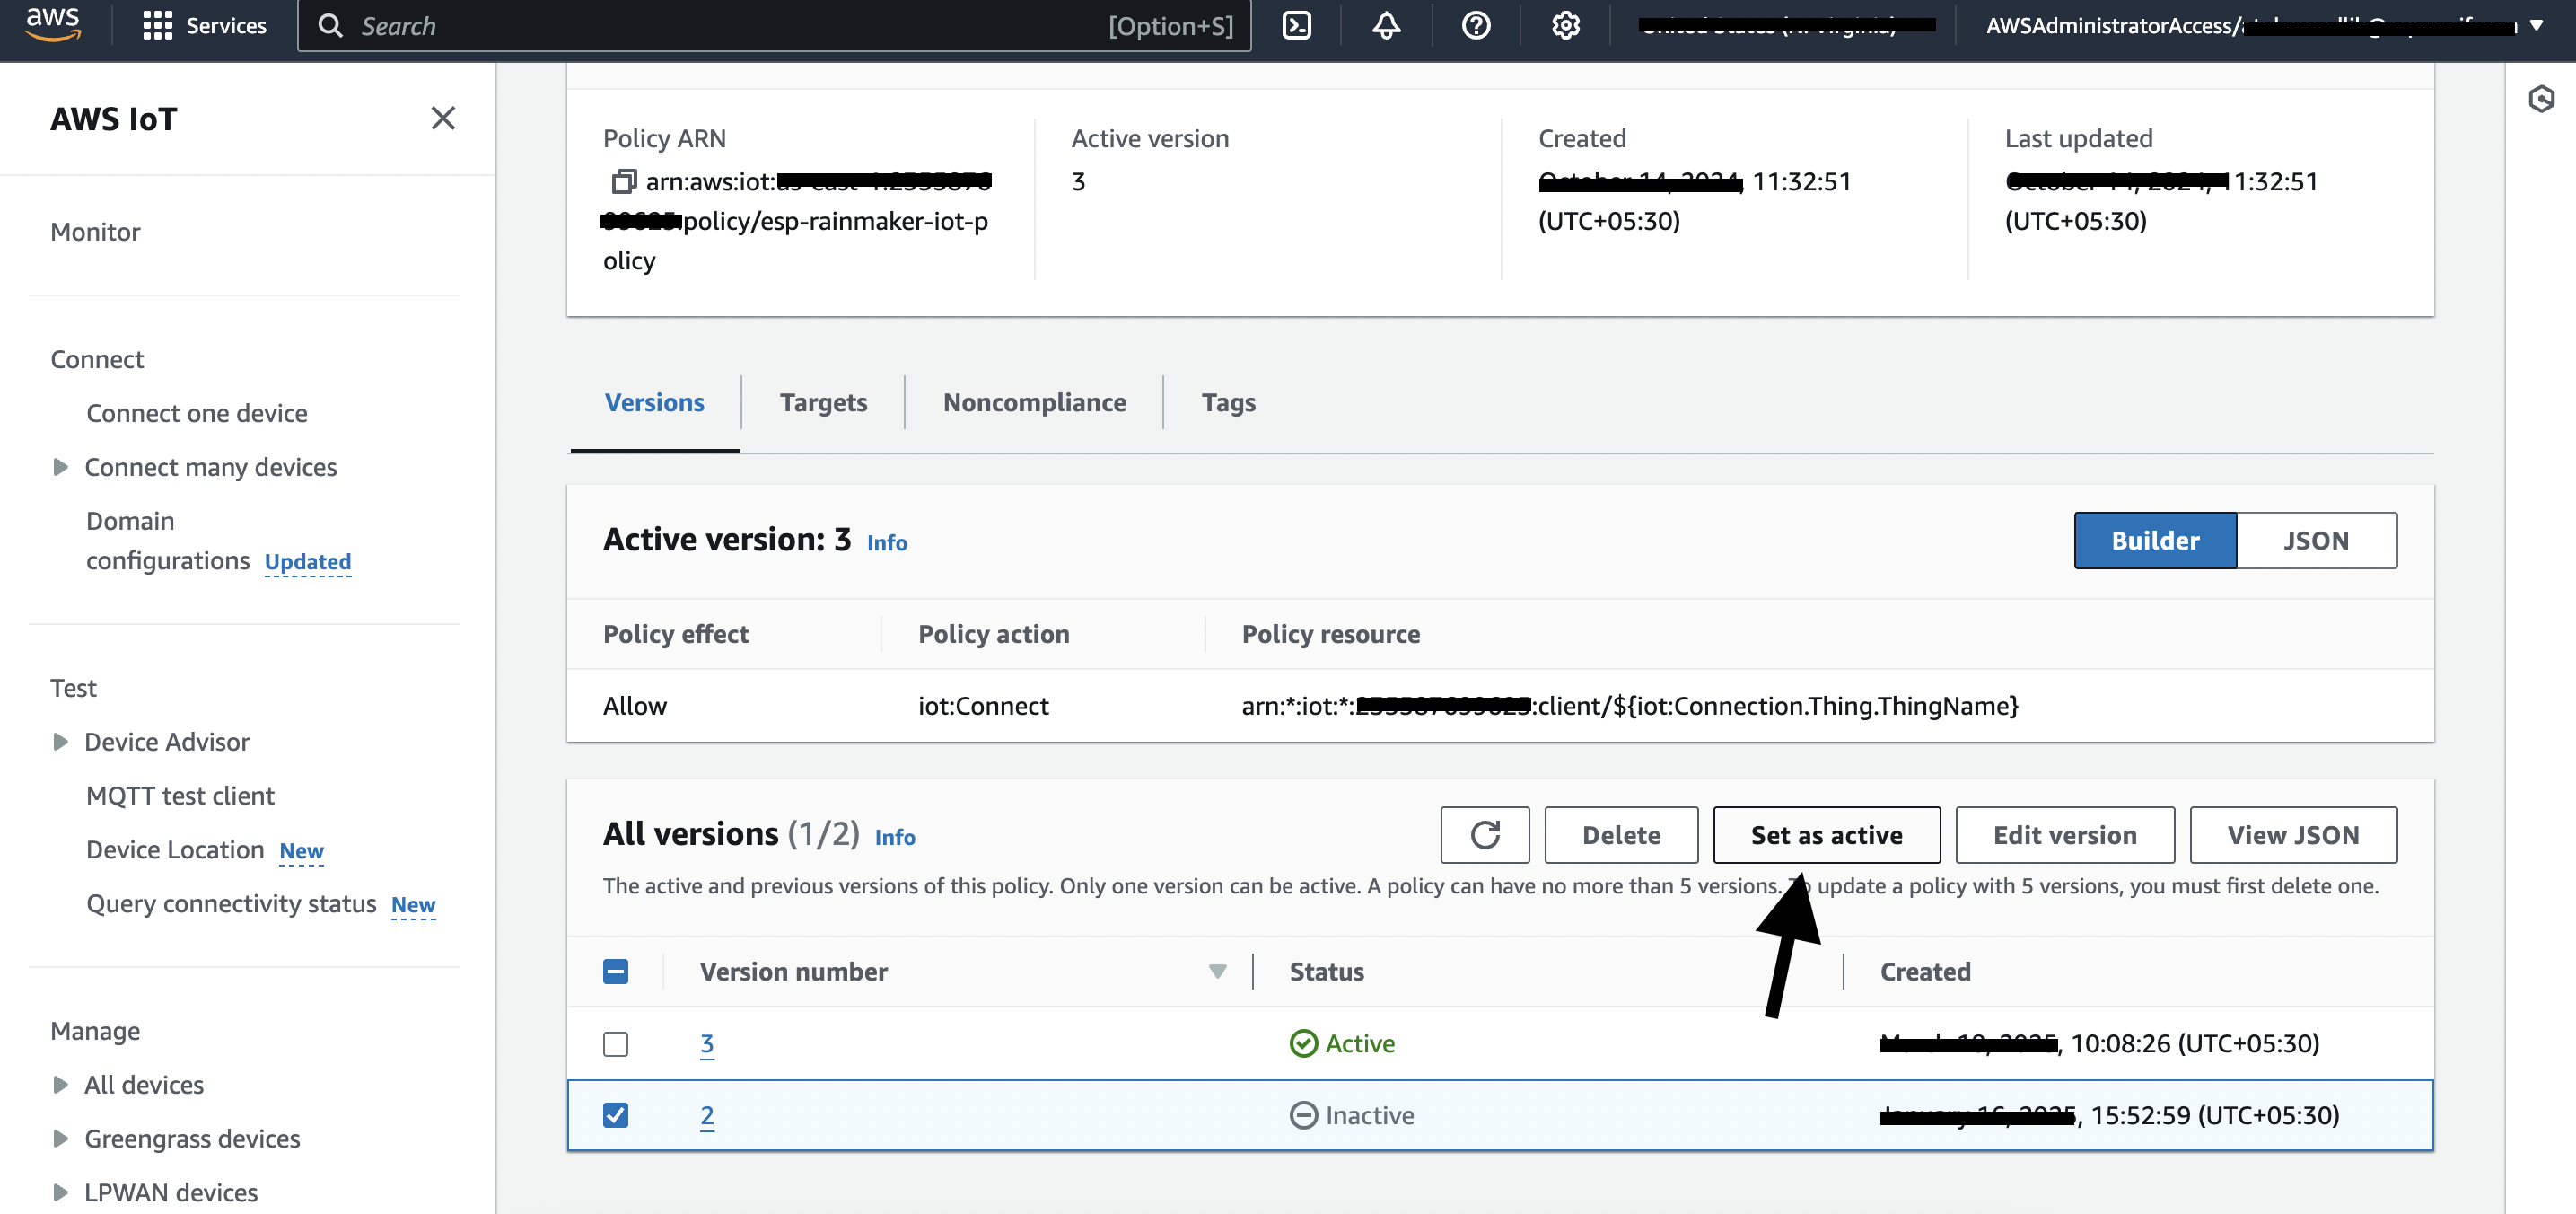
- From left hand menu, expand Security and click on Policies and then choose
esp-rainmaker-iot-policy
- If your
ActivePolicy looks something like
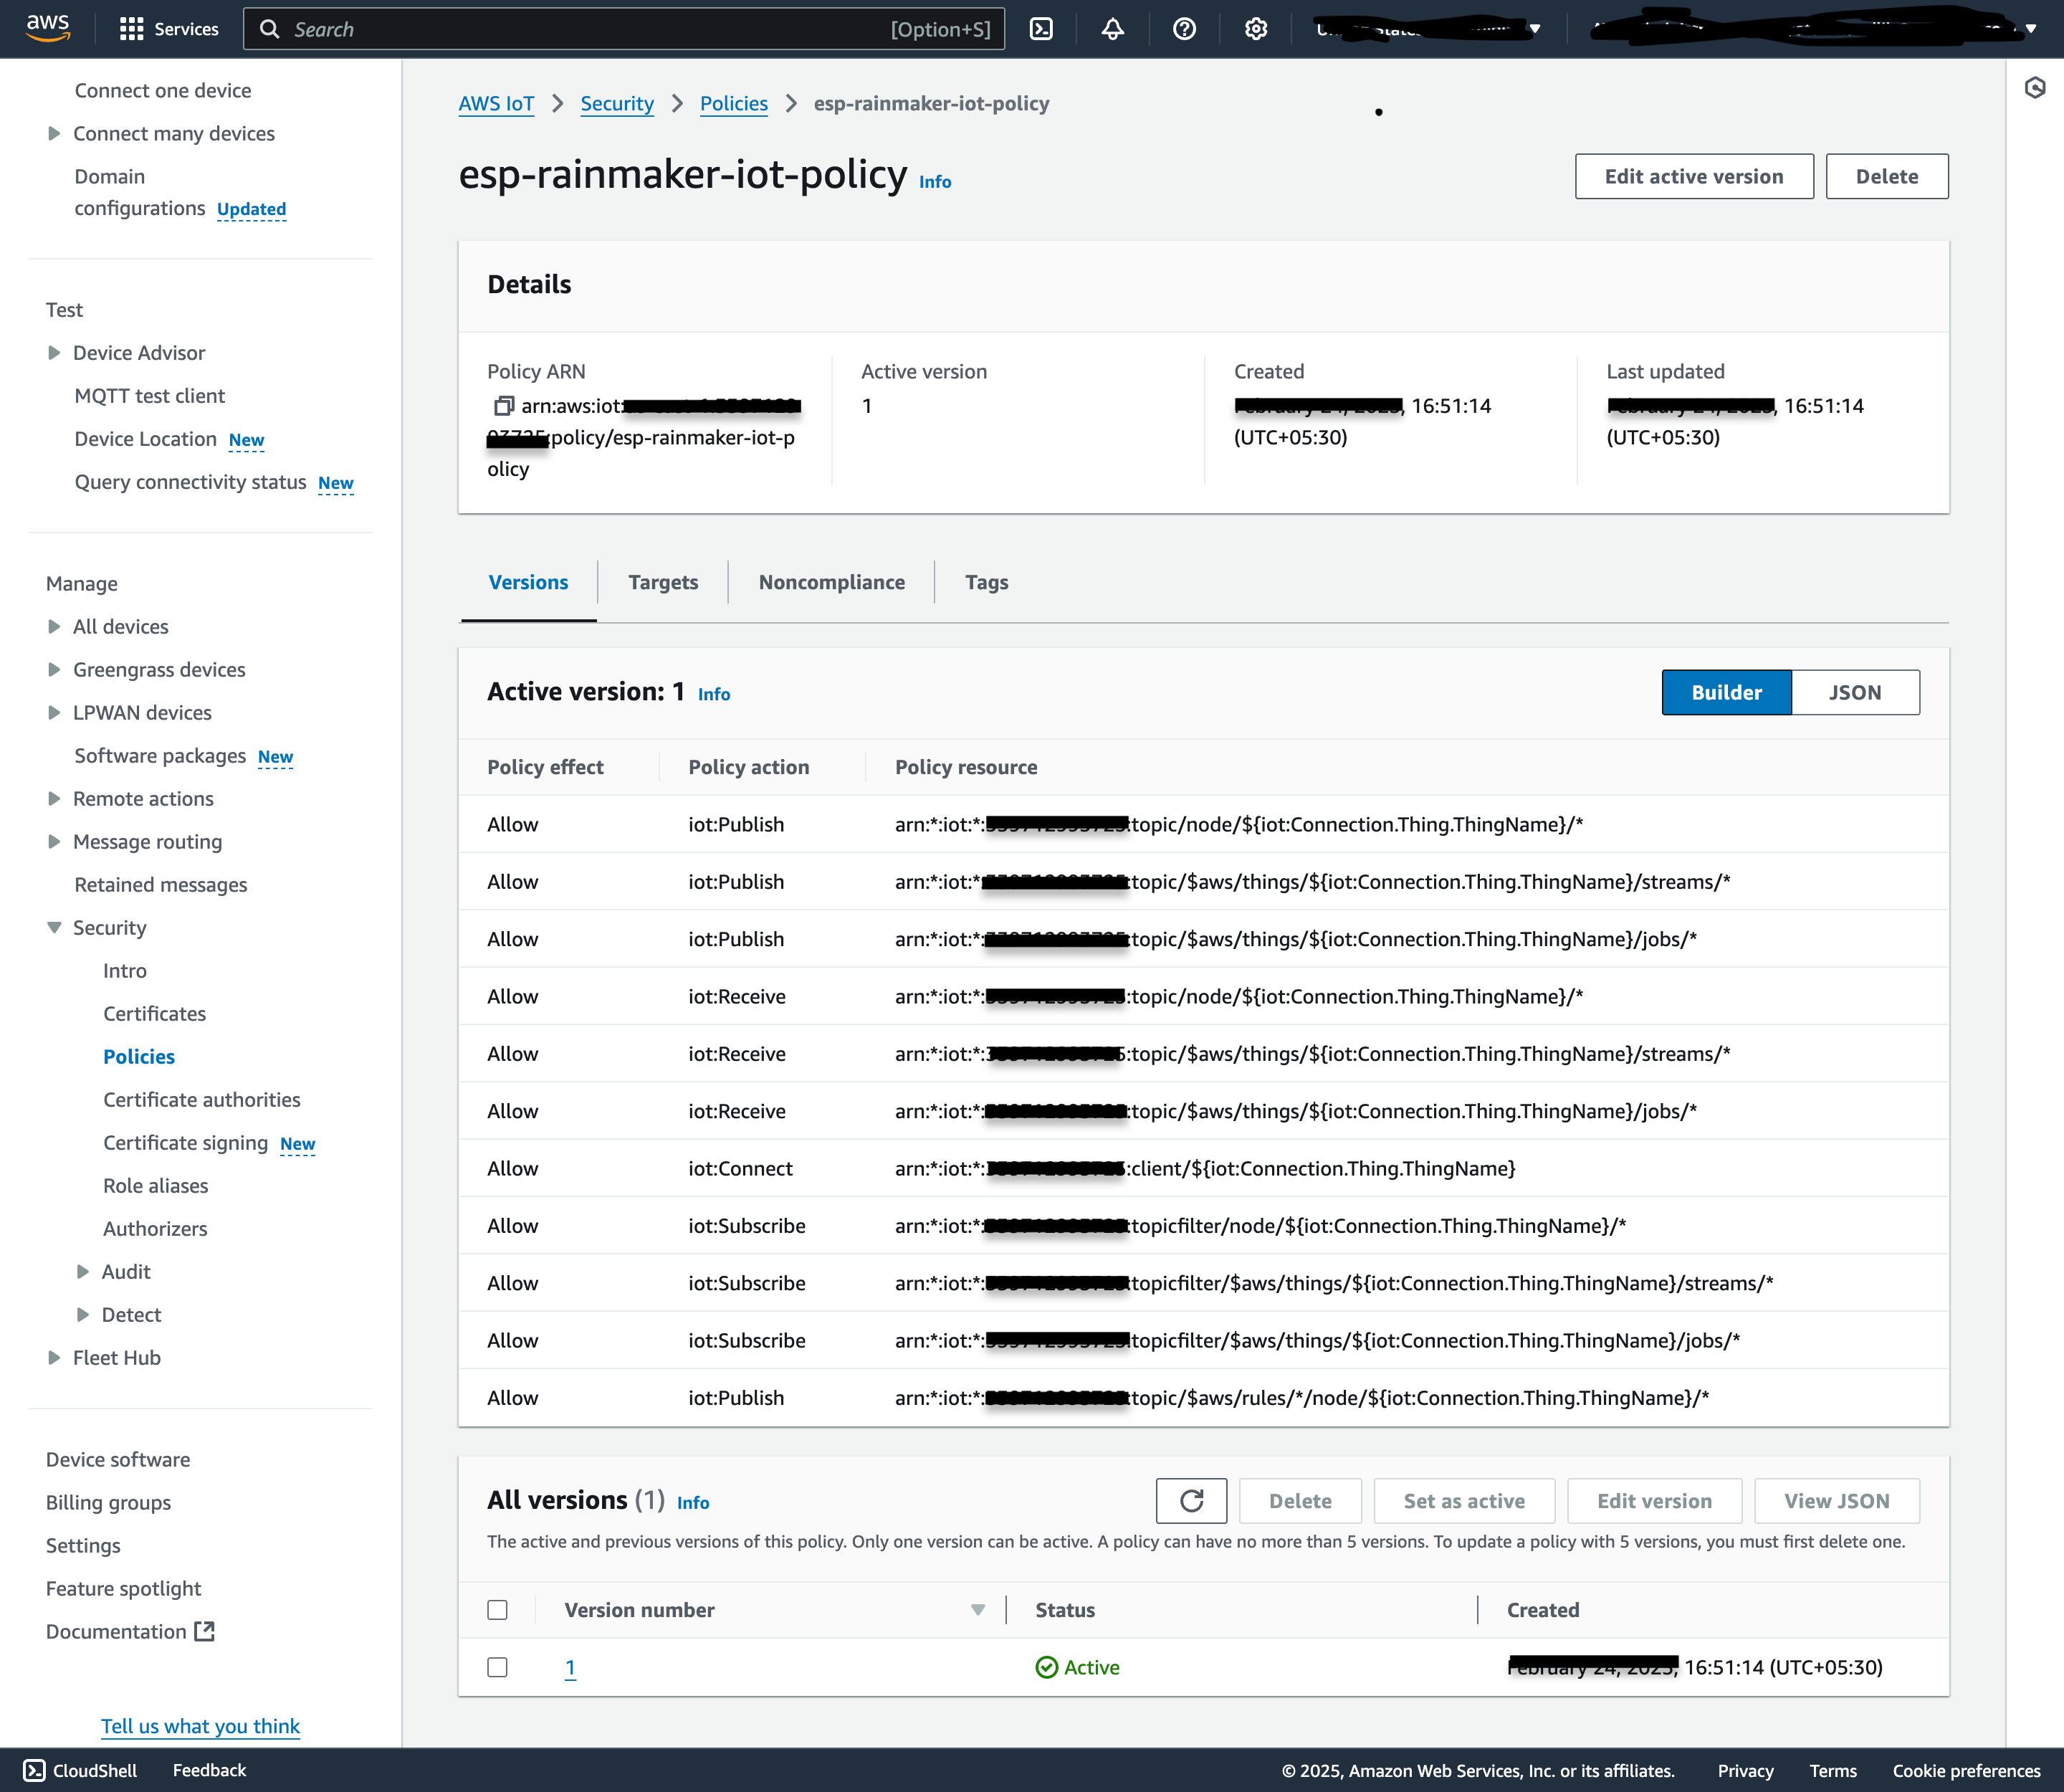
then it means that your System is Working As Expected, there is No MQTT downtime and your devices are connected.
- If your
ActivePolicy looks something like Connect only policy
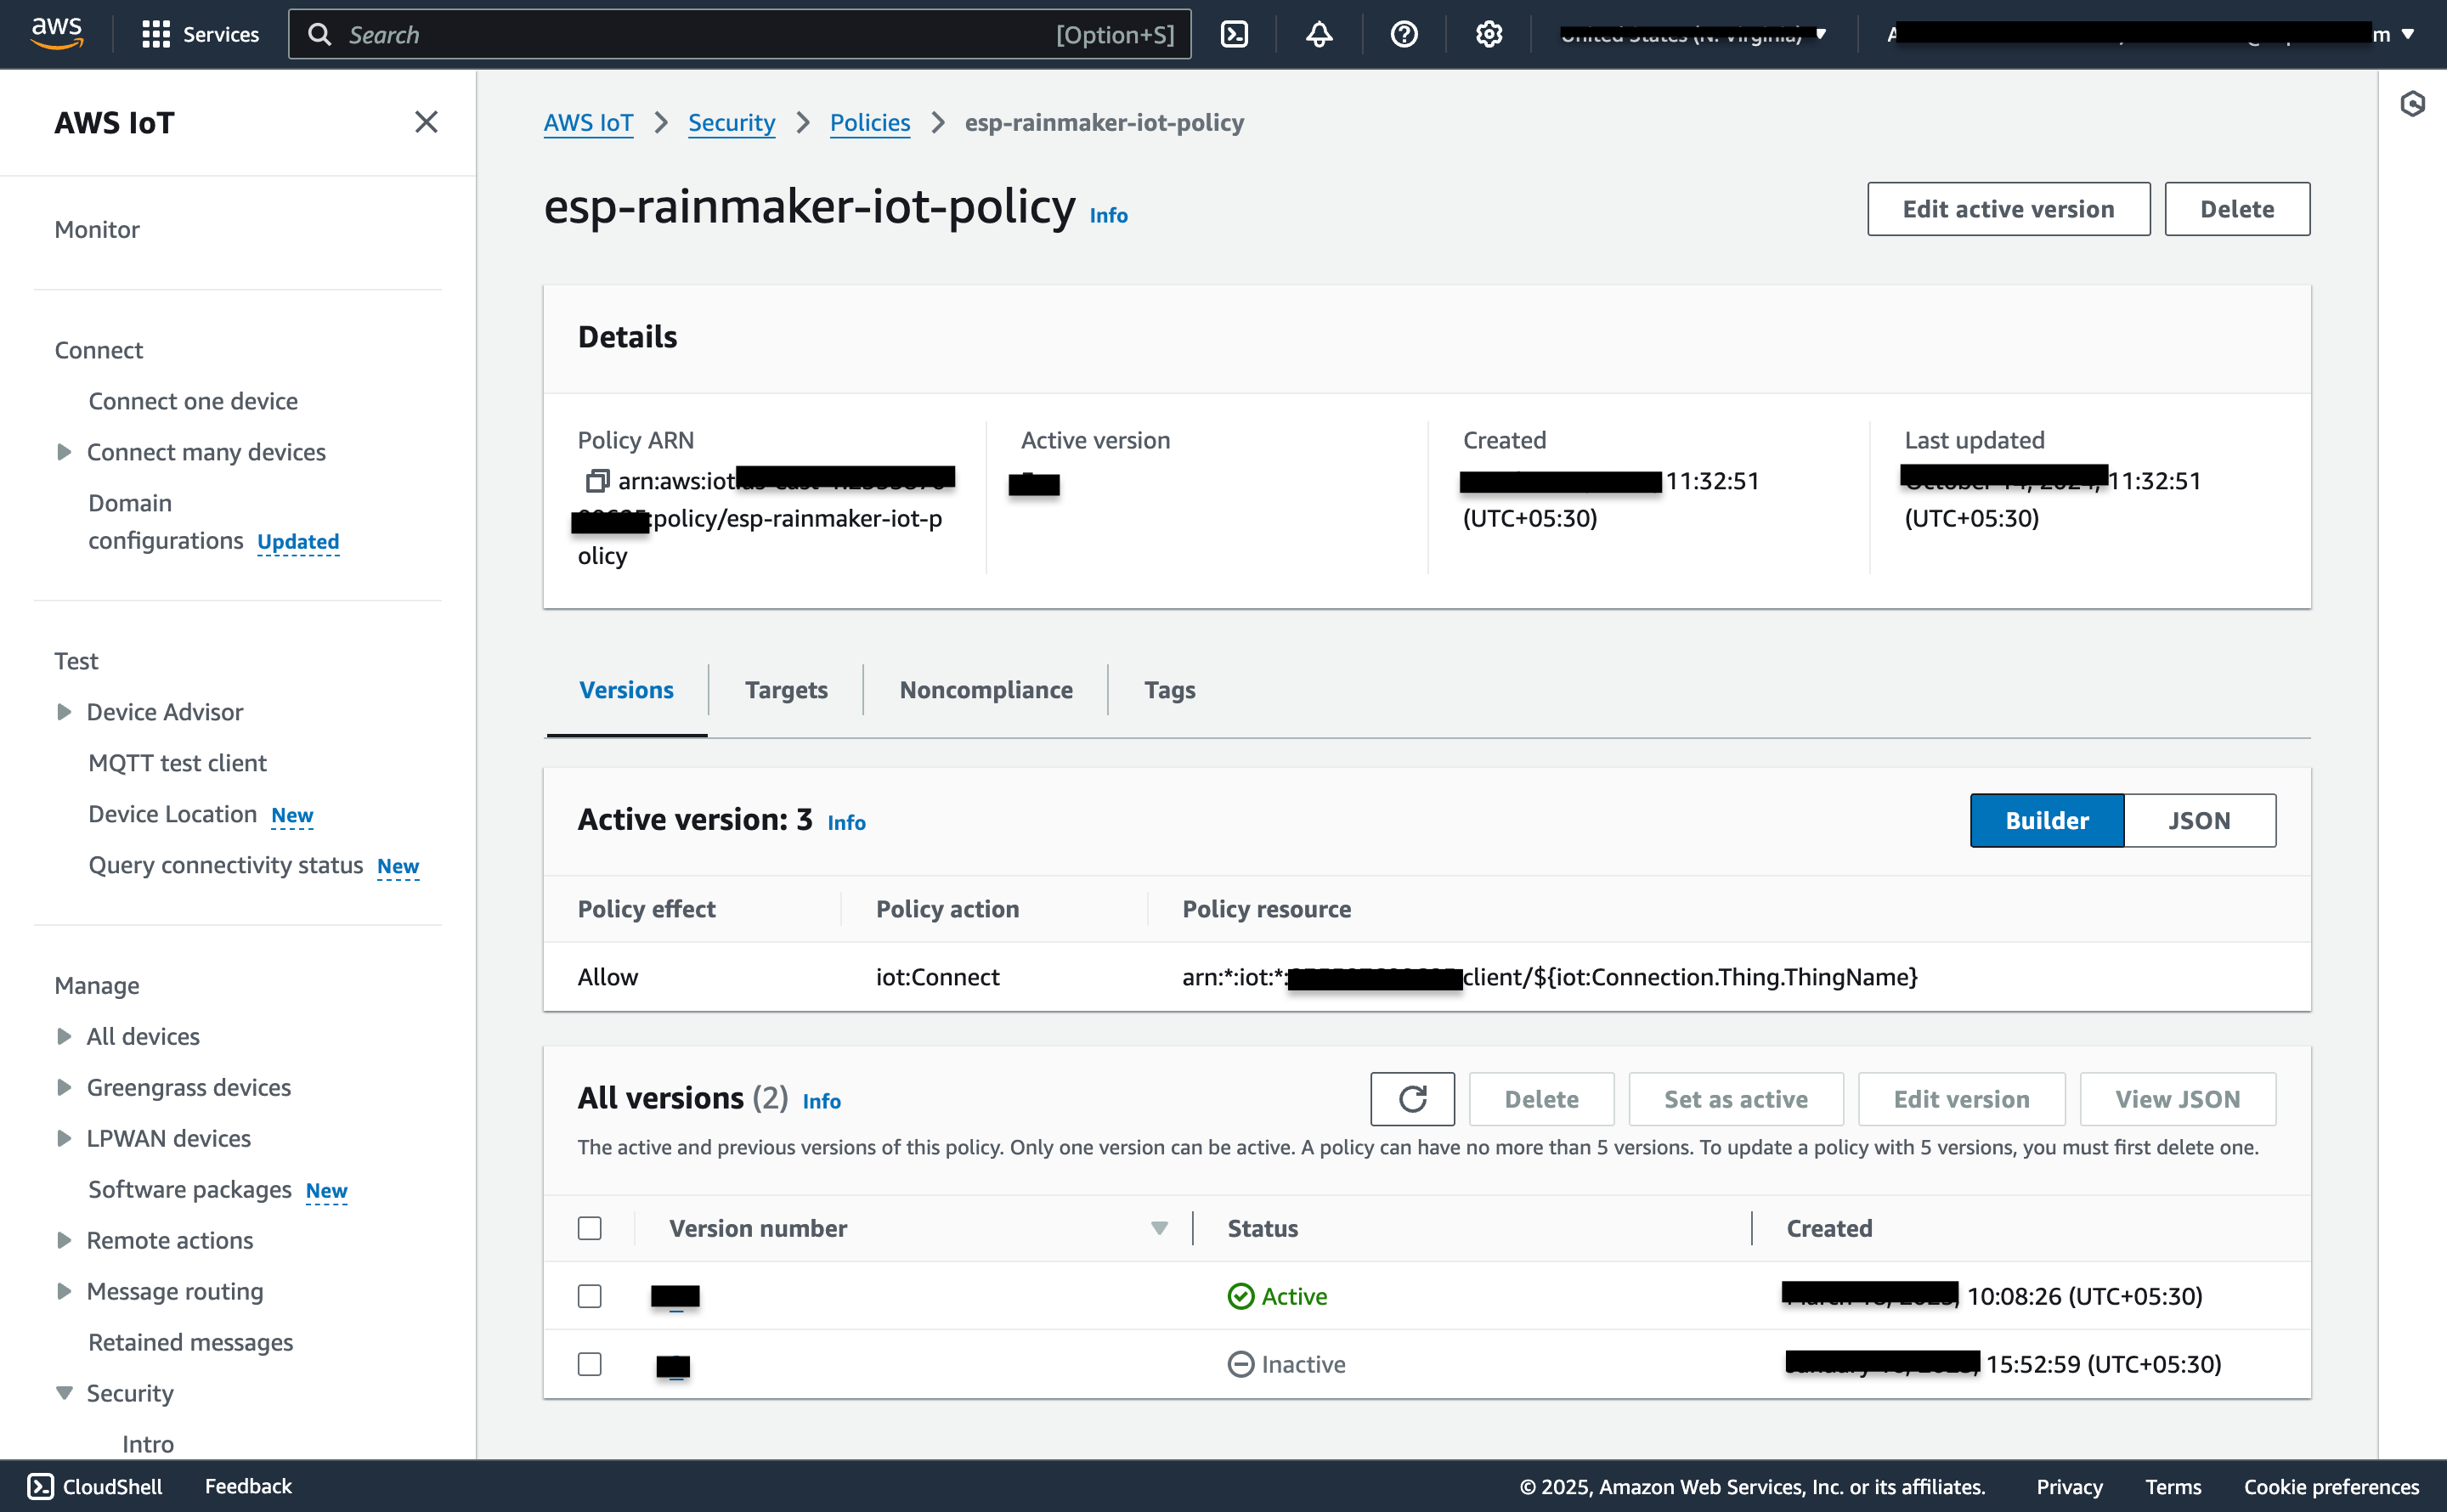
then check which other Inactive version which looks like
Select that Inactive version and click on Set as Active