Pre-Deployment
Welcome to the pre-deployment section, the second of four stages in the deployment of Private RainMaker. 🚀 As there are differences in the deployment of Private RainMaker in China vs in Global region. Two tabs are displayed to distinct Global and China region. Please select the relevant tab that is based on the region of your deployment.
- Global Region
- China Region
Configure Simple Email Service (SES)
Amazon Simple Email Service (SES) is an affordable email service that enables you to send transactional emails, marketing messages, or any other type of high-quality content to end-users.
To initiate SES into your deployment, please follow these steps to configure them. Click here to understand more about SES.
Email Verification
To send email notifications to the end-users, a mail ID needs to be created and configured.
These steps are performed using AWS Simple Email Service (SES) console.
-
Open the AWS dashboard and search for the SES service.

-
Click
Verified identitiesin the navigation pane. -
Click
Create identity.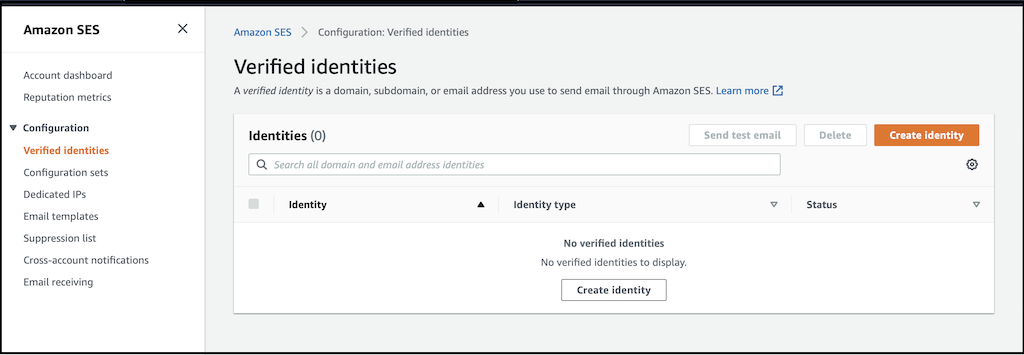
-
Select the
Email addressoption forIdentity type. -
Enter the new email address, which should be used for sending email notifications.
-
After entering the mail address, click
Create identity.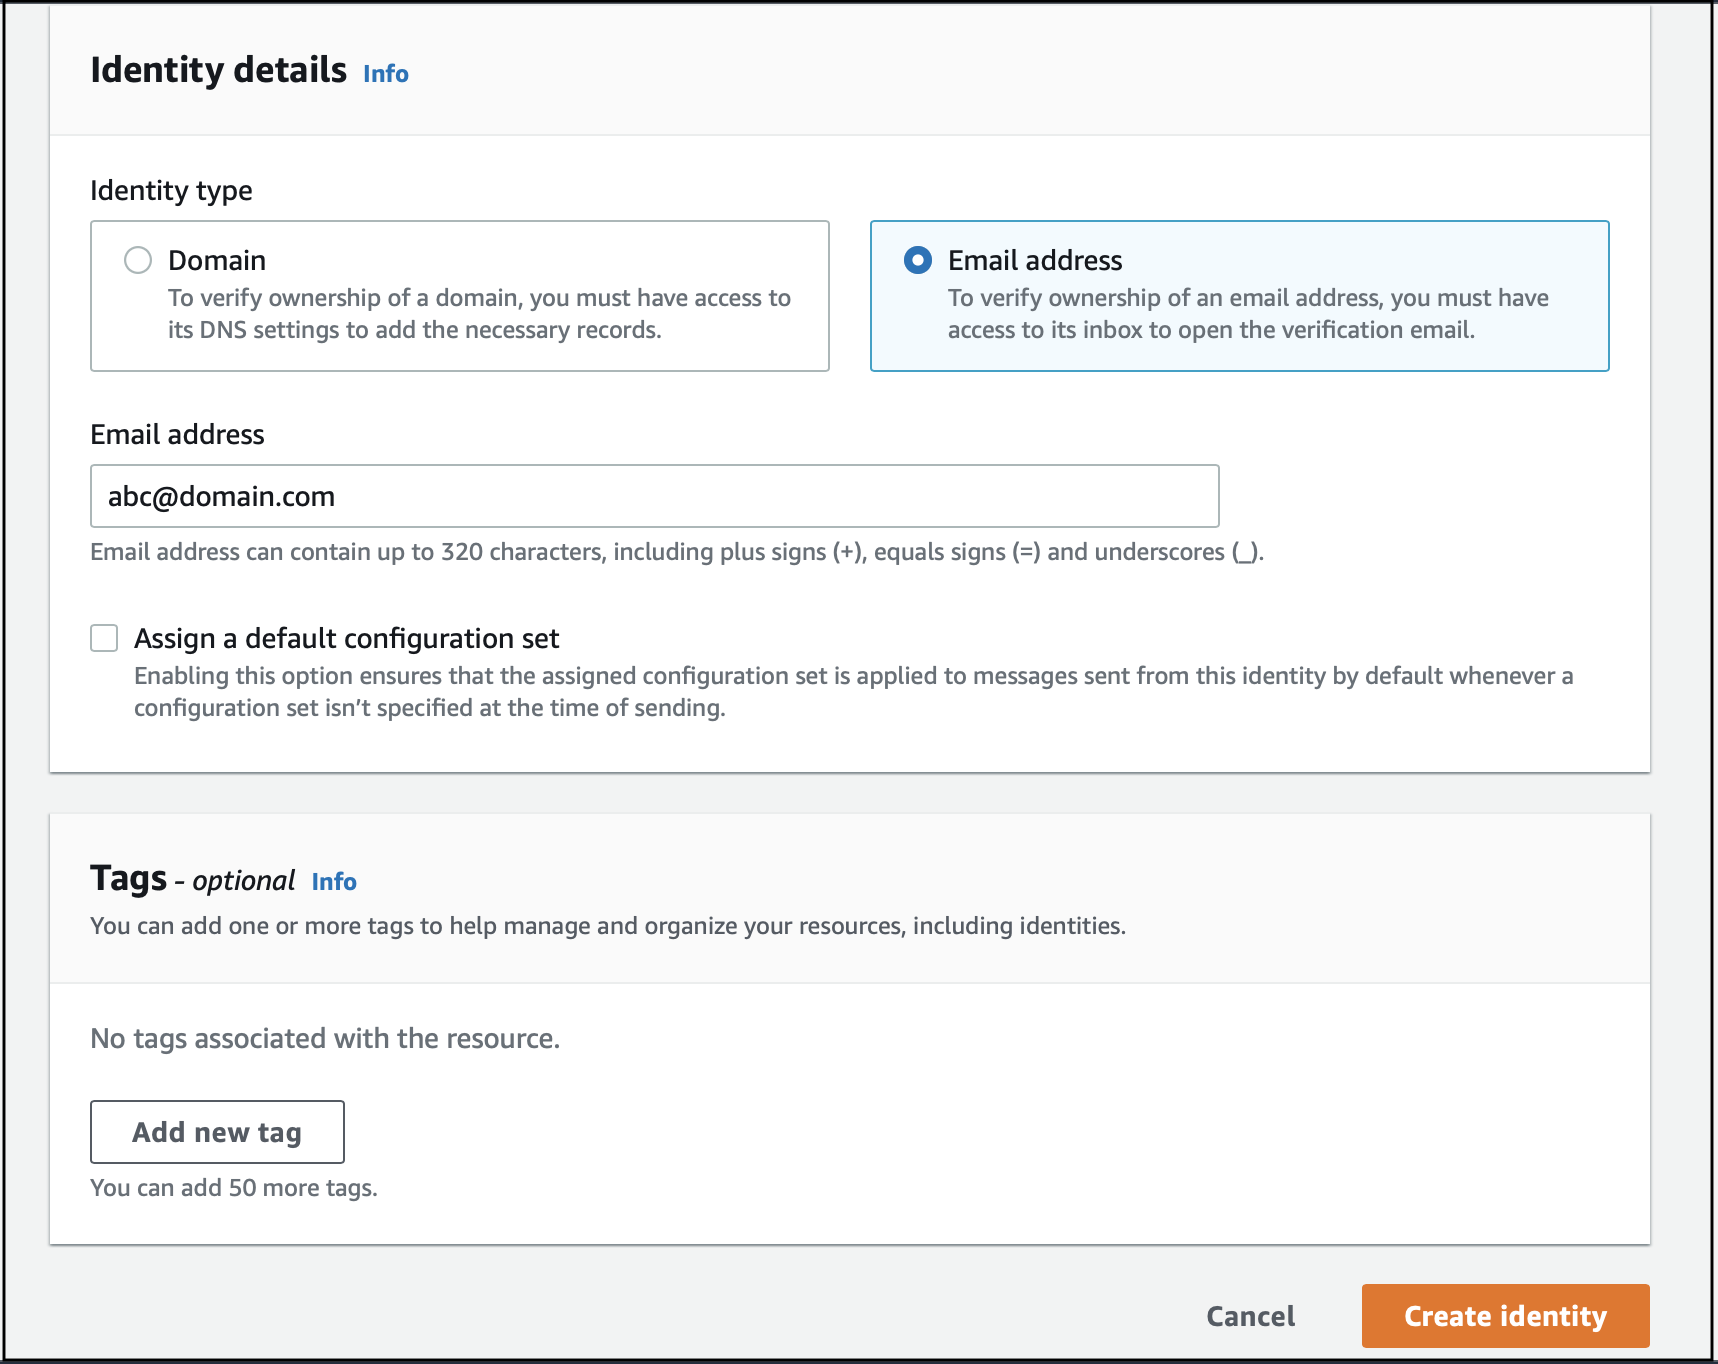
-
An email notification will be sent to the mail ID. Click on the link in the mail to verify the address. After that, the verification status for the mail address will be confirmed.
-
Click on the
Refreshbutton to see the updated status or check the email verification request.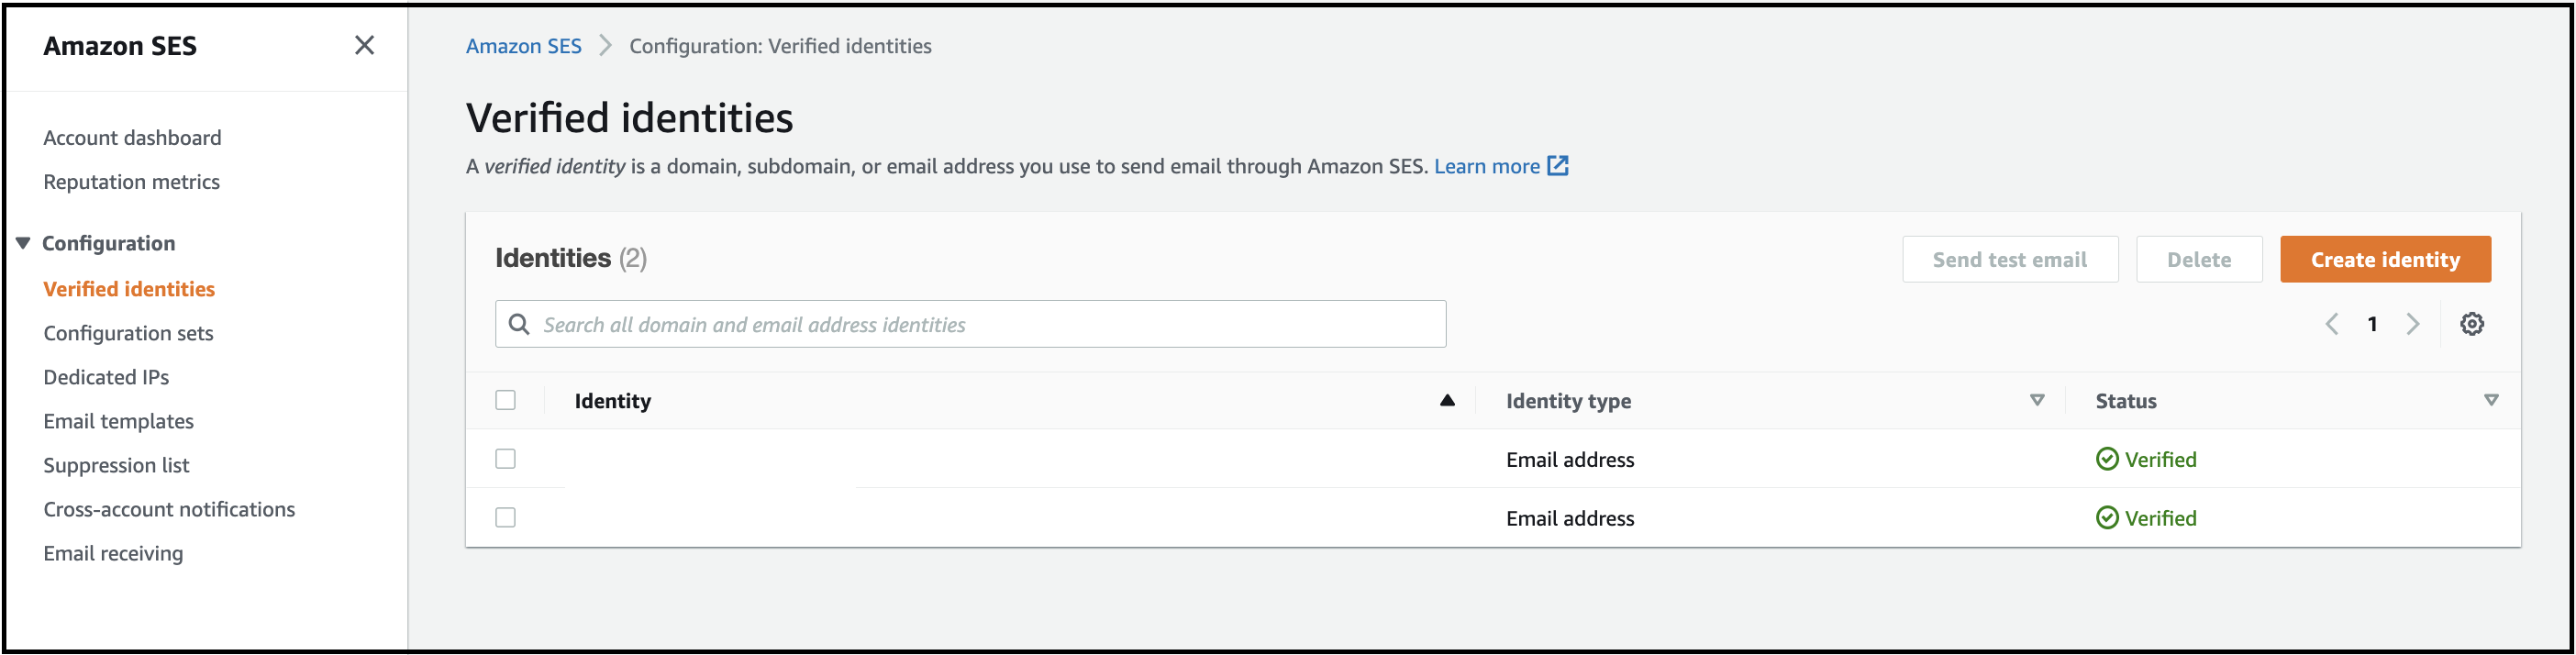
Configure Domain Key Identified Mail
When the user signs up for or interact with RainMaker application, they may often receive emails like account verification or password reset. However, without proper authentication mechanisms in place, these emails are more likely to be marked as spam by email services, creating a poor user experience where users might miss important notifications.
Therefore, we configure the Domain Key Identified Mail (DKIM) to authenticate emails that are being sent to ensure that they are recognized as legitimate by email providers. This reduces emails being marked as spam, increasing reliability of the service that is important during password recovery or sign-ups, which are critical for user engagement and retention.
These steps are performed using AWS Simple Email Service (SES) console.
- The domain identity should be created and verified according to the following documentation:
AWS SES DKIM Create and Verify Domain
The domain name should be the same as the domain name of your SES verified email.
- Follow the following AWS documentation for Easy DKIM configuration:
AWS SES DKIM Configuration doc
Move out of SES Sandbox
What is SES Sandbox?
Amazon SES (Simple Email Service) starts in sandbox mode, where emails can only be sent to verified recipients (specific email addresses, domains, or AWS test inboxes). This restriction prevents spam and ensures responsible email usage.
Why Move Out of SES Sandbox?
To send emails to any recipient (e.g., customers using RainMaker), you must request production access. This allows RainMaker to send essential emails like OTPs, welcome emails, and deployment notifications without restrictions.
SES Sandbox is AWS region-specific. You should request production access for SES in the RainMaker region that you are deploying in.
This are the following steps to move out of SES sandbox:
-
Log in to the AWS console and select the RainMaker region.
-
Go to the SES service console.
-
Click
Account dashboardfrom the left-hand side menu. -
Click the
Request production accessoption.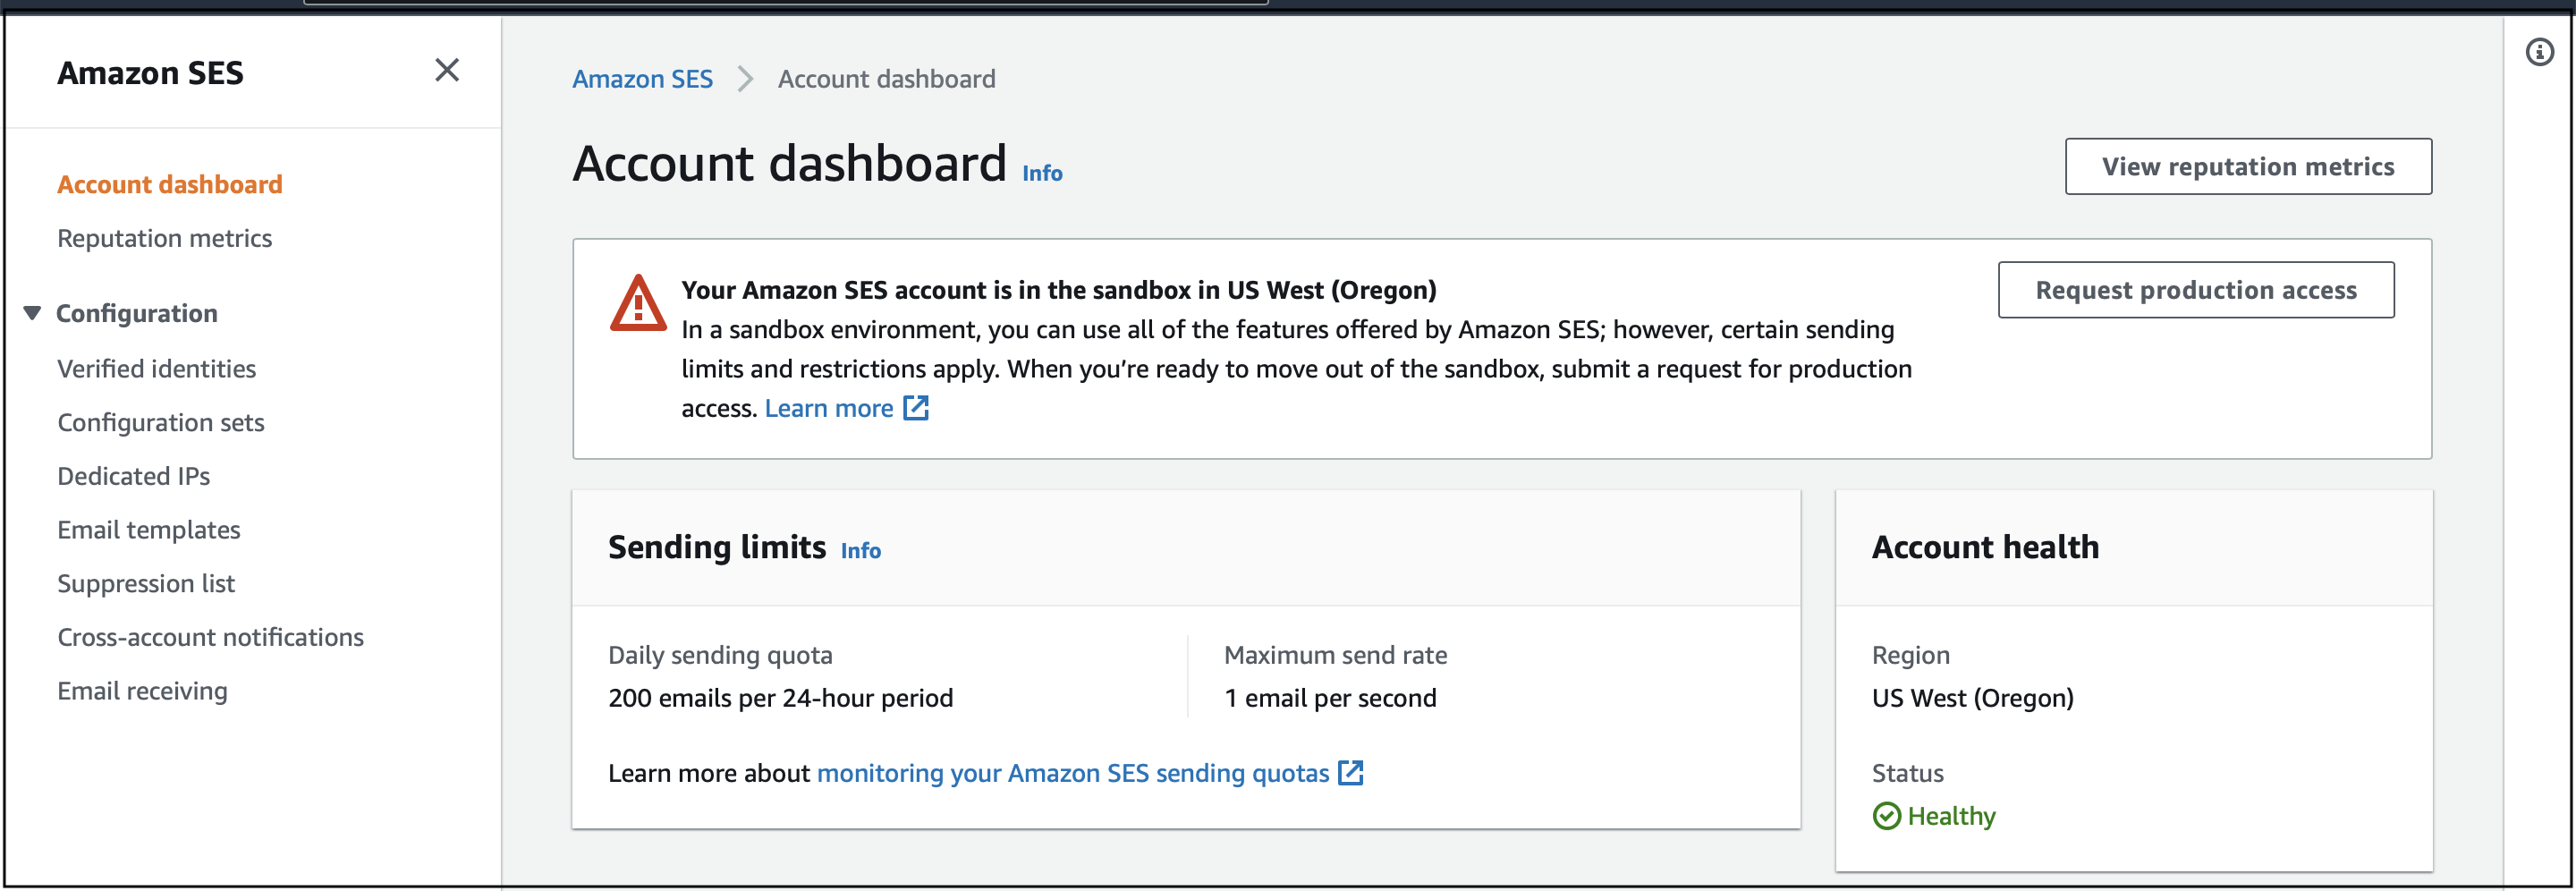
-
Fill out the details in the form, using these details:
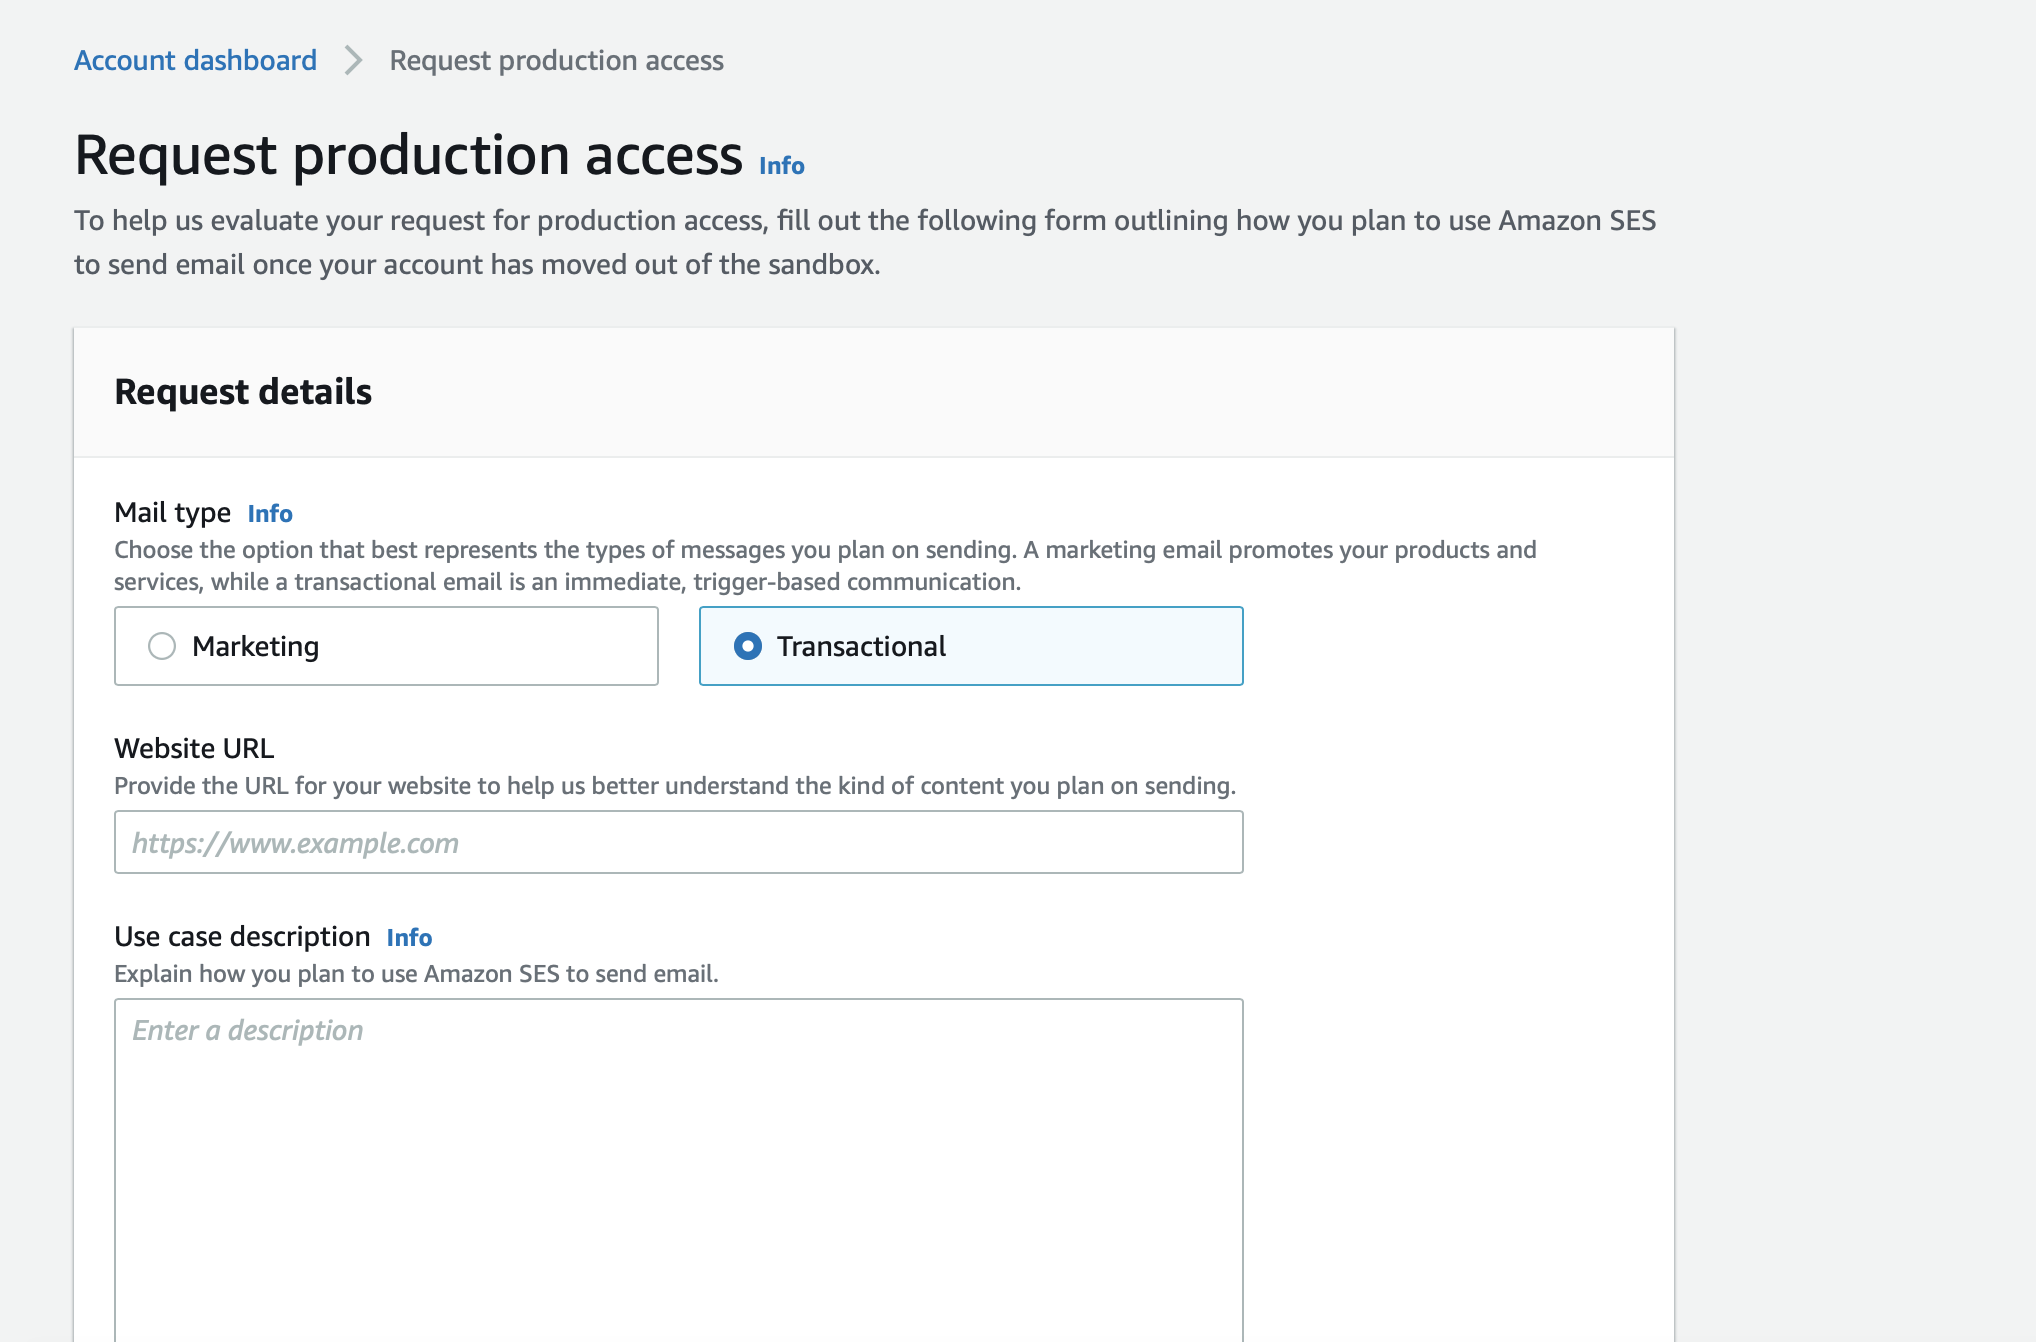
- Select
Transactionalas theMail type. - Enter the URL for your application or enter RainMaker URL.
- In
Use case description, copy and paste the following content in USE CASE DESCRIPTION TEMPLATE below:
- Select
We are requesting Amazon SES production access for our ESP RainMaker platform, a serverless IoT solution listed on the AWS Marketplace: ESP RainMaker on AWS Marketplace.
Use Case Description
Amazon SES will be used exclusively for transactional emails that are critical for user authentication, and account management, which includes:
- Login OTPs and verification codes for user authentication
- Password reset and account recovery notifications
- Security alerts and account notifications
These emails are triggered by user actions within the RainMaker platform and are not promotional or marketing-related.
Compliance with AWS Policies
We fully adhere to AWS Service Terms and Acceptable Use Policy, which includes:
- No bulk marketing or unsolicited emails (Only user-initiated transactional emails)
- Bounce and complaint management (Automatic suppression lists enabled)
- DKIM and SPF authentication (Implemented for better email deliverability)
- User consent and compliance (All emails comply with CAN-SPAM, GDPR, and other relevant regulations)
Request for Production Access
Case: SES sandbox restrictions allow sending emails only to verified addresses or the SES mailbox simulator. Since new user sign-ups require emails to unverified addresses, we are unable to use RainMaker effectively.
Request: We kindly request approval for SES production access in [Region] with an initial sending limit of 500 emails per day to enable seamless communication with our users.
For additional verification, our AWS Partner Manager, Anton Shmagin (antonsh@amazon.com), can provide further details.
Please let us know if any additional information is required to process our request. Thank you.
Change [Region] to your specific region that you will deploy Private RainMaker in.
-
Click
Acknowledgementand submit the request.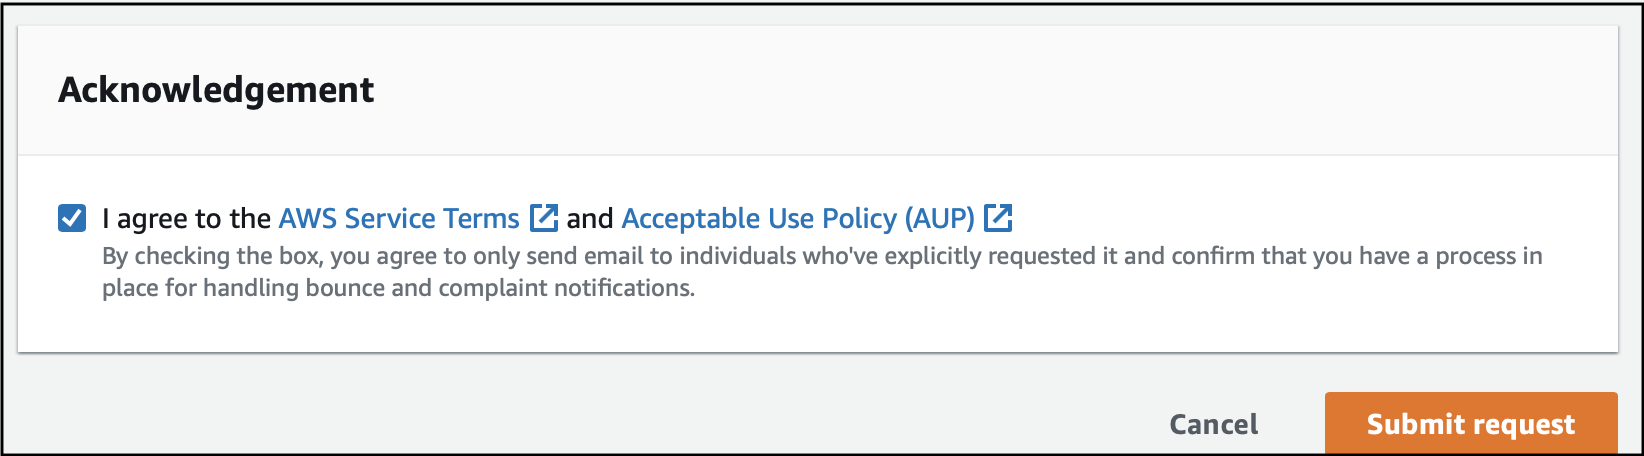
-
This will open a support case with the AWS support team. You will receive an email from the AWS support team, once the request is processed. Generally, this request will be completed by the AWS support team in one day.
tipYou can check the sandbox status of your account from the AWS SES console as well.
The steps can be found in Check the sandbox status for your account.Production access is required during production stage [TO BE REVIEWED]Private RainMaker deployment should be started only after the request is approved and your email account is moved out of SES sandbox mode.
No need for production access during evaluation stage [TO BE REVIEWED]If you are still in the evaluation phrase in testing Private RainMaker, you do not need to request for production access during internal testing.
Increase the Email Sending Limits in SES
You may increase the daily email sending quantity and rate limits if you anticipate a higher volume of sign-ups or email notifications for your service. The current limits may not be sufficient to handle increased traffic, leading to delays or failures in sending important emails (e.g., welcome emails, OTPs). Increasing the sending limits ensures that your system can handle more emails without hitting the maximum quota, improving user experience and preventing interruptions in email communication.
Check your current limits with the steps given in AWS documentation: Check SES Sending Quotas.
Follow these steps to increase the email sending limits:
-
Log in to the AWS console and go to
Service Quotas.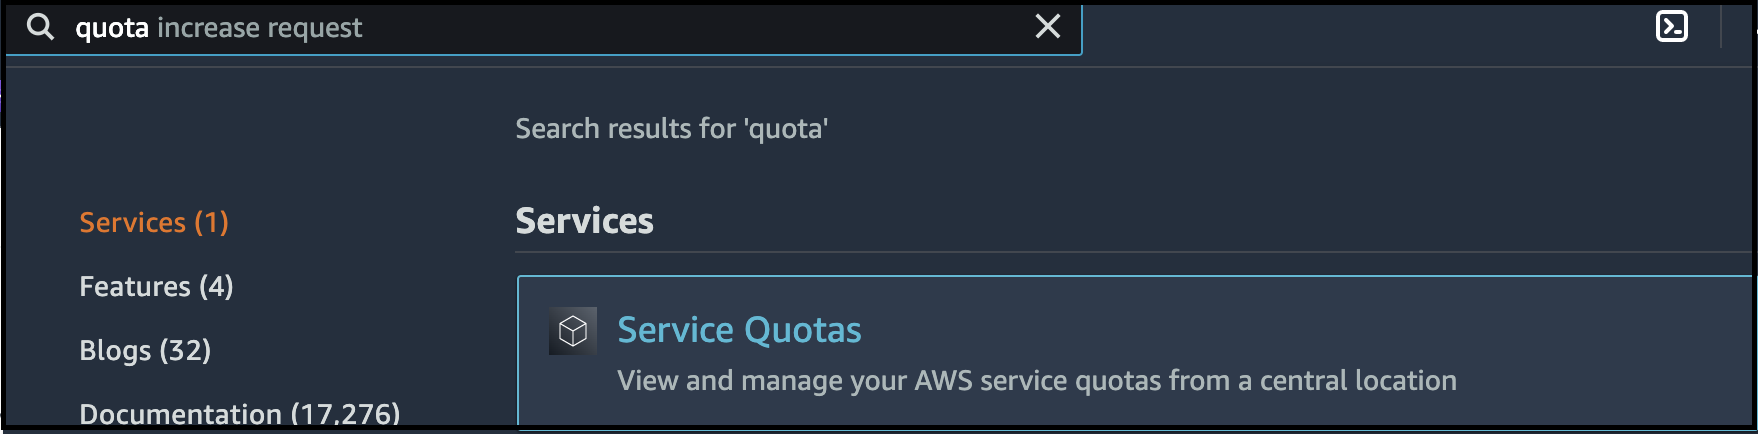
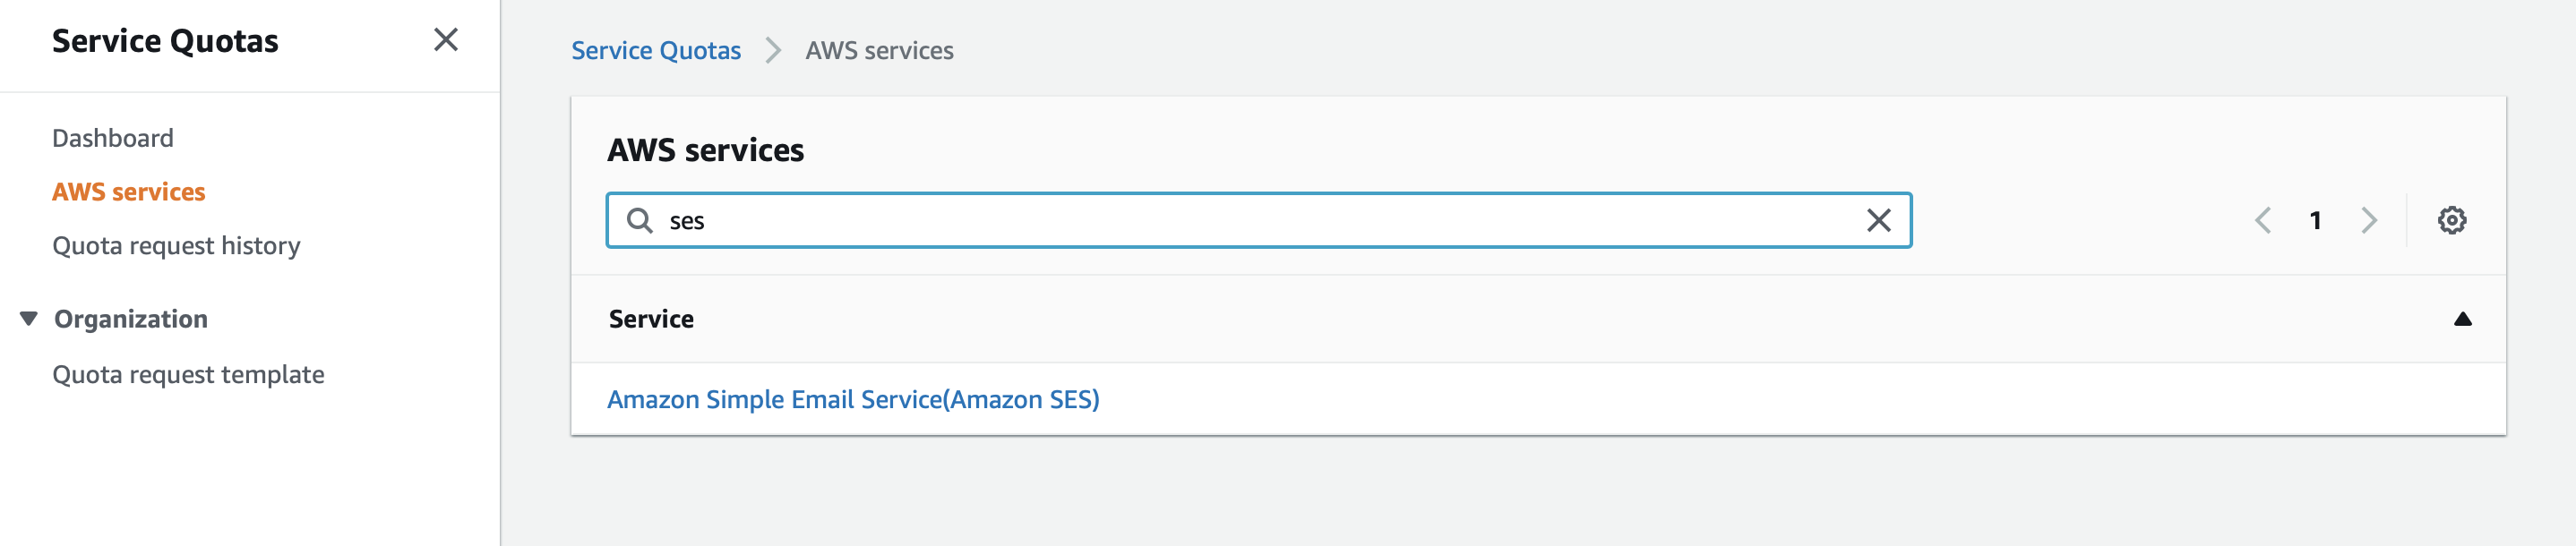
-
Select the RainMaker region.
-
In the navigation pane, choose
AWS services. -
Search for "Amazon SES".
-
Select
Sending quota.
-
Click
Request quota increase.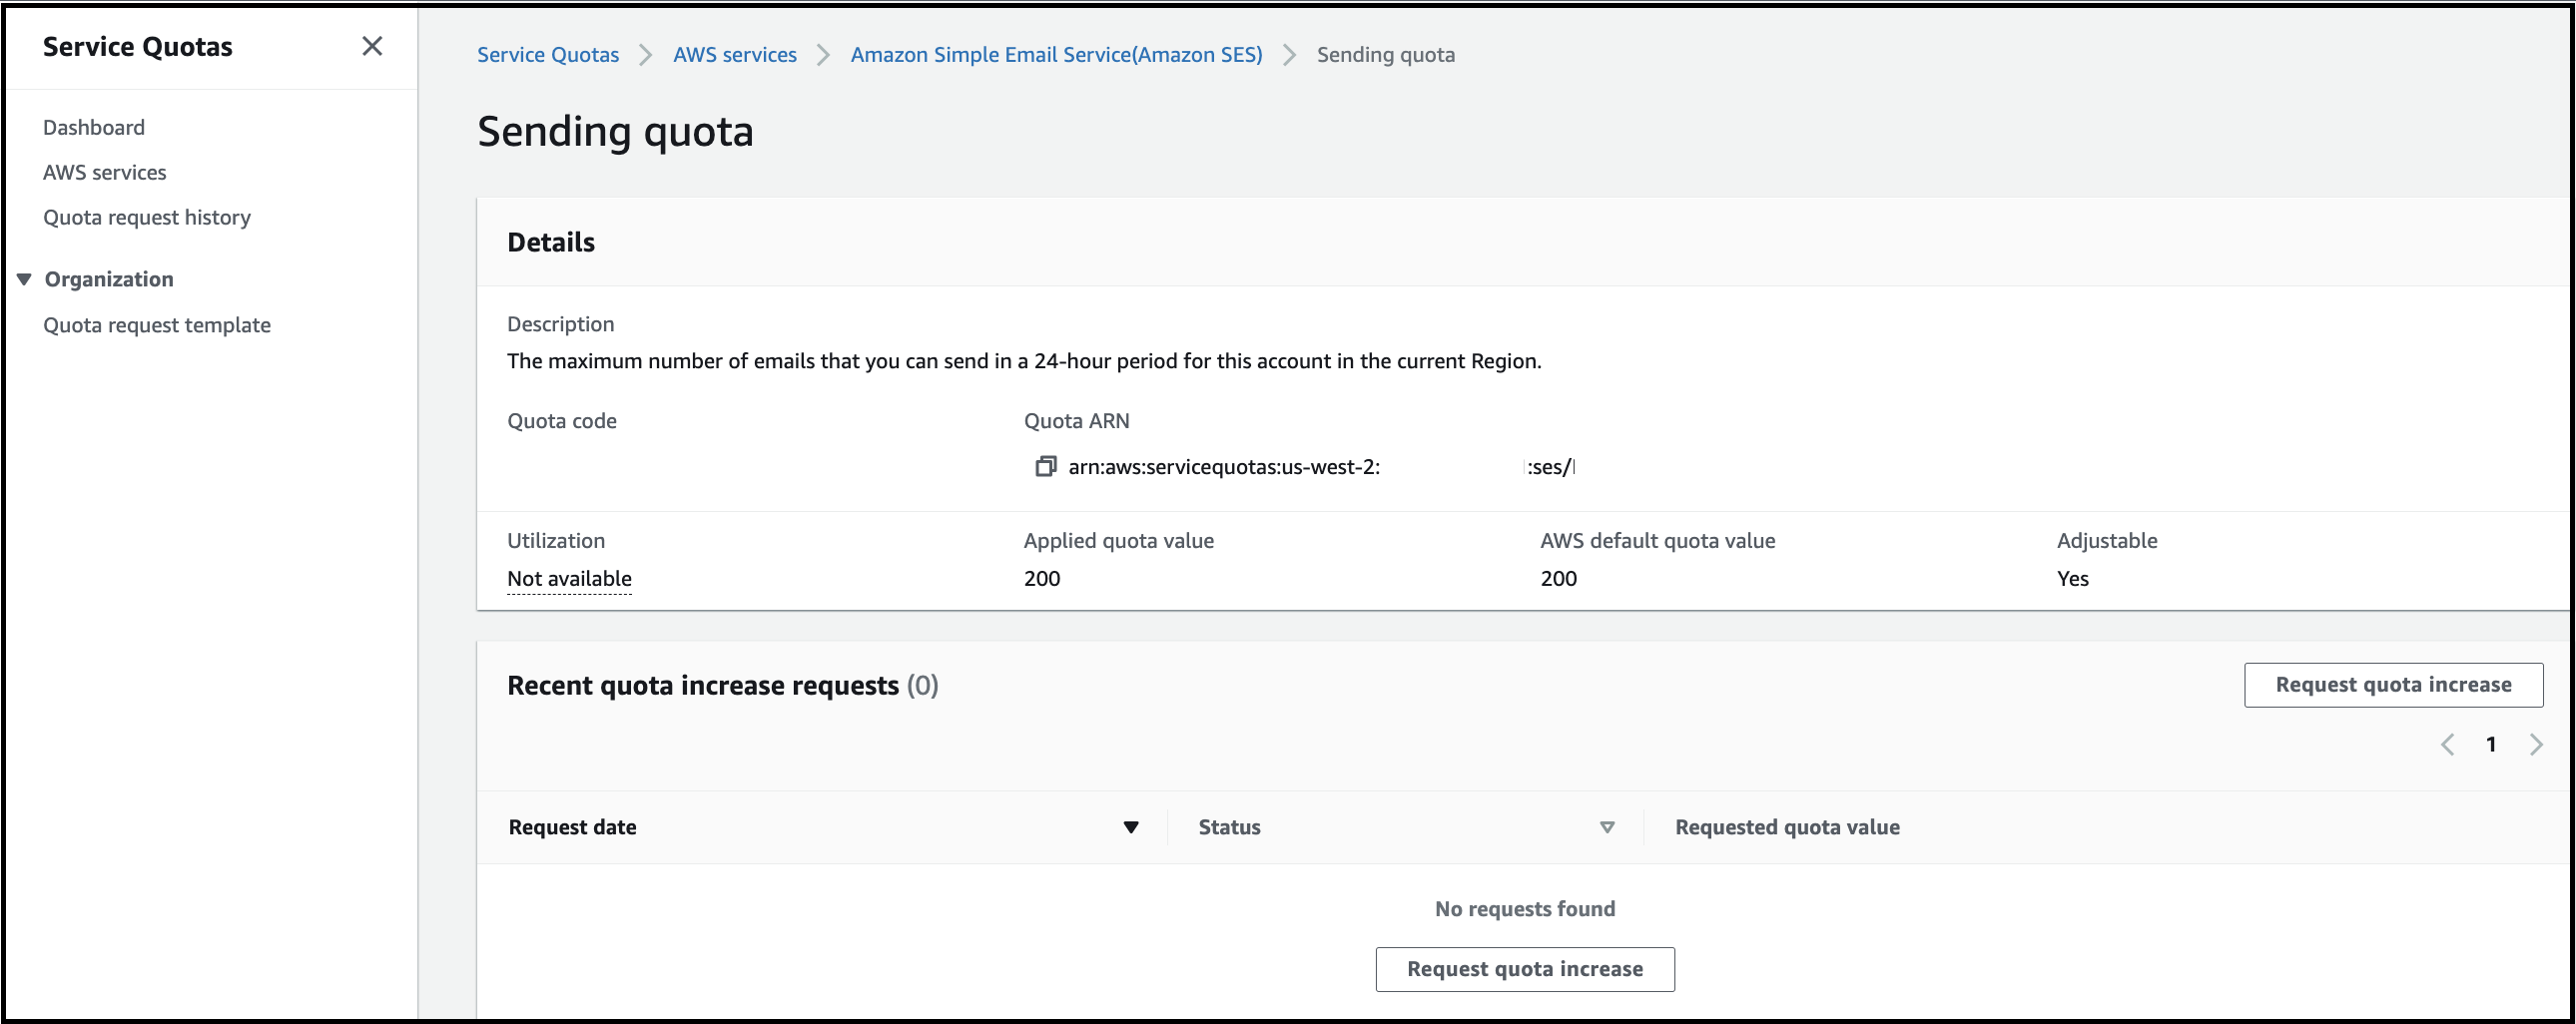
-
Enter the desired quota value (the required maximum number of emails that you can send in a 24-hour period for this account in the current region).
-
Click
Request.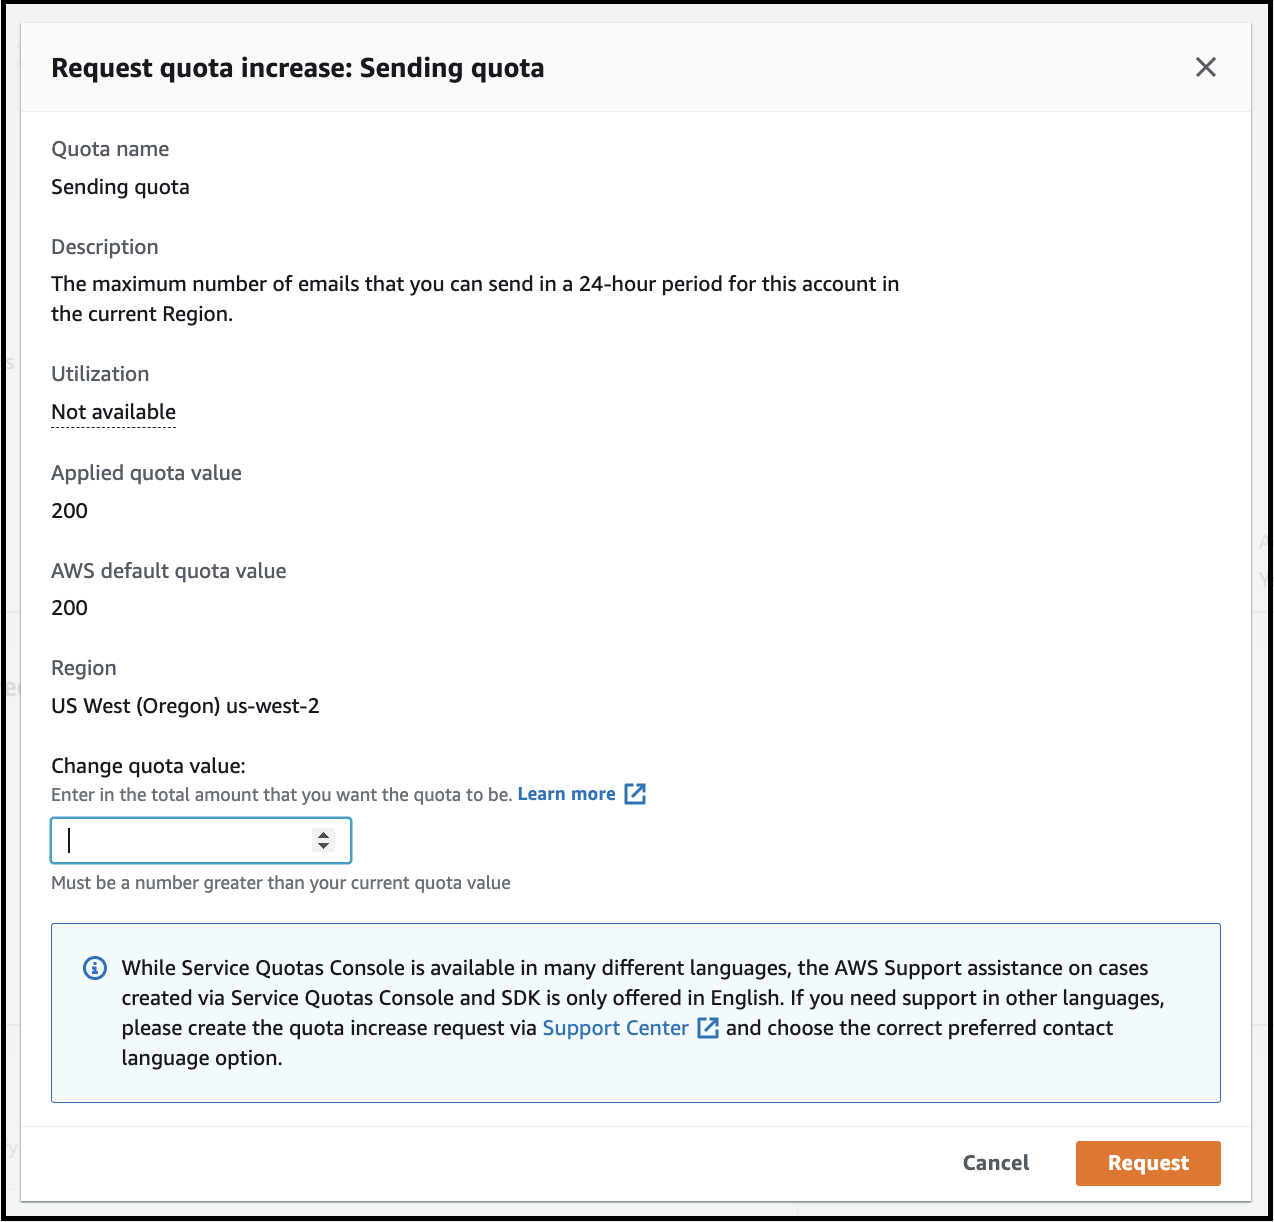
AWS support team will review your request, and update you about the support case via email. You can also check the sending quota with the steps given in the documentation: Check SES Sending Quotas.
Configure SMS Sending Service (SNS)
AWS SNS (Simple Notification Service) is a fully managed messaging service that allows you to send notifications via SMS, email, or other protocols. The SMS sending service within SNS enables businesses to send scalable, cost-effective text messages to users globally. By default, SNS provides SMS sandbox, read on to know more about the conditions to move out of sandbox and increase sending limits.
Click here to understand more about SNS.
Getting the SNS Region Used by Cognito
You should move your account out of the SMS sandbox and increase the monthly SMS sending limit of AWS SNS if you plan to support mobile number-based authentication via AWS Cognito, as the sandbox restricts sending SMS messages to only verified destination phone numbers within SMS sandbox's region based on your account. This step is necessary to send SMS messages to any phone number.
Additionally, RainMaker utilizes the AWS SNS service for text messaging, which is region-specific. To ensure smooth operation, you must move your account out of the SMS sandbox and increase your SMS spending limit in the region that AWS Cognito will use to send verification code messages to users.
In most cases, this region will align with the region that Private RainMaker will be deployed in other than the exception stated below. If you are not using mobile number-based authentication or do not need to send SMS messages to unverified phone numbers, moving out of the SMS sandbox is not required.
If your chosen region in which Private RainMaker is mentioned below, use the corresponding Amazon SNS region to move the account out of SMS sandbox. Otherwise, the region that you intend to deploy Private RainMaker is the region to move the account out of SMS sandbox. Both of these instances are the SNS region used by Cognito.
| Private RainMaker Region | Amazon SNS Region |
|---|---|
| Asia Pacific (Seoul) | Asia Pacific (Tokyo) |
For more information, refer to AWS docs for SMS text messaging.
Move out of SMS Sandbox
If you have decided to move out of SMS Sandbox after reviewing the condition above, please follow the steps below:
You should move your account out of SMS sandbox in the region where Cognito will send messages to your users.
-
Log in to AWS console and go to SNS service console.
-
Select
Text messaging (SMS).
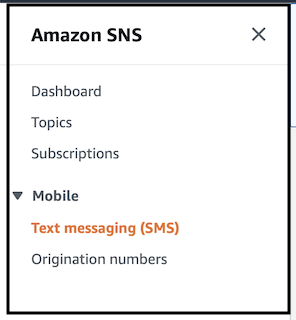
-
Scroll down and check SMS sandbox status for your account.
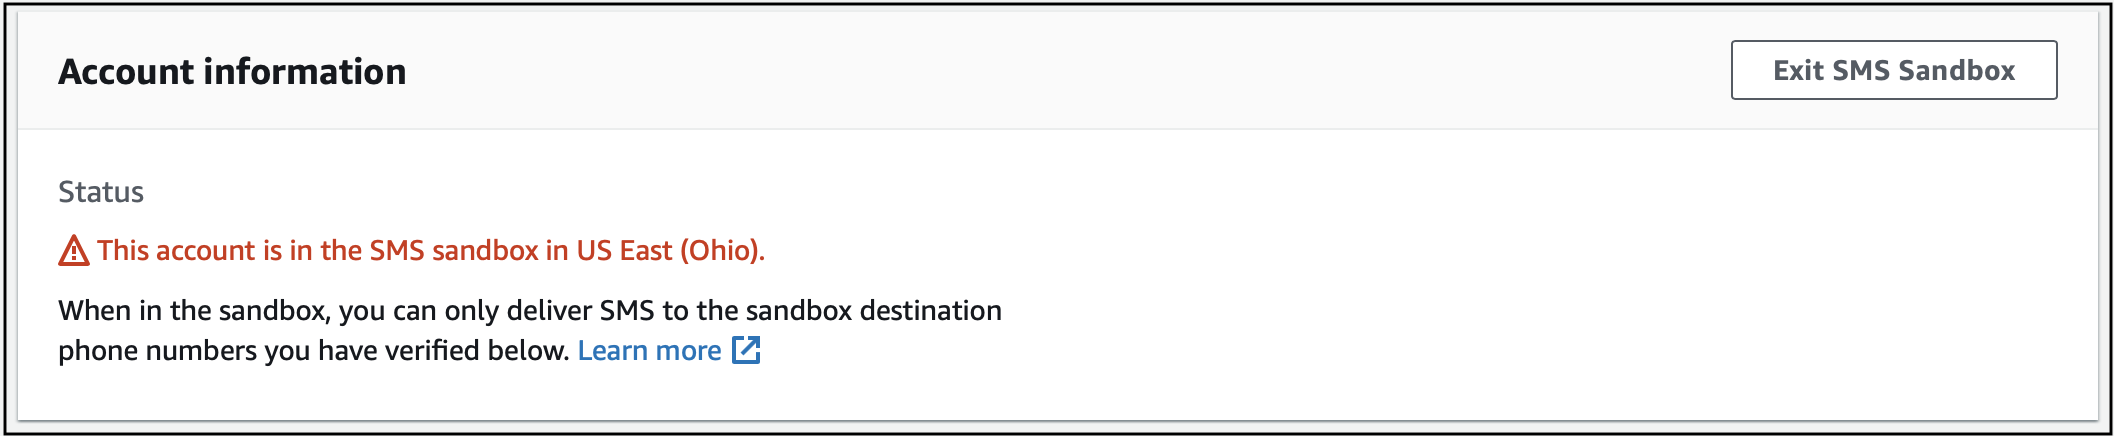
-
If your account is in sandbox, click
Exit SMS Sandbox. -
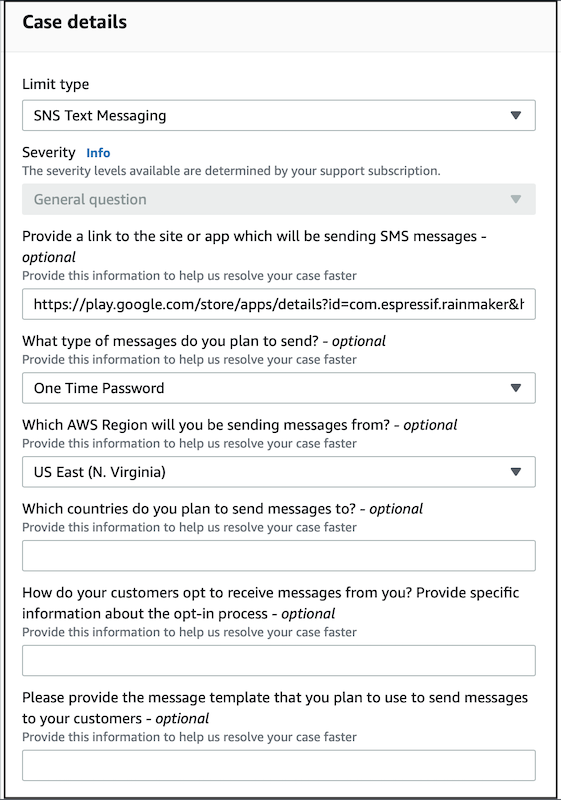
Fill out the
Case detailsform. -
Provide the link of your application or provide RainMaker website URL - https://rainmaker.espressif.com.
-
For
What type of messages do you plan to send, selectOne Time Password. -
For
Which AWS Region will you be sending messages from, select the region closest to RainMaker deployment region. -
For
Which countries do you plan to send messages to, provide the list of countries where your end users are located. -
For
How do your customers opt to receive messages from you? Provide specific information about the opt-in process, copy and paste the following details below:We are using SNS text messaging with AWS Cognito to send verification code to the user for sign up and forgot password requests.
Messages are sent only when user provides the mobile number for sign up or forgot password requests.
-
For
Please provide the message template that you plan to use to send messages to your customers, provide the message template that you will use. If you will be using the default message template, enter the below text:Your verification code is (####).
-
Scroll down and go to
Requestssection. -
Select the SNS region that will be used by Cognito.
Check the previous section to obtain SNS region used by Cognito. Getting the SNS region used by Cognito. -
In the resource type, select
General Limits. -
For
Limit, selectExit SMS Sandbox. -
In the use case description, copy and paste the following:
Our application uses AWS Cognito for user authentication/We are using mobile number-based authentication.
Cognito uses AWS SNS text messaging to send verification code to users.
For this use case, please move the account out of SMS sandbox. Thank you. -
Click
Submit.
Once your request is processed, you will receive an email from the AWS Support team within 2–3 days.
You will also need to increase the SMS sending limit via the SNS console. Please proceed to the next section for instructions.
Increasing the SMS Sending Limit
If you want to opt for mobile number-based authentication, it is required to increase the monthly SMS sending limit of AWS SNS.
The default SMS spending limit of AWS SNS is US$1 per month. You can specify the desired spending limit according to the number of SMS you expect to send per month. Please check AWS SNS pricing for more information.
Follow these steps to open a support case to increase SMS sending limit:
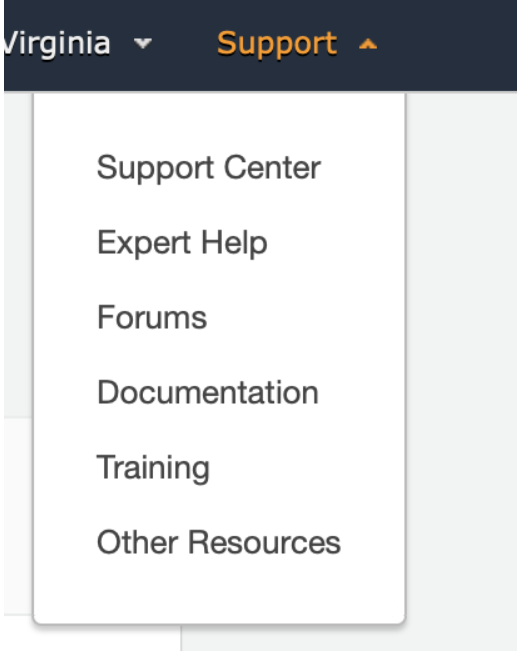
- Log in to AWS Console and click
Support Center.
-
Click on
Create case, enter the required details.
- Choose the option
Service limit increase. - In
Case details, Search forSNS Text Messaging. - For message type, select
One Time Password. - For AWS Region, select the SNS region that will be used by Cognito.
Check out Getting the SNS region used by Cognito if you have not obtained the region. - You may keep other fields blank.
- Choose the option
-
In the
Requestssection, select the region in which RainMaker is deployed.
-
For case description, please copy, edit and paste the following details:
Please move the AWS account out of the SNS sandbox and increase the monthly spending limit to (desired_value).
Message Type:One Time Password
Once your request is processed, you will receive an email from the AWS support team within 2–3 days.
You will also need to increase the SMS sending limit via the SNS console. Please proceed to the next section for instructions.
Follow the steps to increase the SMS sending limit:
-
Log in to AWS console, and go to SNS (Simple Notification Service) console.
-
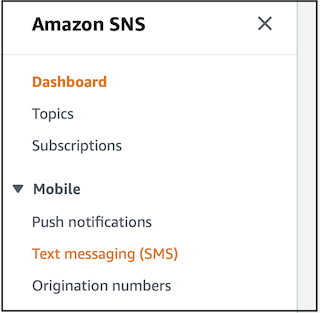
From the left-hand side menu, click
Text messaging (SMS).
-
Scroll down to the
Delivery status logssection, and clickEdit preferences.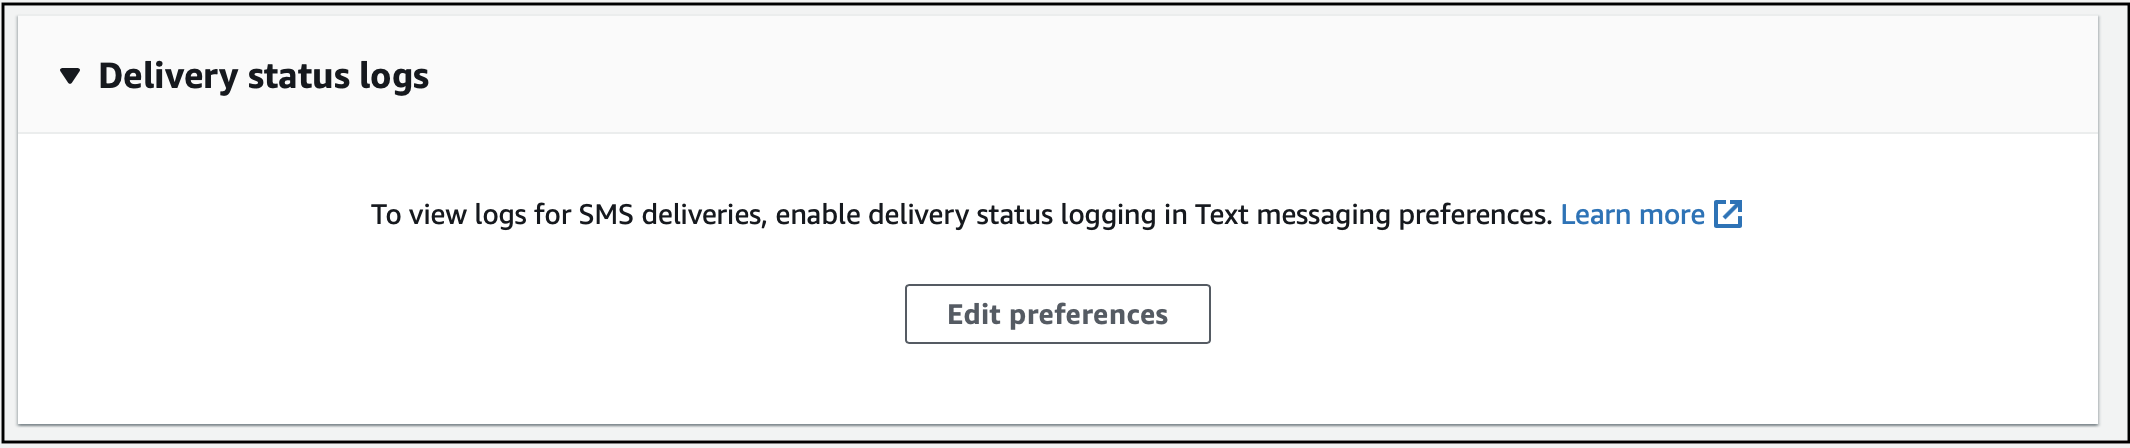
-
For
Default message type, selectTransactional. -
For
Account spend limit, enter the desired spend limit.noticeThe account spend limit should not exceed the spending limit requested in the support center in the last step.
-
Keep other fields blank. Click
Save changes.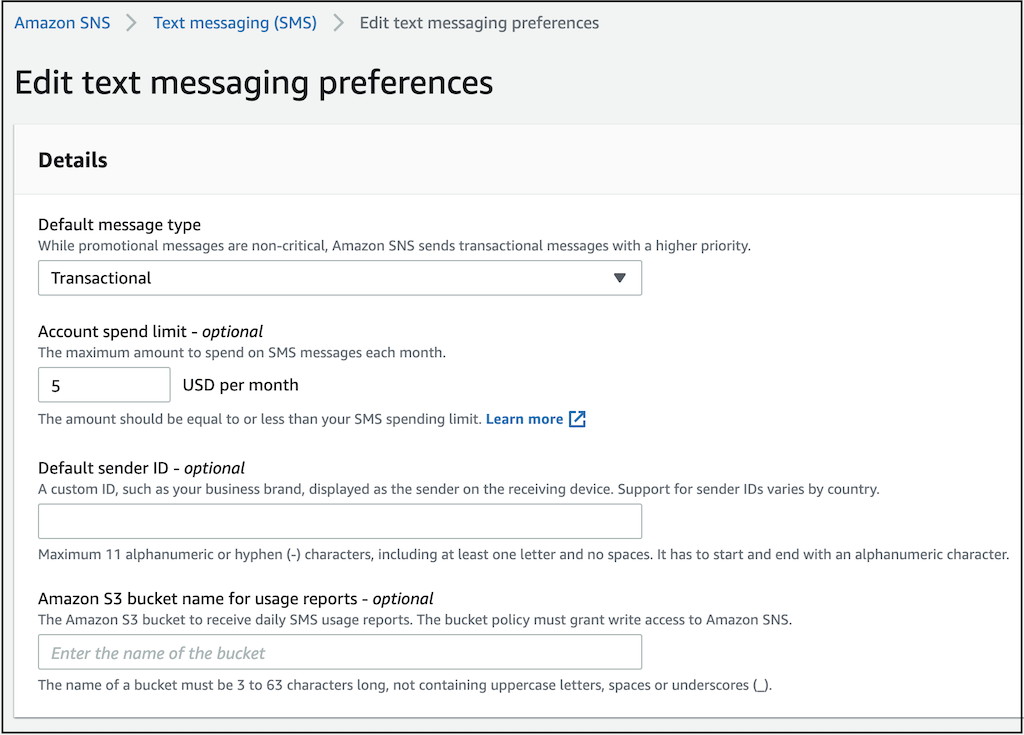
With that, you have successfully increased SMS sending limits! 🎉
ICP Registration
Please get in touch with the ESP RainMaker support team (esp-rainmaker-support@espressif.com) to deploy or set up China specified deployment requirement.
Ports Open Setup
Please get in touch with the ESP RainMaker support team (esp-rainmaker-support@espressif.com) to deploy or set up China specified deployment requirement.
Increase Lambda Concurrency Limit
You should increase the AWS Lambda concurrency limit to ensure your application can handle the expected load without throttling or failures. The default concurrency is currently too low (e.g., 10), preventing the deployment of high-demand applications like RainMaker. Increasing the limit to at least 1000 ensures smooth execution of Lambda functions, allowing them to handle more simultaneous requests efficiently and preventing service disruptions.
It is required to check the Lambda concurrency limit before deployment.
Follow the steps to check the Lambda concurrency value:
- Log in to AWS Console and search for Lambda service.
- On the left navigation bar, click
Dashboard. - Here, you will get the full account concurrency value.

If the default value is less than 1000, you need to raise the AWS support case requesting to increase the value.
Follow the steps for raising a support ticket:
-
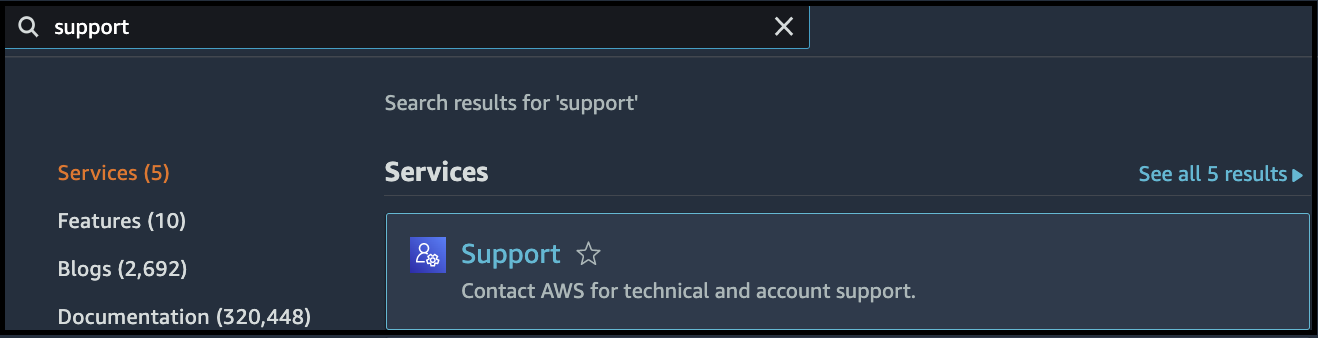
Go to your AWS console and search for "support".
-
Click
Create Case. -
Select
Service limit increase, and then selectLambdafrom theLimit typedropdown list as shown below: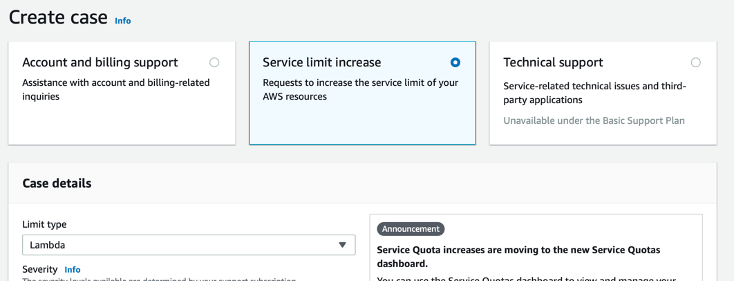
-
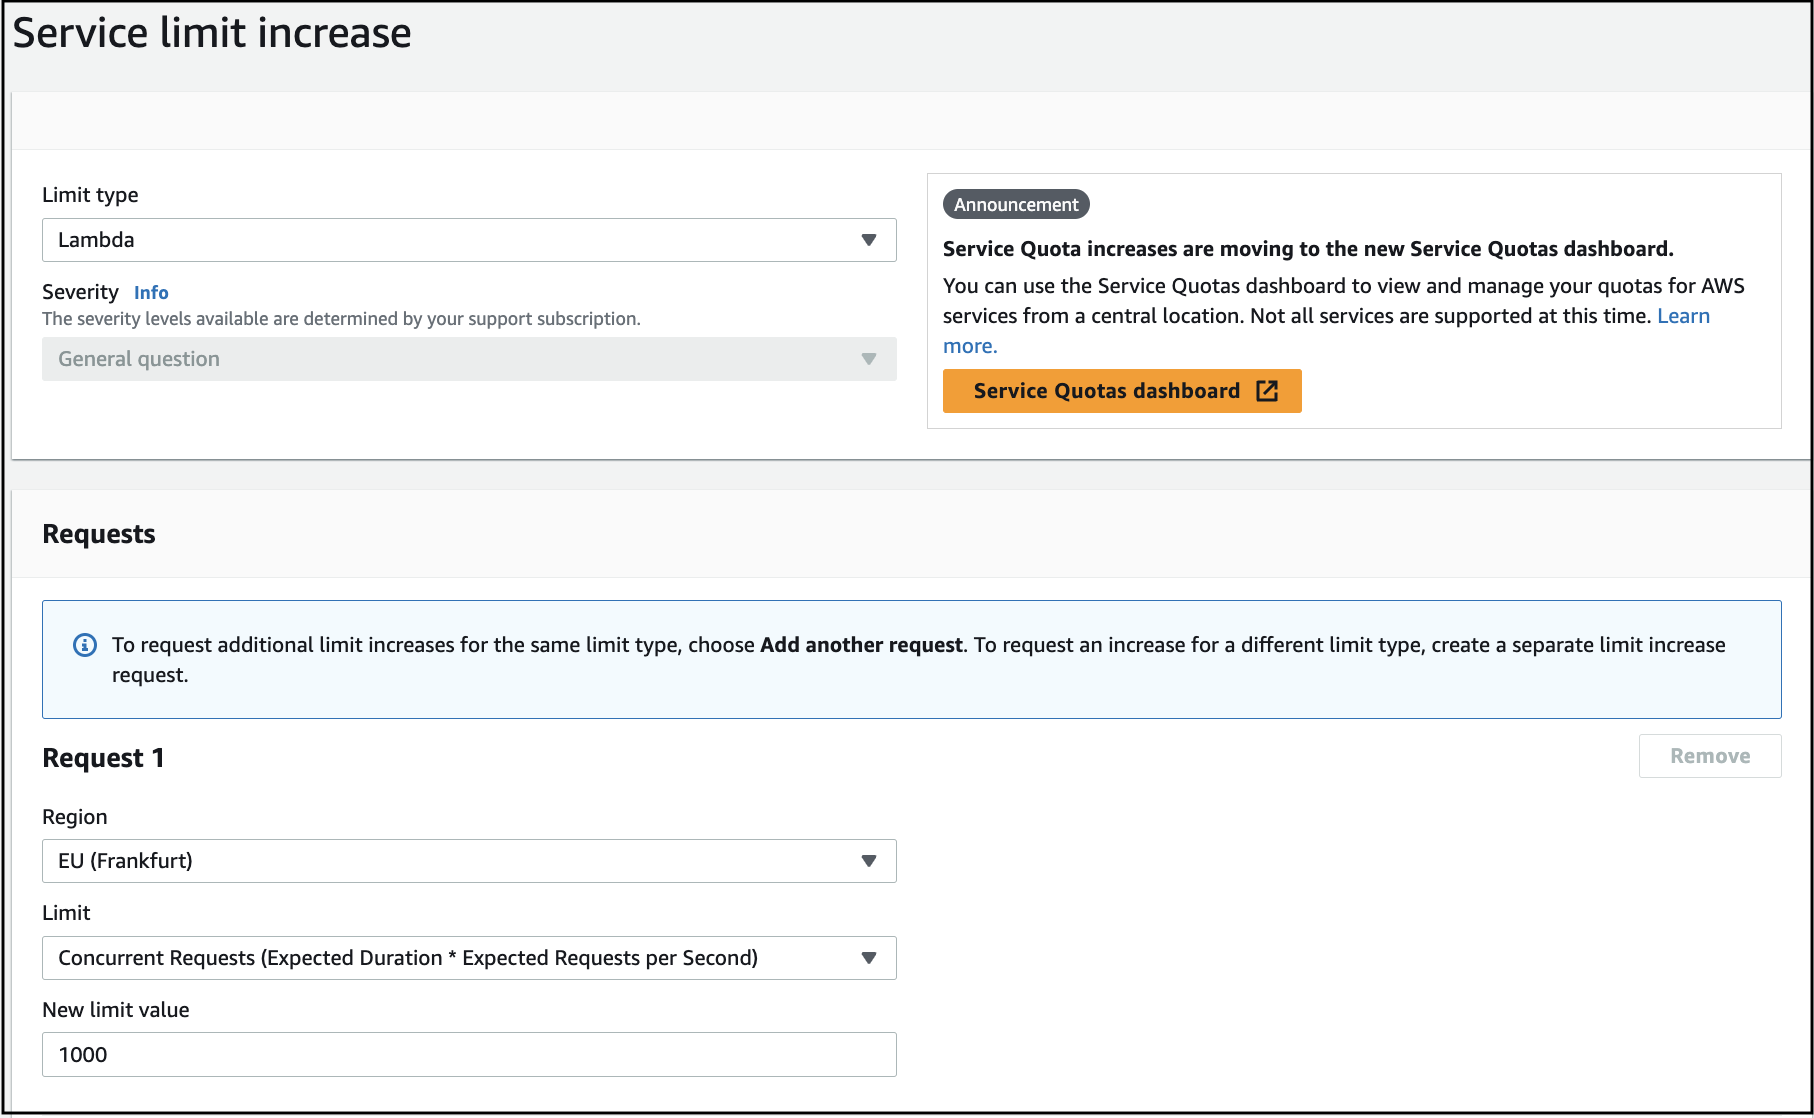
Fill in the case details and add the following request:
Region: Select your deployment regionLimit: Concurrent Requests (Expected Duration * Expected Requests per Second)New Limit Value: 1000
-
Add this Case Description.
We are trying to deploy our product: https://rainmaker.espressif.com/. Since the current concurrency limit is 10, we cannot deploy our product. May I request to set the concurrency limit to 1000? Thank you.
-
Submit the request.
Once your request is processed, you will receive an email from the AWS support team within 2–3 days.
With that, you have successfully increased Lambda concurrency limits! 🎉