Deployment Setup
Welcome to the deployment section, the third of four stages in the deployment of Private RainMaker. 🚀
This section provides a step-by-step guide to deploy Private RainMaker using AWS CloudFormation with the SAM model. We will start off with some deployment setup by explaining how to construct S3 deployment URLs and learn how to create CloudFormation stacks.
- Before proceeding to this deployment section, please make sure that you have completed all Pre-deployment steps.
- All AWS cases should be resolved correctly before proceeding to this section.
Derive S3 URLs
In this section, we will derive the required deployment URLs for various ESP-Rainmaker components that would be needed later when deploying ESP-RainMaker Components.
It is advisable to note this down in a word document so that you can easily derive, copy, and paste these URLs in the AWS console during stack creation.
S3 URL Template
The link below is a template for constructing S3 URLs used by all RainMaker components. There are 5 tags within the link that needs to be configured to suit your specific deployment:
https://esp-rainmaker-sam-deployments-<MASKED_ACCOUNT_ID>-<REGION>.s3.<REGION>.<DOMAIN>/<VERSION>/packages/<PACKAGE_NAME>.yml
<MASKED_ACCOUNT_ID><REGION><DOMAIN><VERSION><PACKAGE_NAME>
Configure S3 URL
As there are differences in tags for deploying Private RainMaker in Global and China region, please select the relevant tab in which you are deploying RainMaker in. Let's proceed to derive the respective S3 URLs.
- Global Region
- China Region
-
Replace
<MASKED_ACCOUNT_ID>with192622e2680f.https://esp-rainmaker-sam-deployments-192622e2680f-<REGION>.s3.<REGION>.<DOMAIN>/<VERSION>/packages/<PACKAGE_NAME>.yml -
Choose the Rainmaker backend version and region you want to use. Replace
<REGION>and<VERSION>in the deployment links with your selections. -
Replace
<DOMAIN>withamazonaws.com. -
Replace
<PACKAGE_NAME>with the appropriate package name:a. ESP-Rainmaker-Base
esprainmakersambase_package.yml
b. ESP-Rainmaker-Coreesprainmakersamcore_package.yml
c. ESP-Nested-AddOnsespnestedaddons_package.yml
d. ESP-TimeSeriesesptsdata_package.yml
e. ESP-Rainmaker-Skillsdeploy-3p-integration-all-regions-add-ons_package.ymlExample URLs based of the respective package names are as shown below:
https://esp-rainmaker-sam-deployments-192622e2680f-.s3..amazonaws.com//packages/esprainmakersambase_package.ymlhttps://esp-rainmaker-sam-deployments-192622e2680f-<region>.s3.<region>.amazonaws.com/<version>/packages/esprainmakersamcore_package.ymlhttps://esp-rainmaker-sam-deployments-192622e2680f-<region>.s3.<region>.amazonaws.com/<version>/packages/espnestedaddons_package.ymlhttps://esp-rainmaker-sam-deployments-192622e2680f-<region>.s3.<region>.amazonaws.com/<version>/packages/esptsdata_package.ymlhttps://esp-rainmaker-sam-deployments-192622e2680f-<region>.s3.<region>.amazonaws.com/<version>/packages/deploy-3p-integration-all-regions-add-ons_package.ymlinfoYou would need to replace the
<REGION>and<VERSION>.tipPackage for ESP-Rainmaker-Base and ESP-RainMaker-Core are both mandatory packages that needs to be derived, the rest are dependant on the type of services that you would require for your application.
-
Replace
<MASKED_ACCOUNT_ID>witha7c02756c325.https://esp-rainmaker-sam-deployments-a7c02756c325-<REGION>.s3.<REGION>.<DOMAIN>/<VERSION>/packages/<PACKAGE_NAME>.yml -
Choose the Rainmaker backend version and region you want to use. Replace
<REGION>and<VERSION>in the deployment links with your selections. -
Replace
<DOMAIN>withamazonaws.com.cn. -
Replace
<PACKAGE_NAME>with the appropriate package name:a. ESP-Rainmaker-Base
esprainmakersambase_package.yml
b. ESP-Rainmaker-Coreesprainmakersamcore_package.yml
c. ESP-Nested-AddOnsespnestedaddons_package.yml
d. ESP-TimeSeriesesptsdata_package.yml
e. ESP-Rainmaker-Skillsdeploy-3p-integration-all-regions-add-ons_package.yml
Example URLs based of the respective package names are as shown below:
https://esp-rainmaker-sam-deployments-a7c02756c325-<region>.s3.<region>.amazonaws.com.cn/<version>/packages/esprainmakersambase_package.yml
https://esp-rainmaker-sam-deployments-a7c02756c325-<region>.s3.<region>.amazonaws.com.cn/<version>/packages/esprainmakersamcore_package.yml
https://esp-rainmaker-sam-deployments-a7c02756c325-<region>.s3.<region>.amazonaws.com.cn/<version>/packages/espnestedaddons_package.yml
https://esp-rainmaker-sam-deployments-a7c02756c325-<region>.s3.<region>.amazonaws.com.cn/<version>/packages/esptsdata_package.yml
https://esp-rainmaker-sam-deployments-a7c02756c325-<region>.s3.<region>.amazonaws.com.cn/<version>/packages/deploy-3p-integration-all-regions-add-ons_package.yml
You would need to replace the <REGION> & <VERSION>.
Package for ESP-Rainmaker-Base & ESP-RainMaker-Core are both mandatory packages that needs to be derived, the rest are dependant on the type of services that you would require for your application.
Generic Steps to create a CloudFormation Stack
In this sub-section, we will layout out the common steps to create a CloudFormation stack. This will be a common reference when deploying the different stacks as seen in the later section.
- Go to AWS Management Console
- In
Services, search for CloudFormation and click on CloudFormation.
- In

-
Create a Stack
- Click on
Create stackin the CloudFormation service.
- Alternative Step: If you are on the stacks page, click on
Create stackand selectWith new resources (standard).
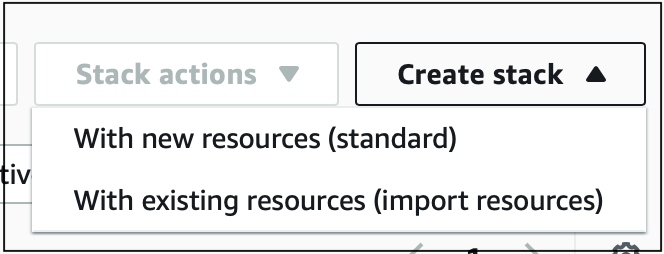
- Click on
- Select Template
- Select the option
Choose an existing template. - Paste the specific S3 URL for the stack you are creating in the field Amazon S3 URL by referencing the section above and click on
Next. - For Screenshots and link, refer the specific stack sections.
- Select the option
- Configure Stack
- Enter the stack name.
- Fill in the required parameters.
- Click
Next. - For Screenshots, stack name and parameter descriptions, refer the specific stack sections.
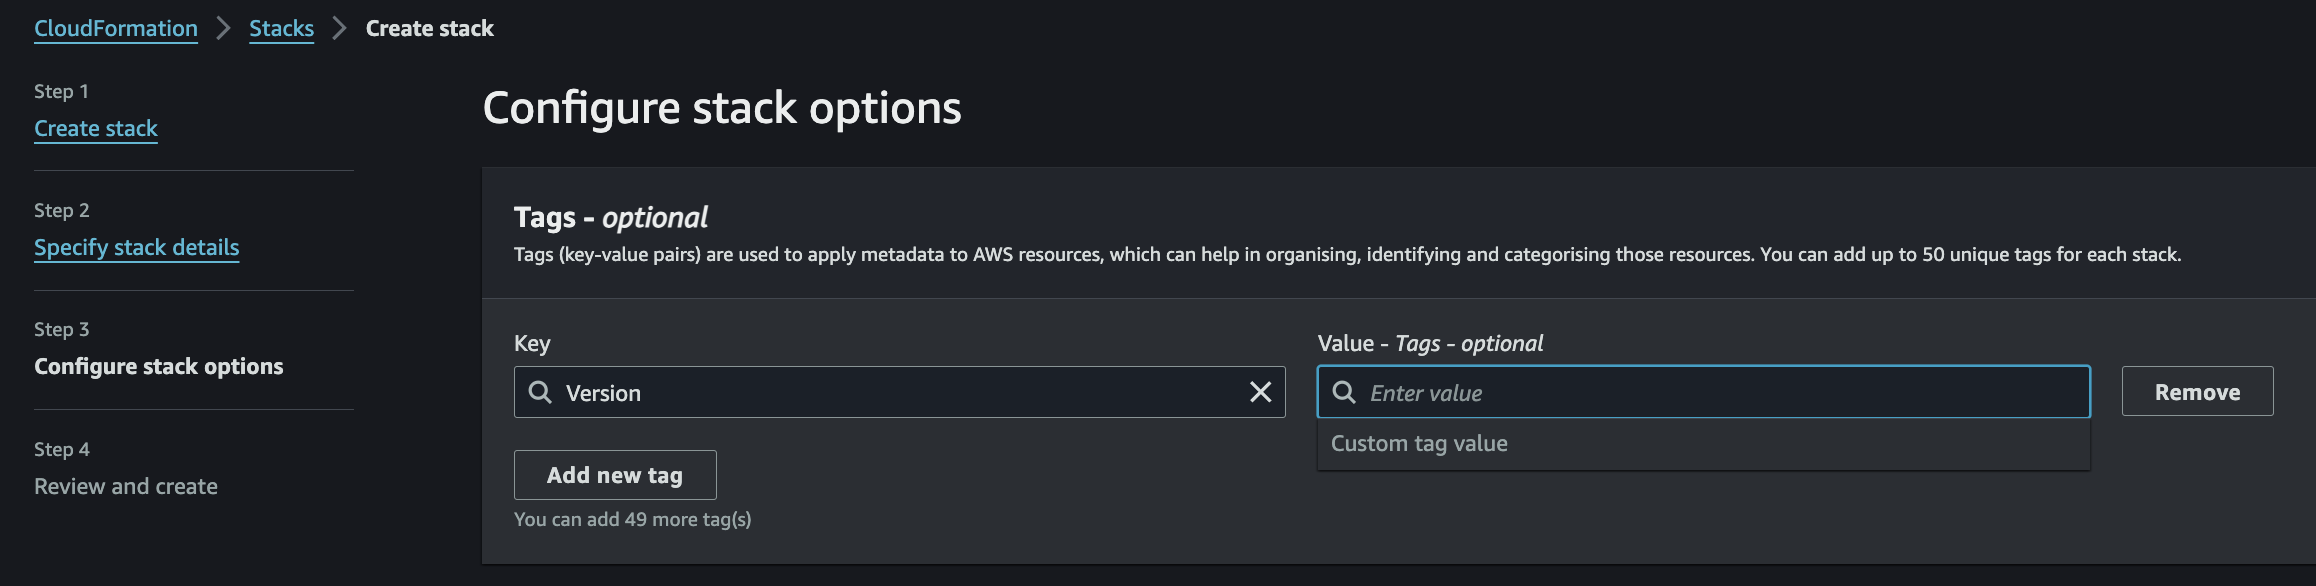
-
Add Tags
-
Enter the version tag as shown below:
- Key: Version
- Value:
<VERSION>(replace<VERSION>with your selected version)
-
Click on Add new tag button, leave the rest as default, and click
Next.
-
-
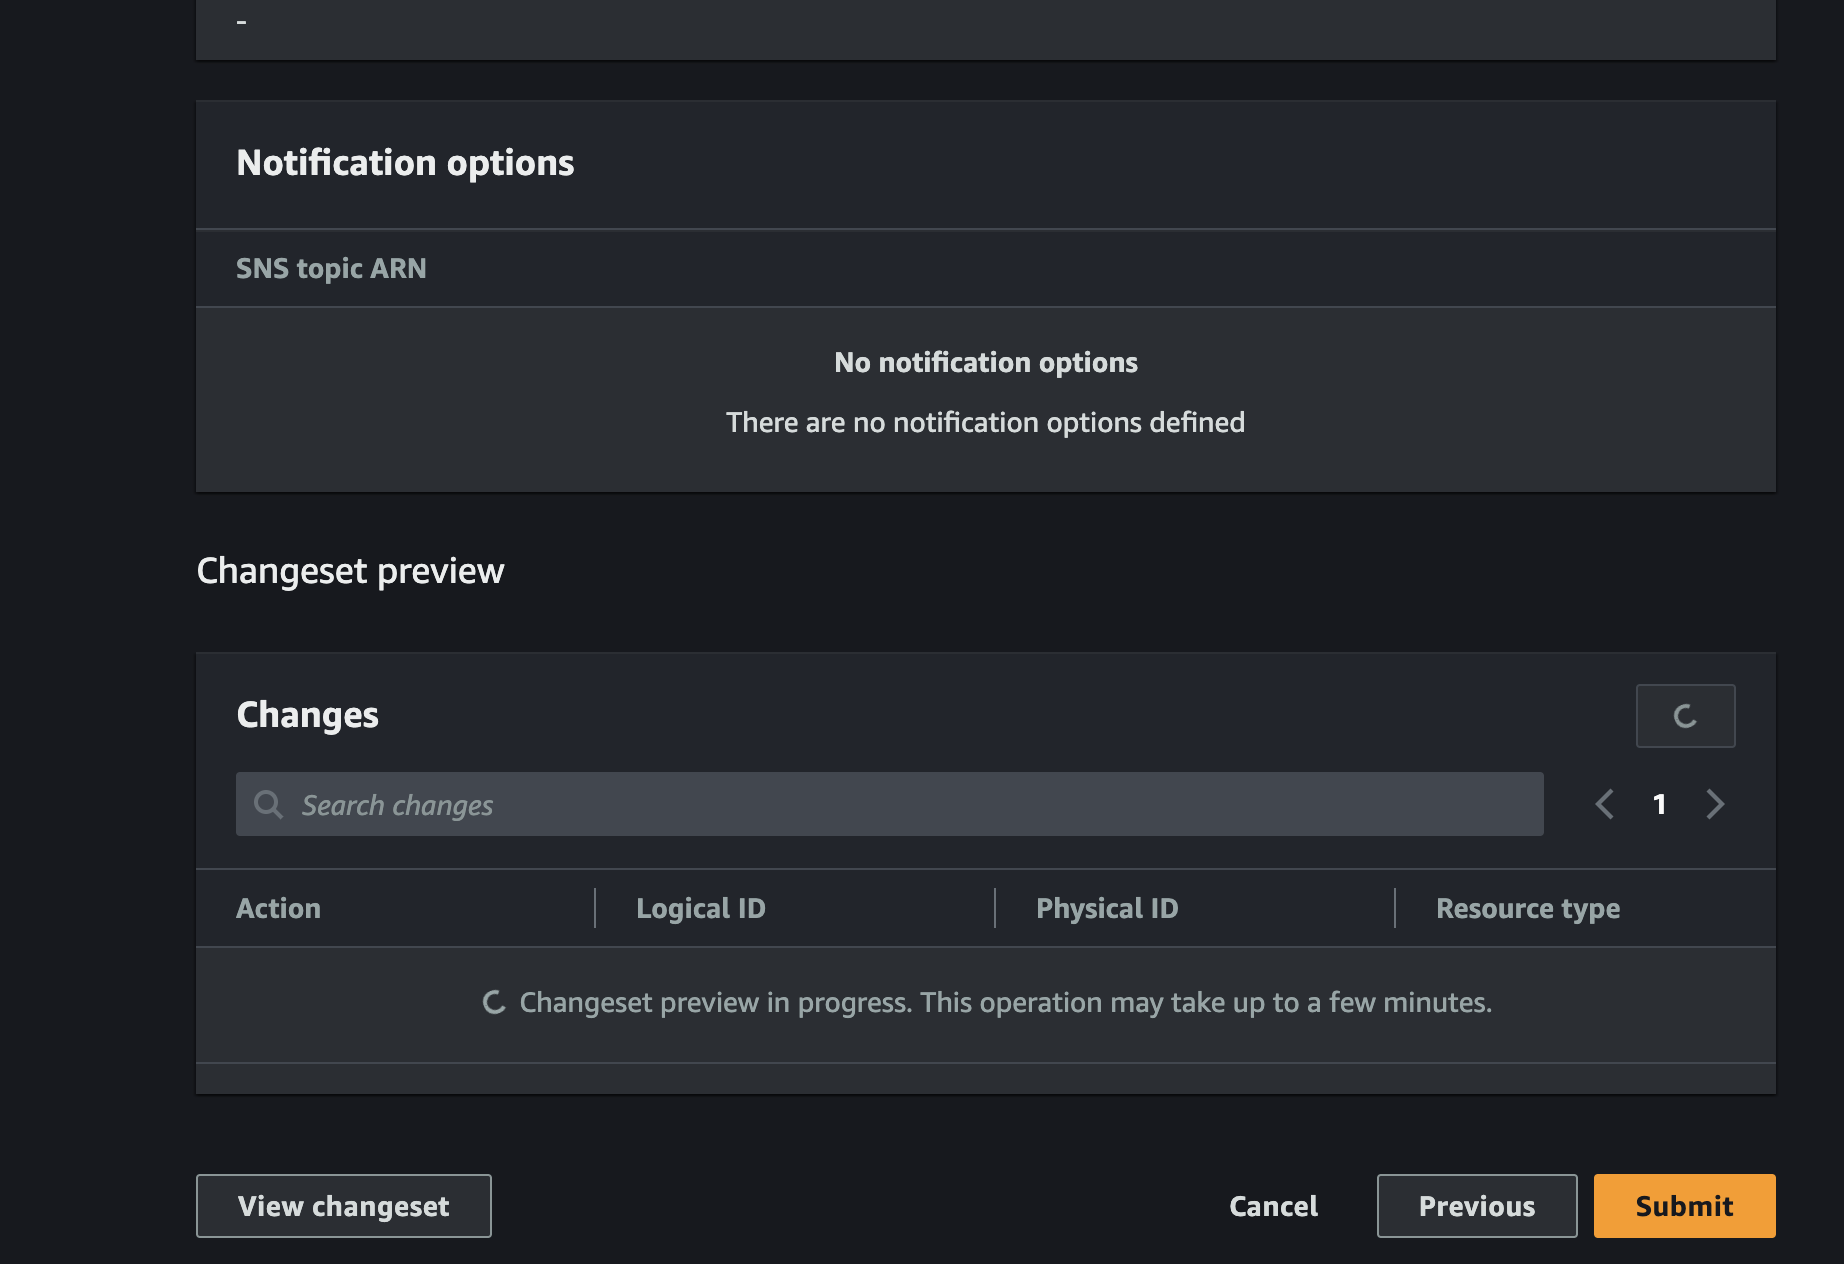
Review and Create
-
Check the following options:
- I acknowledge that AWS CloudFormation might create IAM resources.
- I acknowledge that AWS CloudFormation might create IAM resources with custom names.
- I acknowledge that AWS CloudFormation might require the following capability: CAPABILITY_AUTO_EXPAND.
-
Click on
Create stackas shown below.

-
-
Review and Submit
- Review the stack details and click on
Submit.
- Review the stack details and click on
- Wait for Completion
- Wait for the stack to be created. For Screenshot and completion time, refer the specific stack sections.
Now that you know how to create a CloudFormation stack, let's proceed with deploying the stacks for the RainMaker backend and add-on services.