用户池迁移指南
RainMaker 提供两个 Cognito 用户池:rainmaker-user-pool 和 rainmaker-user-email-mobile-pool。rainmaker-user-email-mobile-pool 用户池较新,除了支持 rainmaker-user-pool 已支持的功能,还支持基于 OTP 和手机号码的登录方式。Email & Phone User Pool 用户池处于持续更新中,因此建议在第三方和语音助手集成中使用该用户池。Email User Pool 将在不久后弃用。
如果已在旧用户池上部署 RainMaker,请按照本指南中的步骤迁移到新的用户池。
1. 升级
1a. 后端
- 参照这些步骤升级 RainMaker 后端。
1b. 前端
- 参照这些步骤升级 RainMaker 前端。
2. 创建域
- 参照这些步骤为你的公司创建新的域。
3. 手动配置第三方控制台
请首先确认当前配置的身份提供商,以判断此步骤是否适用。
-
使用管理员账号登录 RainMaker 管理面板,打开
Deployment Settings。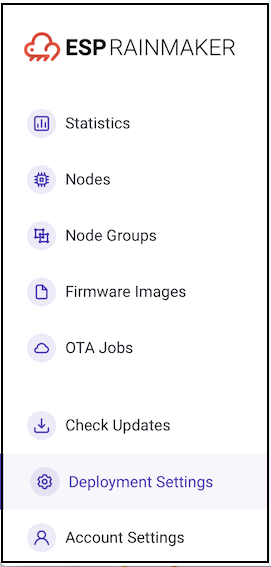
-
打开
Identity Providers标签页,切换到旧用户池。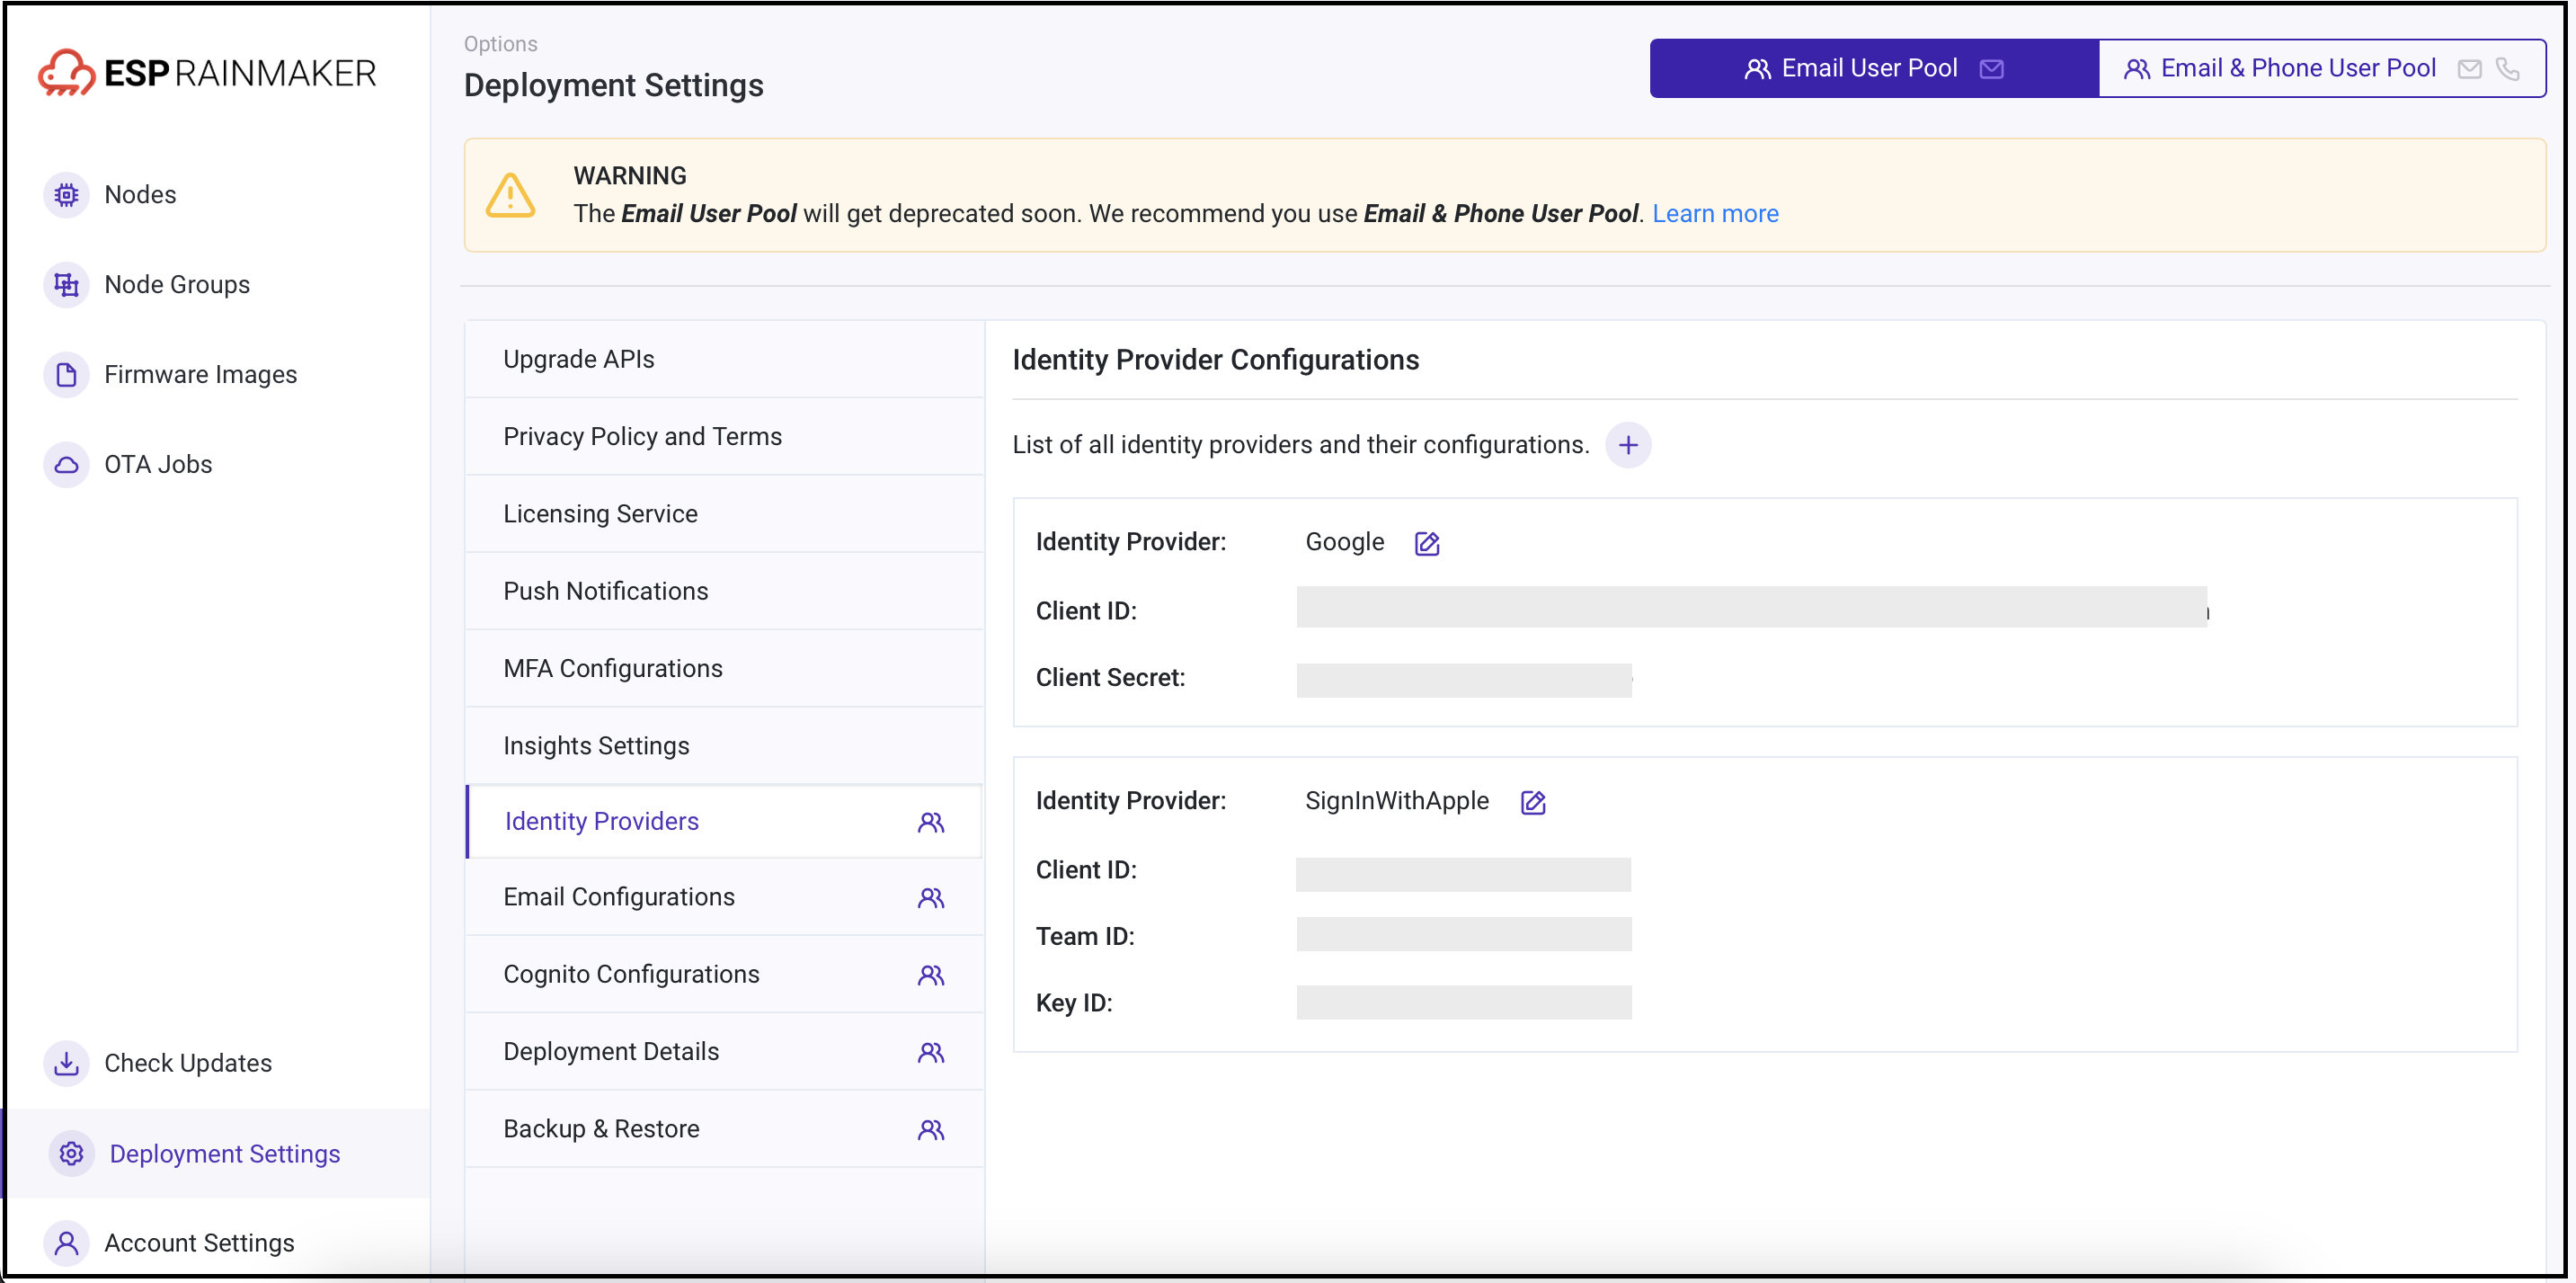
-
记下已启用的身份提供商,后续步骤只需针对这些提供商进行操作。
3a. 谷歌
谷歌开发者账号配置
-
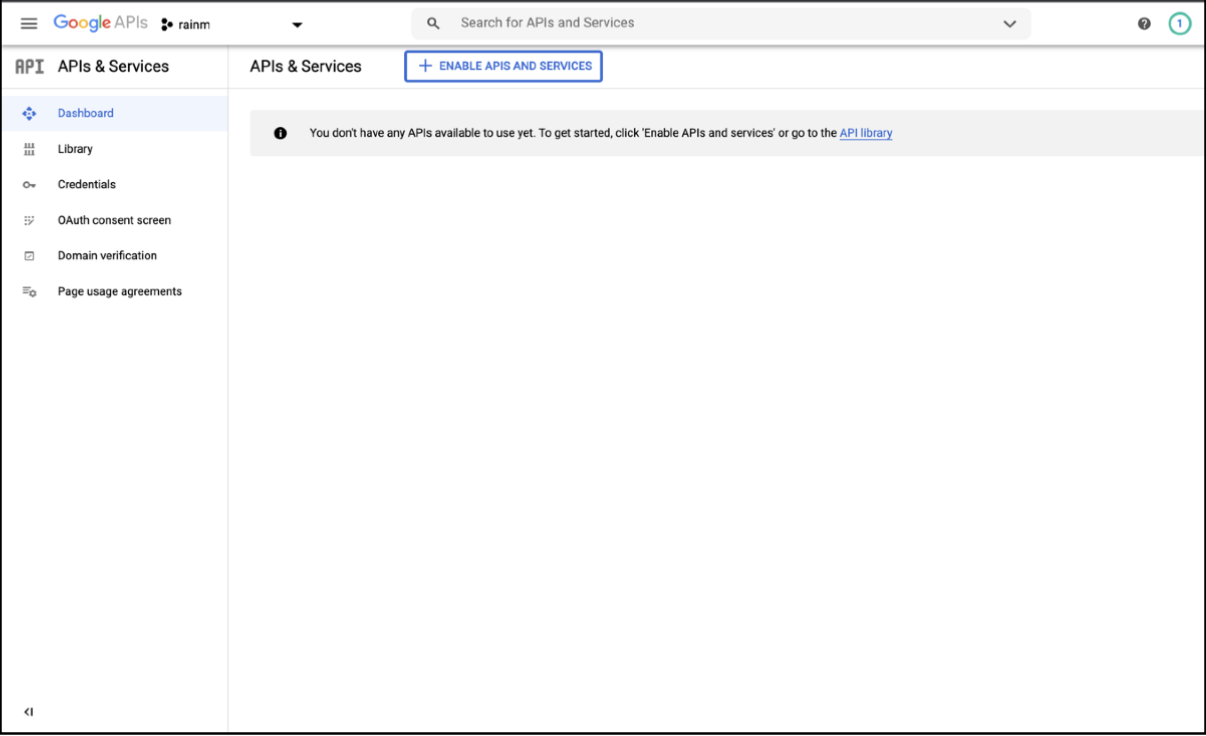
在 https://console.developers.google.com/ 中使用谷歌开发者账号登录 Google API 控制台。
-
登录后将看到如下界面:
-
在 Google API 控制台中,在左侧导航栏点击
Credentials。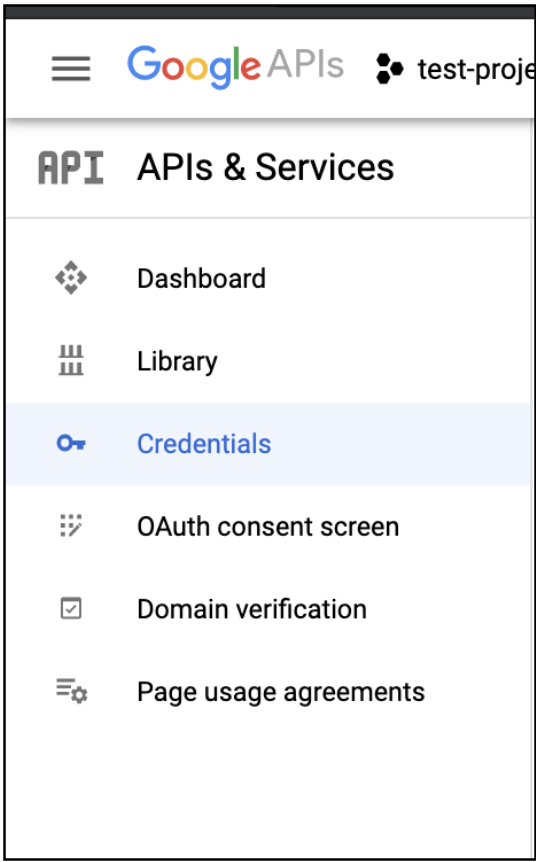
-
界面中会显示
OAuth 2.0 Client ID列表。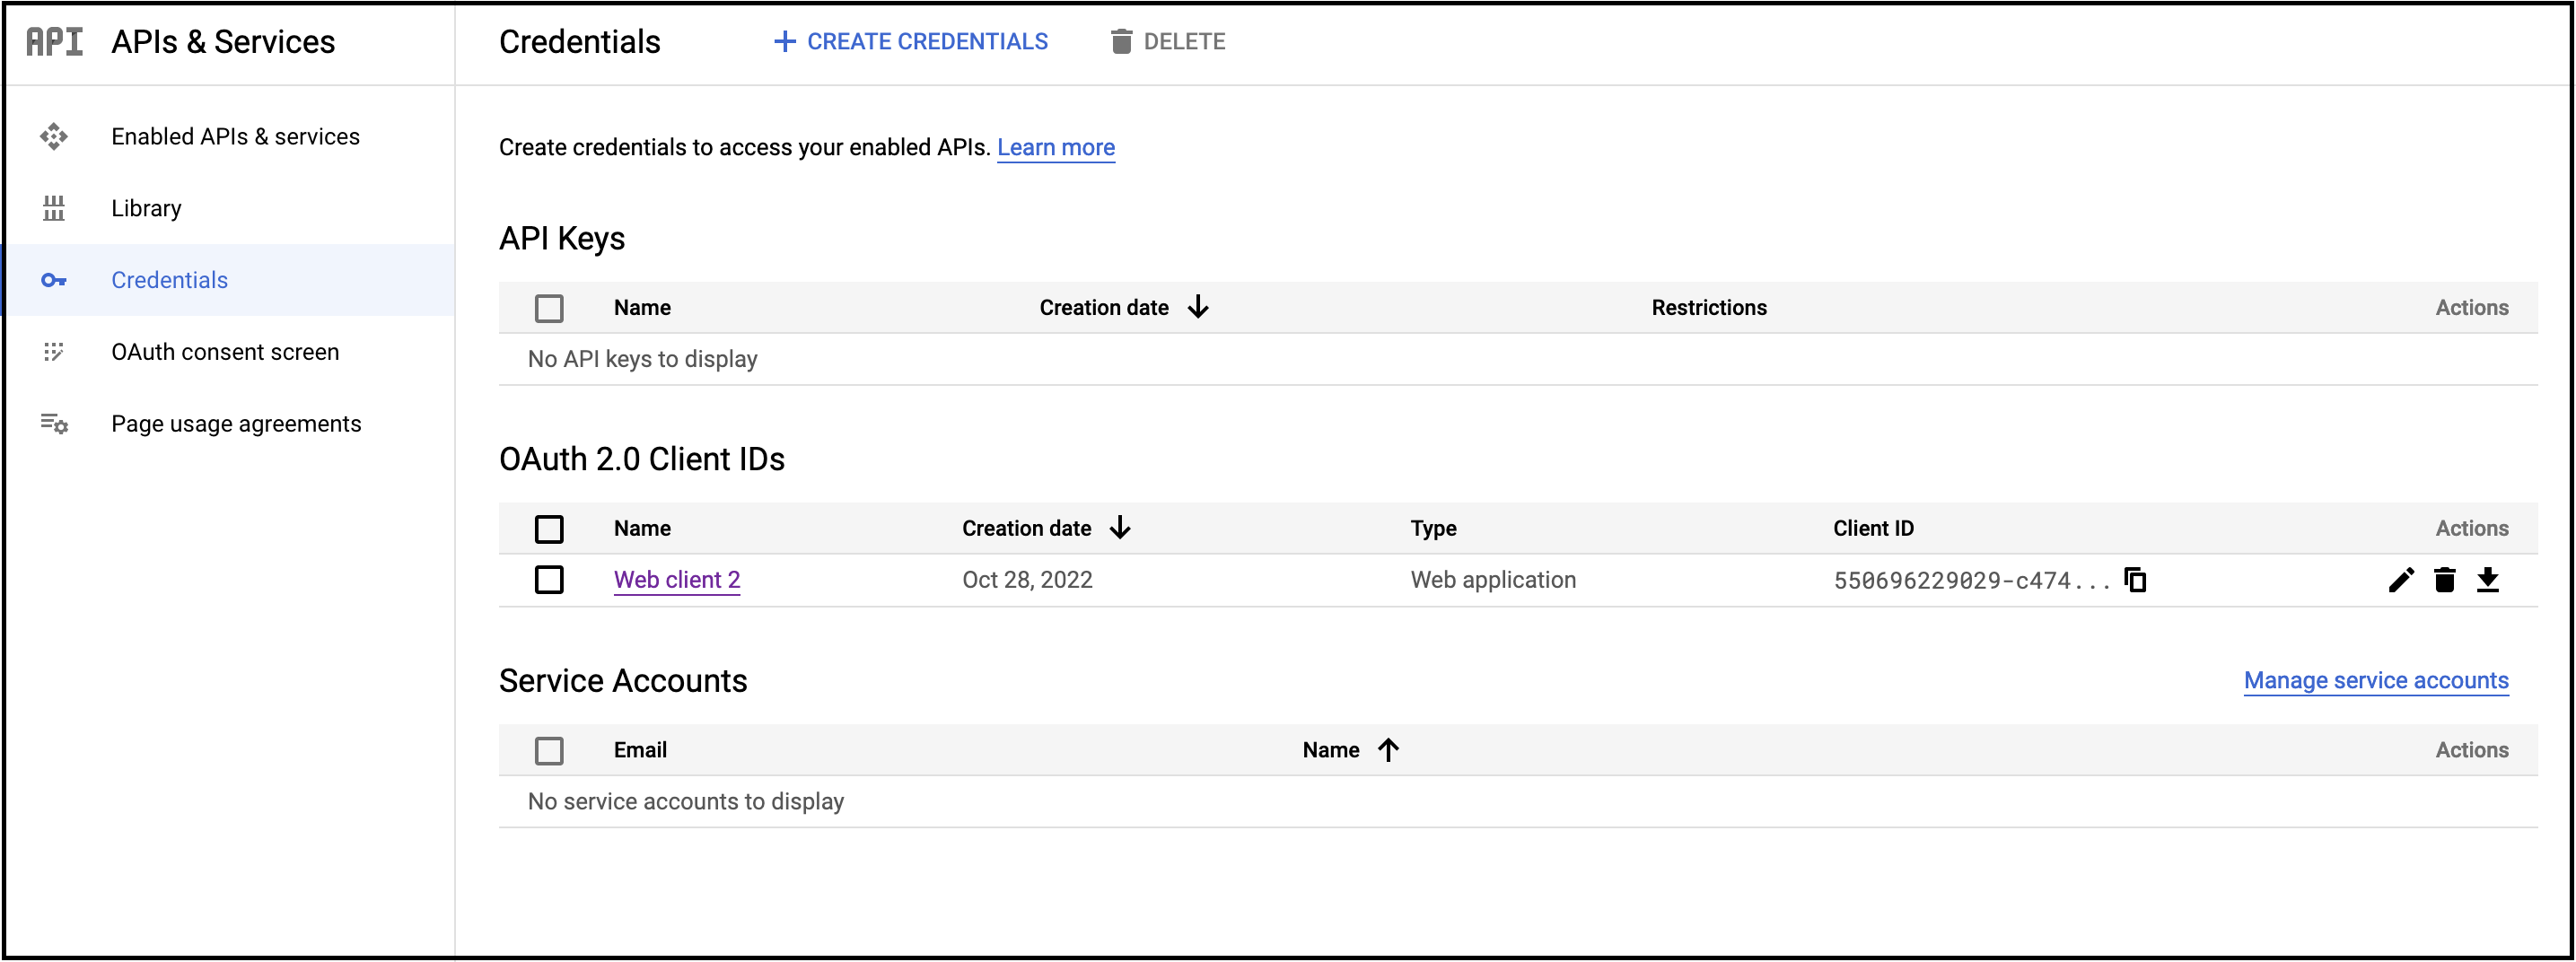
-
选择在首次配置谷歌登录时创建的客户端。
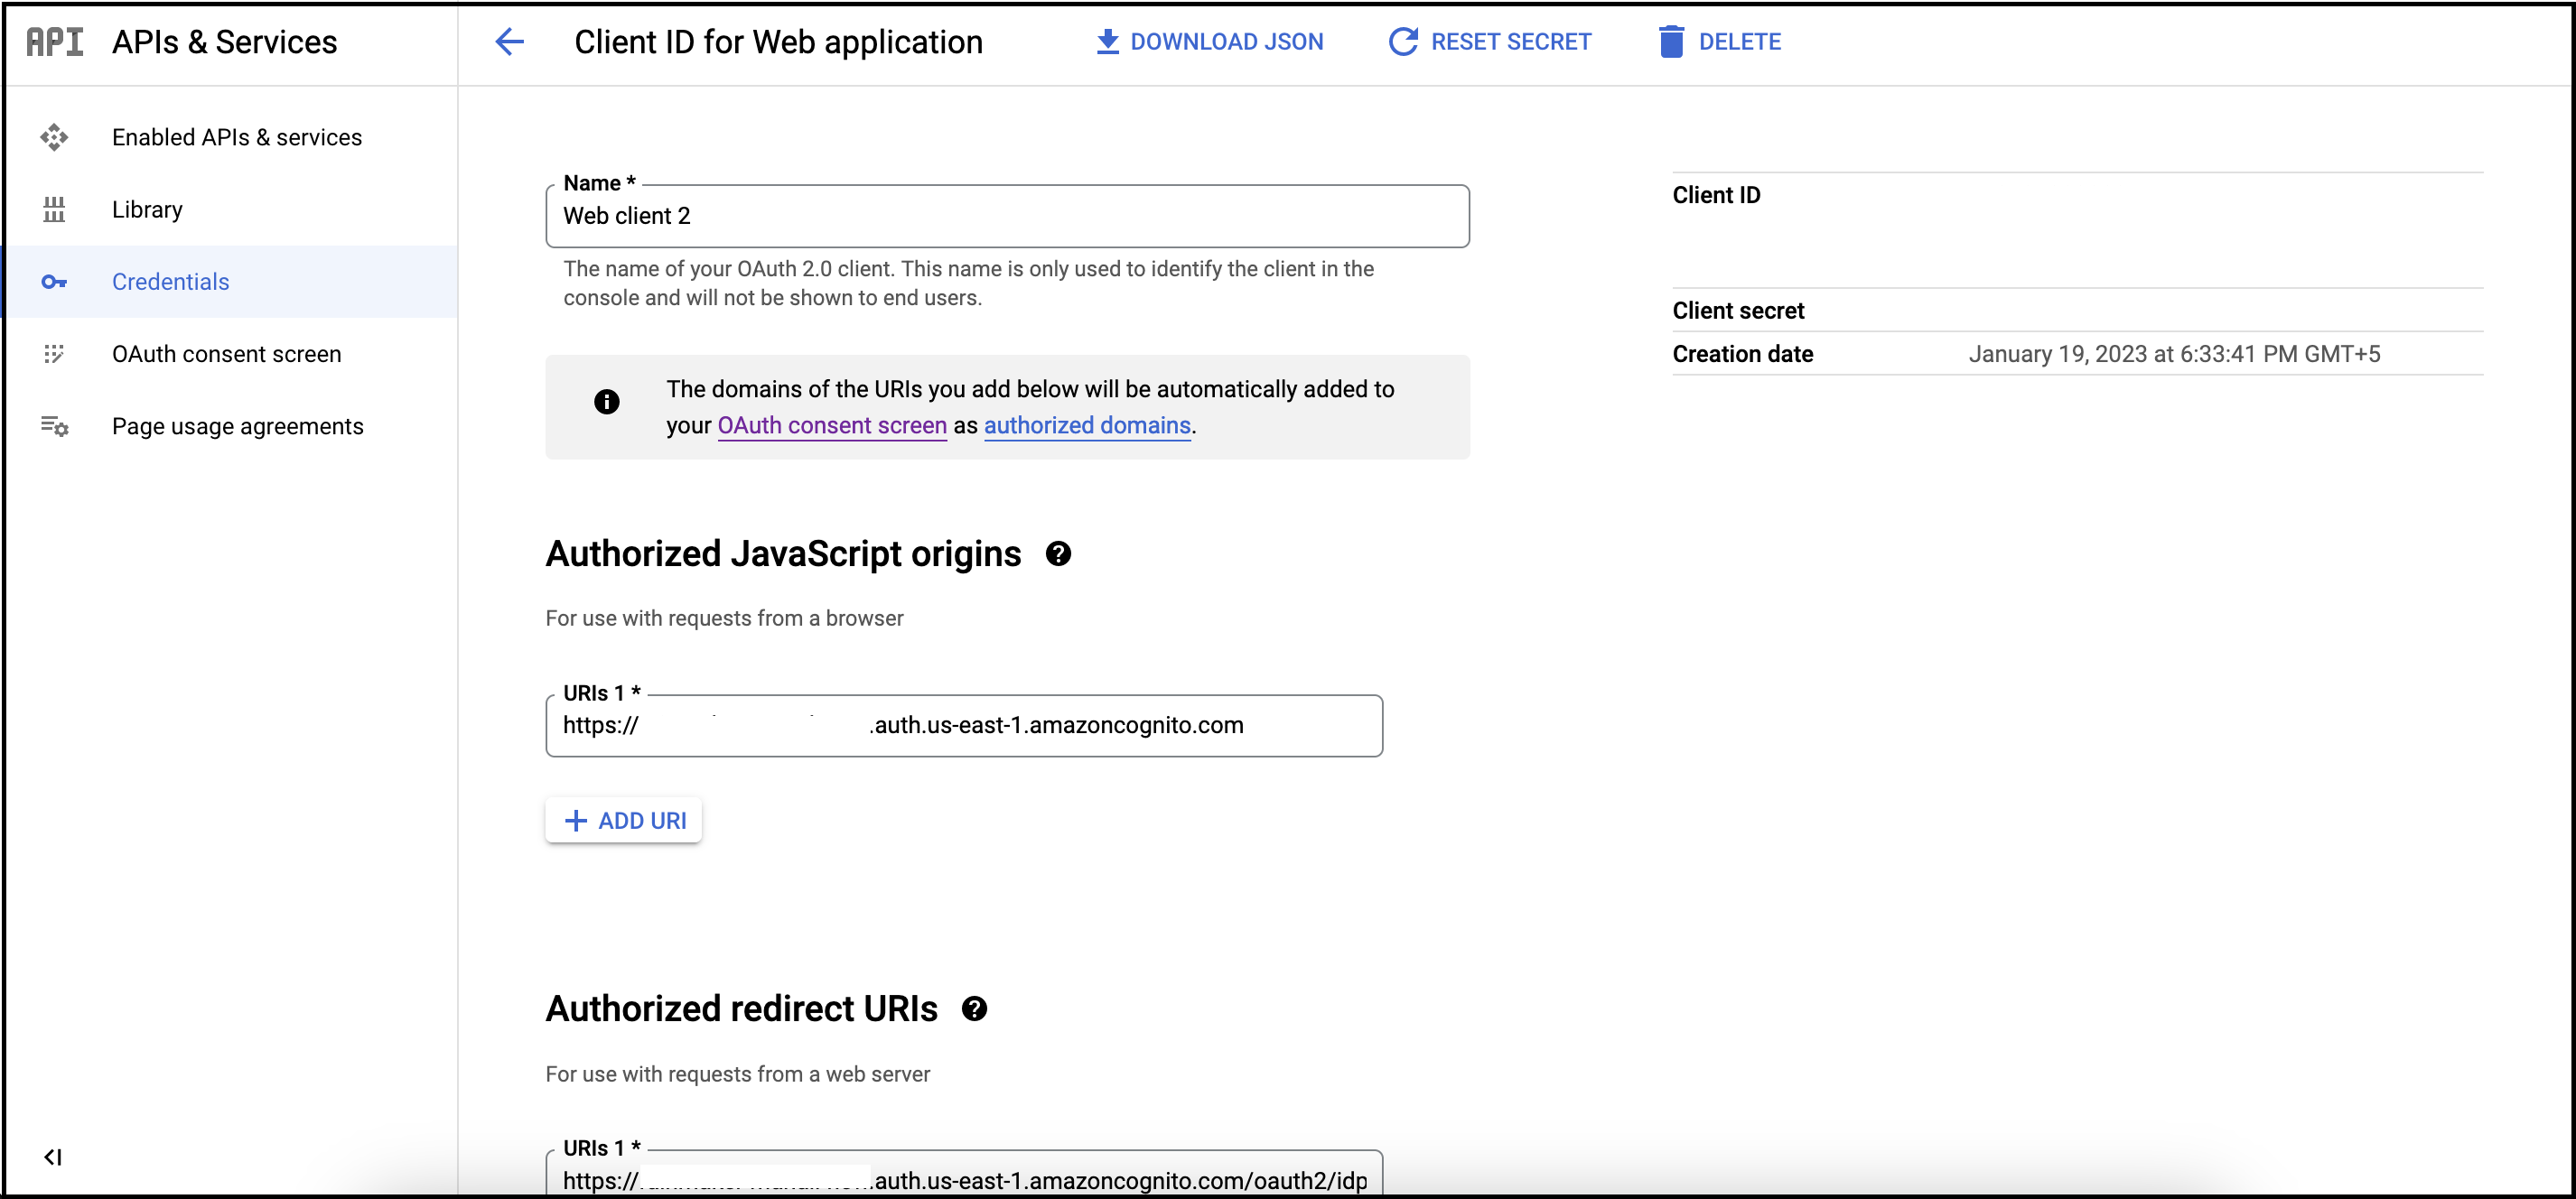
-
参照下表添加新 URI:
URI 获取方式 Authorized JavaScript origins 该值为 <new-company-domain>.auth.<aws-region>.amazoncognito.com,其中<new-company-domain>是在步骤 2 中创建的域。Authorized redirect URIs 该值为 https://<new-company-domain>.auth.<aws-region>.amazoncognito.com/oauth2/idpresponse,其中<new-company-domain>是在步骤 2 中创建的域。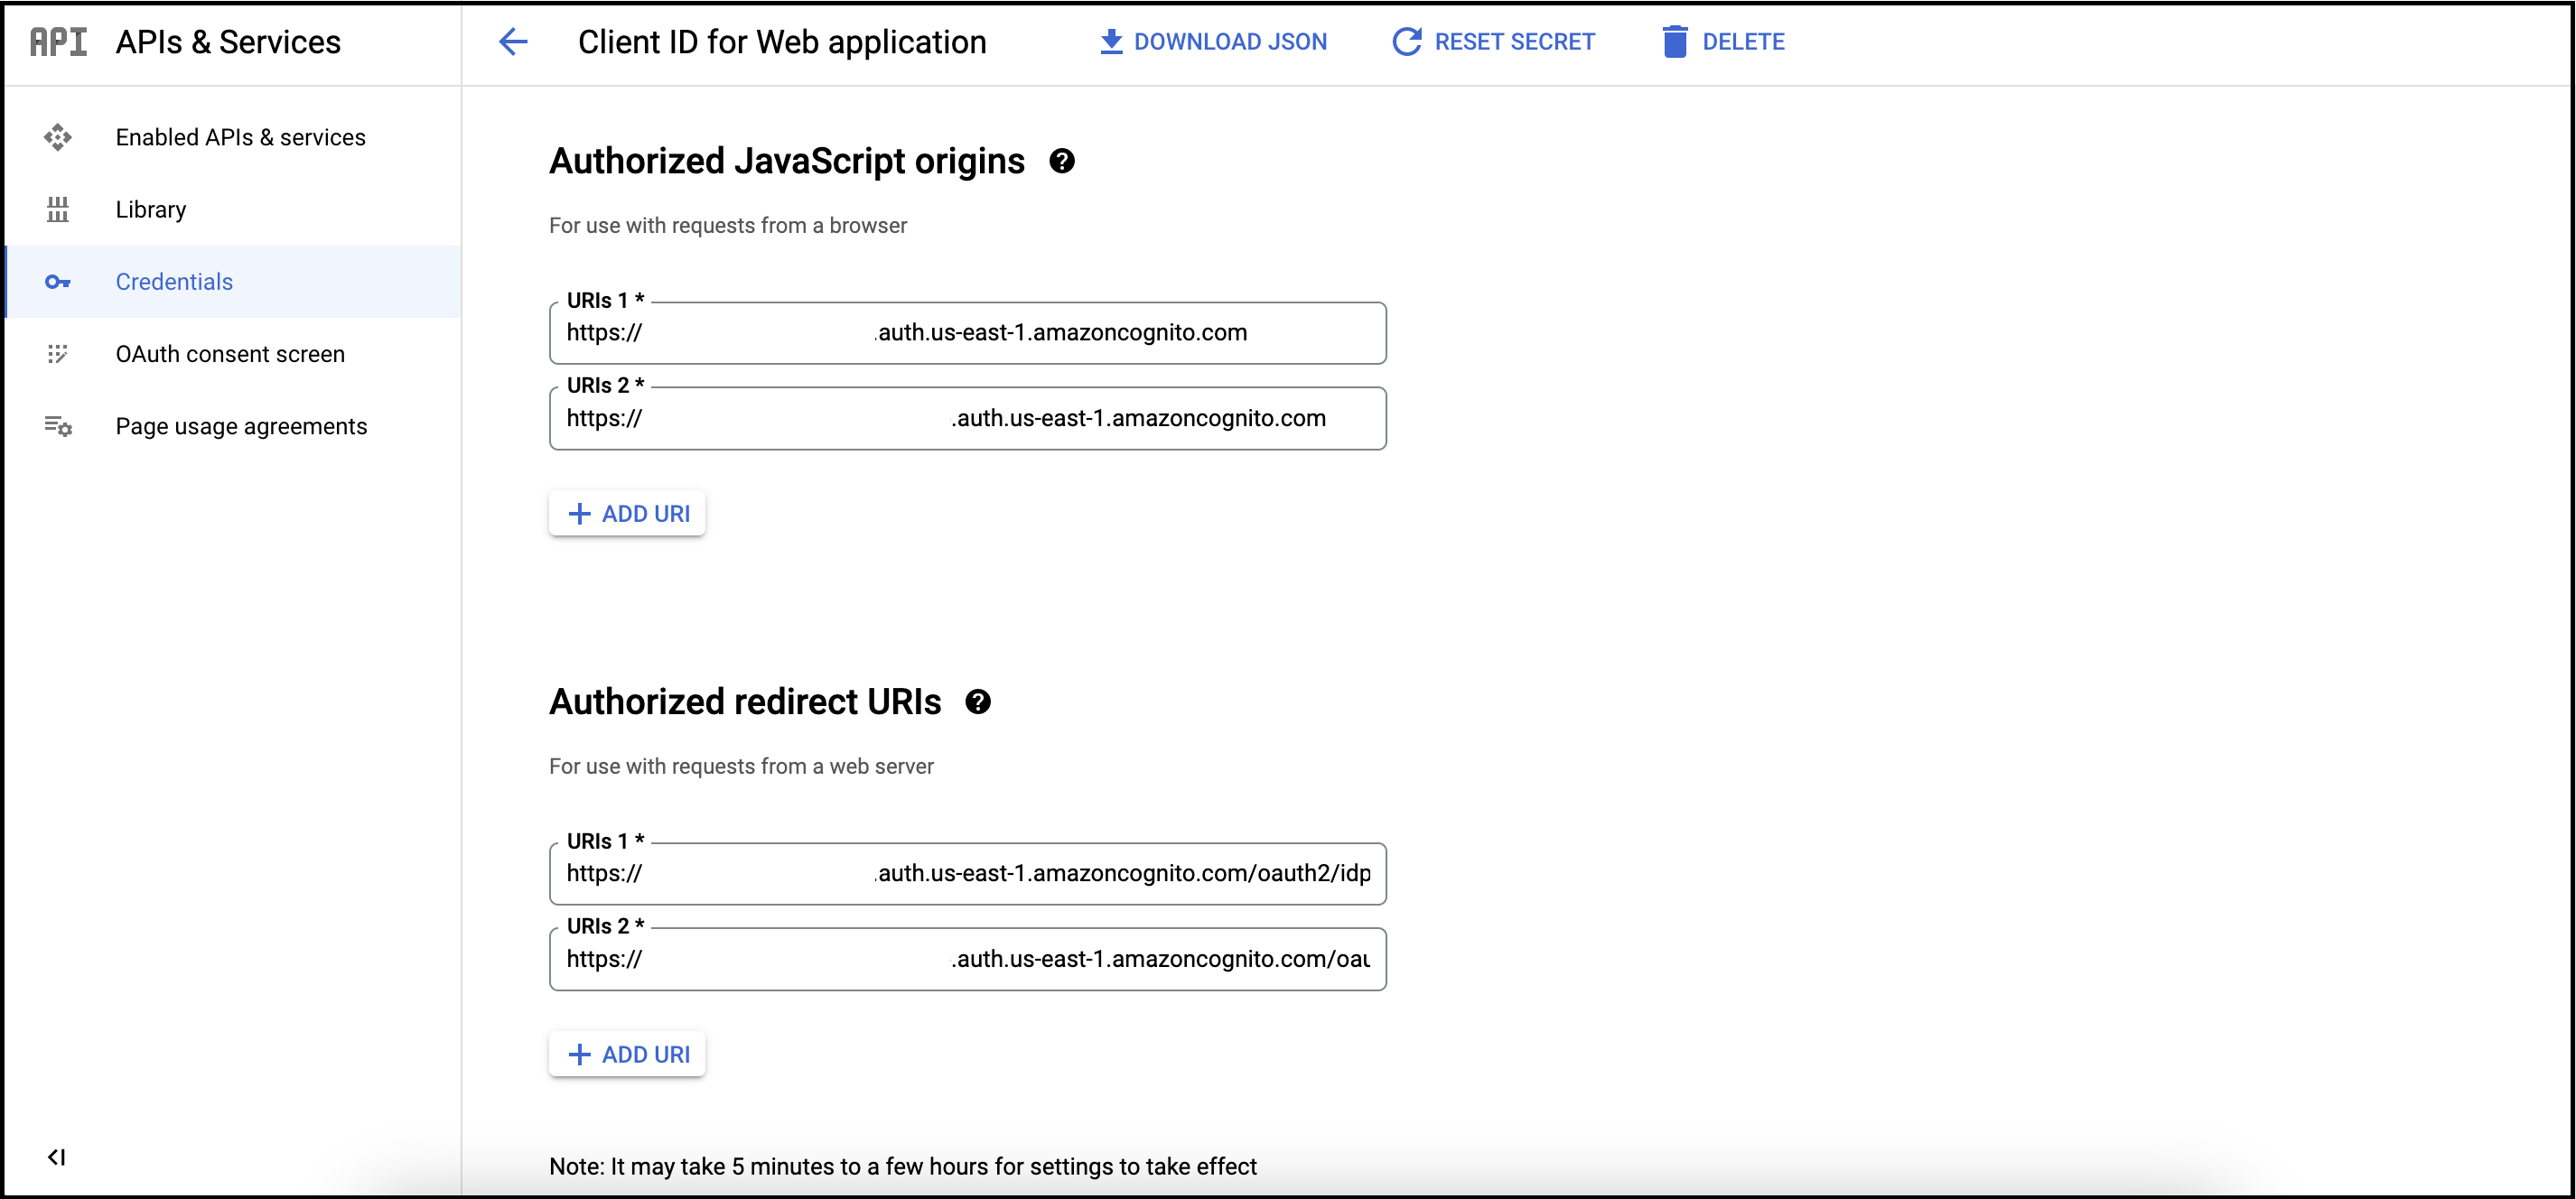
-
点击
Save。
在 RainMaker 管理面板上将谷歌配置为身份提供商
-
使用管理员账号登录 RainMaker 管理面板,打开
Deployment Settings。 -
打开
Identity Providers标签页,切换到旧用户池并记下参数值。 -
参照这些步骤,复制记录下来的参数,为新用户池添加谷歌身份提供商。
3b. 苹果
苹果开发者账号配置
在 https://developer.apple.com/account/resources/certificates/list 中使用苹果开发者账号登录苹果开发者控制台。
-
打开
Identifiers并选择Service IDs。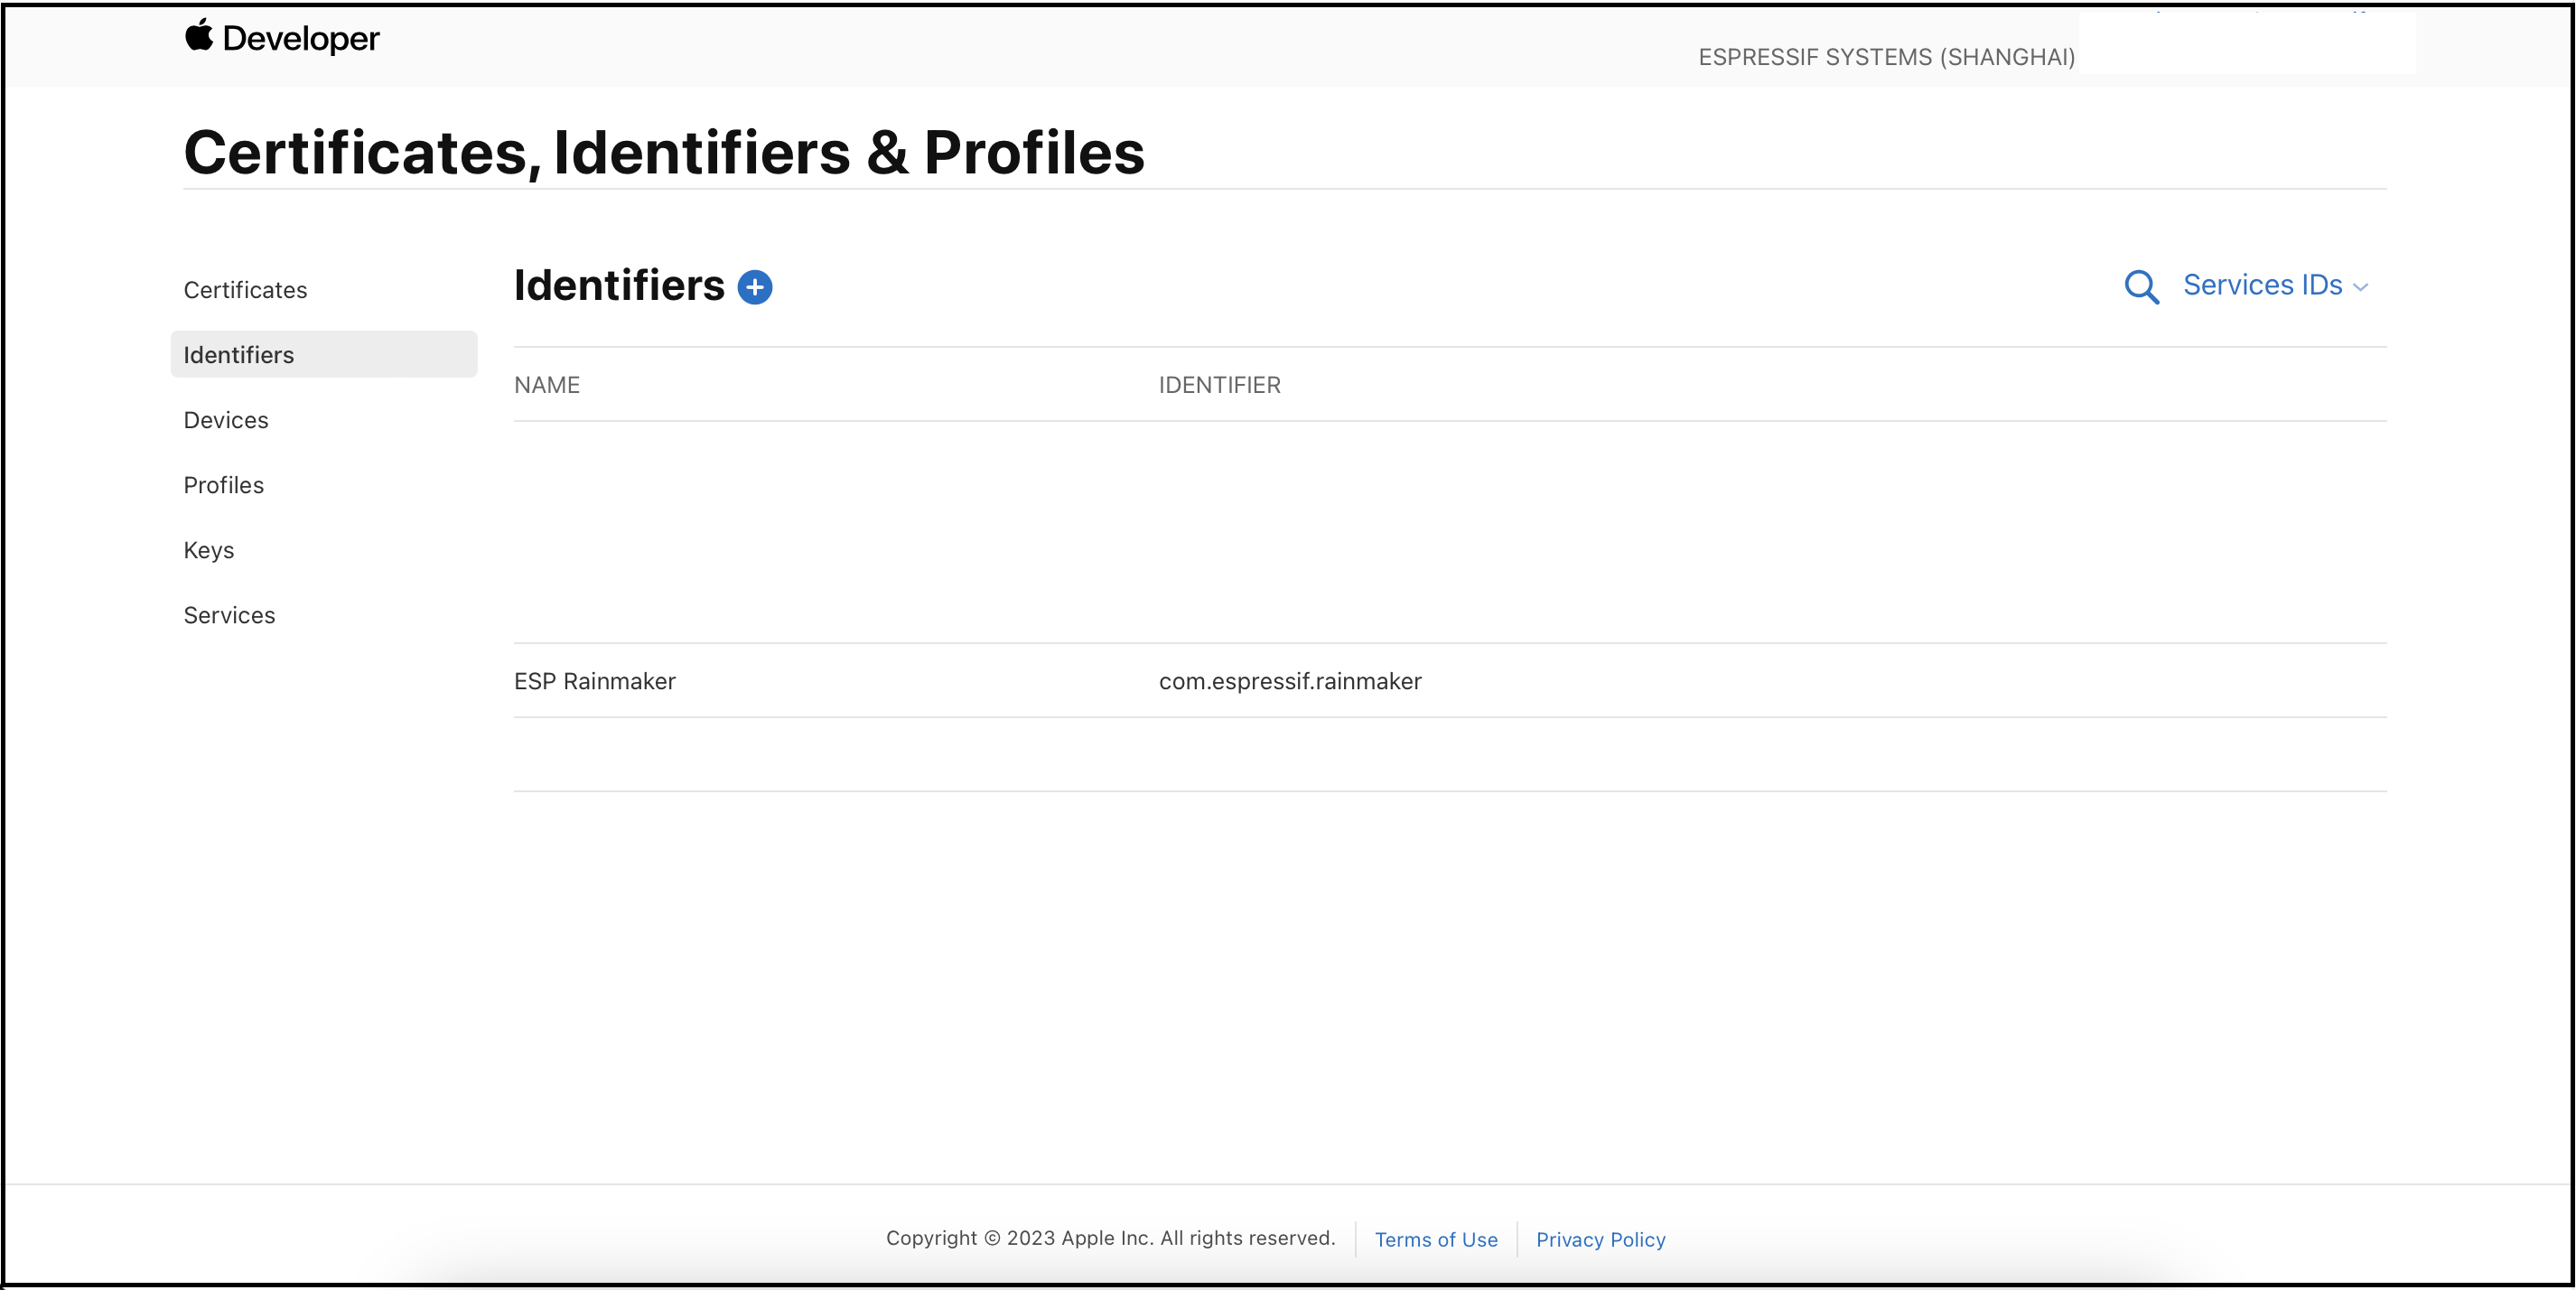
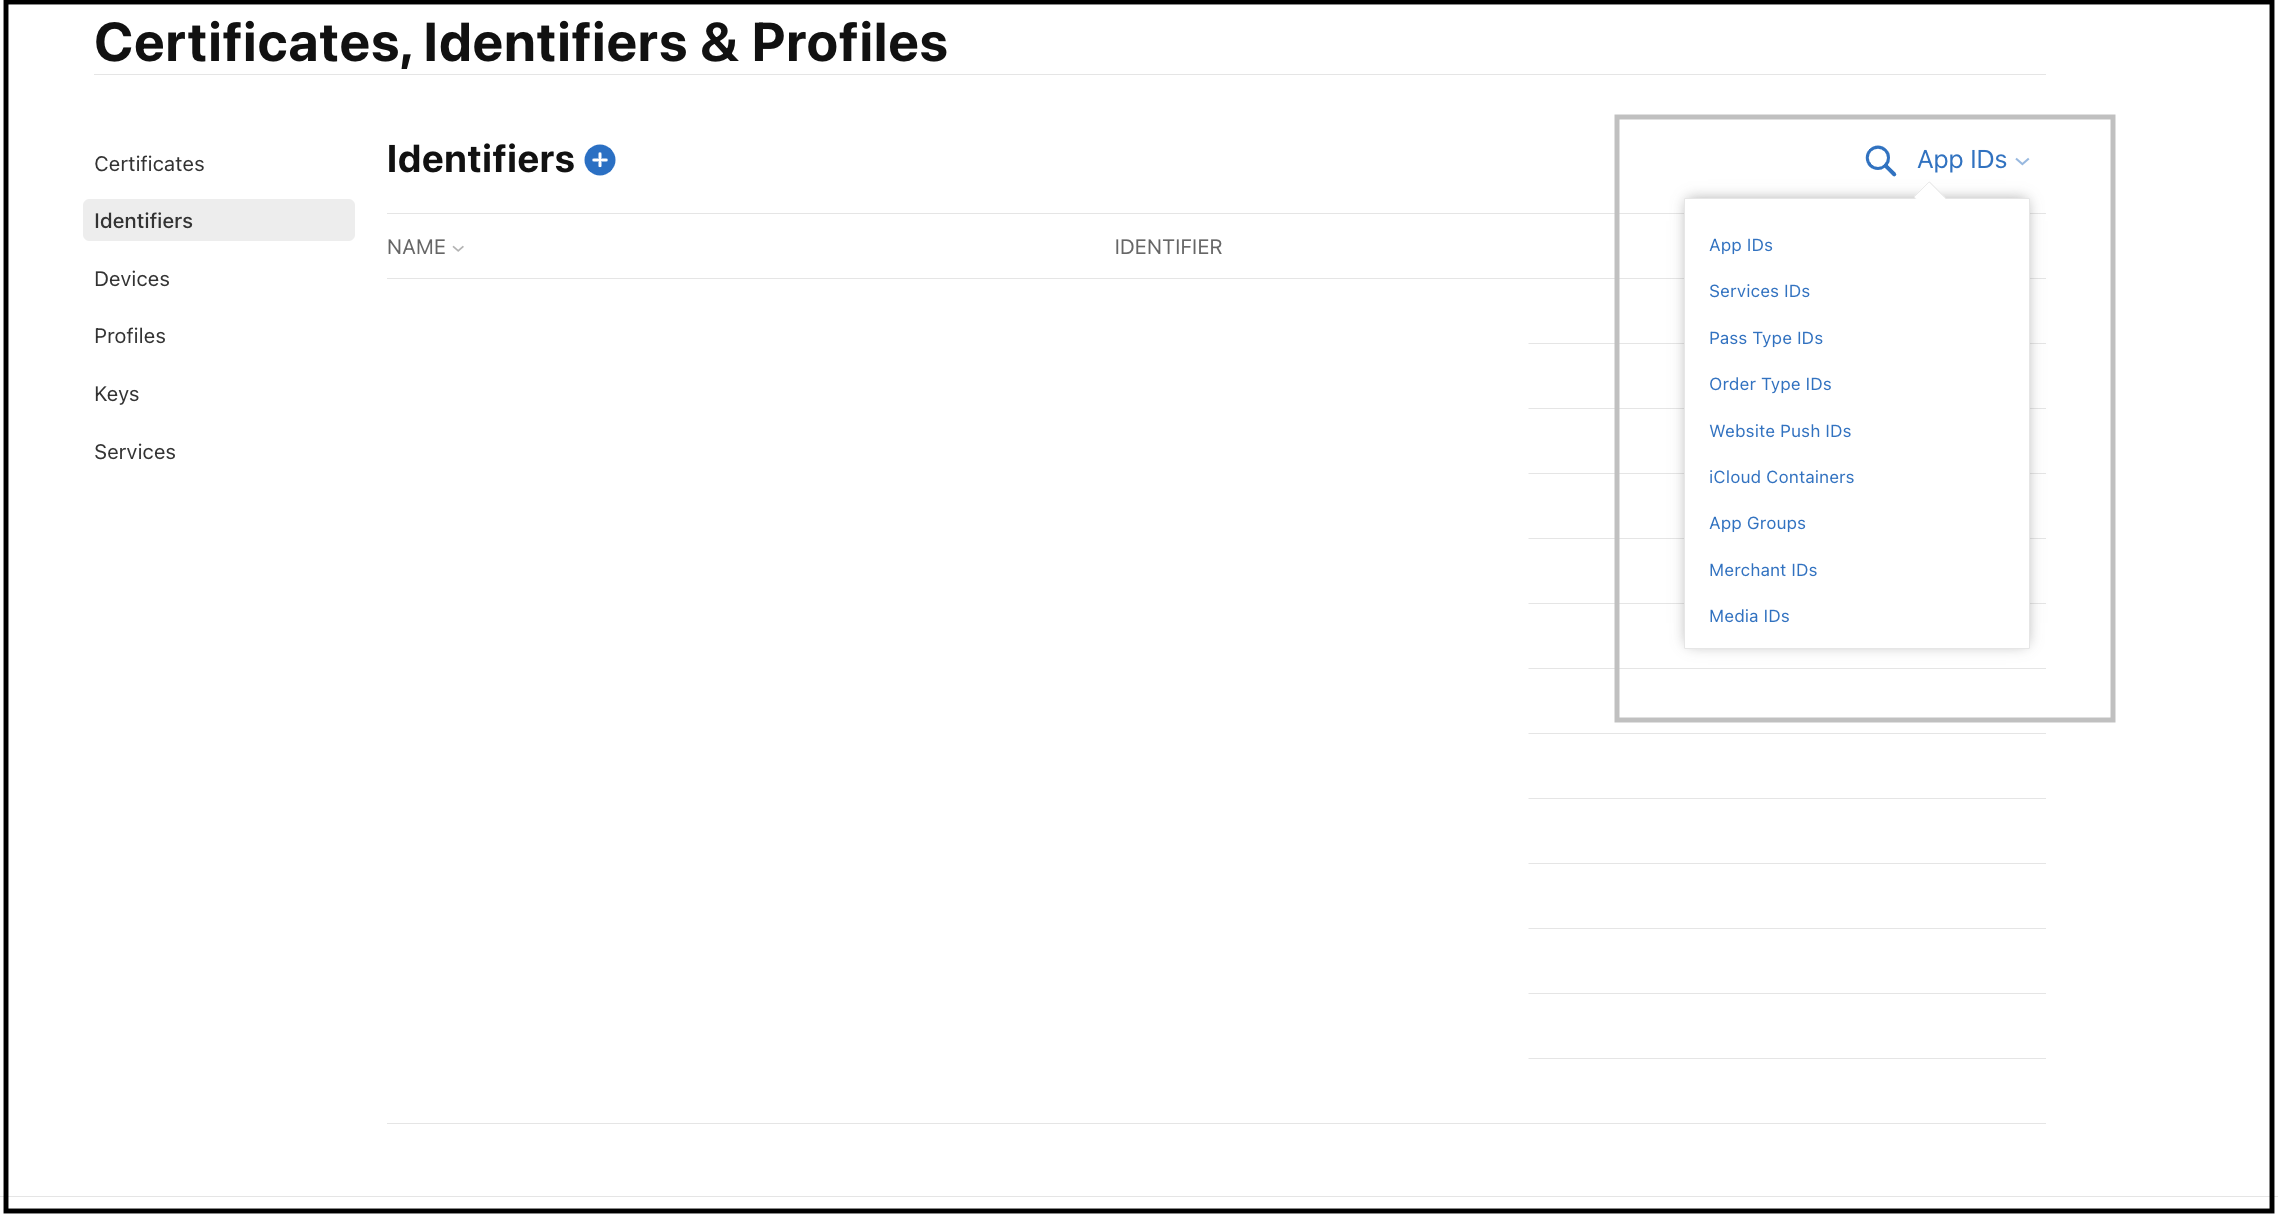
-
选择先前配置好的应用程序服务标识符。
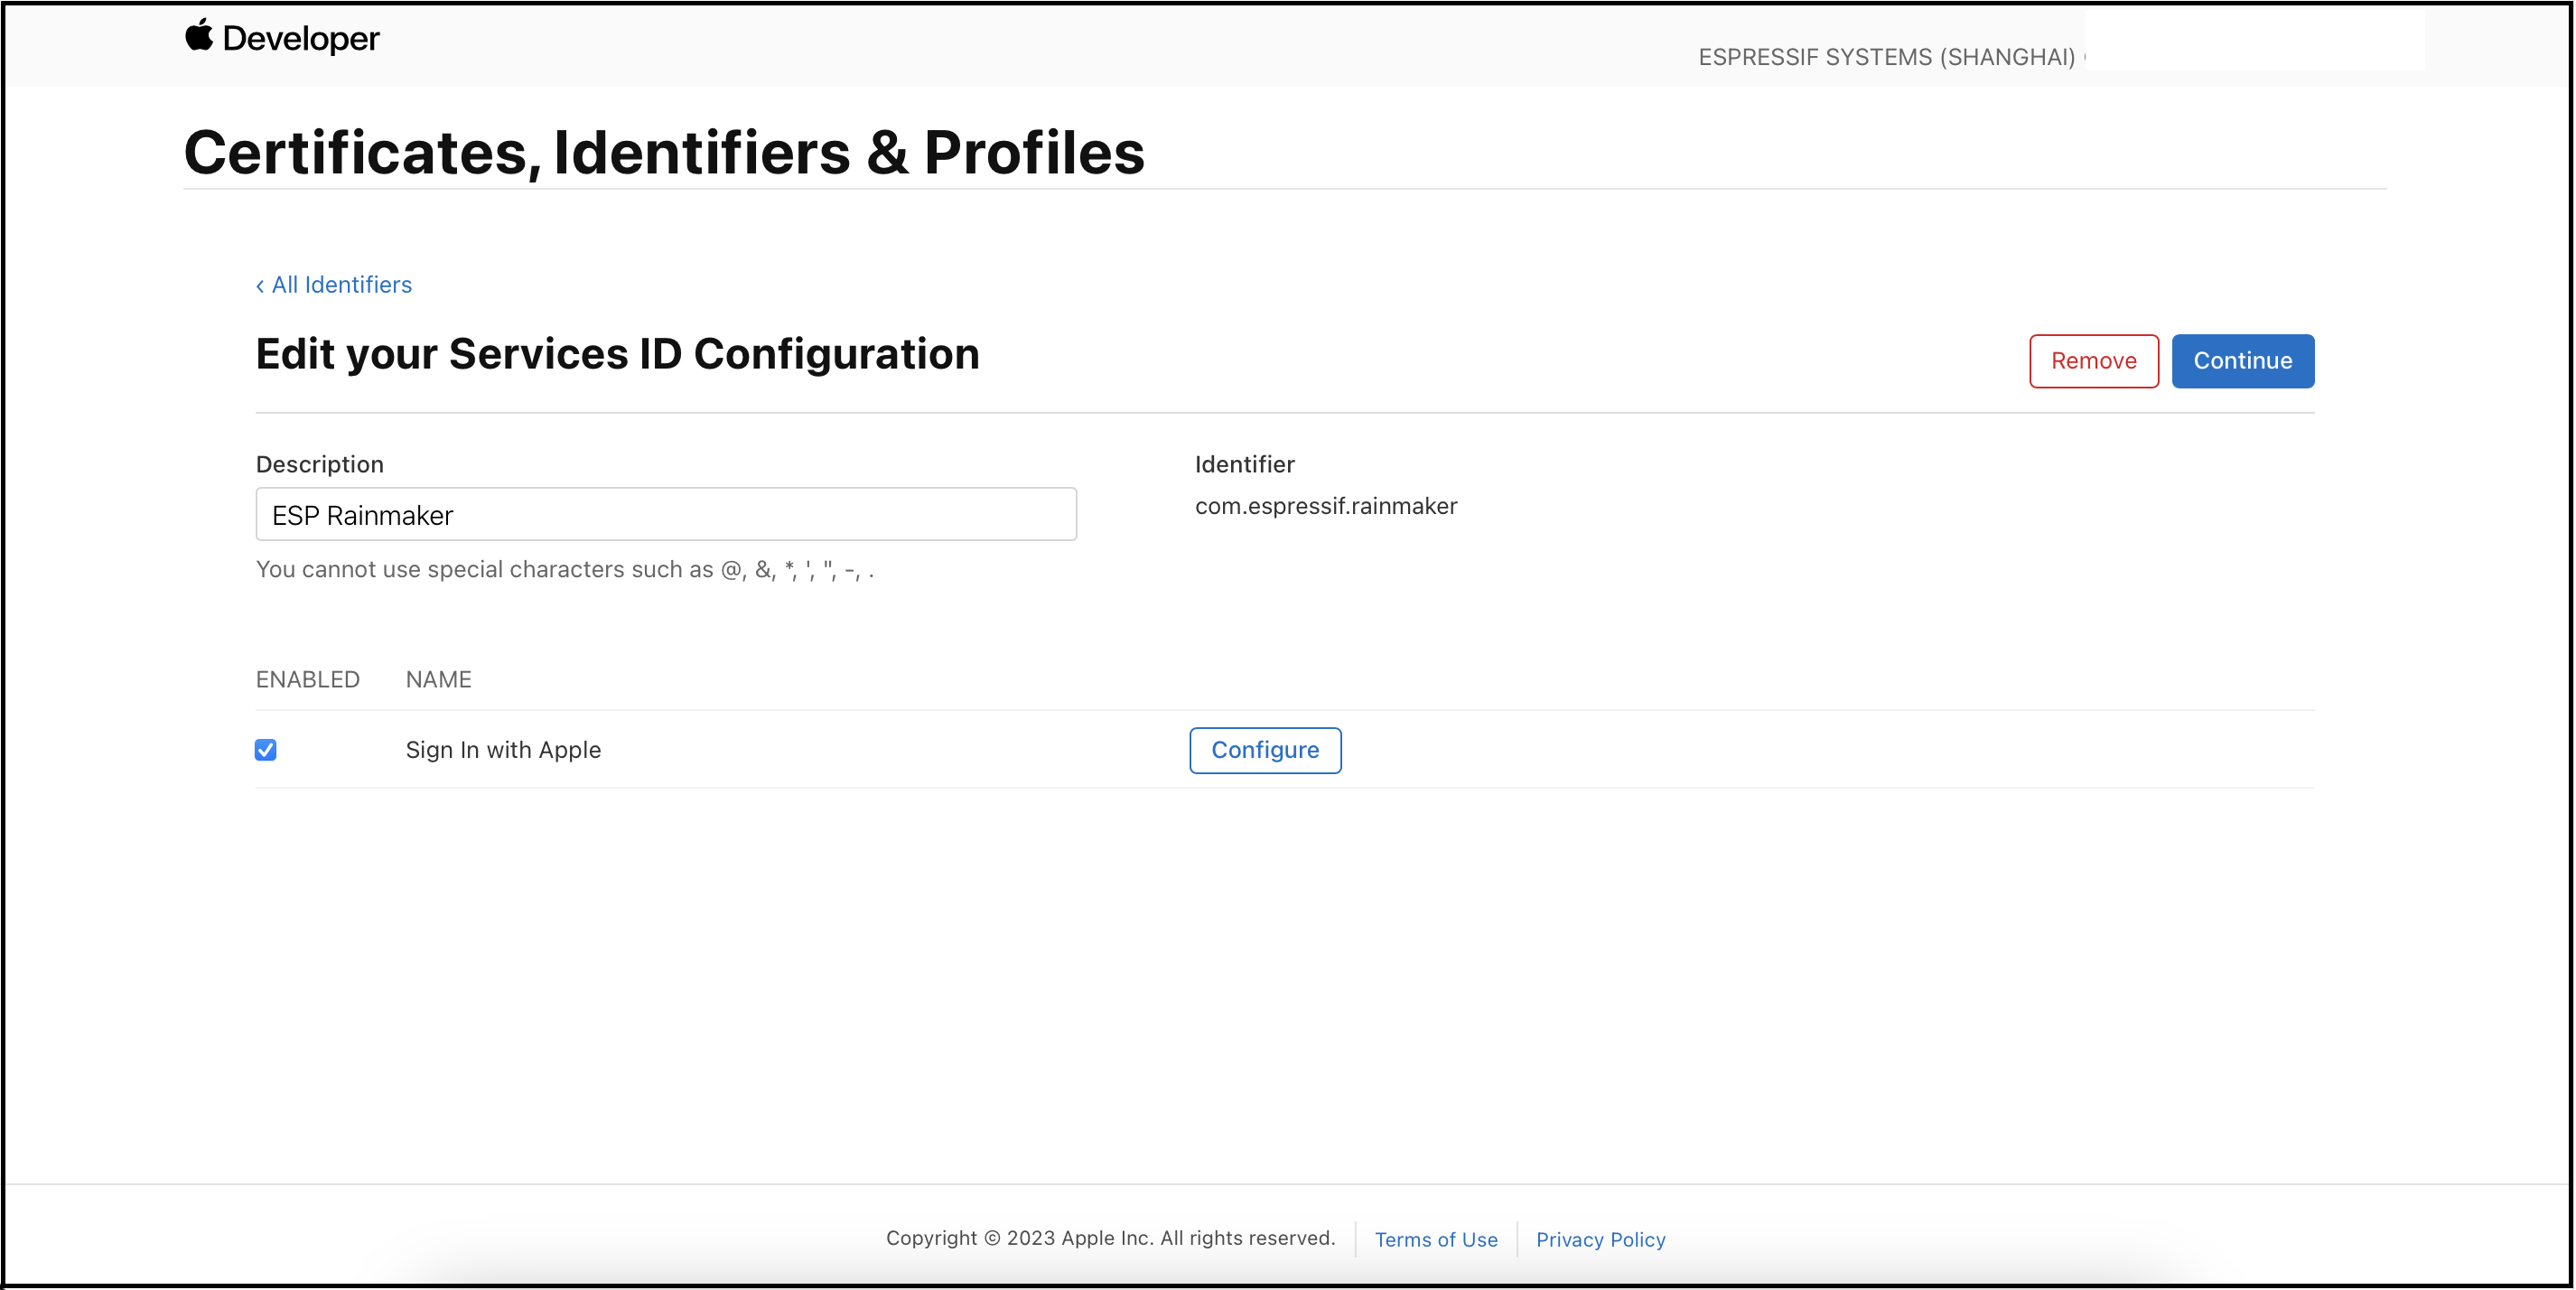
-
点击
Configure。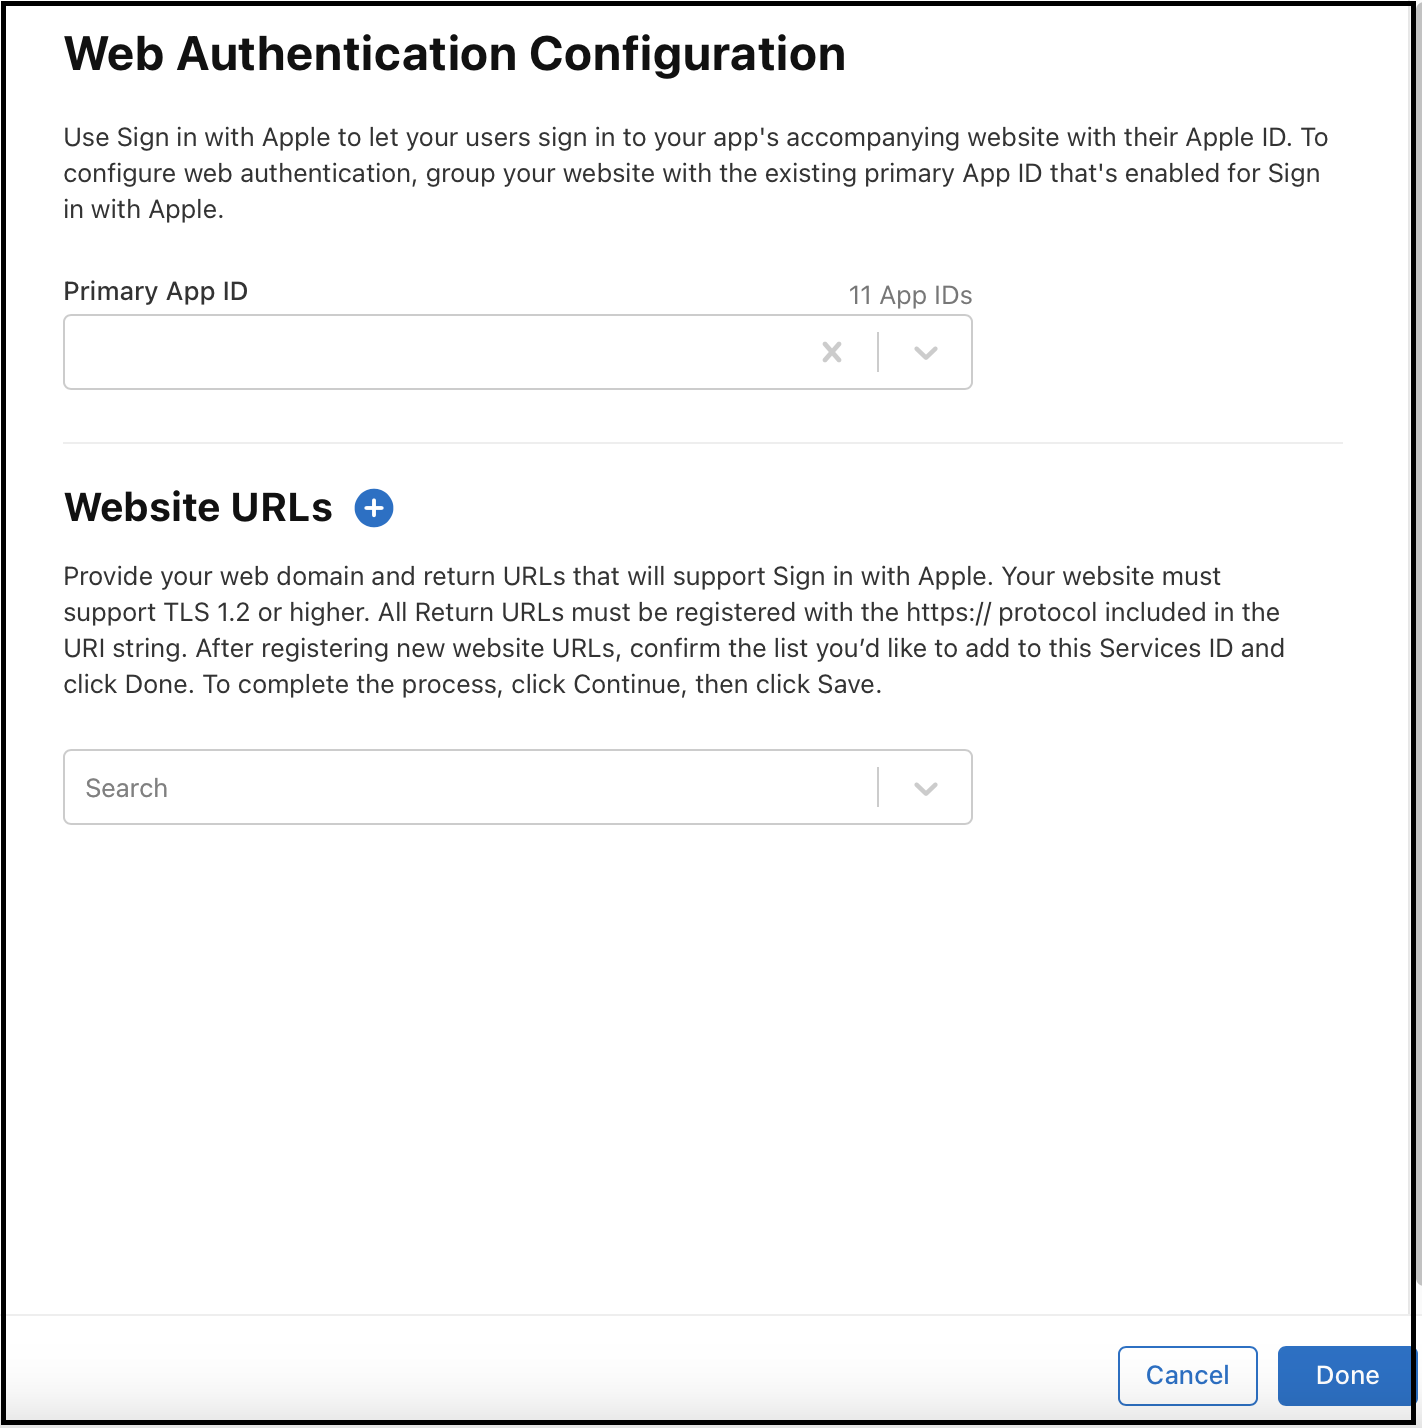
-
点击
Website URLs旁的+图标。 -
参照下表添加新 URI:
URL 获取方式 Domains and Subdomains 该值为 <new-company-domain>.auth.<aws-region>.amazoncognito.com,其中<new-company-domain>是在步骤 2 中创建的域。Return URLs 该值为 https://<new-company-domain>.auth.<aws-region>.amazoncognito.com/oauth2/idpresponse,其中<new-company-domain>是在步骤 2 中创建的域。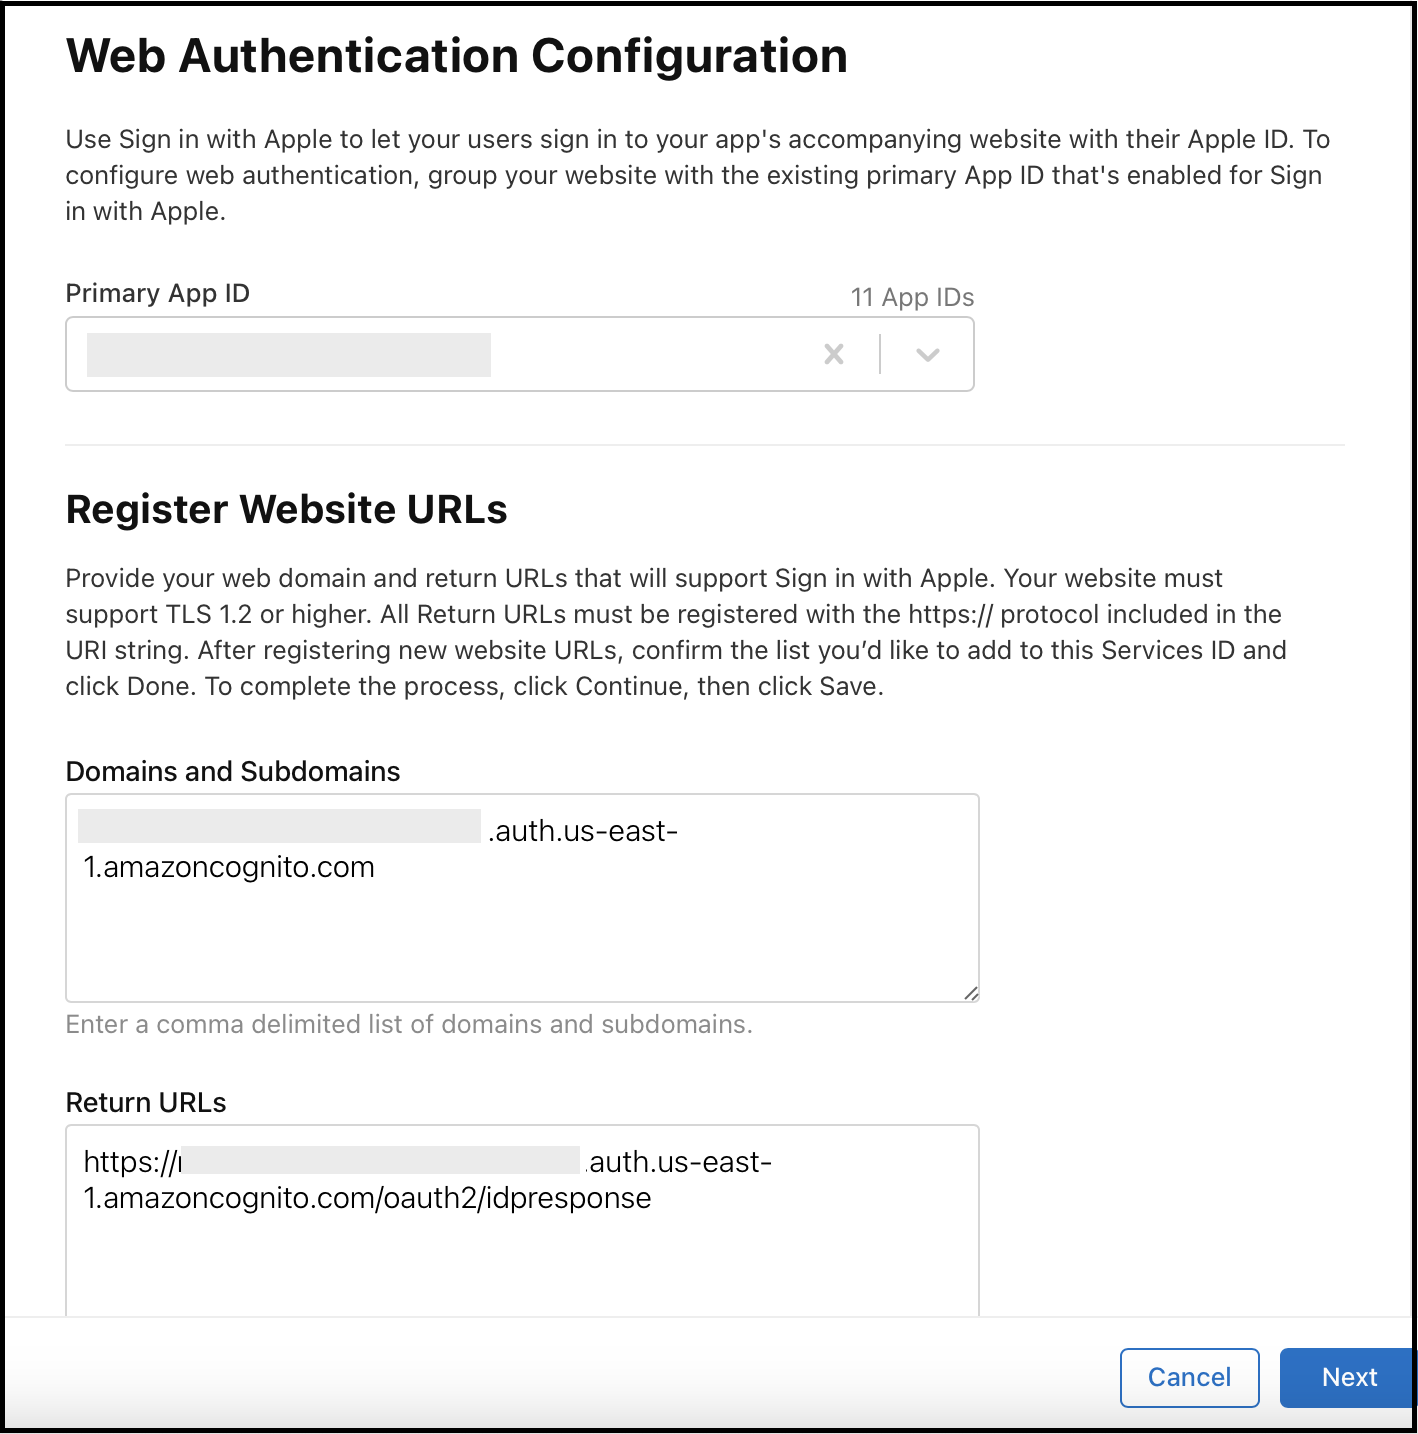
-
点击
Next和Done。 -
点击
Continue。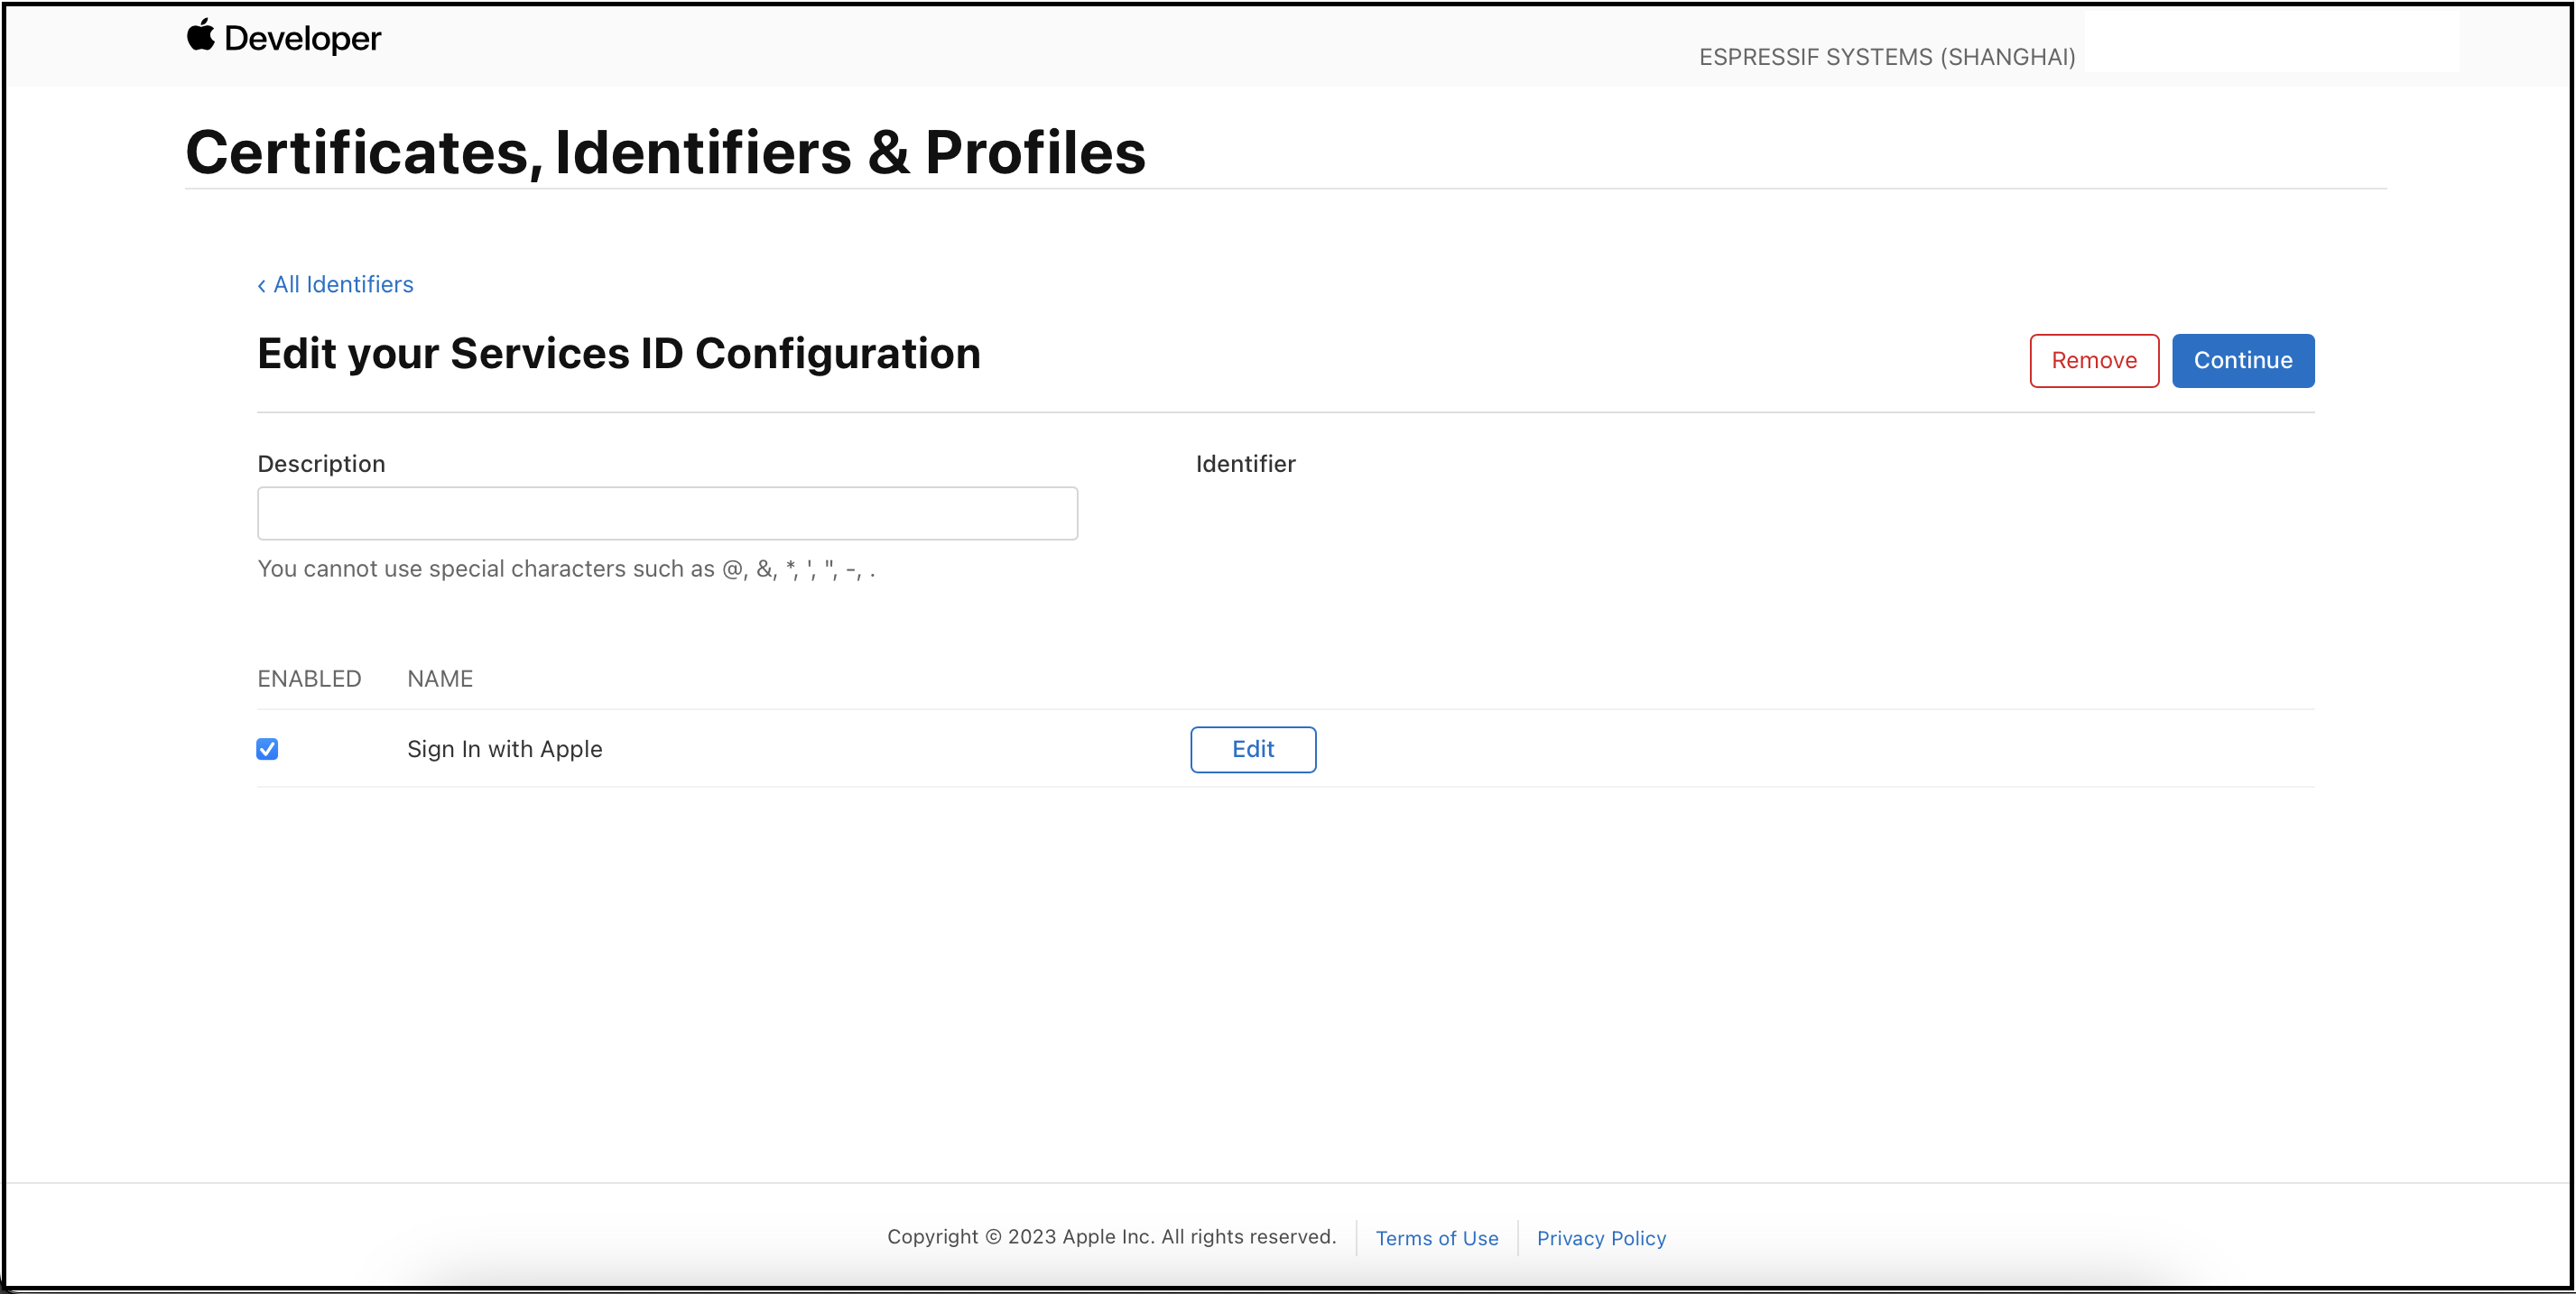
-
点击
Save。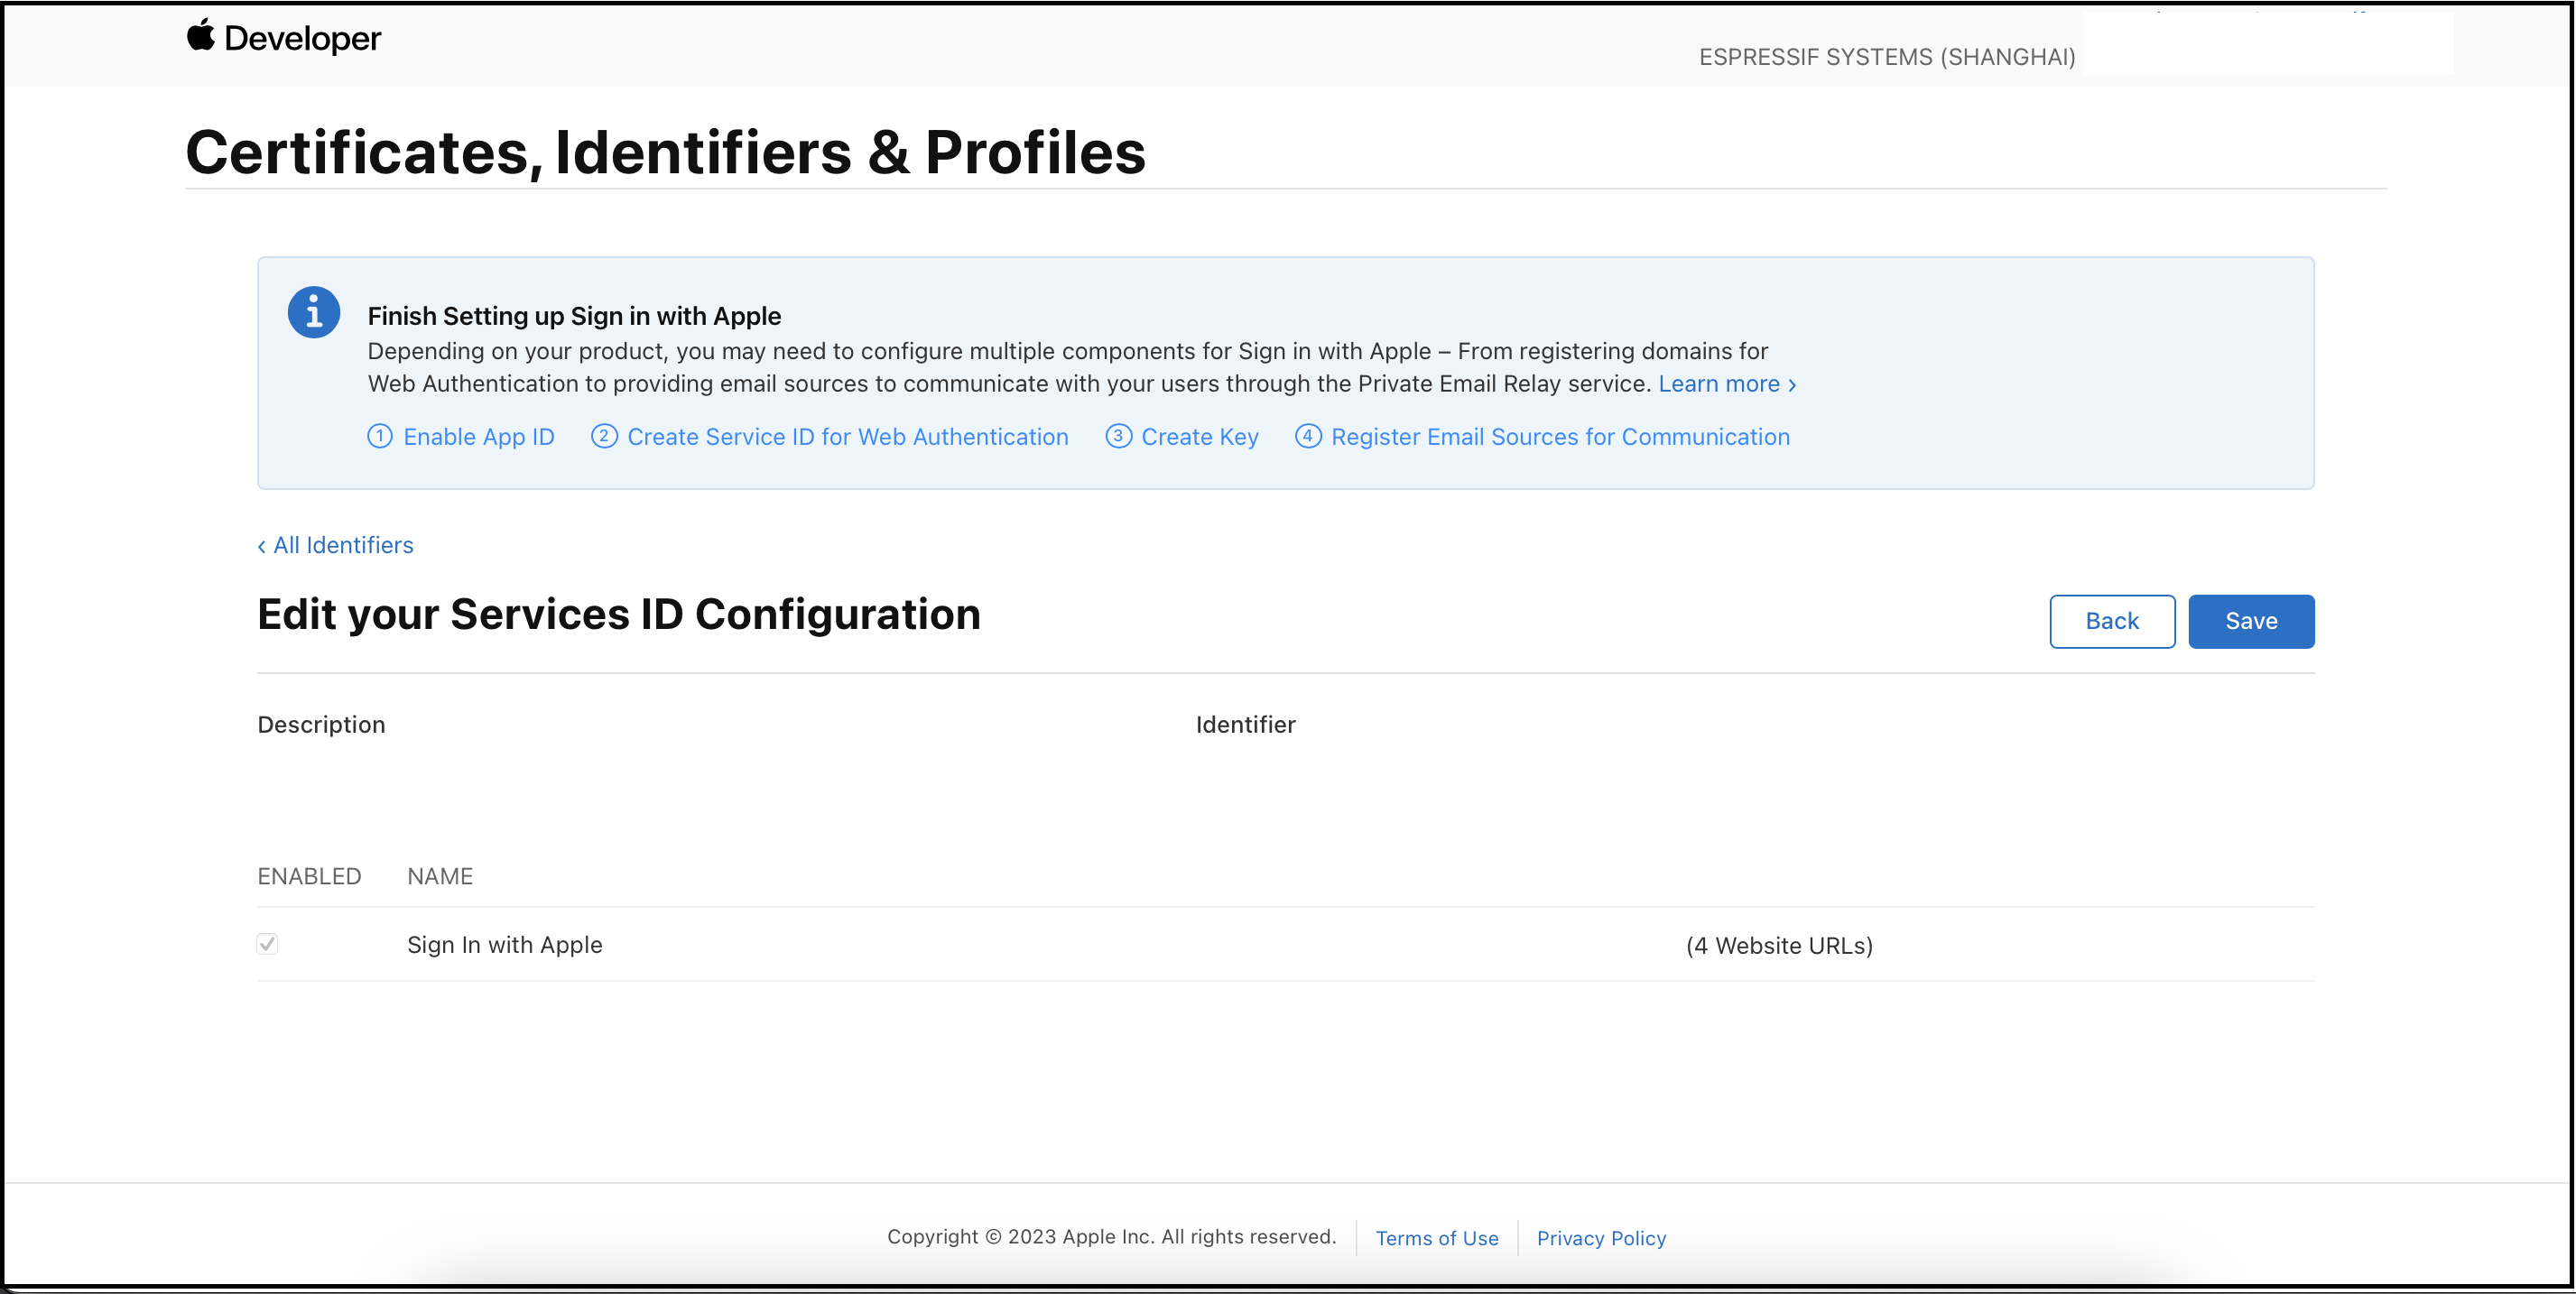
在 RainMaker 管理面板上将苹果配置为身份提供商
-
使用管理员账号登录 RainMaker 管理面板,打开
Deployment Settings。 -
打开
Identity Providers标签页,切换到旧用户池并记下参数值。 -
参照这些步骤,复制记录下来的参数,为新用户池添加苹果身份提供商。(注意: 你需要从苹果开发者控制台下载密钥文件。)
-
在 RainMaker 管理面板上,打开
Deployment Settings>Cognito Configurations。 -
检查启用的身份提供商和回调 URL 是否正确,可参考安卓 URI 和 iOS URI。

4. Cognito 应用客户端配置
-
使用管理员账号登录 RainMaker 管理面板,打开
Deployment Settings。 -
打开
Identity Configurations标签页,切换到旧用户池,并记下Enabled Identity Providers和Callback URLs的参数值。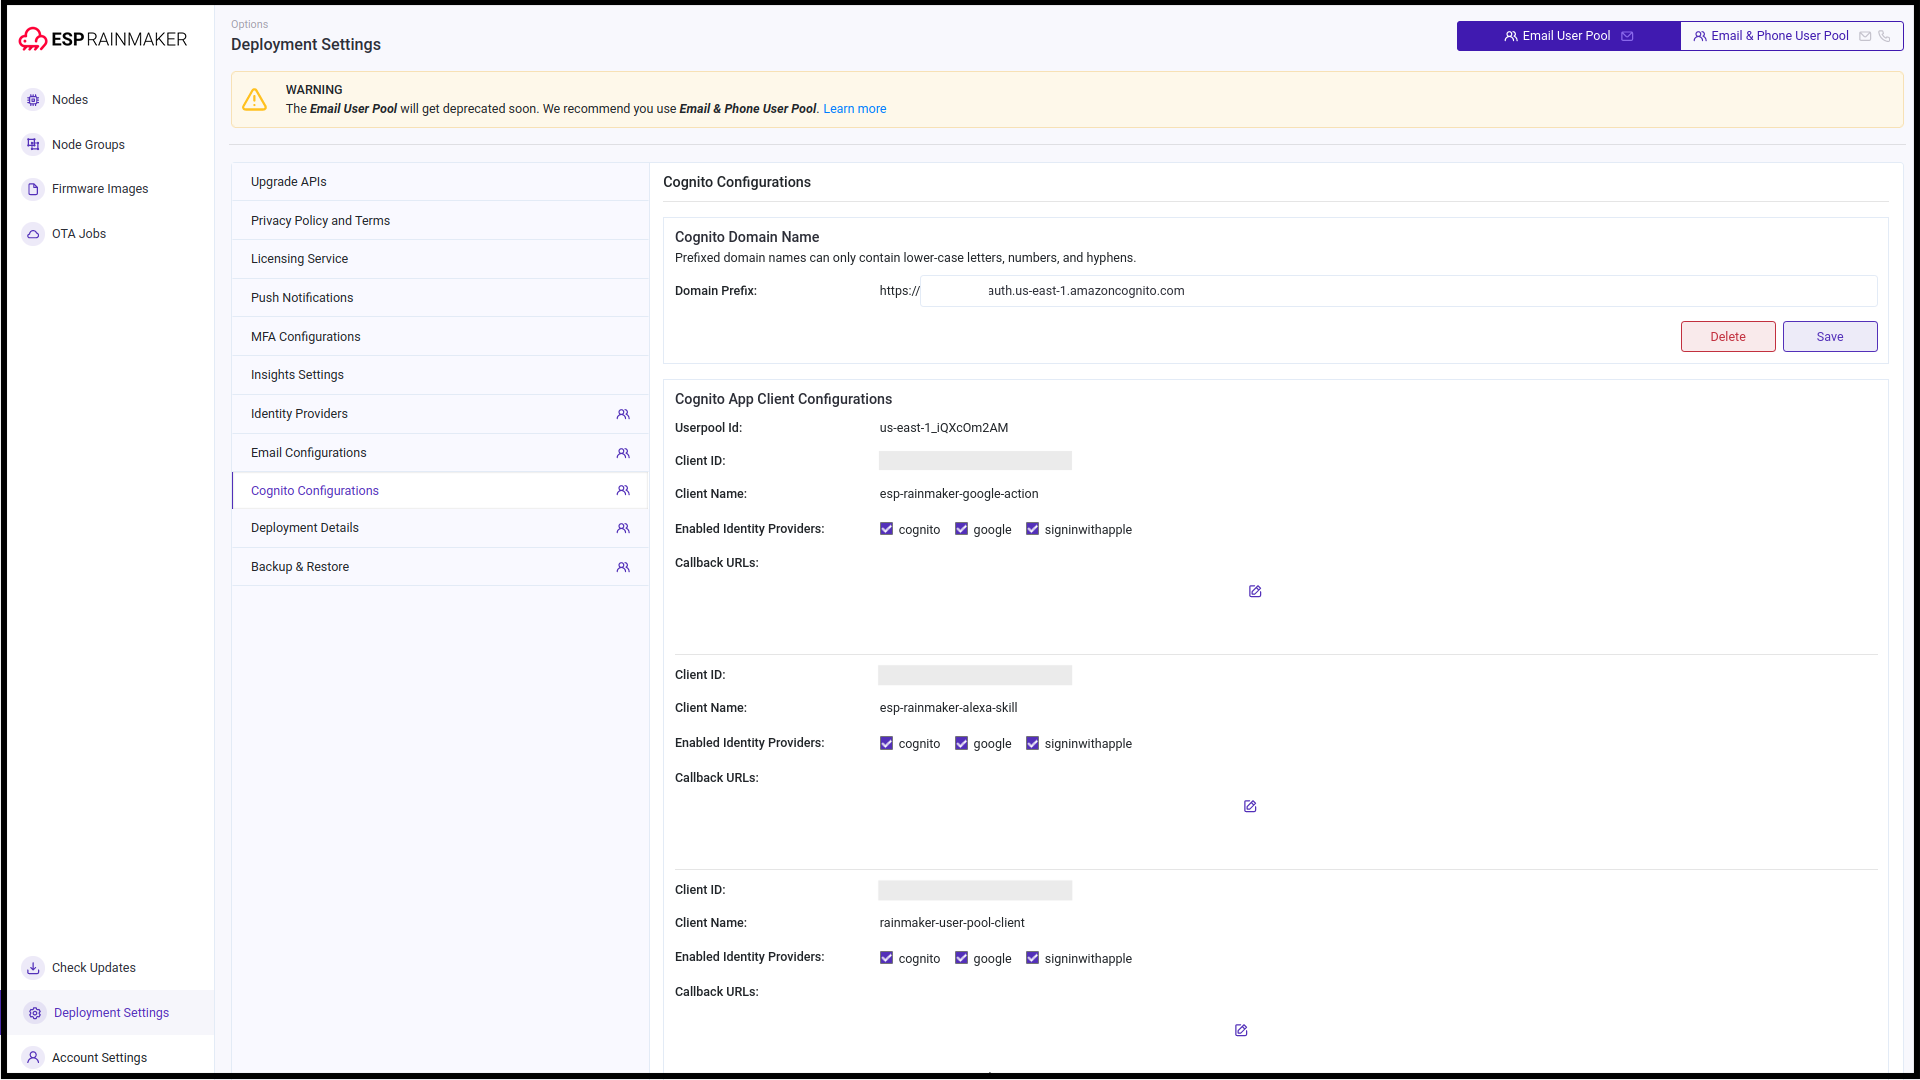
-
切换到
Email & Phone User Pool标签页,将上述值复制到新用户池的相应参数中。 -
配置完成。
5. 电子邮件模板配置
-
使用管理员账号登录 RainMaker 管理面板,打开
Deployment Settings。 -
打开
Email Configurations标签页,切换到旧用户池并记下相关参数值。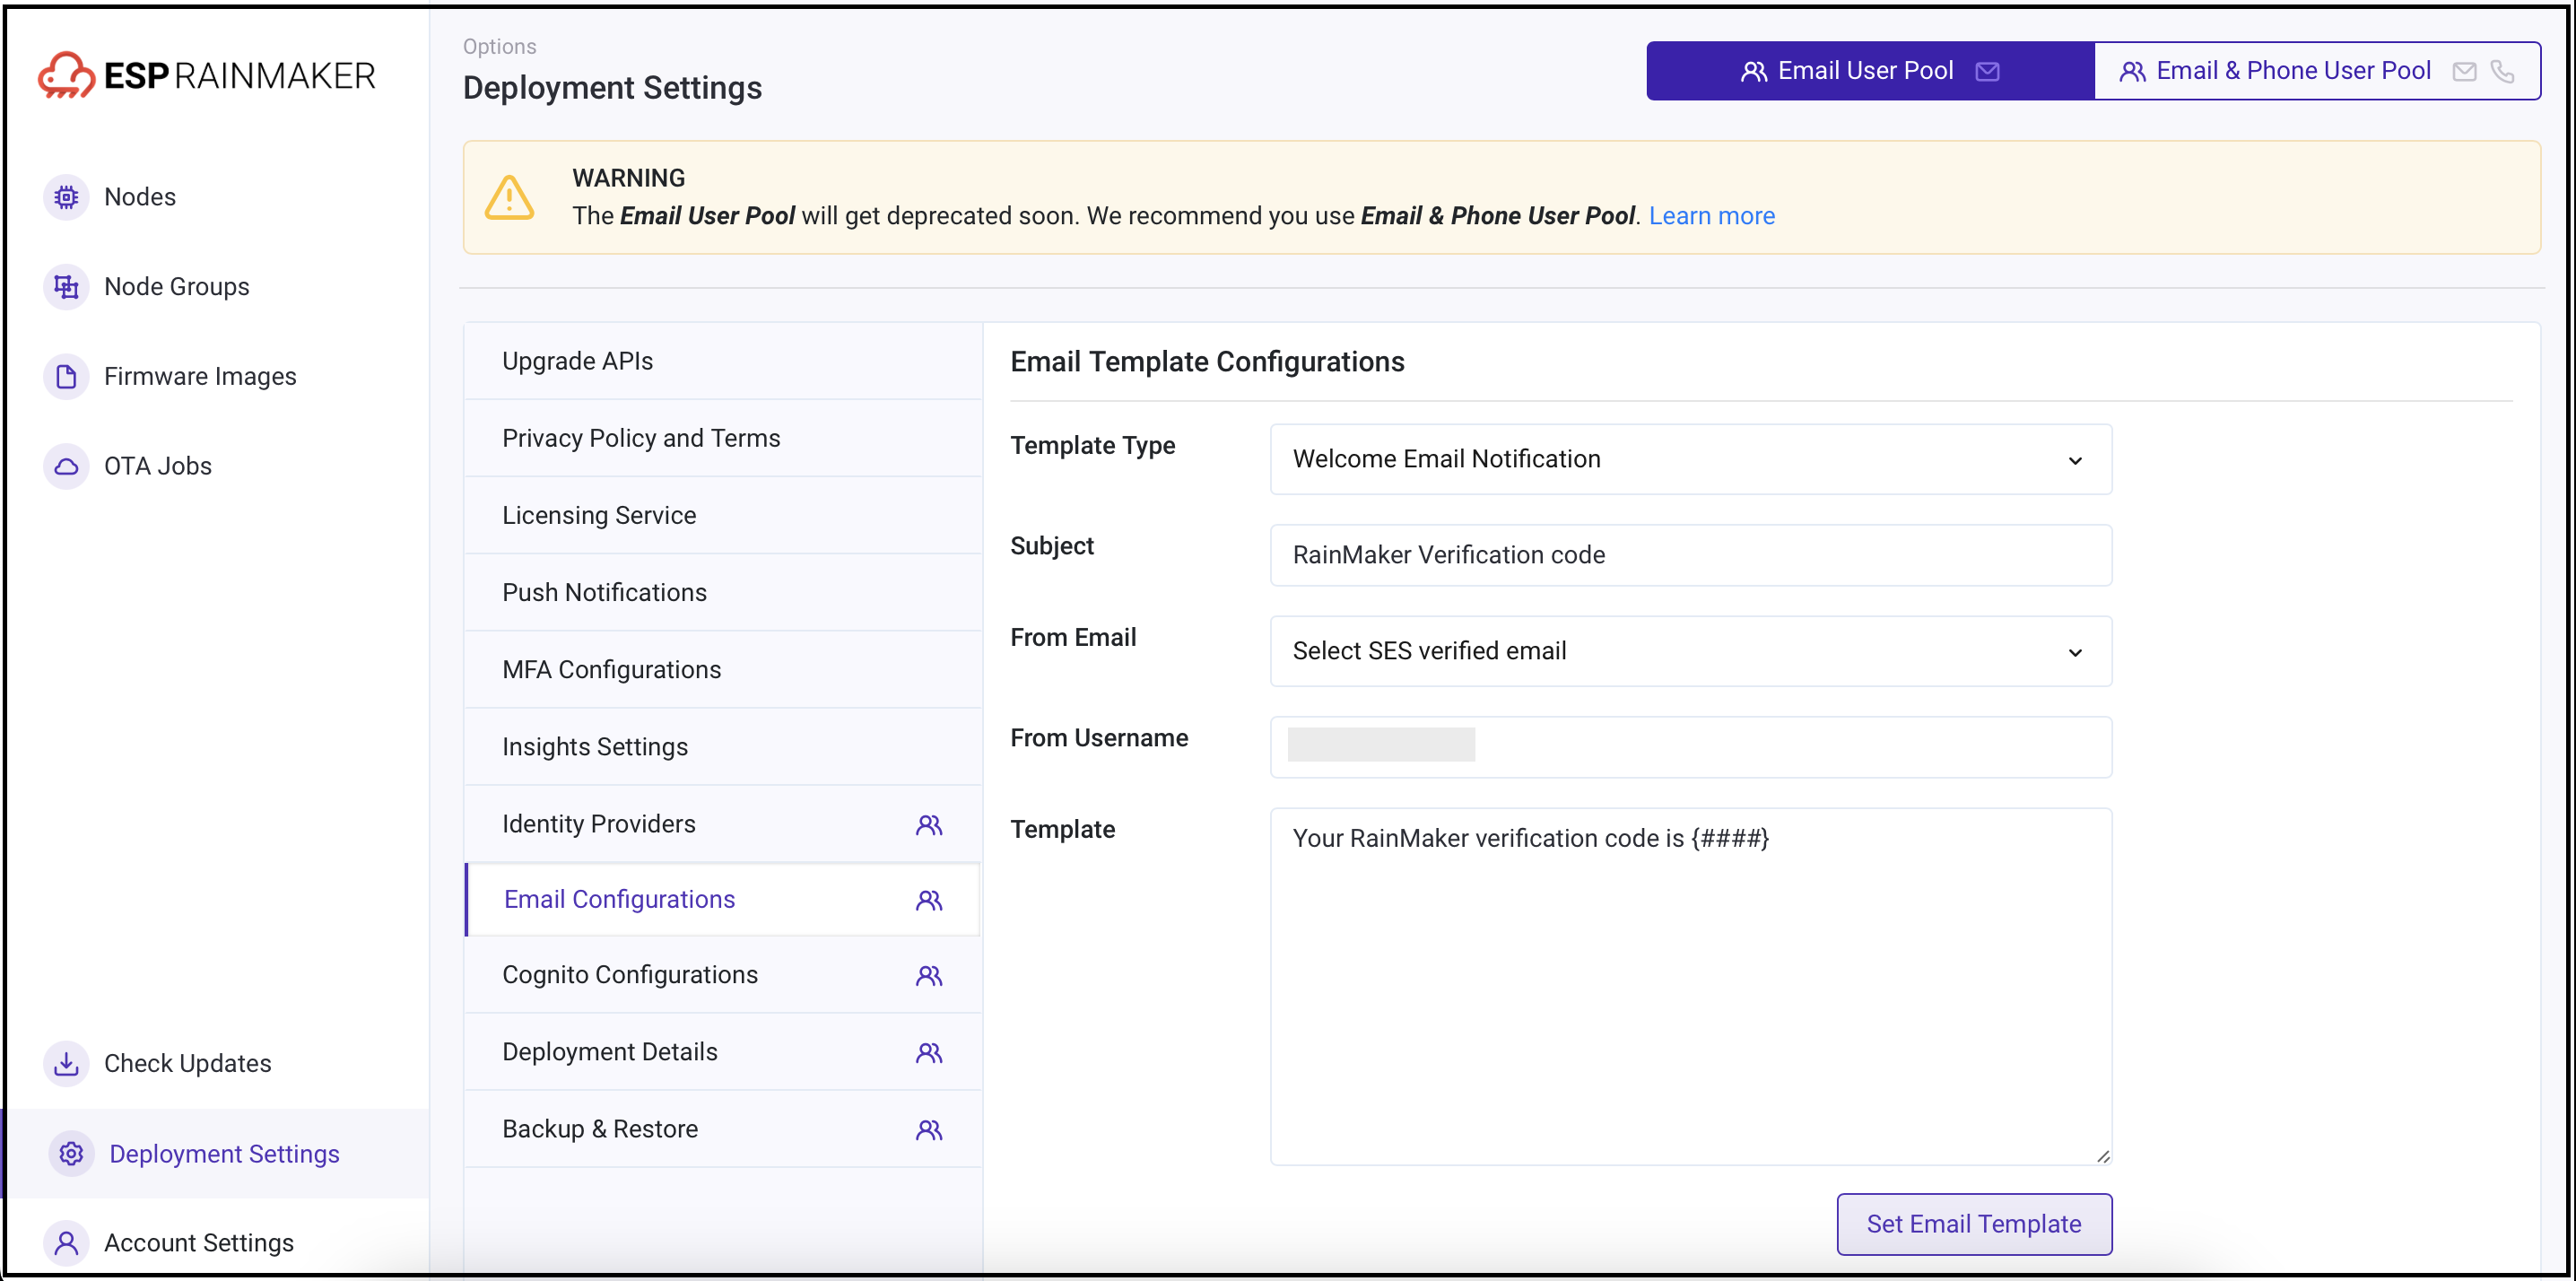
-
按照这些步骤为新用户池配置电子邮件模板,并填入记下的参数。
6. Skill 升级
-
打开 AWS 控制台,搜索 "Serverless Application Repository" 或 "SAR"。
-
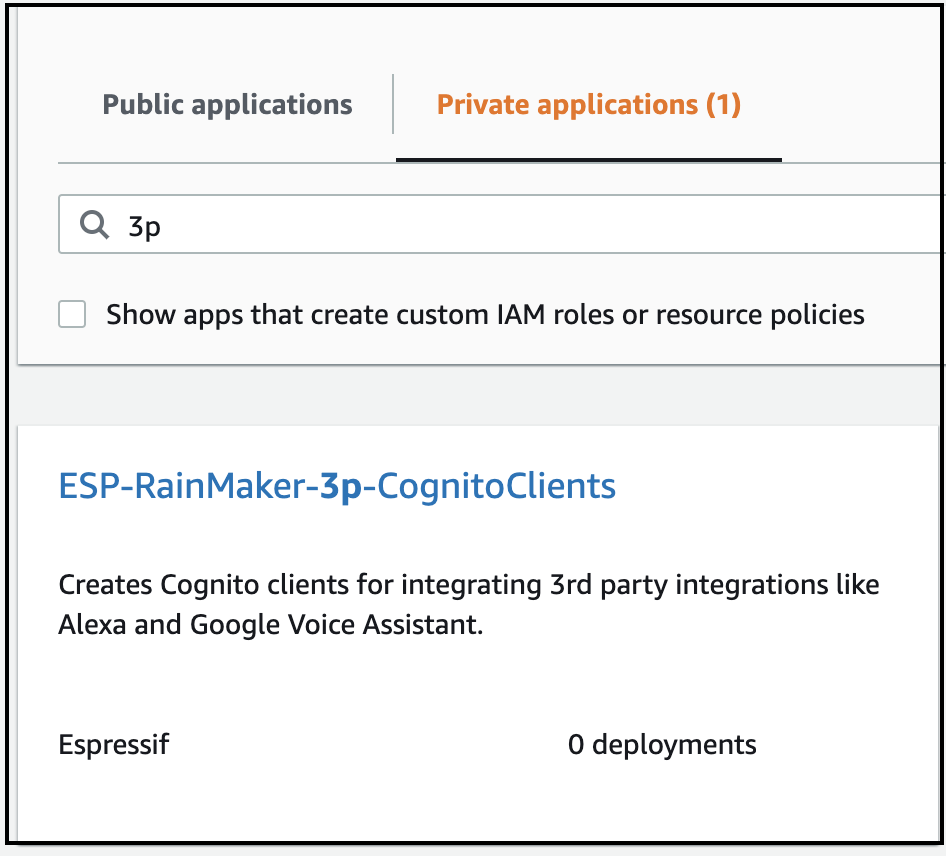
打开
Private applications,勾选Show apps that create custom IAM roles or resource policies。
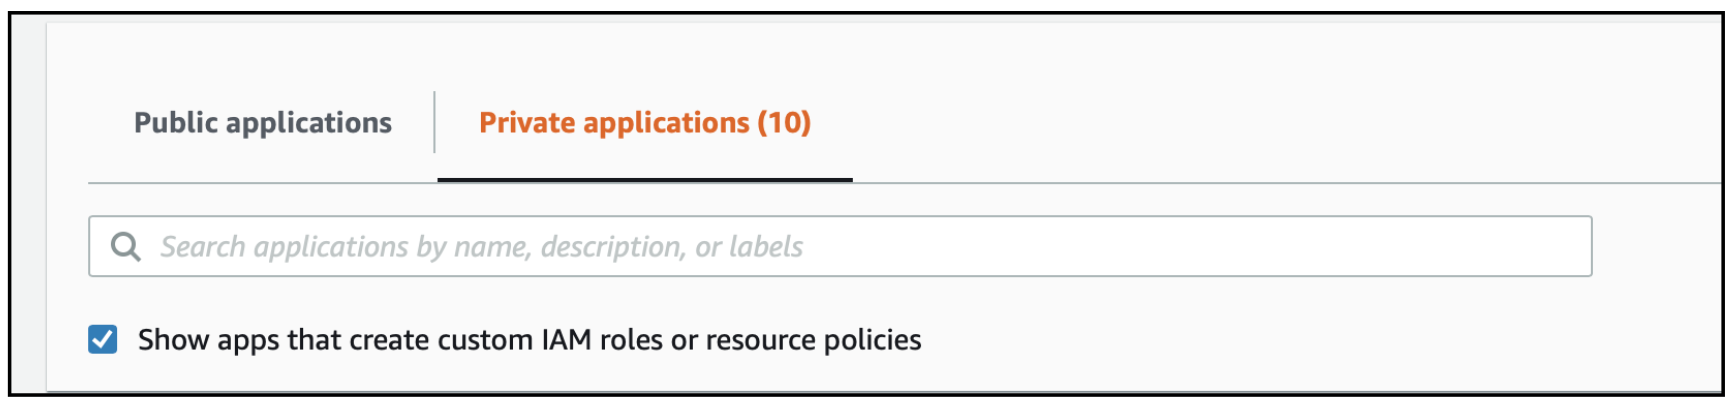
- 搜索并打开 "ESP-RainMaker-3p-CognitoClients"。
-
在新标签页中打开
CloudFormation服务,确保区域为 "us-east-1"。 -
打开
View Nested视图。 -
搜索堆栈名称 "serverlessrepo-ESP-RainMaker-3p-CognitoClients"。
-
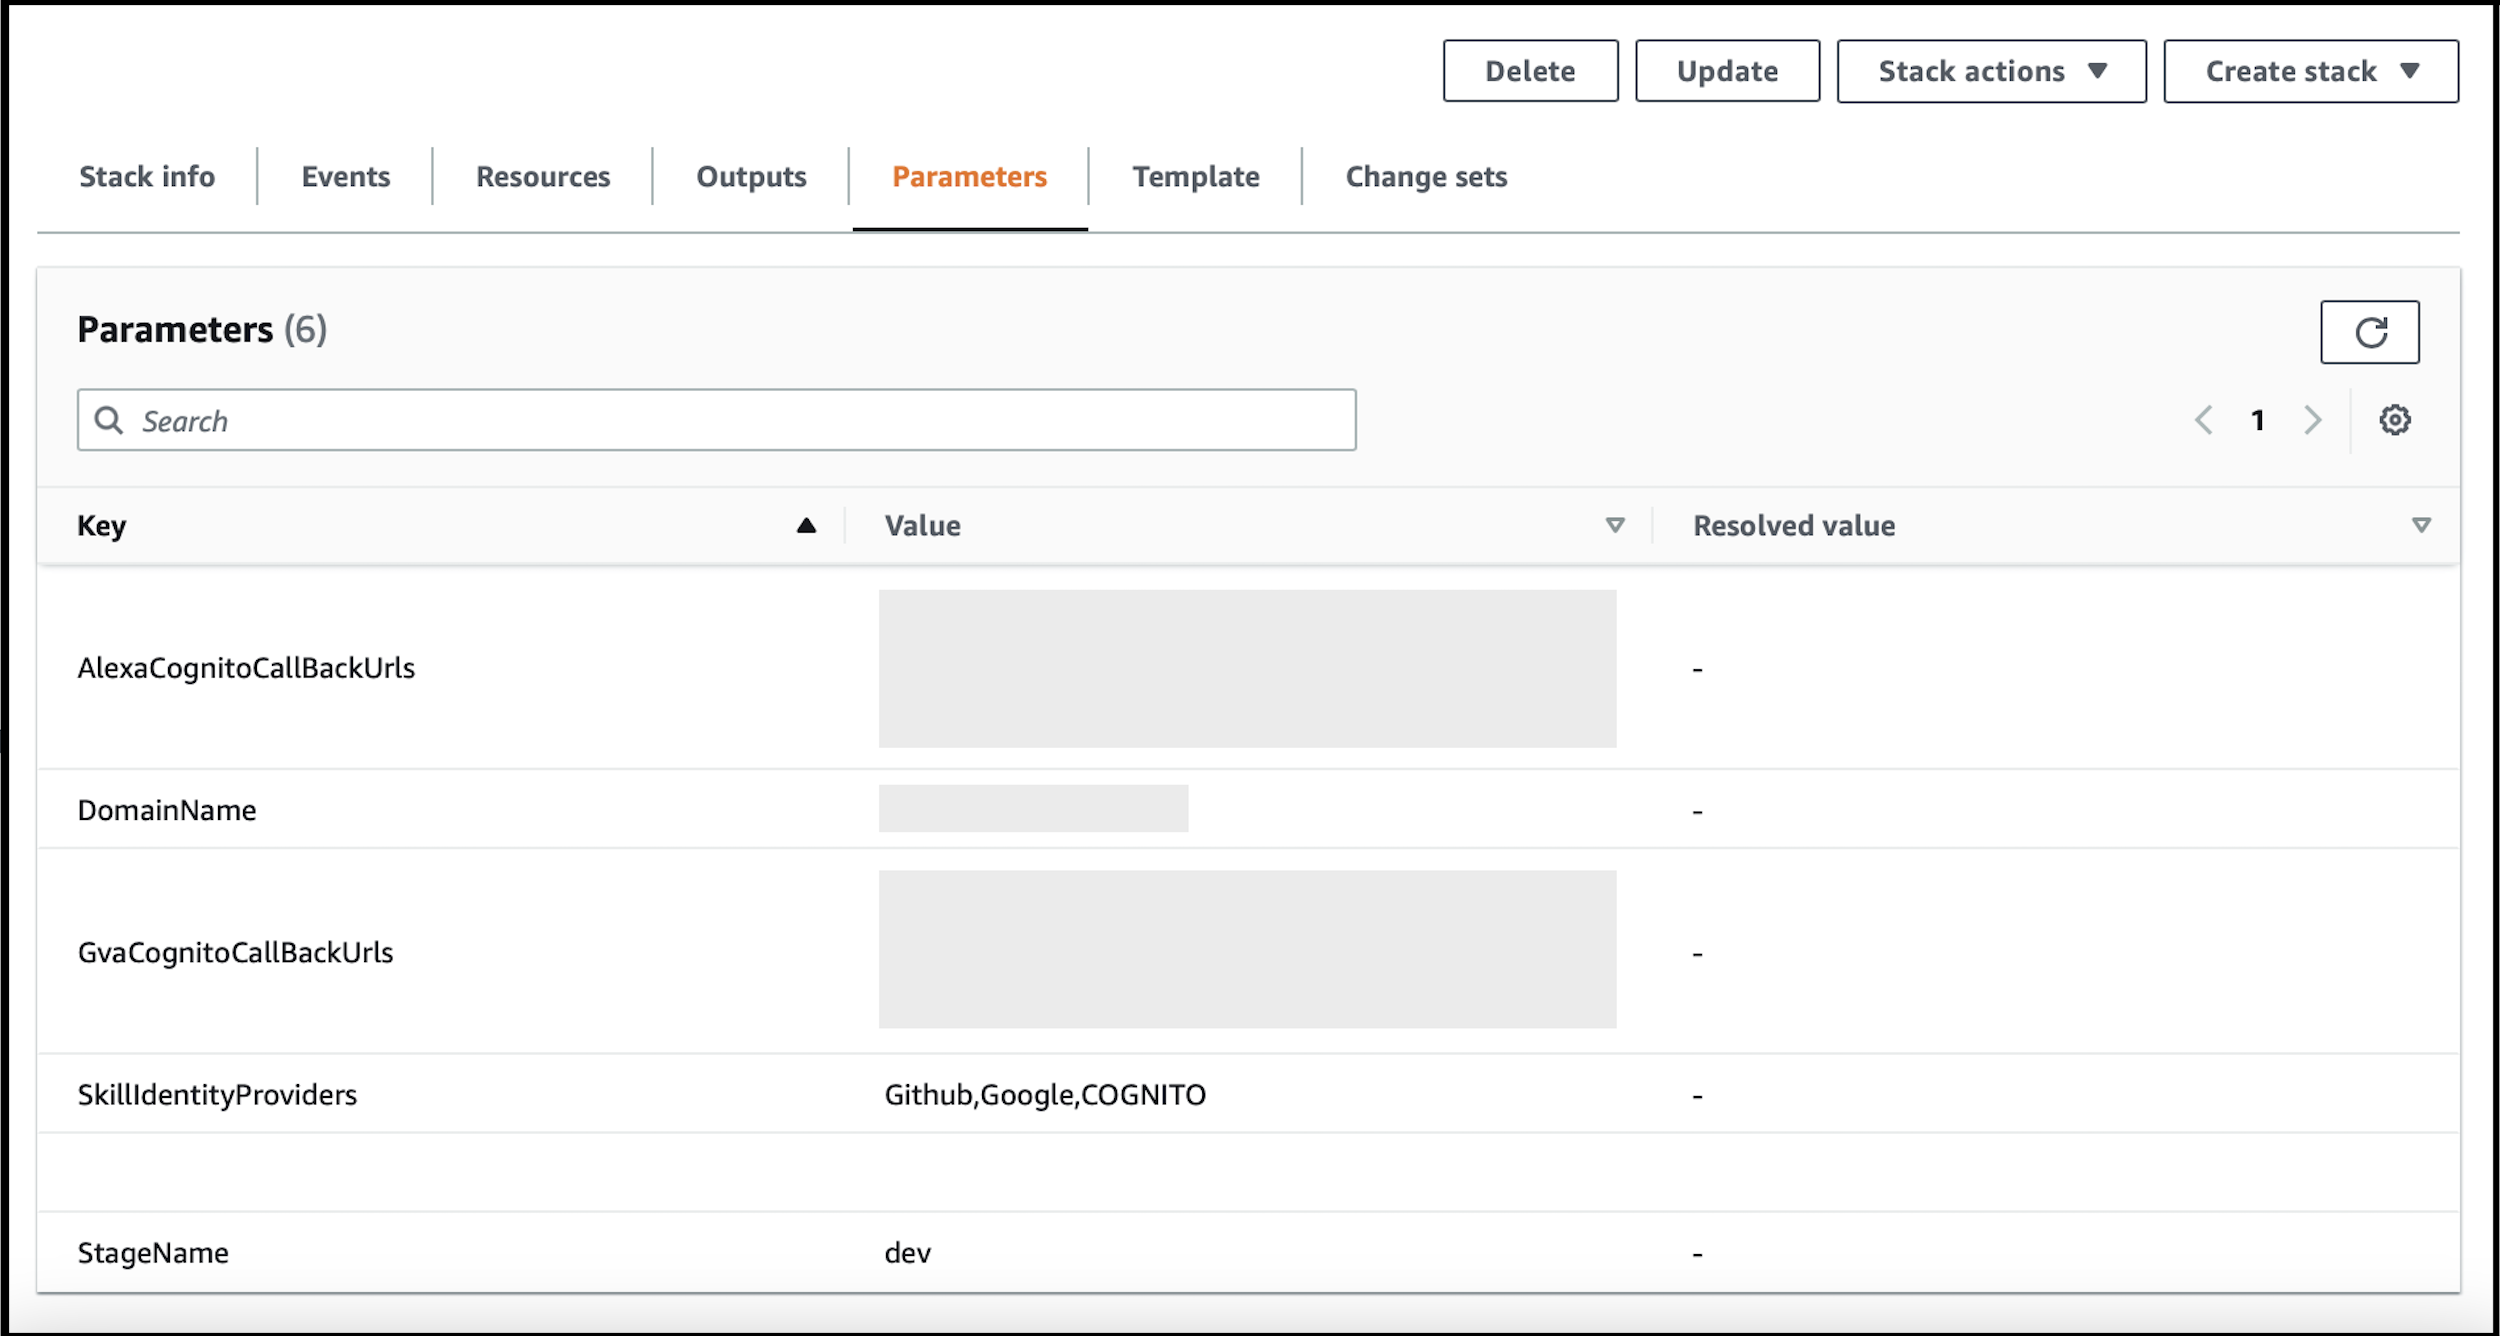
打开 CloudFormation 堆栈的
Parameters标签页。
-
返回 SAR 服务页面,查看需要填写的参数值。
-
查看所有 Cloudformation 参数的值,并将相应值复制到 SAR 服务页面的参数中。
-
参照下表为参数添加值:
| 参数名 | 获取步骤 |
|---|---|
| SkillIdentityProvidersNewUserPool | - 登录 RainMaker 管理面板。 - 点击左侧导航栏的 Deployment Settings。- 点击 Identity Providers 标签页。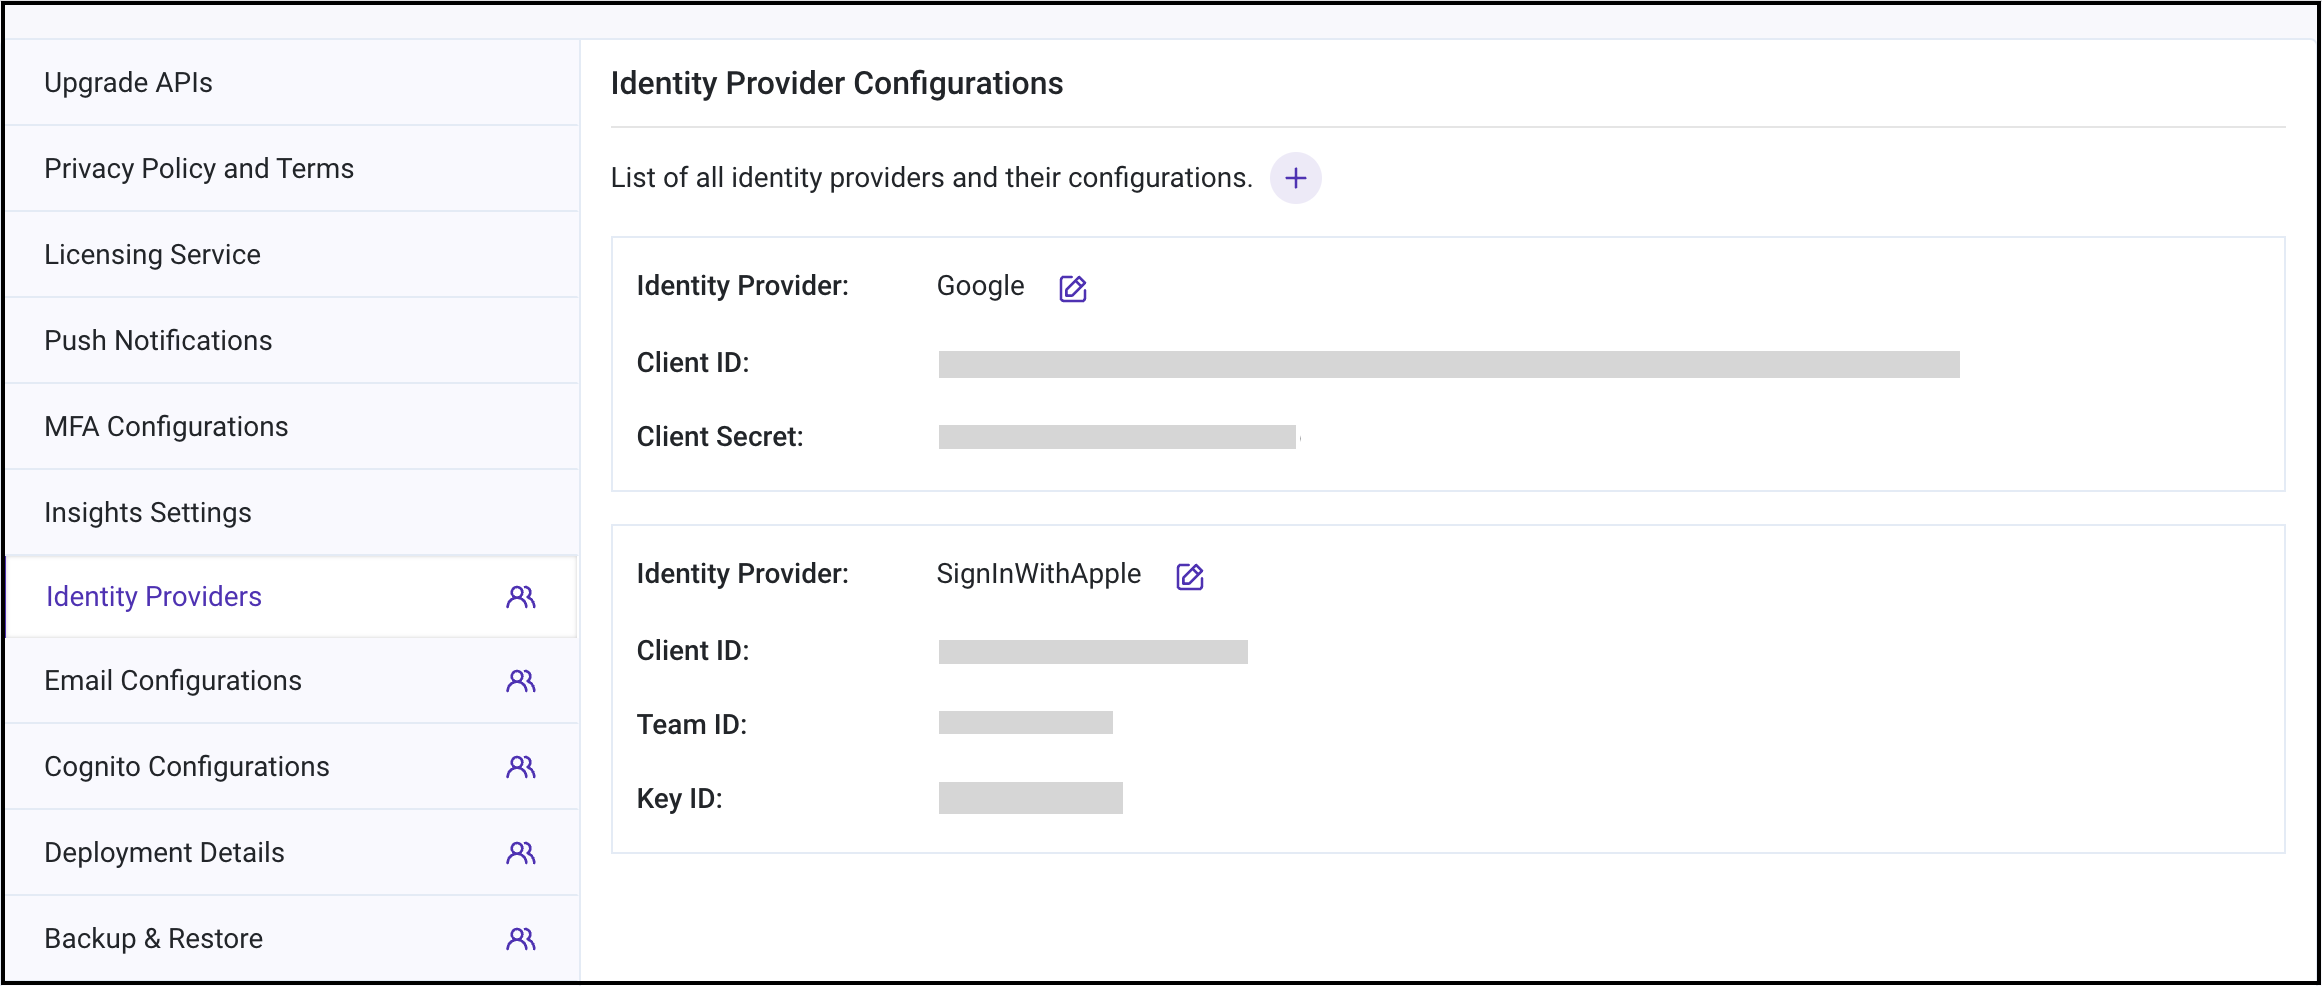 - 记下 Identity Providers 的值。- 如果已配置 Google、GitHub、SignInWithApple,则部署 ESP-RainMaker-3p-CognitoClients SAM 应用时,SkillIdentityProvidersNewUserPool 的值应为 Google, GitHub, SignInWithApple, COGNITO;如果未配置身份提供商,则默认值为 COGNITO。- 输入记下的身份提供商。 |
- 点击
Deploy。
7. 在 Skill 控制台手动更改配置并重新认证
7a. Alexa
-
登录 Alexa 开发者控制台。
-
选择之前创建的 Skill。
-
点击左侧导航栏中的
Account Linking。 -
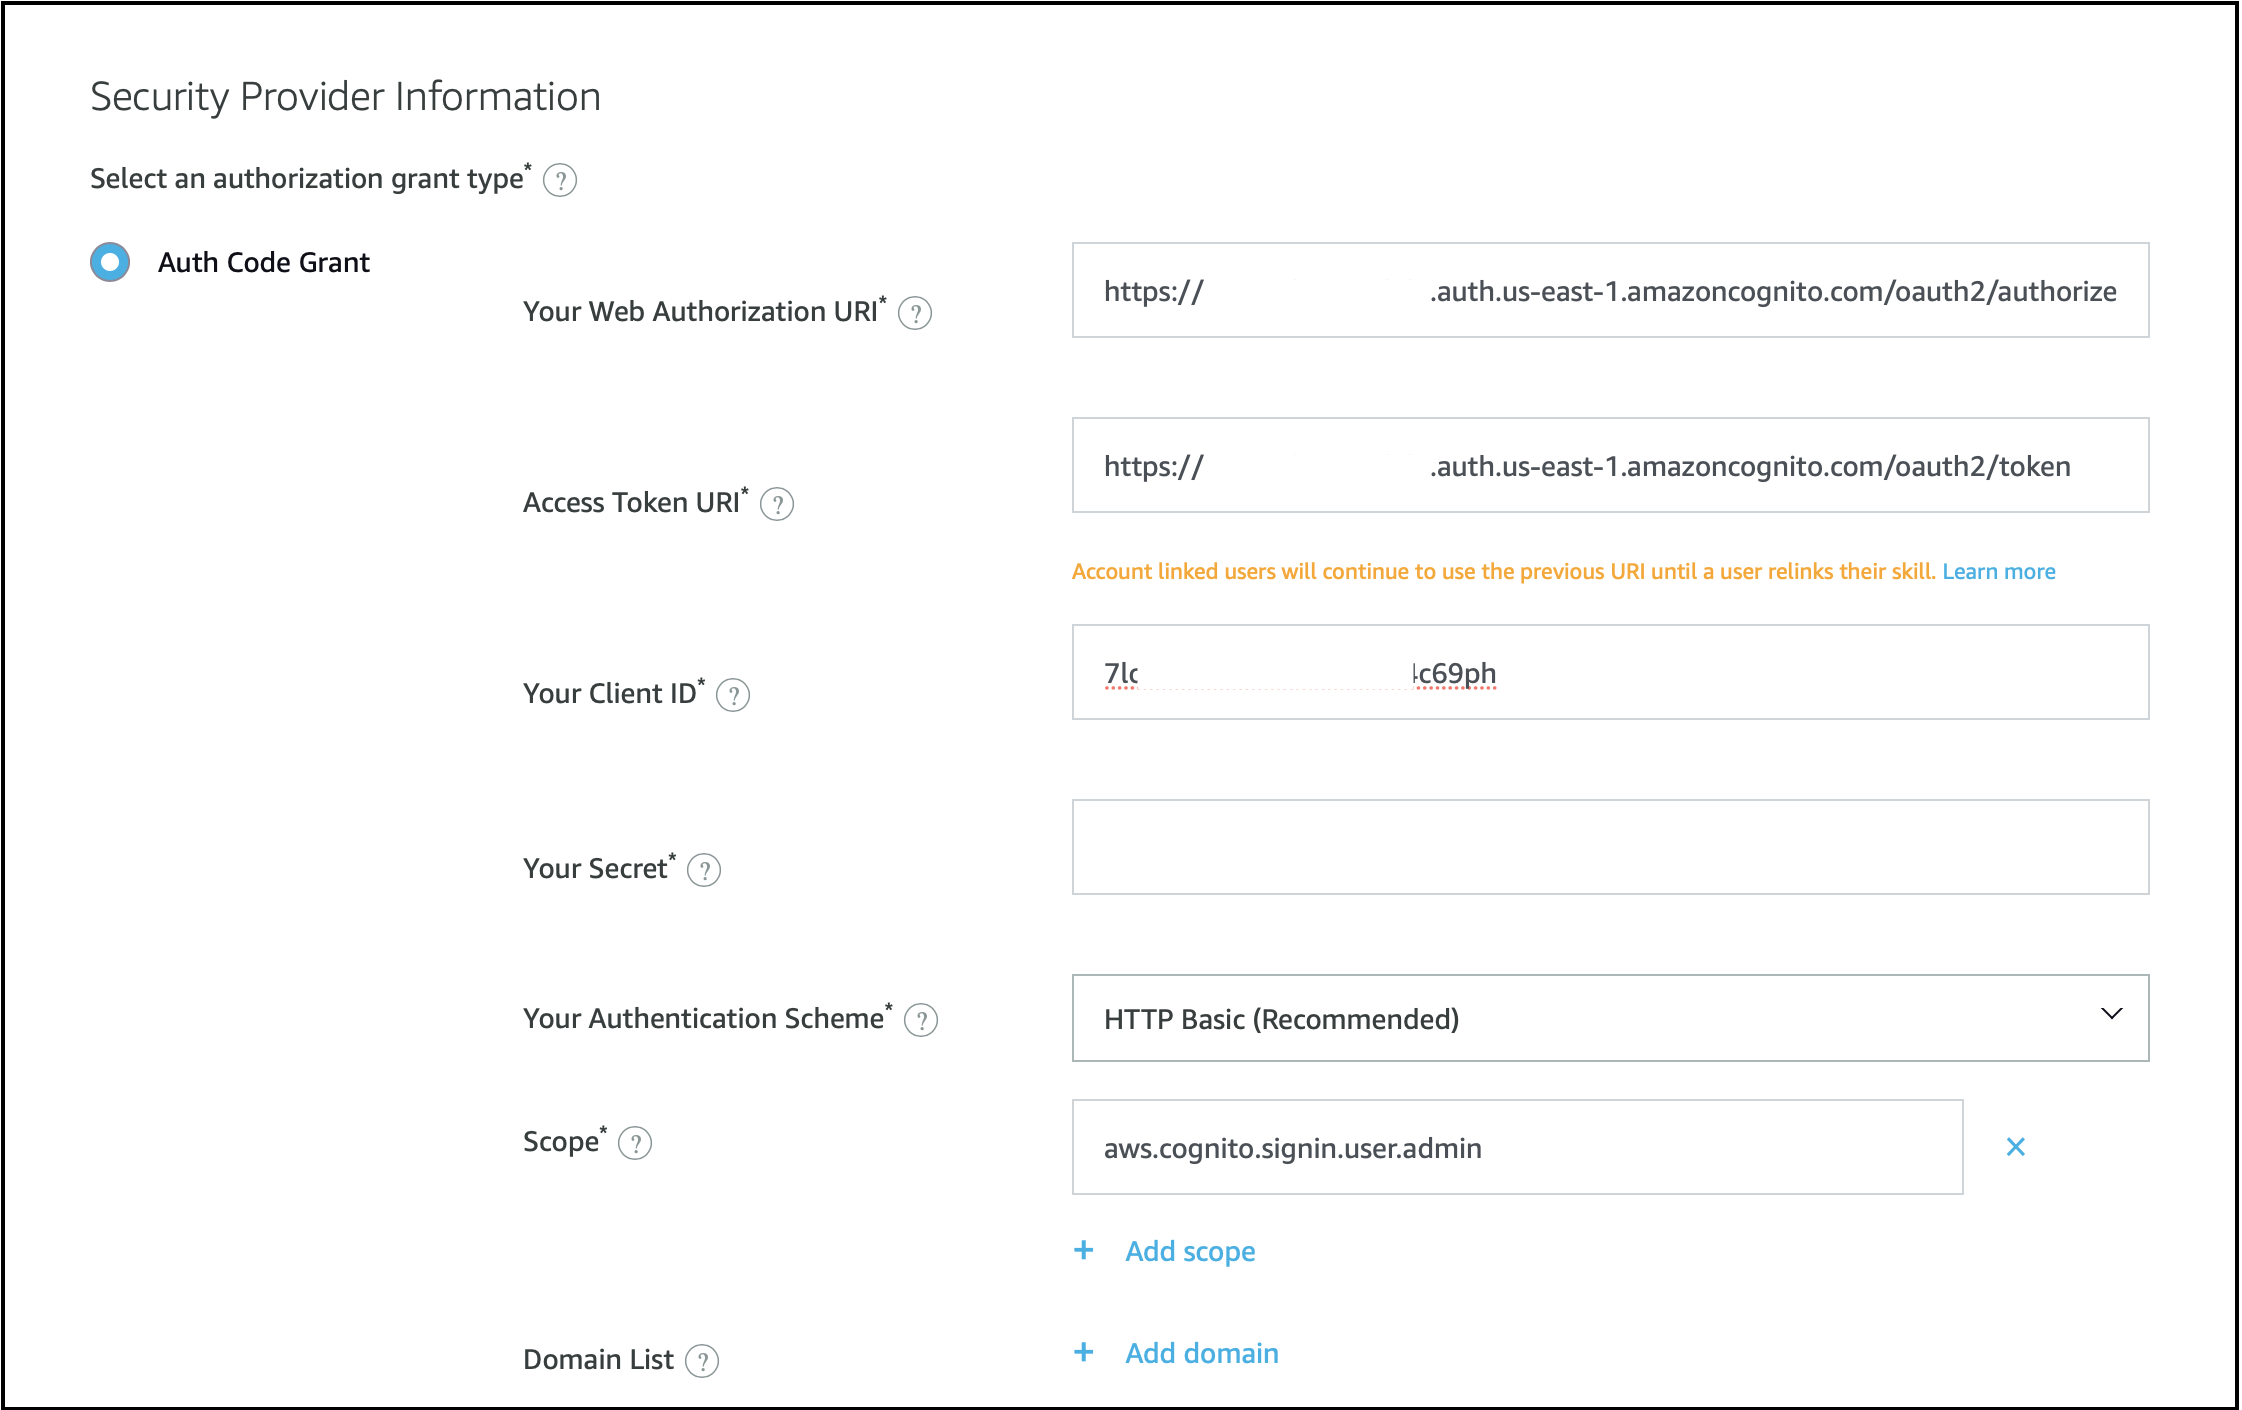
参照下表编辑相应参数值:
| 参数名 | 获取步骤 |
|---|---|
| Your Web Authorization URI | 该值为 https://<new-company-domain>.auth.<aws-region>.amazoncognito.com/oauth2/authorize,其中 <new-company-domain> 为步骤 2 中创建的新域。 |
| Access Token URI | 该值为 https://<new-company-domain>.auth.<aws-region>.amazoncognito.com/oauth2/token,其中 <new-company-domain> 为步骤 2 中创建的新域。 |
| Your Client ID 与 Your Secret | 按照步骤获取并复制 esp-rainmaker-alexa-skill 客户端信息。 |
- 参照这些步骤重新提交 Skill 以获取认证。
7b. 谷歌语音助手
-
打开相应 Action 的
Develop标签页。 -
打开
Account linking。
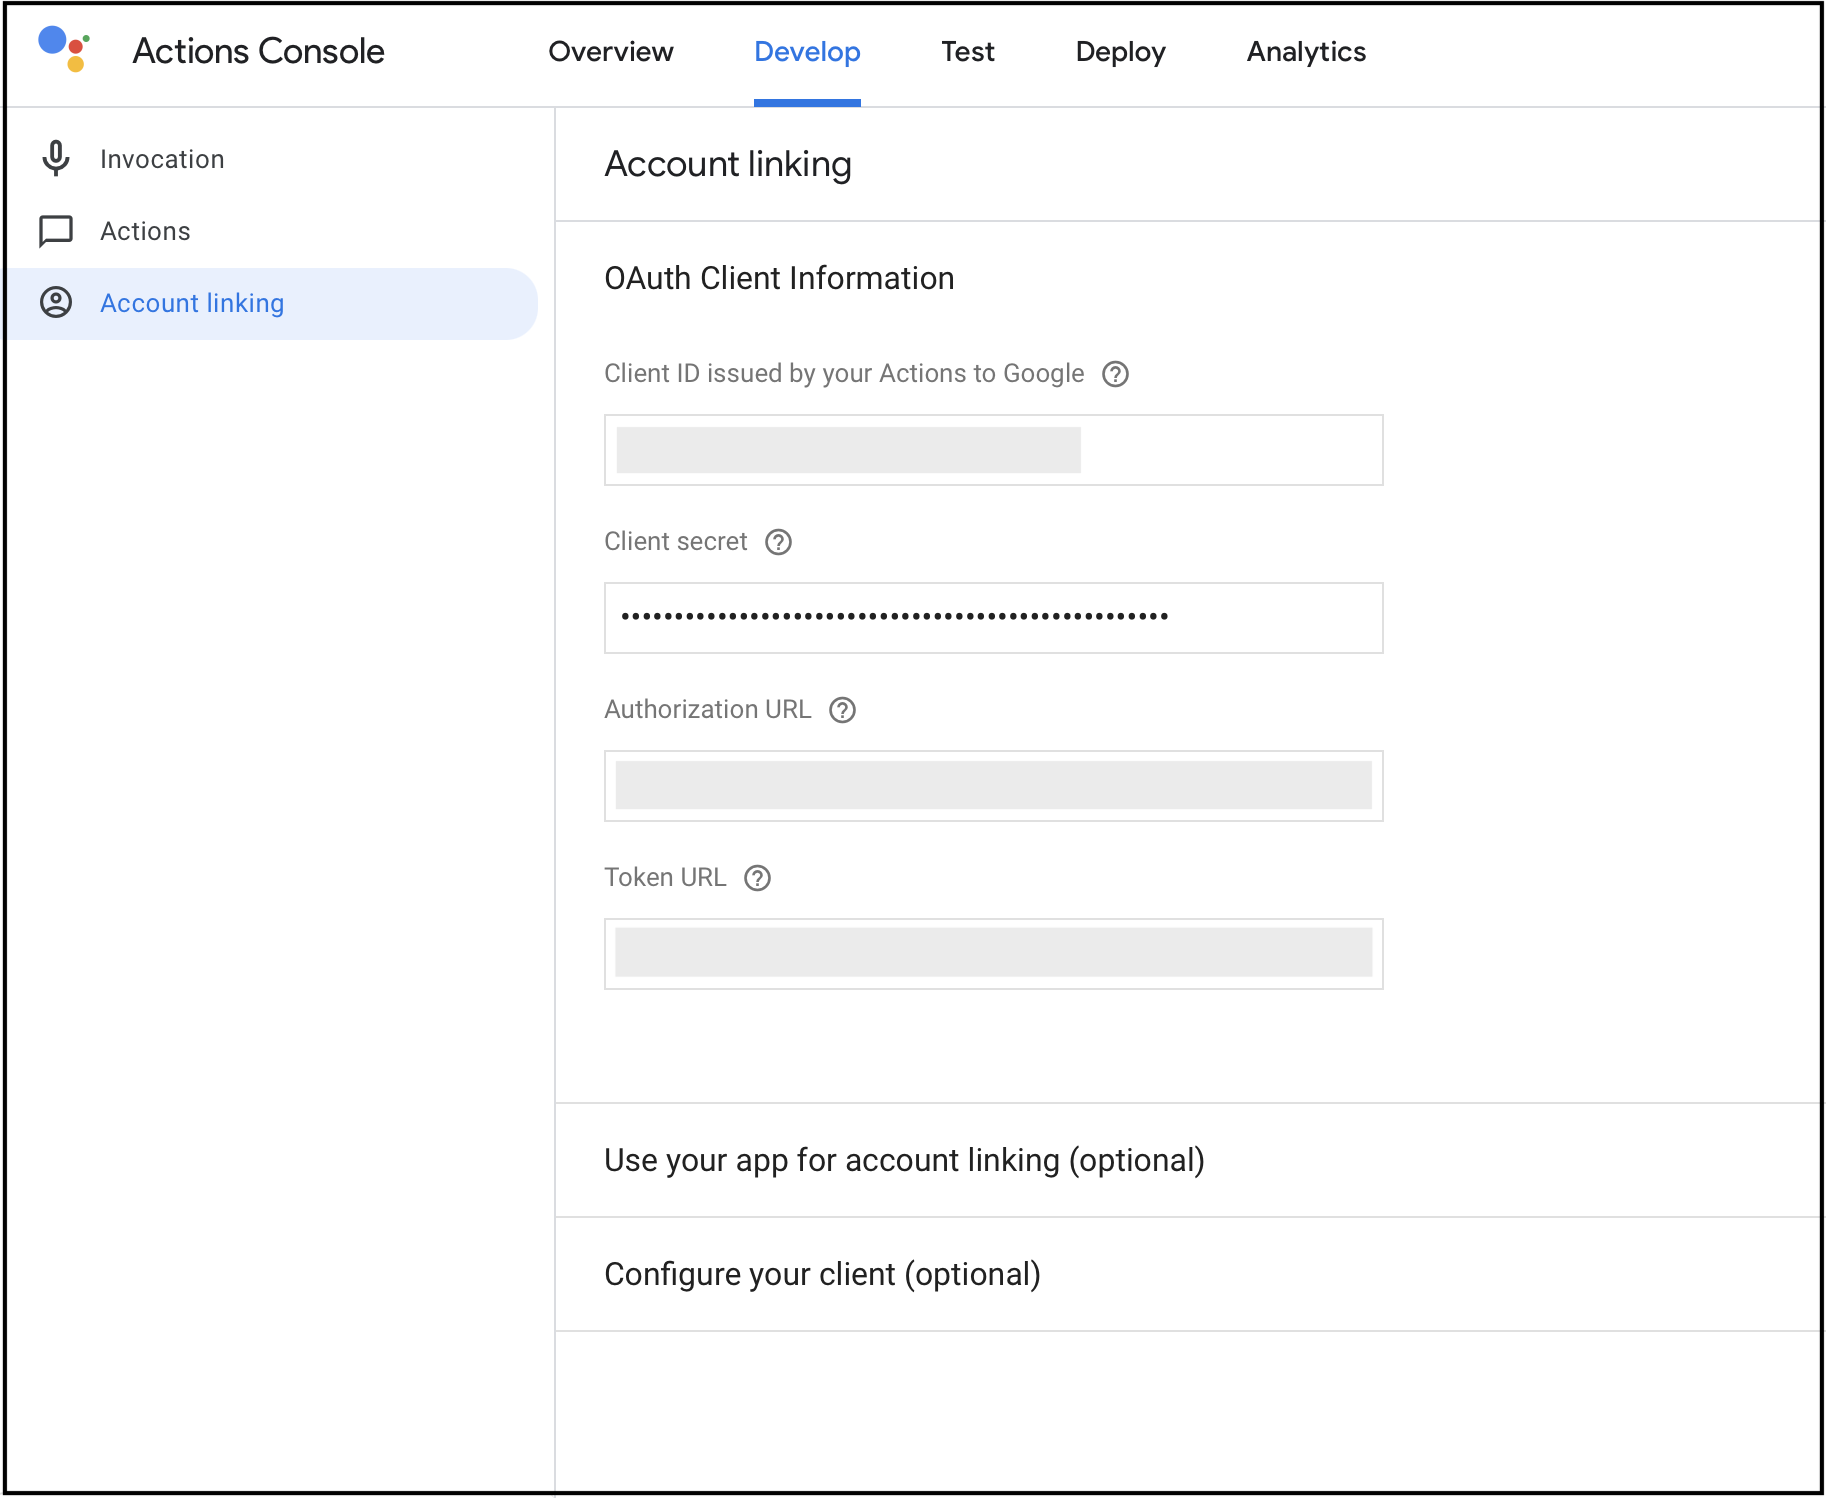
- 参照下表为参数添加值:
| 参数名 | 获取步骤 |
|---|---|
| Client ID 和 Client secret | 参考小节 Getting the Client ID and Client Secret for Alexa Skill and Google Action 中的步骤,复制 esp-rainmaker-google-action 的值。 |
| Authorization URL | 该值为 https://<new-company-domain>.auth.<aws-region>.amazoncognito.com/oauth2/authorize,其中 <new-company-domain> 为步骤 2 中创建的新域。 |
| Token URL | 如果已经在 Skill 中使用了新用户池,则该值为https://<new-company-domain>.auth.<aws-region>.amazoncognito.com/oauth2/token,其中 <new-company-domain> 是在步骤 2中创建的新域。若仍在使用旧的用户池: 1. 在新浏览器标签页中打开 RainMaker 管理面板。 2. 打开 Deployment Settings 标签页。3. 打开 Deployment Details,复制 API Path URI 的值。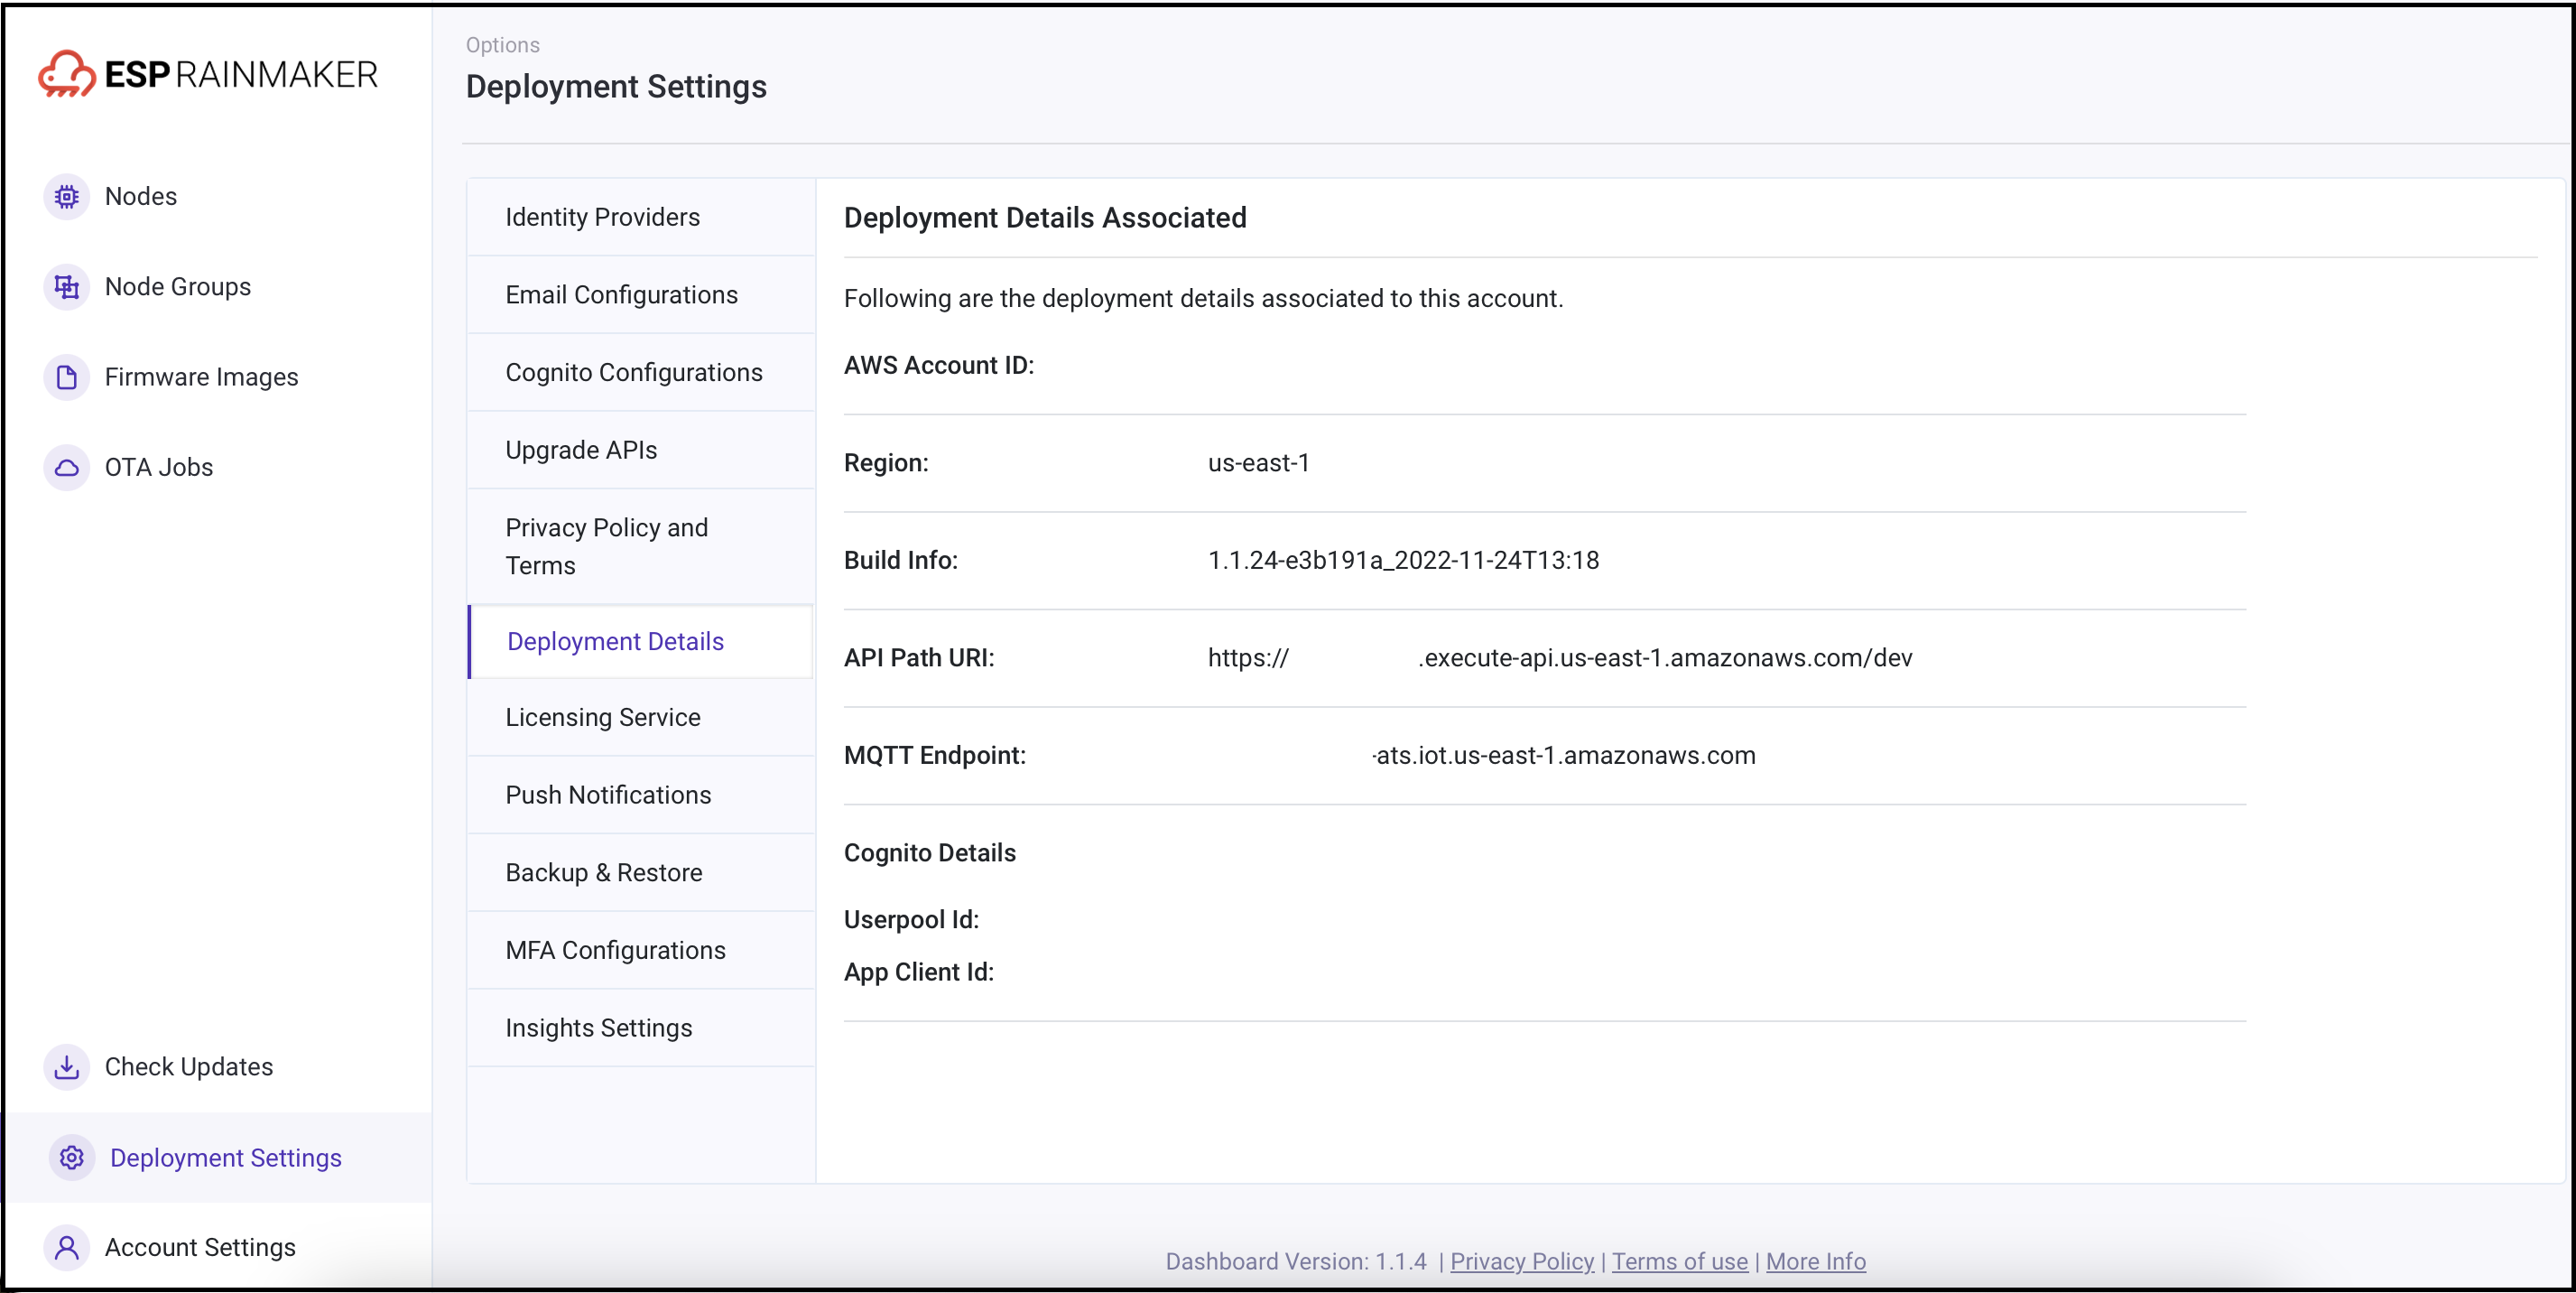 4. 将 Token URI 编辑为:<api_path_uri>/custom_token,其中 <api_path_uri> 是上一步中复制的 URL。 |
- 完成以下步骤:
8. 移动应用配置
8a. 安卓
-
在 Android Studio 中打开 RainMaker 项目(拉取并合并最新的源代码:https://github.com/espressif/esp-rainmaker-android)。
-
在
local.properties文件中,编辑以下字段的值。
| 字段 | 类型 | 获取步骤 |
|---|---|---|
| authUrl | 字符串 | OAuth URL:https://<new-company-domain>.auth.<aws_region>.amazoncognito.com/oauth2,其中 <new-company-domain> 为步骤 2 中创建的新域。 |
| clientId | 字符串 | 在用户池中标识一个特定的应用程序。参考[获取 Client ID 的步骤](/i18n/zh-Hans/docusaurus-plugin-content-docs/current/deployment_section/faq-deployment/faq-generic.md#在哪里可以找到第三方集成和手机应用的-client-id-和回调 -url)。 |
| alexaRMClientId(如果已设置 Alexa) | 字符串 | 参考[获取 Alexa 和 GVA 的 Client ID 步骤](/i18n/zh-Hans/docusaurus-plugin-content-docs/current/deployment_section/faq-deployment/faq-generic.md#在哪里可以找到-alexa-和-gva-的-client-id-和回调 -url),复制 esp-rainmaker-alexa-skill 的客户端 ID。 |
- 完成后,在 Play Store 中重新发布应用程序。
8b. iOS
-
在 Xcode 中打开 RainMaker 项目(拉取并合并最新的源代码:https://github.com/espressif/esp-rainmaker-ios)。
-
打开
Configuration.plist文件,编辑以下字段。
| 字段 | 类型 | 获取步骤 |
|---|---|---|
| App Client ID | 字符串 | 在用户池中标识一个特定的应用程序。参考[获取 Client ID 的步骤](/i18n/zh-Hans/docusaurus-plugin-content-docs/current/deployment_section/faq-deployment/faq-generic.md#在哪里可以找到第三方集成和手机应用的-client-id-和回调 -url)。 |
| Authentication URL | 字符串 | OAuth URL:https://<new-company-domain>.auth.<aws_region>.amazoncognito.com/oauth2,其中 <new-company-domain> 为步骤 2 中创建的新域。 |
| Alexa RM Client ID(*如设置了 Alexa) | 字符串 | 参考[获取 Alexa 和 GVA 的 Client ID 步骤](/i18n/zh-Hans/docusaurus-plugin-content-docs/current/deployment_section/faq-deployment/faq-generic.md#在哪里可以找到-alexa-和-gva-的-client-id-和回调 -url),复制 esp-rainmaker-alexa-skill 的客户端 ID。 |
- 完成后,在 App Store 上重新发布应用程序。
迁移到新用户池的影响
如果已经在旧用户池完成了 Alexa Skill App-to-App 账号关联功能配置,那么用户只需更新应用程序,就可以将 Alexa Skill 无缝迁移到新用户池。
但是,如果用户尚未更新其应用程序,仍在使用针对旧用户池配置的旧版本,那么 App-to-App 账号关联功能配置可能会失败。如遇到此问题,请将应用程序升级到最新版本。
现有的已关联账号将保持不变,无需重新关联。
建议提醒所有用户及时更新应用程序,以避免上述问题。