Deployment Prerequisites
Welcome to the prerequisites section, the first of four stages in the deployment of private RainMaker. 🚀
This section would provide a prerequisites guide to ensure a successful deployment of private RainMaker. There will also be differences in the deployment of private RainMaker between the Global and China regions.
- Global Region
- China Region
Before preoceeding, a deep understanding of AWS Services is not required to deploy RainMaker. However, familiarity with the AWS Management Console and AWS services like CloudFormation, CloudWatch, etc will be helpful.
All repositories under SAM are deployed through the AWS Management Console, which can be accessed from any Browser. No specific operating system is required.
Required Accounts
Since private RainMaker provides you with full control over your data and integrations, the accounts and tools listed below give an overview of the necessary accounts you’ll need to manage.
We will cover the details in the following sections.
Core Accounts
1. An AWS Global Account
2. Admin CLI
AWS Global Account: Mandatory requirement for private deployment as all services are deployed on AWS.
RainMaker Admin CLI: Use this to generate the device credentials.
Related Accounts (Global)
1. Google/Apple Login Authentication
2. GVA/Alexa Voice Assistant Account
3. Google/Apple App Developer Account
Google Developer Account: Required for uploading Android apps to Google Play store. It is also used for configuring Sign in with Google (optional), integrating Google Voice Assistant (optional), and setting up push notifications.
Apple Developer Account: Required for iOS app development and publishing on the Apple App Store. It is also needed for configuring Sign in with Apple and setting up push notifications.
Alexa Developer Account: Required for developing Alexa Smart Home Skills (optional).
- Core Accounts are the minimum required accounts to deploy private cloud via AWS and generate device credentials.
- Related Accounts are supporting accounts within the RainMaker deployment ecosystem, typically required for third-party logins, phone app publishing, notification services, etc.
- Some Related Accounts will require additional configurations and certifications.
Now that you are familiar with the accounts for private deployment, lets now dive into the specifics.
Create an AWS Account and Use an IAM User
Before creating an AWS account, please note that you will need to set up an IAM user within your AWS account when deploying private RainMaker. Logging in via an IAM user should be the default method for deployment-related tasks. Avoid using the Root user for account access.
Using an IAM user instead of the root user in AWS improves security by following the principle of least privilege. This reduces the risk of unauthorized, accidental, or malicious changes to your AWS account.
If you already have an AWS account, follow the steps below to create an IAM User with Administrative access.
- Create AWS Account
- Create IAM User with Administrative Access
Follow the link below for detailed steps on creating and activating an AWS account.
How to create an AWS account
Steps to create an IAM user with administrative access:
- Log in to the AWS Management Console and navigate to the IAM service.
- Select the
Userstab.
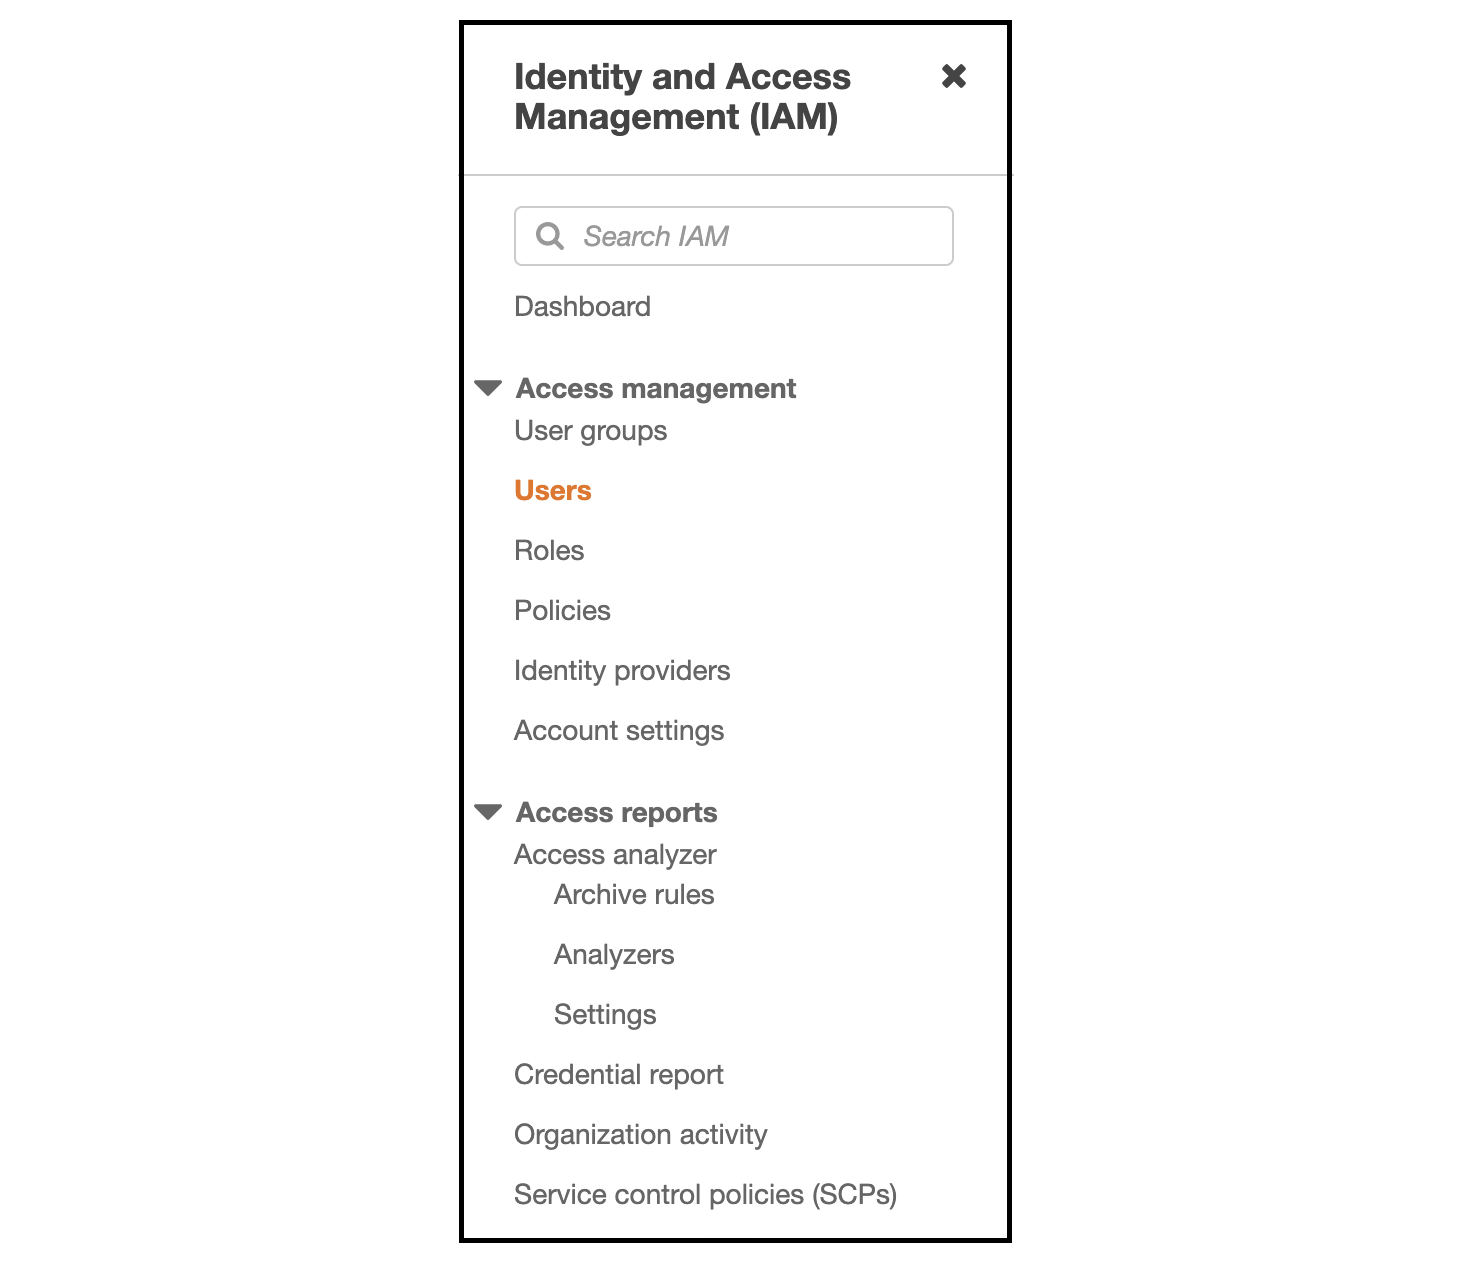
- Click
Add users.

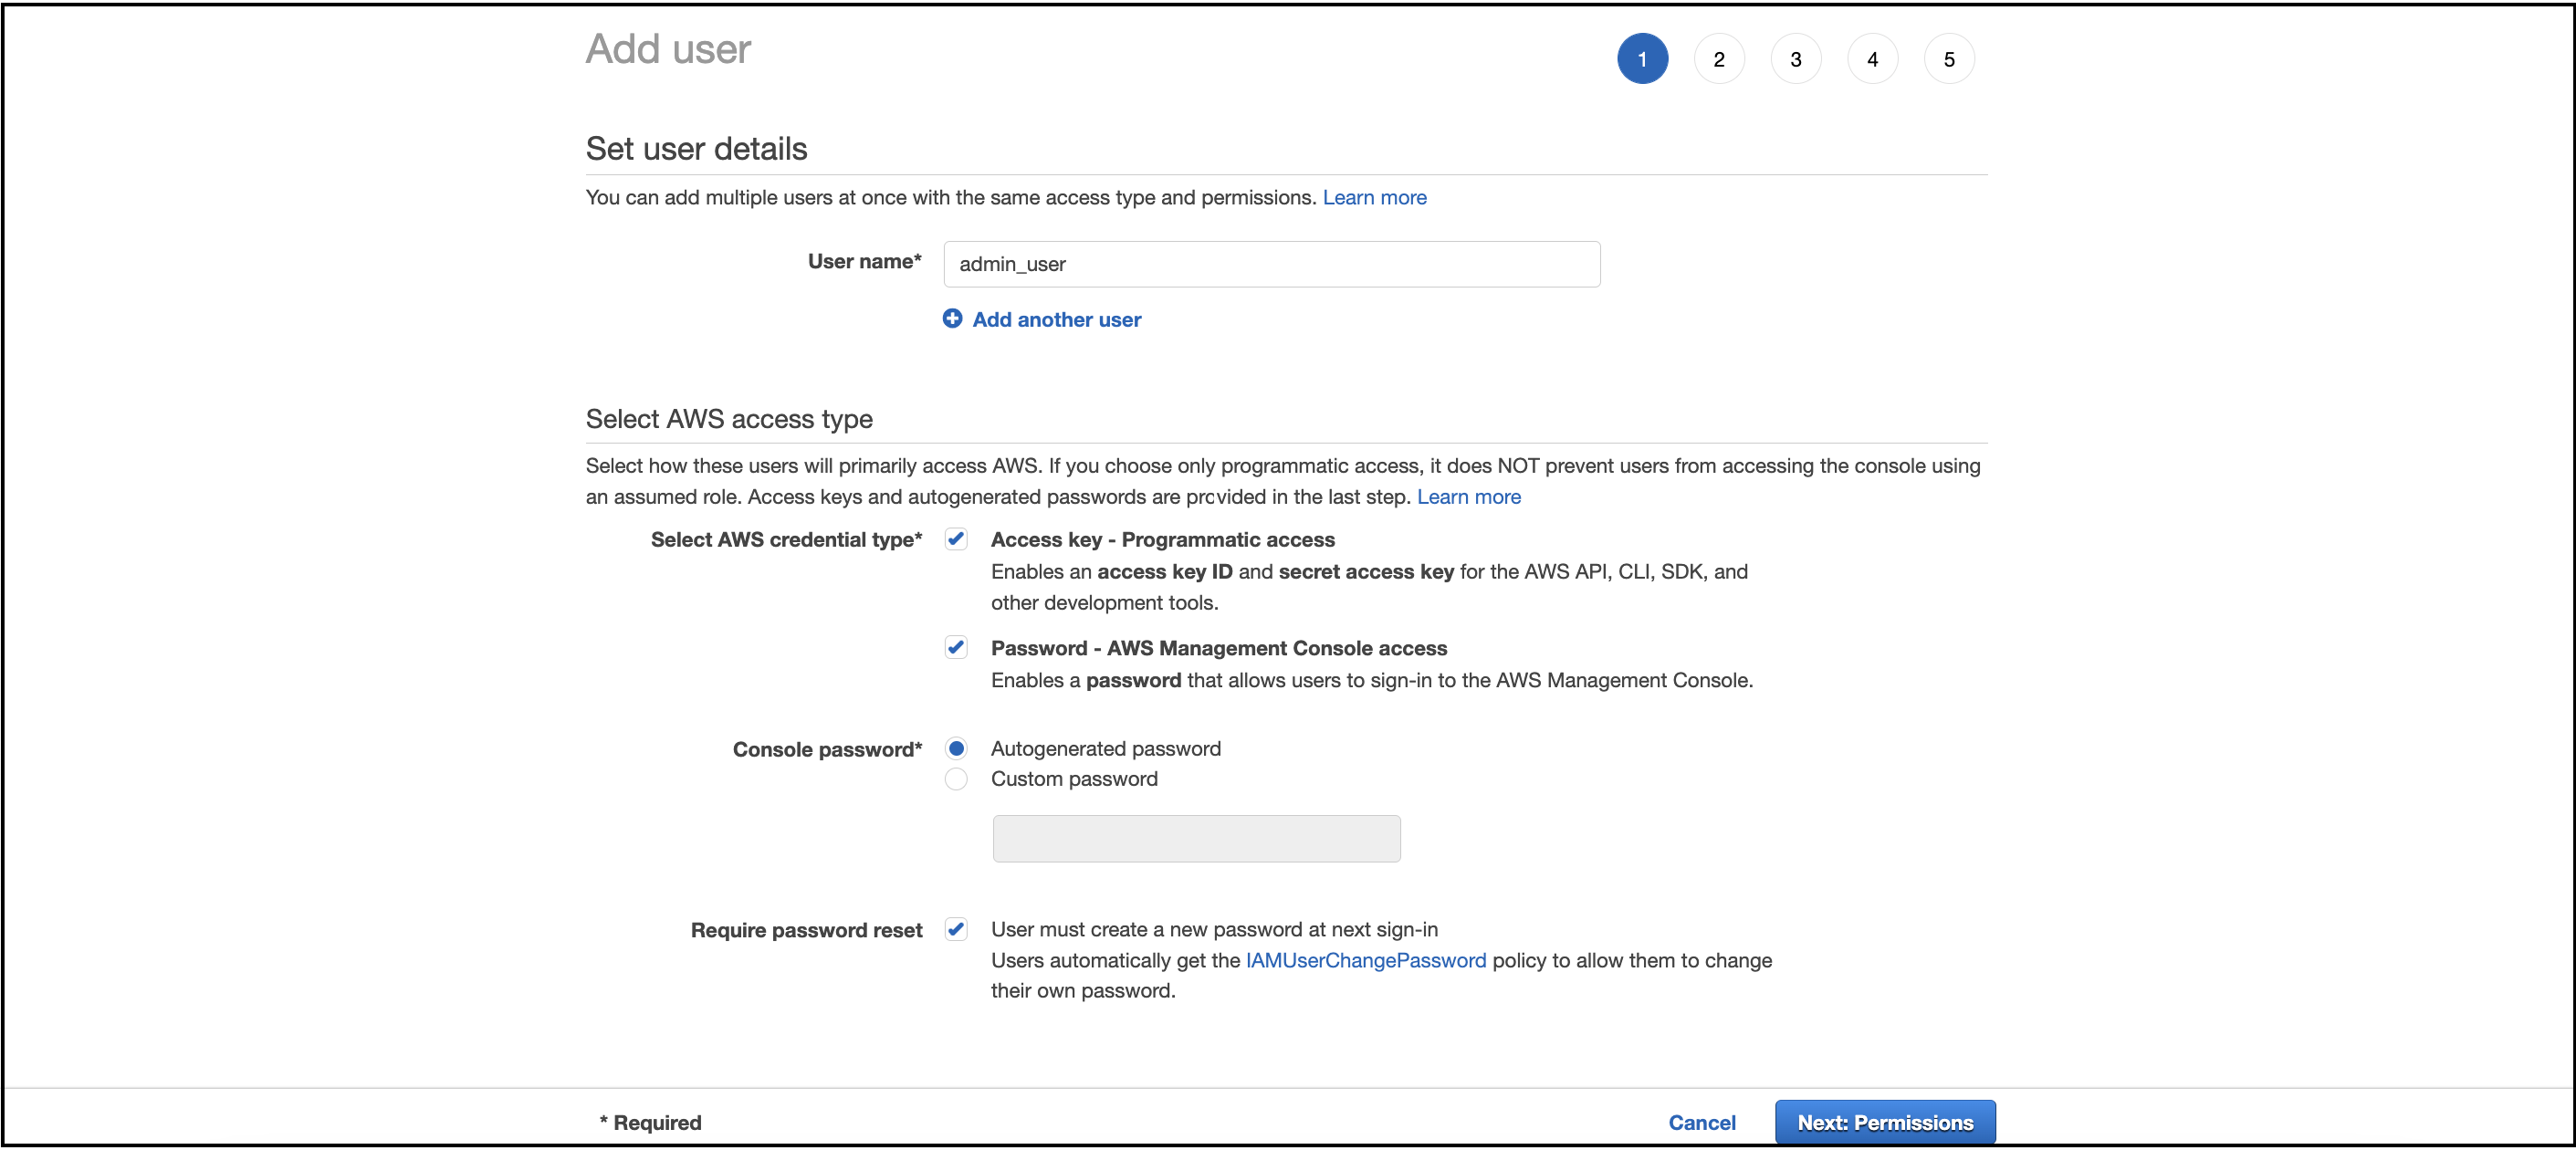
- Enter the
User nameand select the following access types:
- Programmatic access
- AWS Management Console access
- Leave other settings as default
- Programmatic access
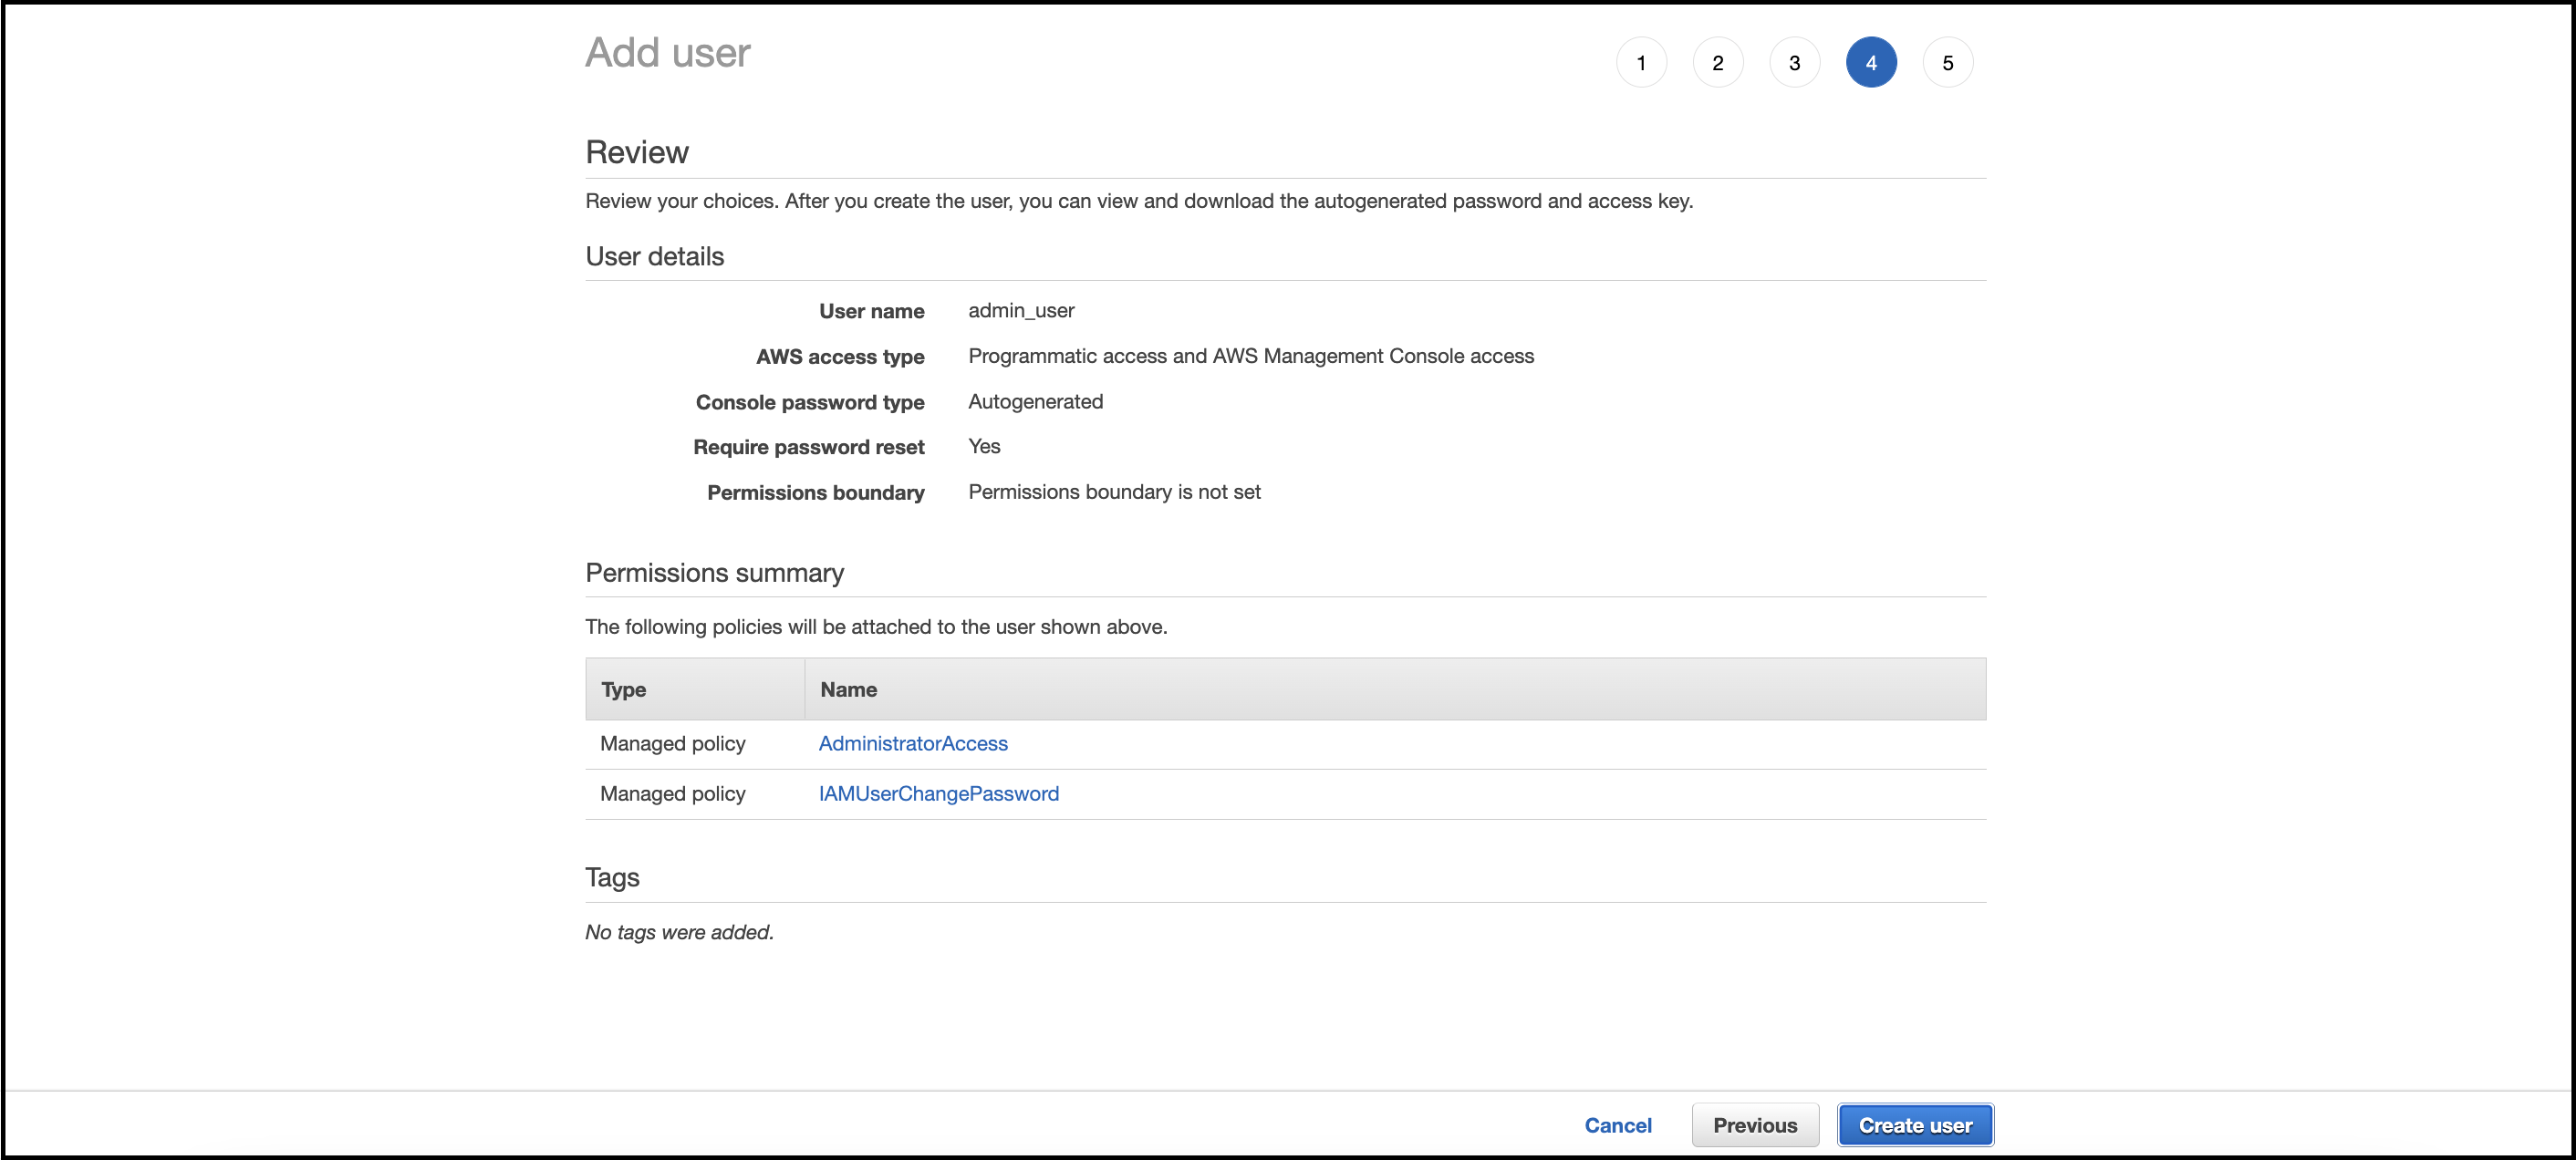
- Choose
Attach existing policies directly. Select theAdministratorAccesspolicy to grant administrative permissions.

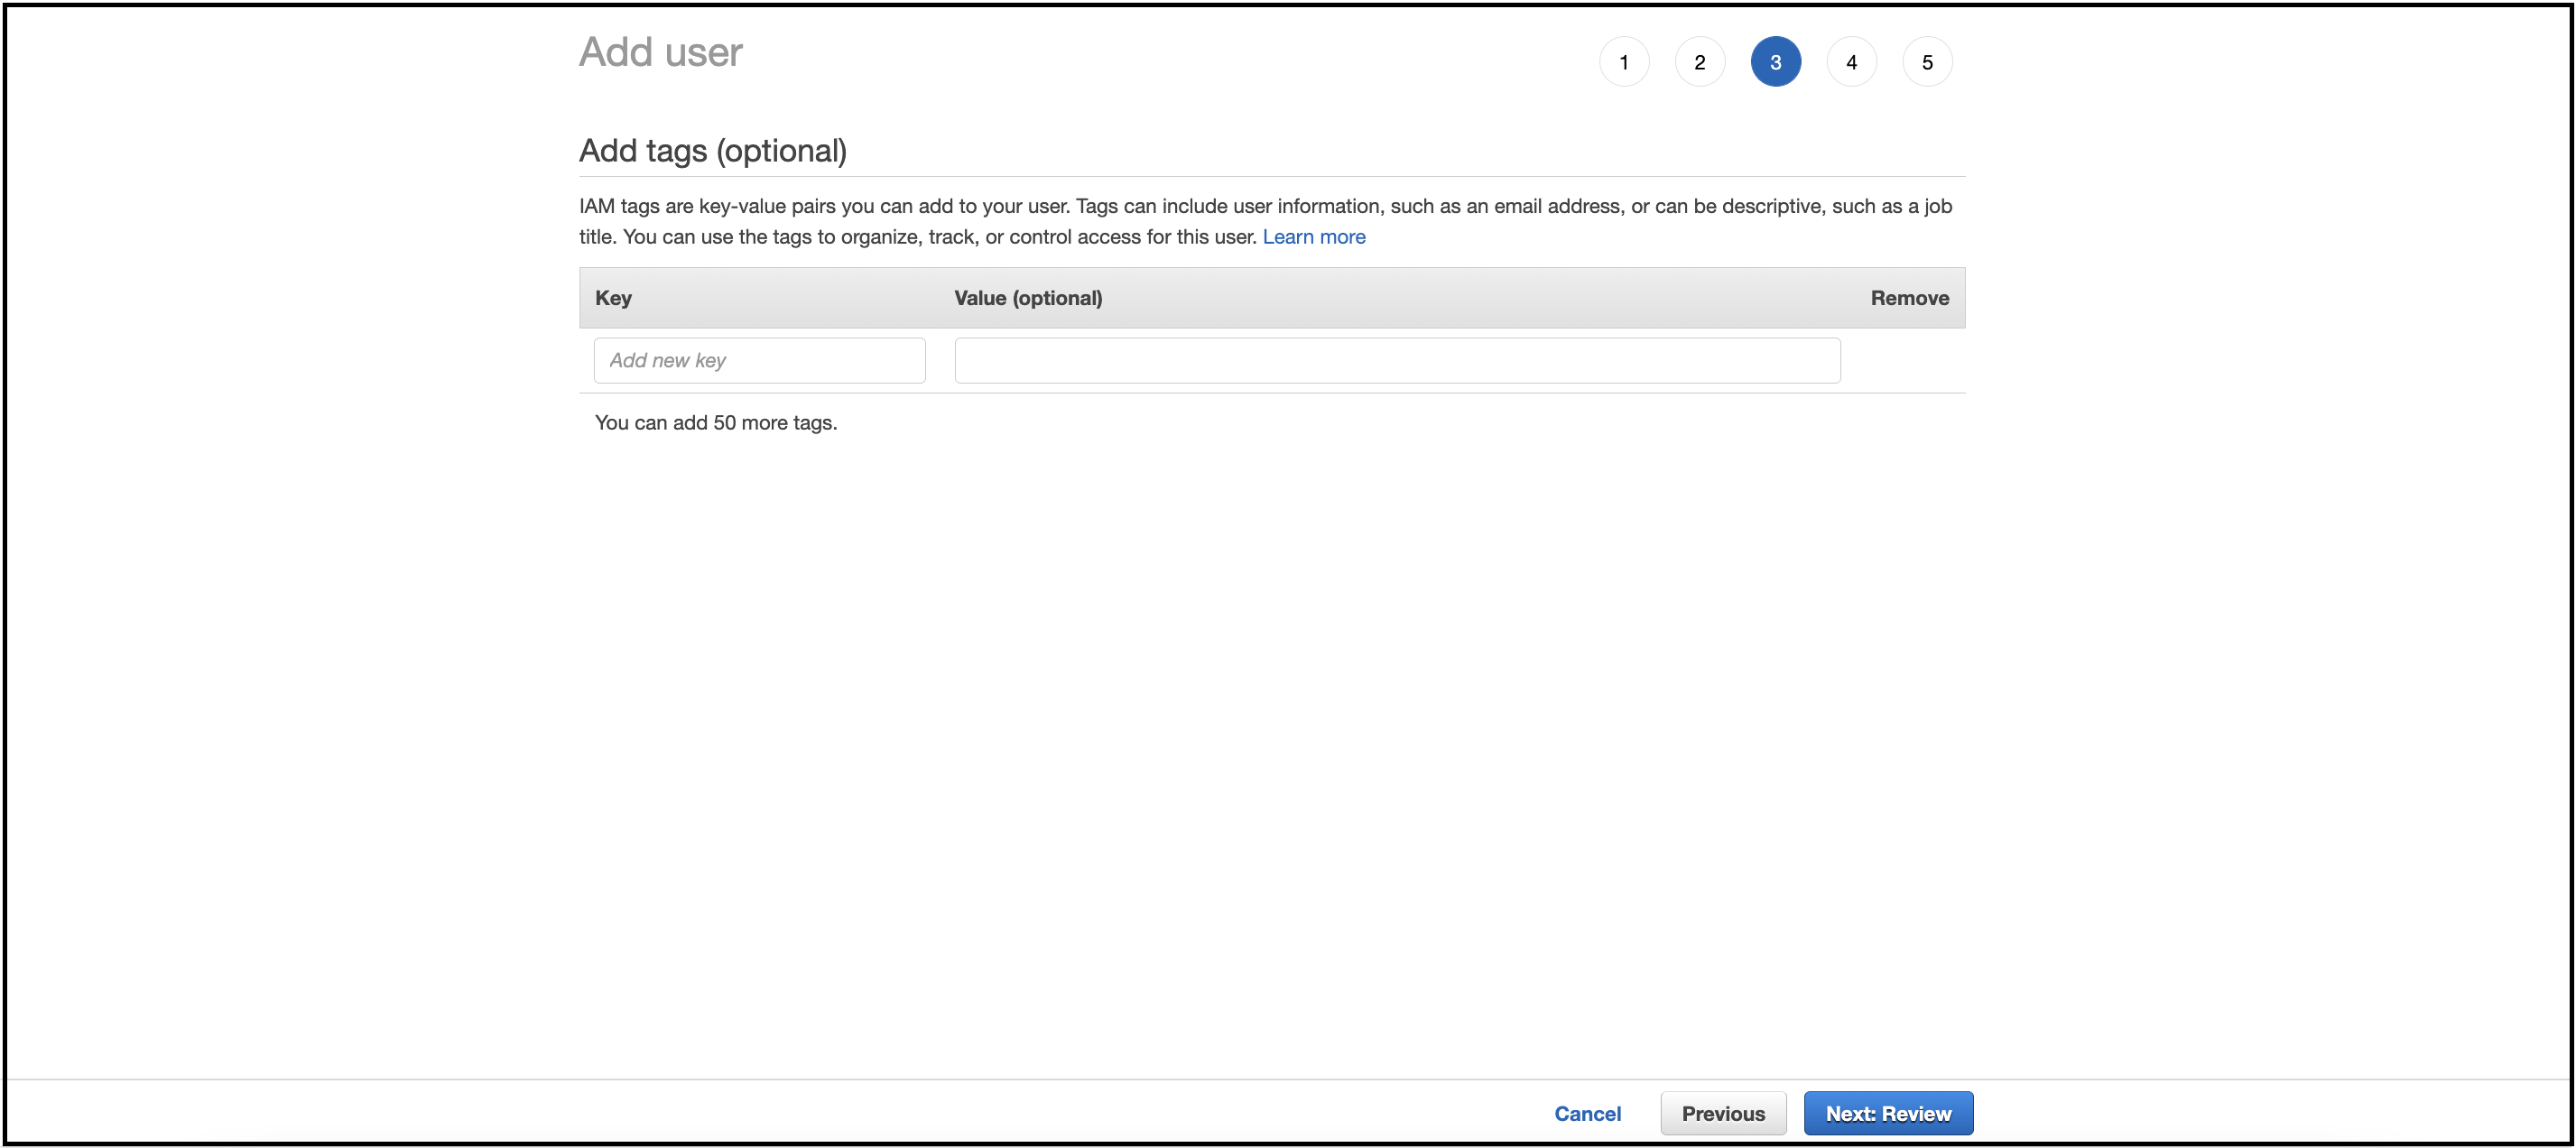
- (Optional) Add tags if needed.
- Review the settings and click
Create user.
- Important:
Download the .csv file containing the access key and password.
This is the only time these credentials will be available for download.
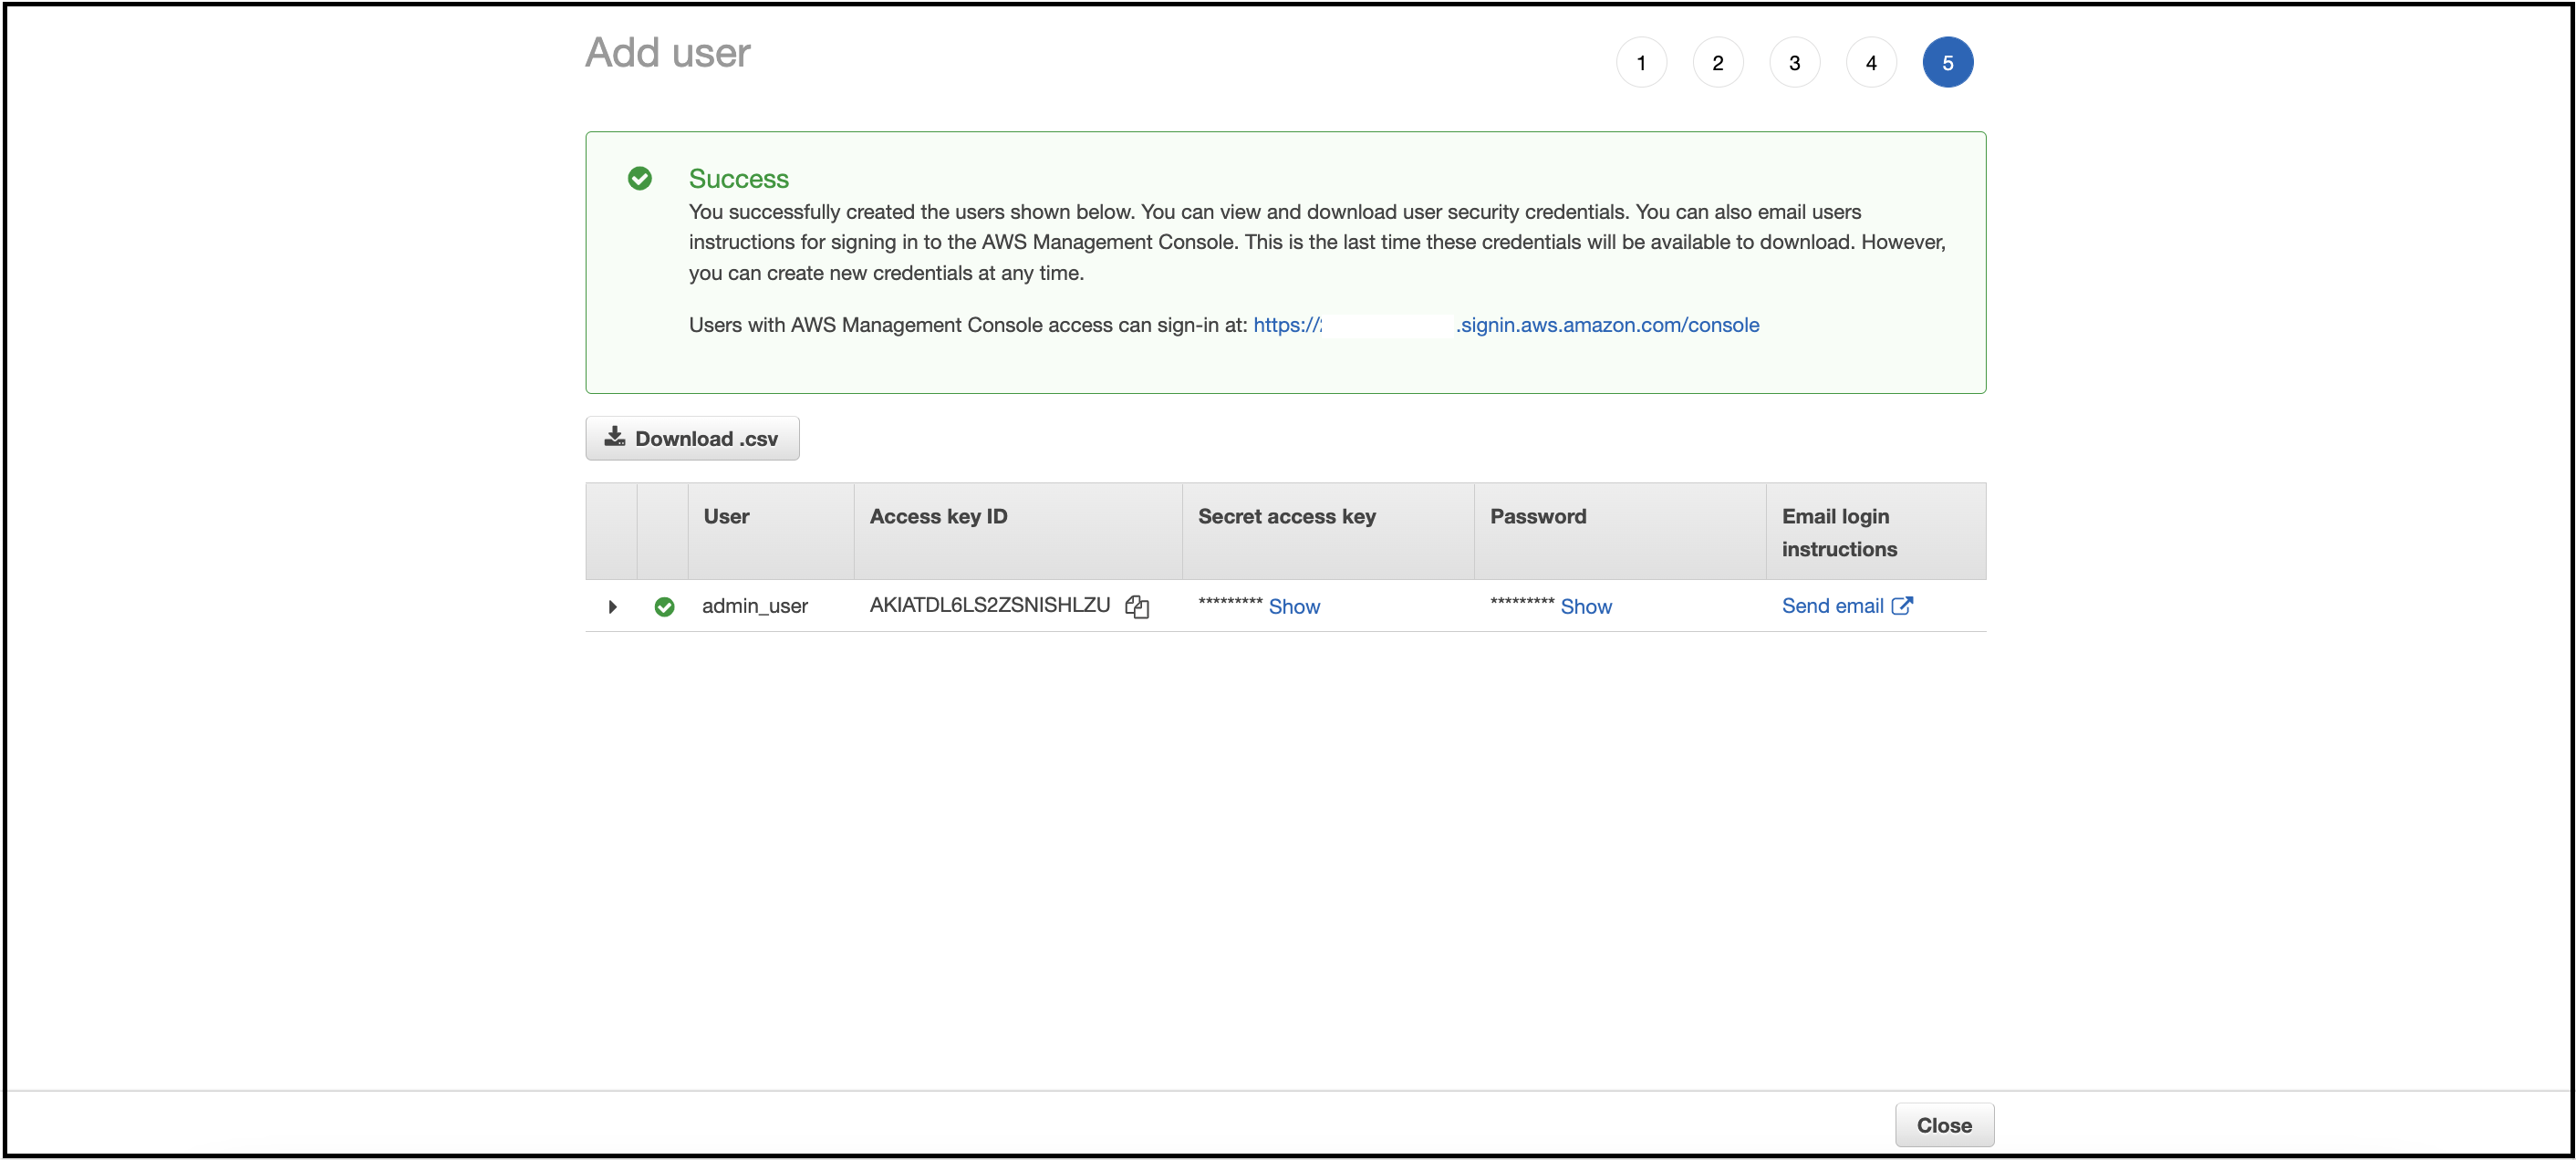
Your IAM user with Administrative privileges has been successfully created.
Learn more.
Login to AWS Account
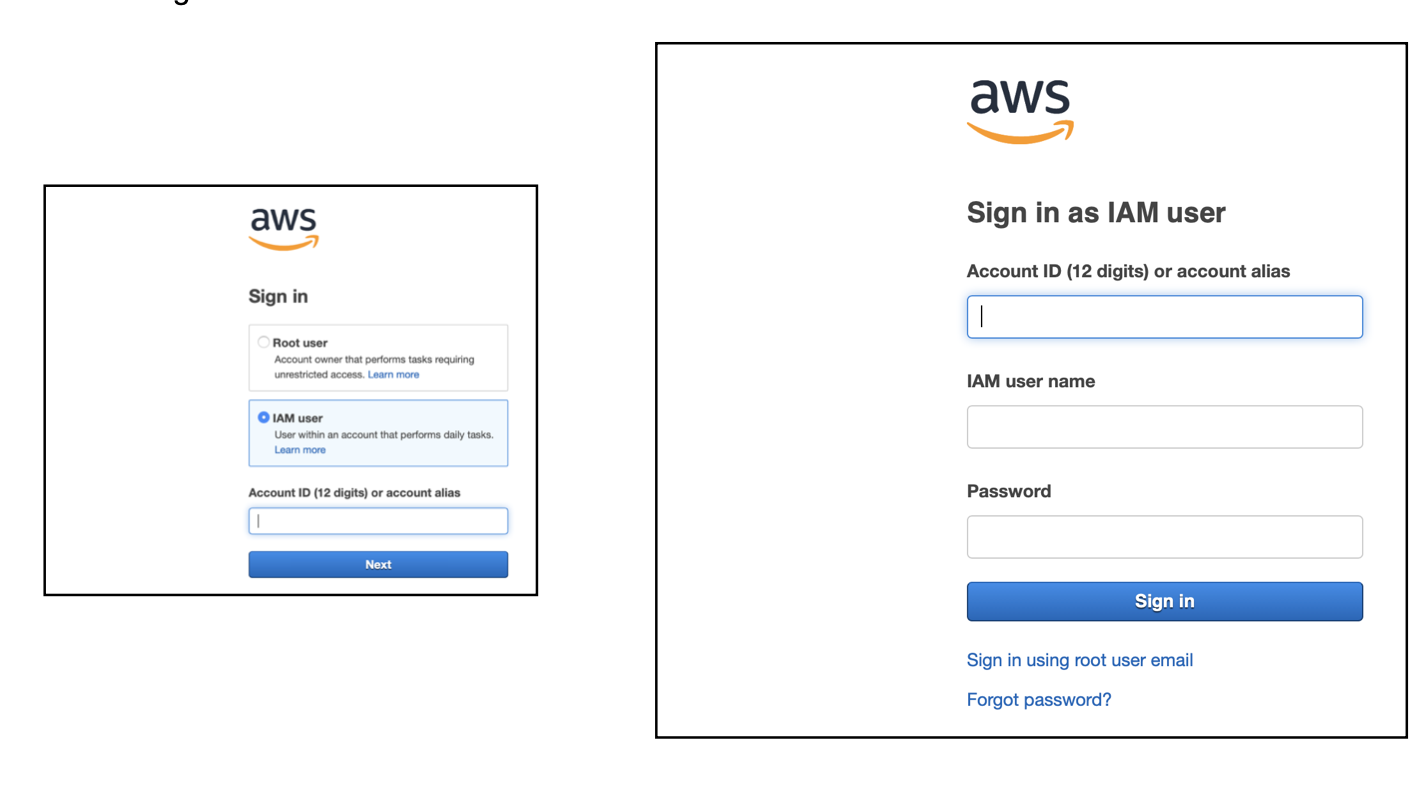
Once the Administrator IAM user is created, you can access your AWS account via the following link: https://console.aws.amazon.com/.
- Select the
IAM useroption to log in to the AWS console. - Enter your
Account IDand theIAM user namefor the Administrator user, then proceed to log in to the AWS Management Console.
Before preoceeding, a deep understanding of AWS Services is not required to deploy RainMaker. However, familiarity with the AWS Management Console and AWS services like CloudFormation, CloudWatch, etc will be helpful.
All repositories under SAM are deployed through the AWS Management Console, which can be accessed from any Browser. No specific operating system is required.
Required Accounts
Since private RainMaker provides you with full control over your data and integrations, the accounts and tools listed below give an overview of the necessary accounts you’ll need to manage.
We will cover the details in the following sections.
Core Accounts
1. An AWS China Account
2. Admin CLI
AWS China Account: Mandatory requirement for private deployment as all services are deployed on AWS.
RainMaker Admin CLI: Use this to generate the device credentials.
- Core Accounts are the minimum required accounts to deploy private cloud via AWS and generate device credentials.
- Related Accounts are supporting accounts within the RainMaker deployment ecosystem, typically required for third-party logins, phone app publishing, notification services, etc.
- Some Related Accounts will require additional configurations and certifications.
Now that you are familiar with the required accounts for private deployment, let’s dive into the specifics.
AWS China Sign-up and Login Process
Please contact the ESP RainMaker support team at esp-rainmaker-support@espressif.com for assistance with deploying or setting up China-specific deployment requirements.
Supported Regions Where RainMaker is Available
Now that you have an AWS account, here is a list of regions where you can deploy RainMaker. If you want to deploy RainMaker in a region not listed above, please contact the Espressif RainMaker team at esp-rainmaker-support@espressif.com.
| Region Name | Region |
|---|---|
| US East (N. Virginia) | us-east-1 |
| US West (N. California) | us-west-1 |
| US West (Oregon) | us-west-2 |
| Asia Pacific (Mumbai) | ap-south-1 |
| Asia Pacific (Singapore) | ap-southeast-1 |
| Asia Pacific (Sydney) | ap-southeast-2 |
| Europe (Frankfurt) | eu-central-1 |
| Europe (Ireland) | eu-west-1 |
| South America (São Paulo) | sa-east-1 |
| US East (Ohio) | us-east-2 |
| Europe (London) | eu-west-2 |
| Europe (Paris) | eu-west-3 |
| Asia Pacific (Tokyo) | ap-northeast-1 |
| Europe (Stockholm) | eu-north-1 |
| Middle East (Bahrain) | me-south-1 |
| China (Beijing) | cn-north-1 |
Please make sure that you have selected the region based on the RainMaker SAM access that would be granted for your account. The following section would show you steps to obtain this access.
Click here to learn how to change region in your AWS account.
Obtain RainMaker SAM Access in Your AWS Account
Before deploying the RainMaker Platform into your account, our team needs to provide access to your AWS Account ID so that the required RainMaker repositories are made available for deployment.
- Note down your AWS account ID.
- Note down the region (that you want to deploy private RainMaker).
- Send the above information to Espressif RainMaker Team at esp-rainmaker-support@espressif.com.
Now that you have successfully setup your AWS account. It is time to proceed to pre-deployment!
Obtain License
Licensing your ESP RainMaker is a mandatory step before using the platform.
To obtain a license tailored to your business needs, please contact the Espressif RainMaker team at esp-rainmaker-support@espressif.com.