Upgrading via SAR
Upgrading the RainMaker Backend via SAR
There will be newer versions of RainMaker backend and frontend, which will be made available, periodically.
The backend and the frontend services need to be upgraded separately.
Upgrading the RainMaker Backend
You can check if the newer version of the RainMaker backend service is available, from the Serverless Application Repository (SAR).
You can only upgrade below repositories:
- serverlessrepo-ESP-RainMaker-Base
- serverlessrepo-ESP-RainMaker-Core
Note: You should never upgrade the below repository:
ESP-RainMaker-Base-API
The process of upgrading will be similar to deploying the RainMaker backend for the first time, except you will need to choose the latest version of the SAR repository.
Log in to AWS Console, and search for the SAR Service.

-
Click
Available applicationsand selectPrivate applications. Click the checkboxShow apps that create custom IAM roles or resource policies. -
From the SAR repository menu, search for the "ESP-Rainmaker-" repository.
-
Click
ESP-RainMaker-Base, the latest version of the repository will be displayed.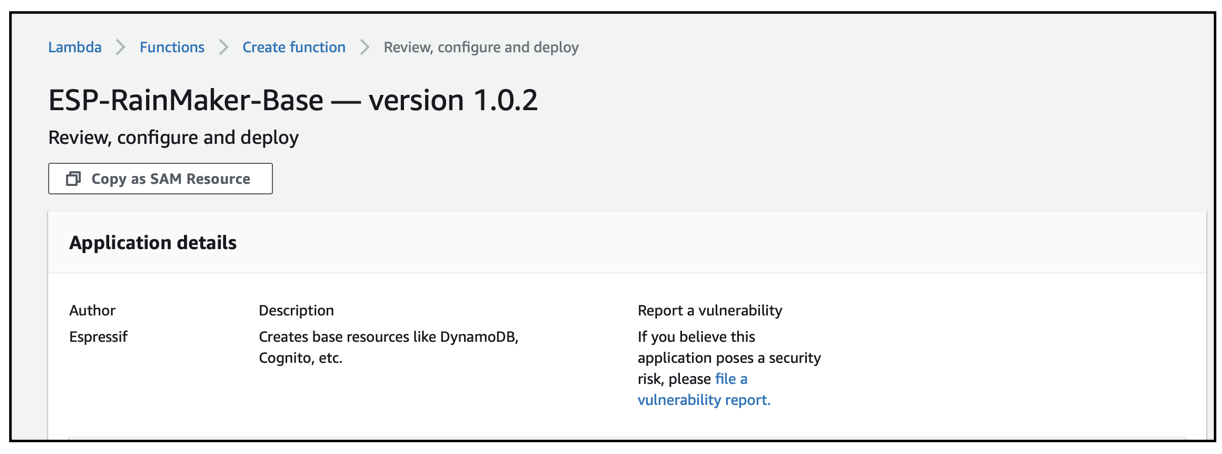
-
If your existing version for
ESP-RainMaker-Baseis older than the latest version, you should upgrade this repository to the latest version. -
The process of upgrading will be similar to deploying the
ESP-RainMaker-Baserepository. -
Scroll down and click the checkbox
I acknowledge that this app deploys nested applications. -
Click the
Deploybutton.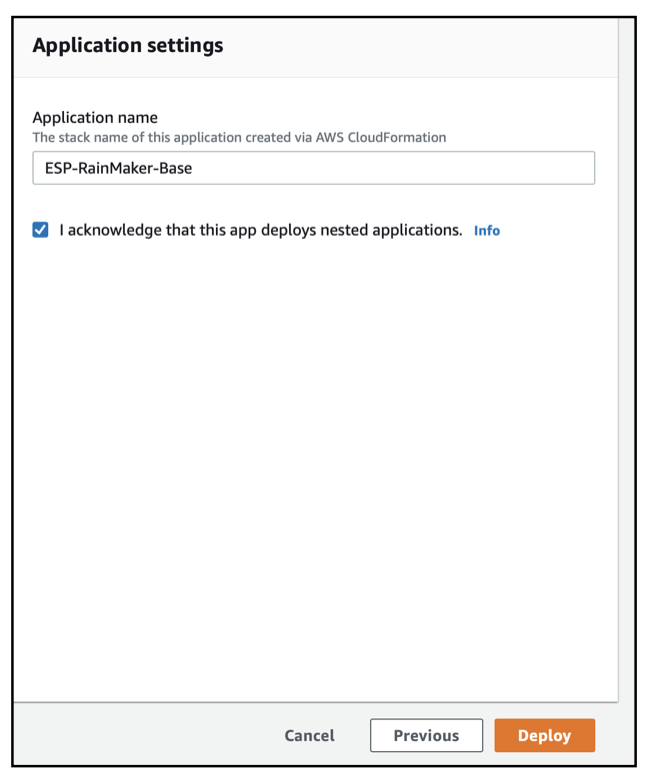
-
The deployment will start. This SAR repository will be deployed in around 10–15 minutes.
-
You can check the status of the deployment of this SAR repository, from CloudFormation.
-
Go to
AWS Console>Services>CloudFormation. The list of stacks deployed will be shown. -
You will see an entry for the
serverlessrepo-ESP-RainMaker-Basestack.CREATE_COMPLETEstatus indicates that, this repository is successfully deployed, as shown below: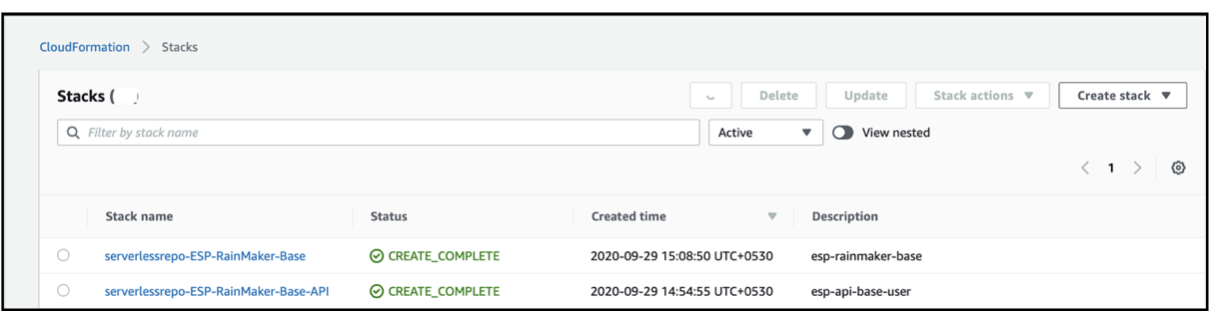
After the ESP-RainMaker-Base repository is upgraded, you will need to upgrade the ESP-RainMaker-Core repository.
-
From the SAR repository menu, search for the "ESP-Rainmaker-" repository.
-
Click
ESP-RainMaker-Core, the latest version of the repository will be displayed.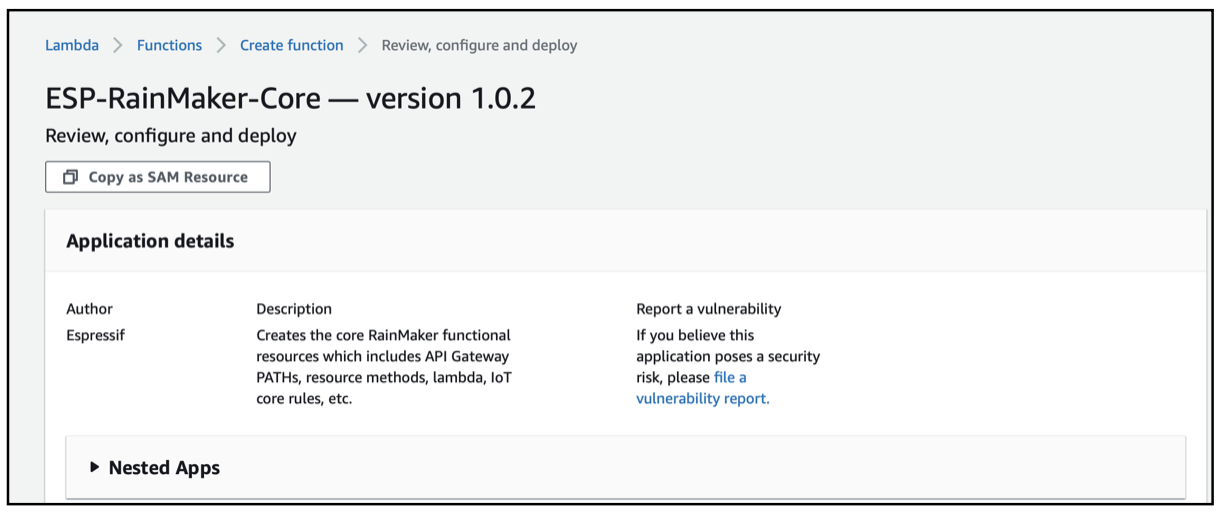
-
If your existing version for
ESP-RainMaker-Coreis older than the latest version, you should upgrade this repository to the latest version. -
The process of upgrading will be similar to deploying the
ESP-RainMaker-Corerepository. -
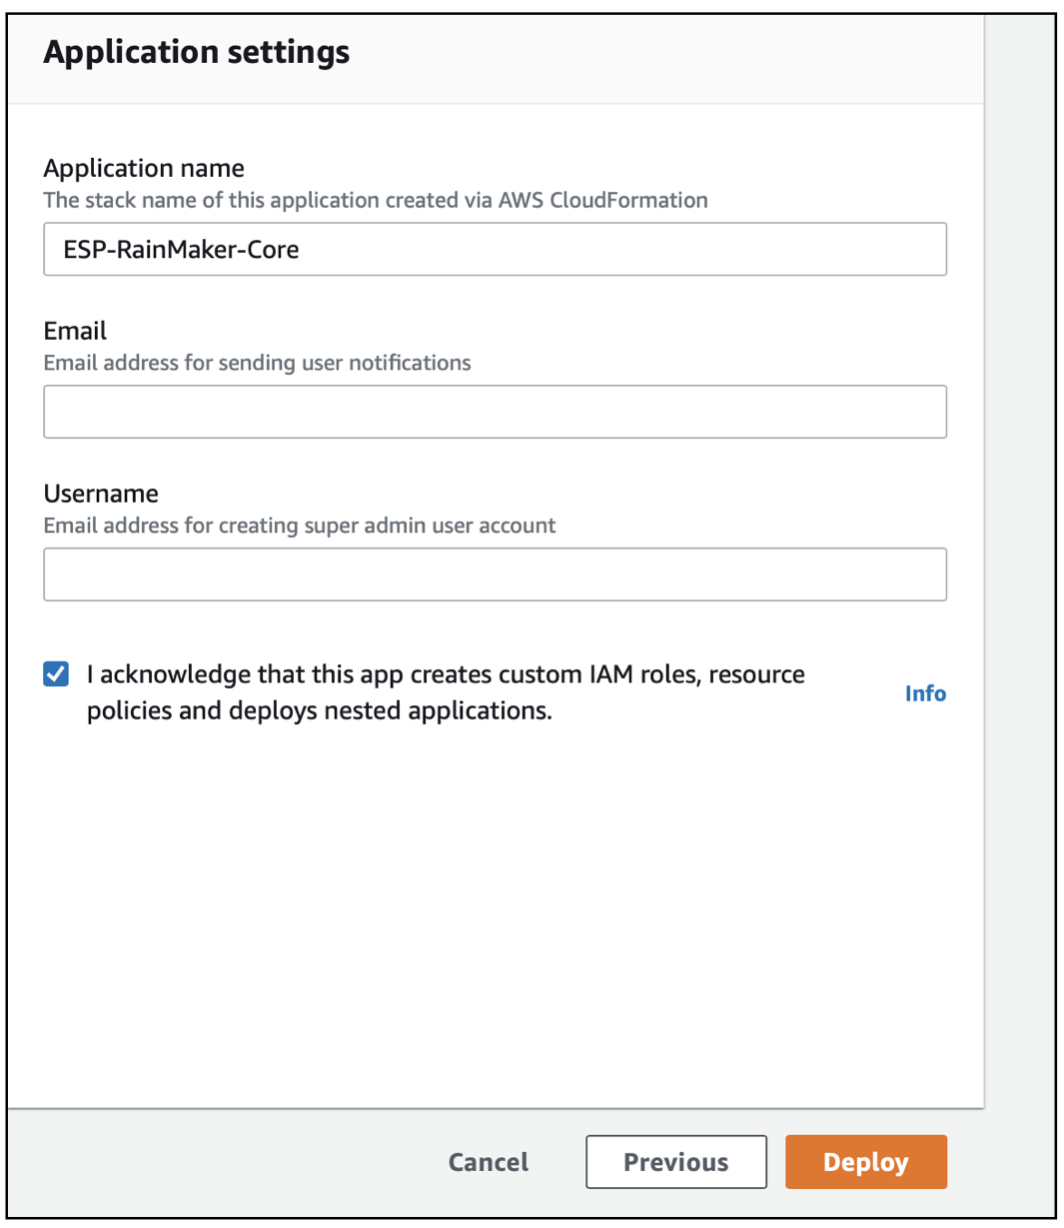
Scroll down and enter the values for the parameters.
-
Email: Email address for sending user notifications. When the new user signs-up, they will receive the verification code from this E-mail address. Please note that this email address should be verified by AWS Simple Email Service, as mentioned in the Configure Simple Email Service section. -
Username: Email address to create the Superadmin user. User with this email will automatically get created after deployment is successful. The login credentials and deployment details will be sent to this email after successful deployment.
Note: The user, which will be created during the deployment will have Superadmin privileges. Only this user will have access to services like RainMaker Admin CLI.
-
Click the checkbox
I acknowledge that this app creates custom IAM roles, resource policies and deploys nested applications. -
Click the
Deploybutton and the deployment for the RainMaker backend start will start.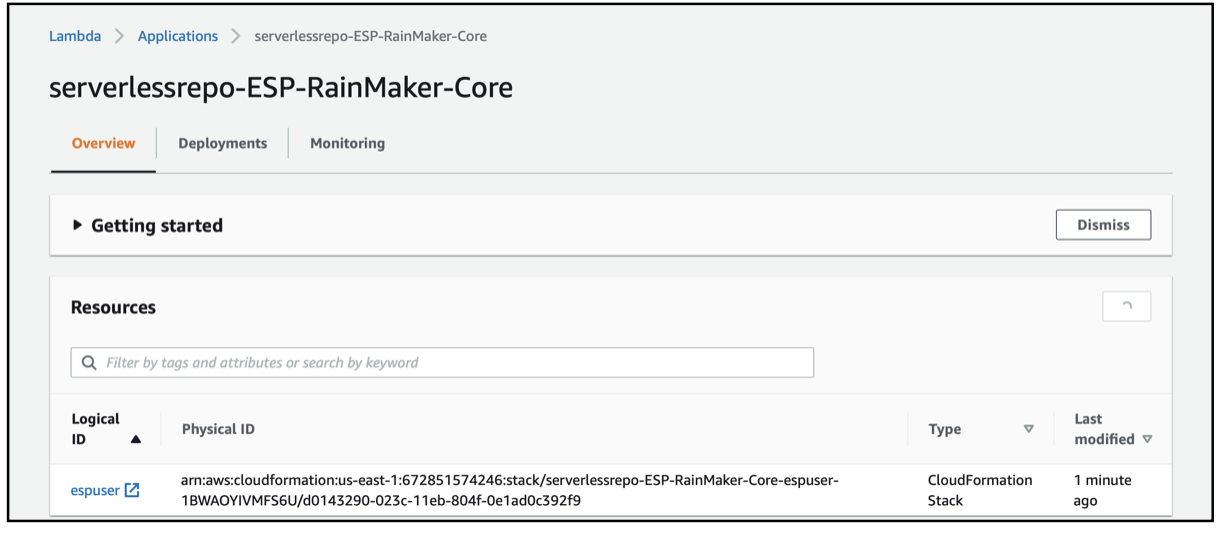
-
The deployment of this repository will be completed in approximately 20–30 minutes.
-
You can check the status of the deployment of this SAR repository, from CloudFormation.
-
Go to
AWS Console>Services>CloudFormation. The list of stacks deployed will be shown. -
You will see an entry for the
serverlessrepo-ESP-RainMaker-Corestack.CREATE_COMPLETEstatus indicates that, this repository is successfully deployed, as shown below: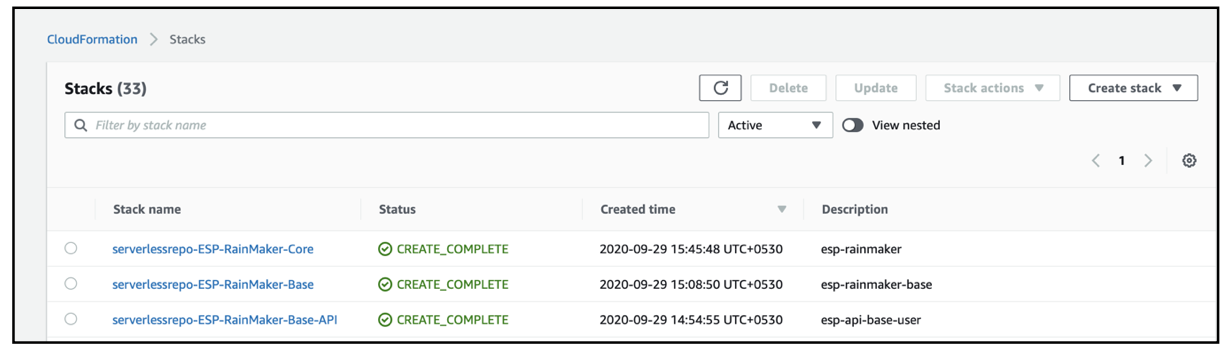
Upgrading the RainMaker Frontend
The RainMaker frontend needs to be upgraded separately.
There are two steps for upgrading the Dashboard.
Step 1: Upgrading from the SAR console.
This step is similar to the way the RainMaker backend components are upgraded or the RainMaker frontend component is deployed for the first time.
-
To trigger the upgrade of the RainMaker frontend deployments, go to the SAR repository service dashboard and select
espdashboard.
-
Scroll down and click the checkbox,
I acknowledge that this app creates custom IAM roles and resource policies.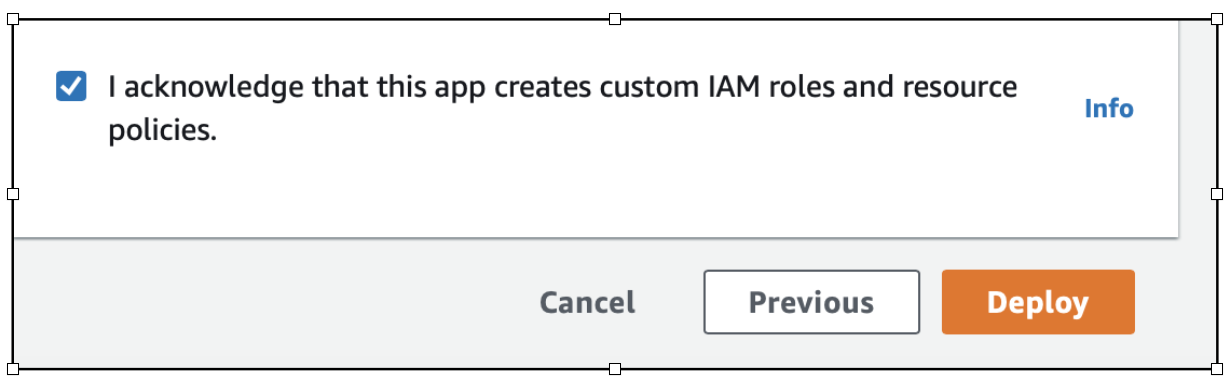
-
The upgrade of the dashboard will start, and the status will be shown in the AWS console.
-
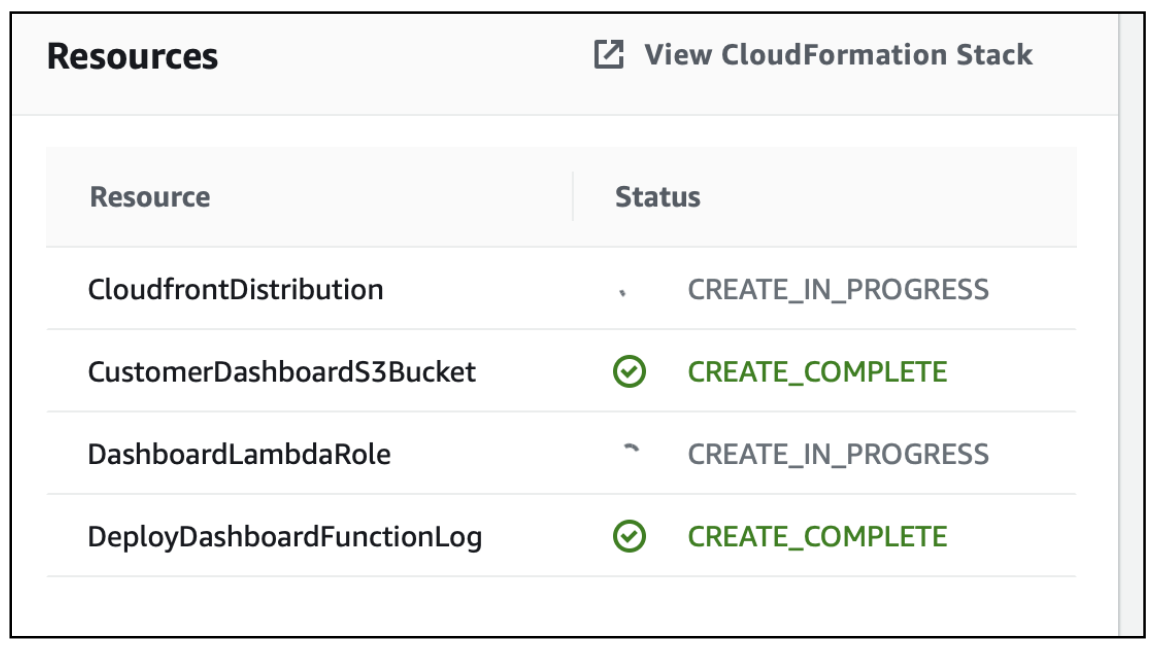
After all the modules of the dashboard are upgraded, the status for all the modules will be shown as
CREATE_COMPLETEand a message will be shown as below:
Step 2: Upgrading from the RainMaker dashboard.
From the dashboard the admin user needs to check if any newer version of the dashboard is available. If any newer version is available, the admin user can upgrade it.
Here are the steps to upgrade the RainMaker frontend.
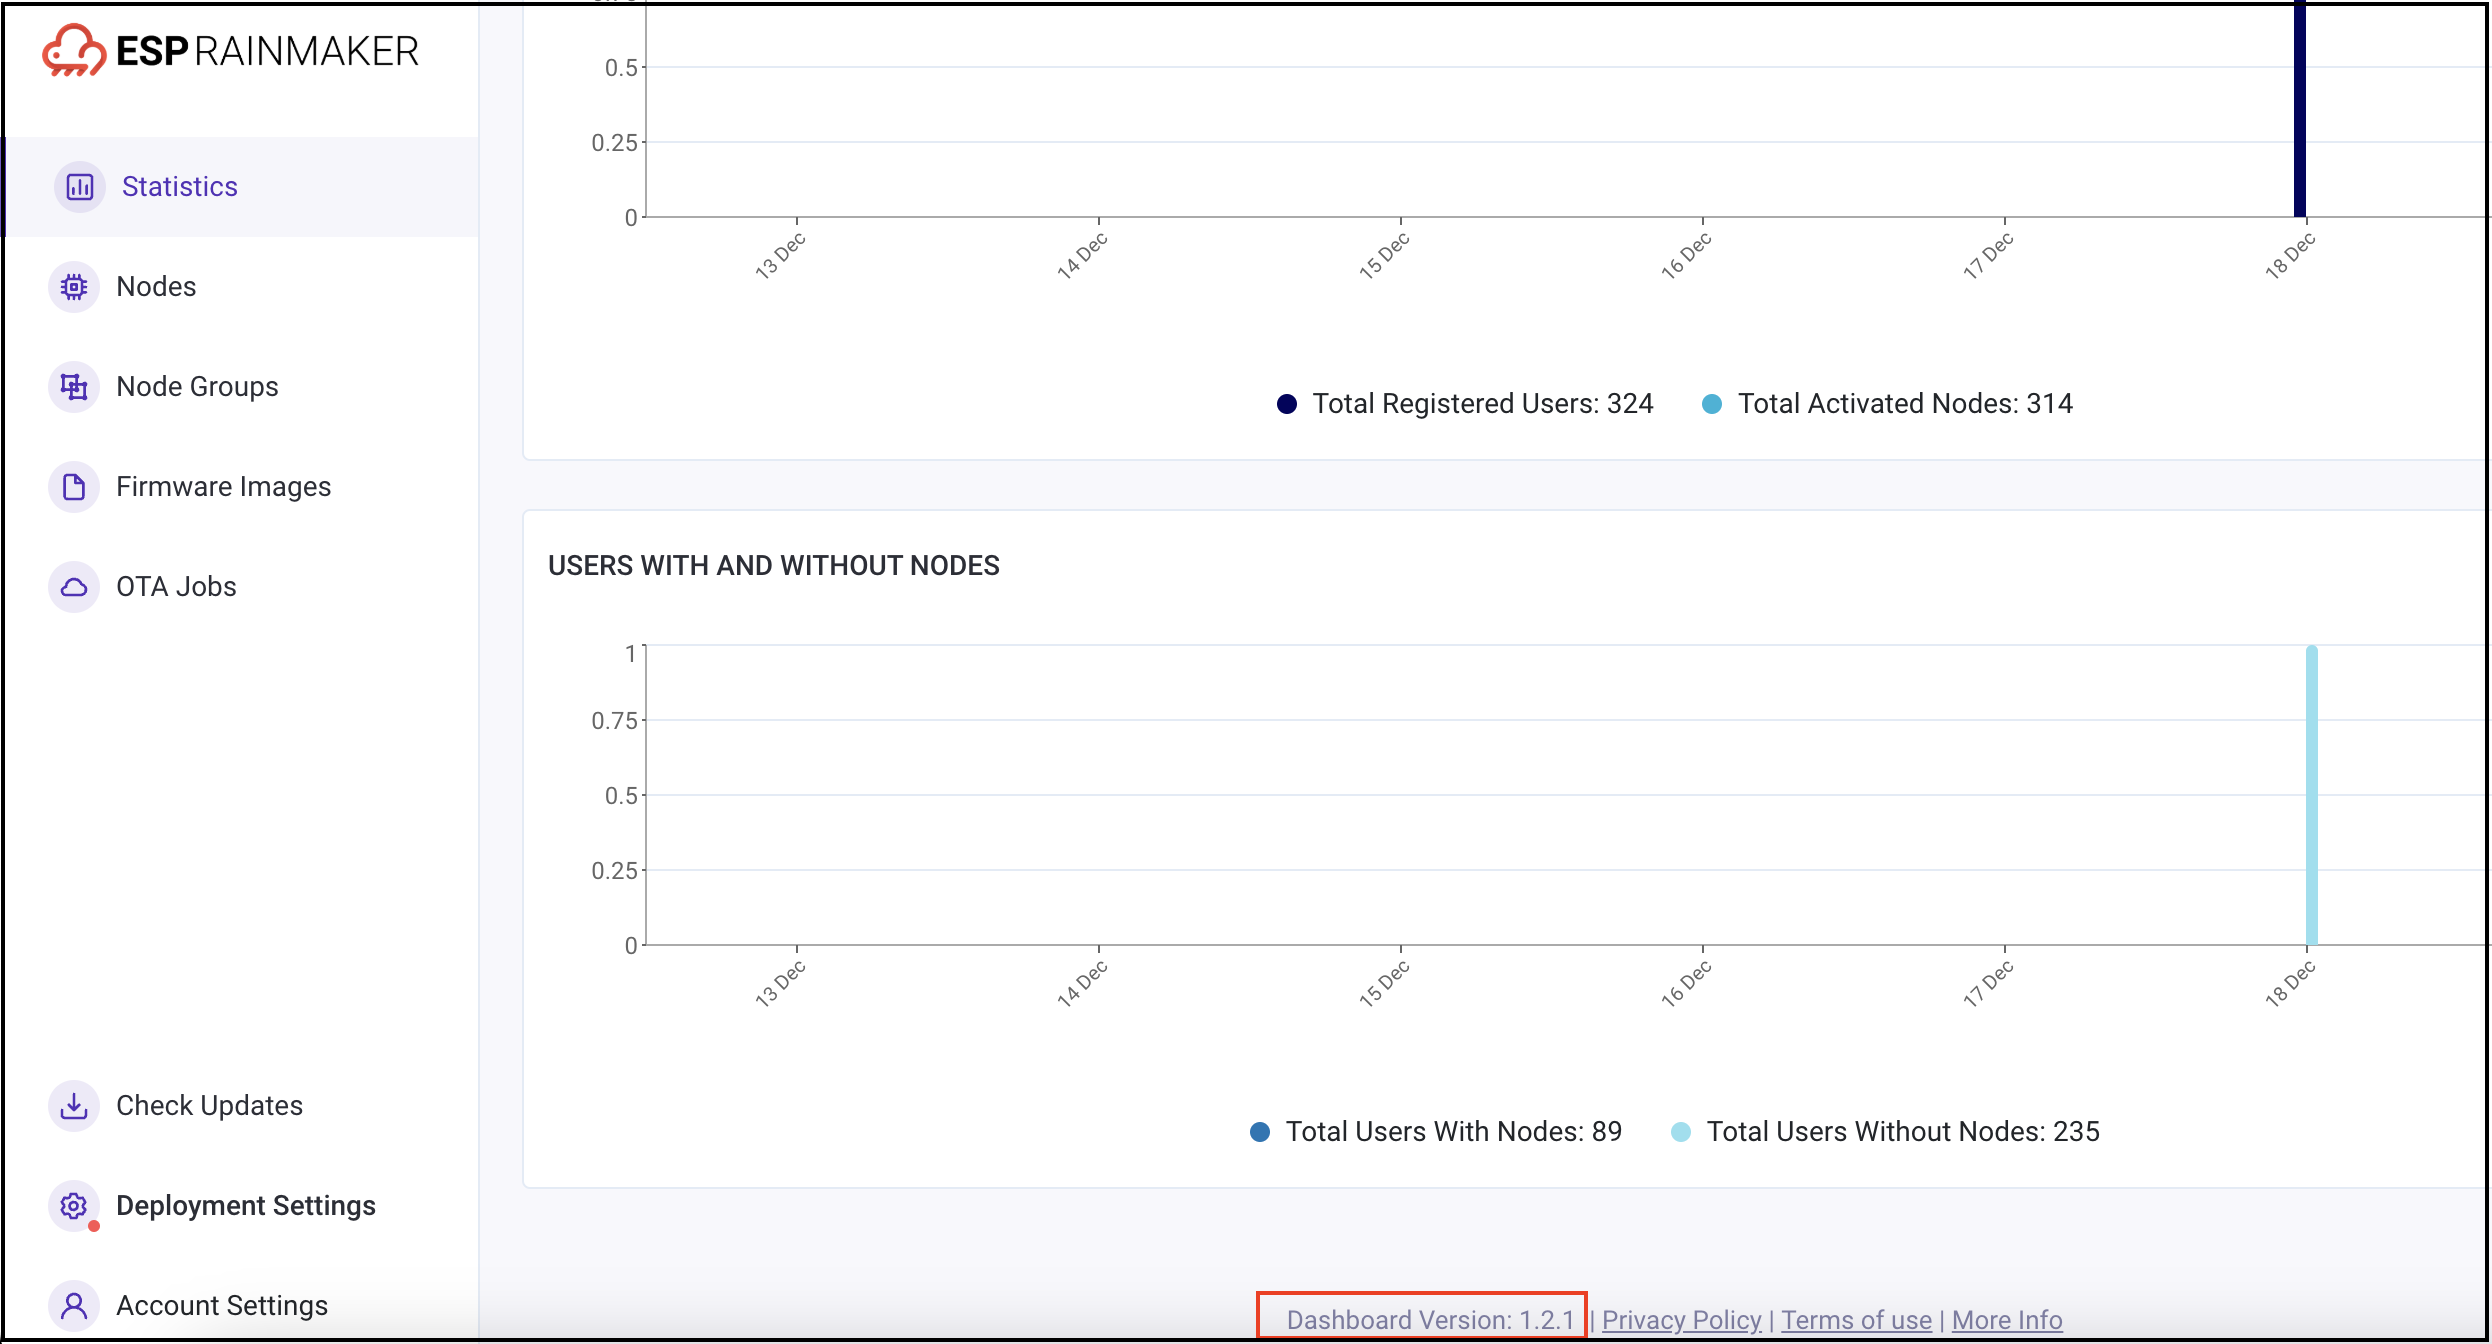
Log in to the RainMaker Dashboard.
At the bottom, the current version will be displayed.
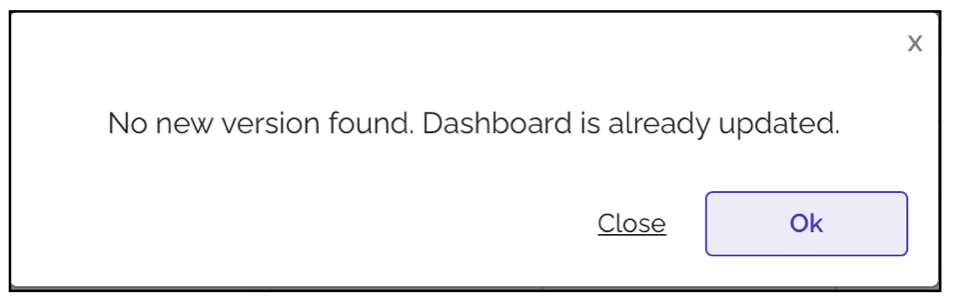
Click the Check Updates button to see if any newer version is available. If there are no new versions are available, the below pop-up will be displayed.
If there are newer versions available for the dashboard, the below pop-up will be displayed.

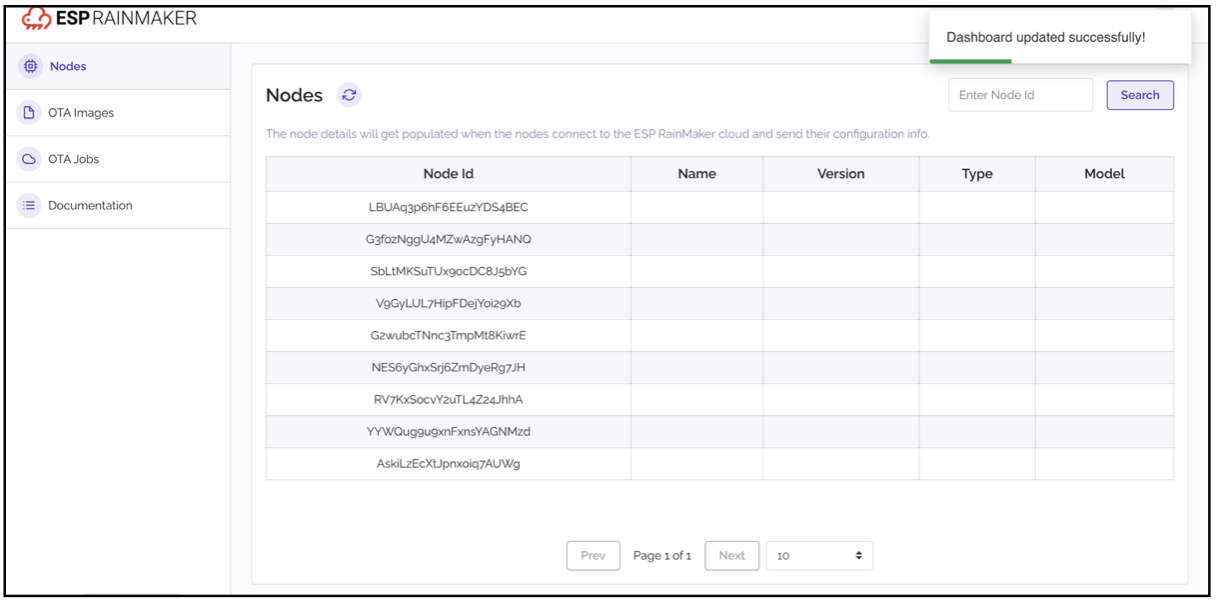
To upgrade to this newer version, click the Update Dashboard button. The process to upgrade the dashboard will be started.
The upgrade generally takes around five minutes. After the upgrade is successful, you will need to refresh the screen or need to log out and log in again.
Upgrading the RainMaker Node Registration Module
The rainmaker-node-registration service is used for generating the bulk certificates for the nodes. Refer the below table for the corresponding node registration module version.
Node Registration Module to Corresponding RainMaker Version Supported
| RainMaker Version | Node registration module version |
|---|---|
| 2.5.0 | v19 |
| 2.2.0 to 2.4.0 | v18 |
| 2.0.2 to 2.1.2 | v17 |
| 2.0.0 to 2.0.1 | v16 |
| 1.1.30 to latest | v14 |
| 1.1.28 to 1.1.29 | v13 |
| 1.1.27 | v12 |
| 1.1.22 to 1.1.26 | v11 |
| 1.1.17 to 1.1.25 | v10 |
| 1.1.12 to 1.1.16 | v9 |
-
Check your RainMaker node registration module version via AWS console.
Go toCloudformation>Stacks>rainmaker-node-registration>Tags>Version.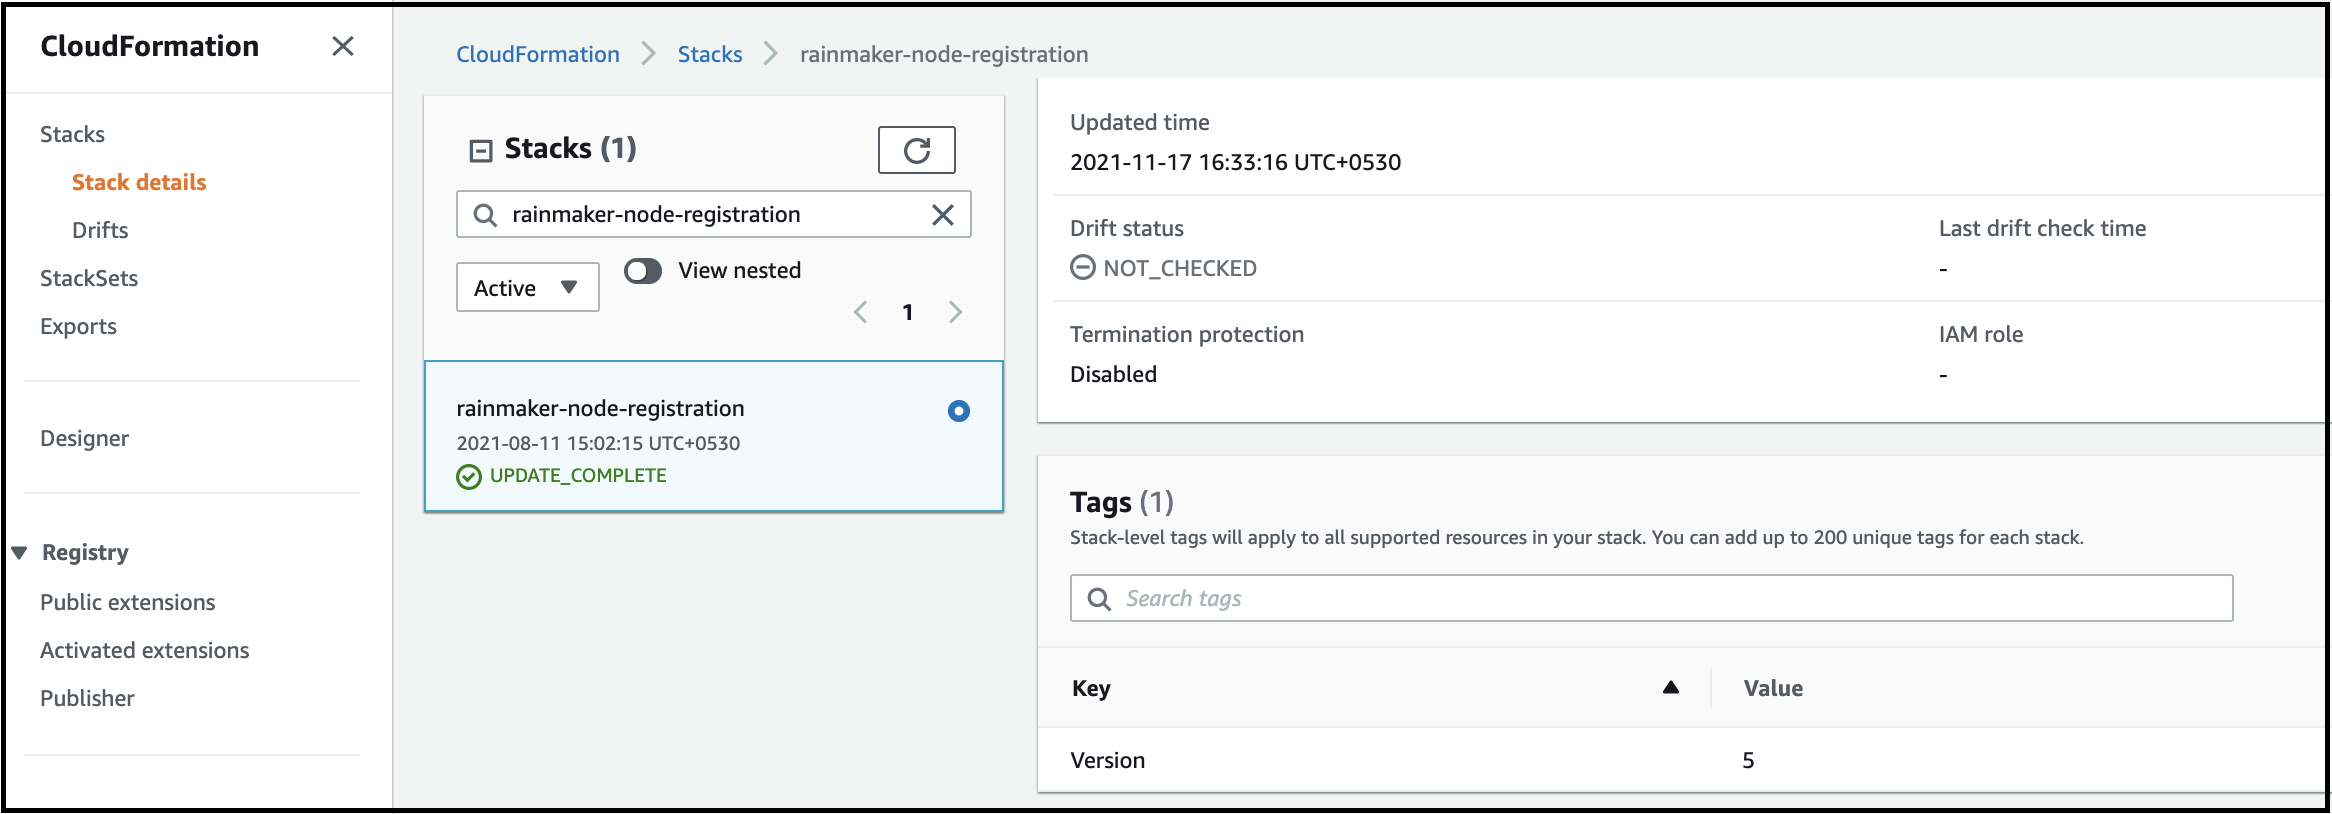
Note: If the above version is lower than the one mentioned in the table,
rainmaker-node-registrationmust be upgraded.
Following are the steps for upgrading the node registration module.
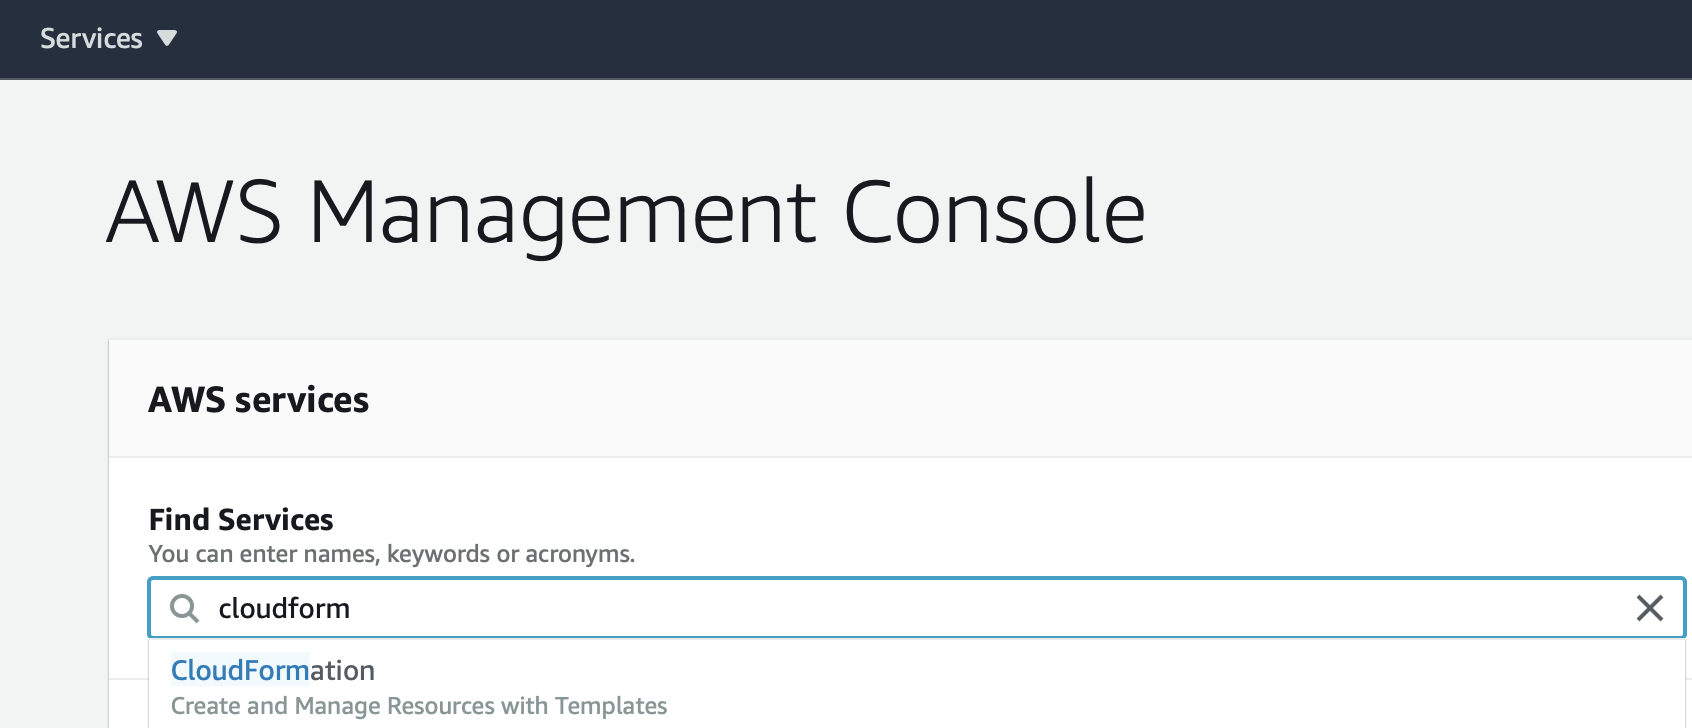
Step 1: From the AWS console, go to the Services, search for CloudFormation, as shown below:
Step 2: Select rainmaker-node-registration stack.

Step 3: Click Update and click Replace current template.
Enter Amazon S3 URL as below:
https://esp-bulknode-batchjob.s3.amazonaws.com/<module_version>/espnoderegistration.yml
For example, for v19, enter https://esp-bulknode-batchjob.s3.amazonaws.com/v19/espnoderegistration.yml.
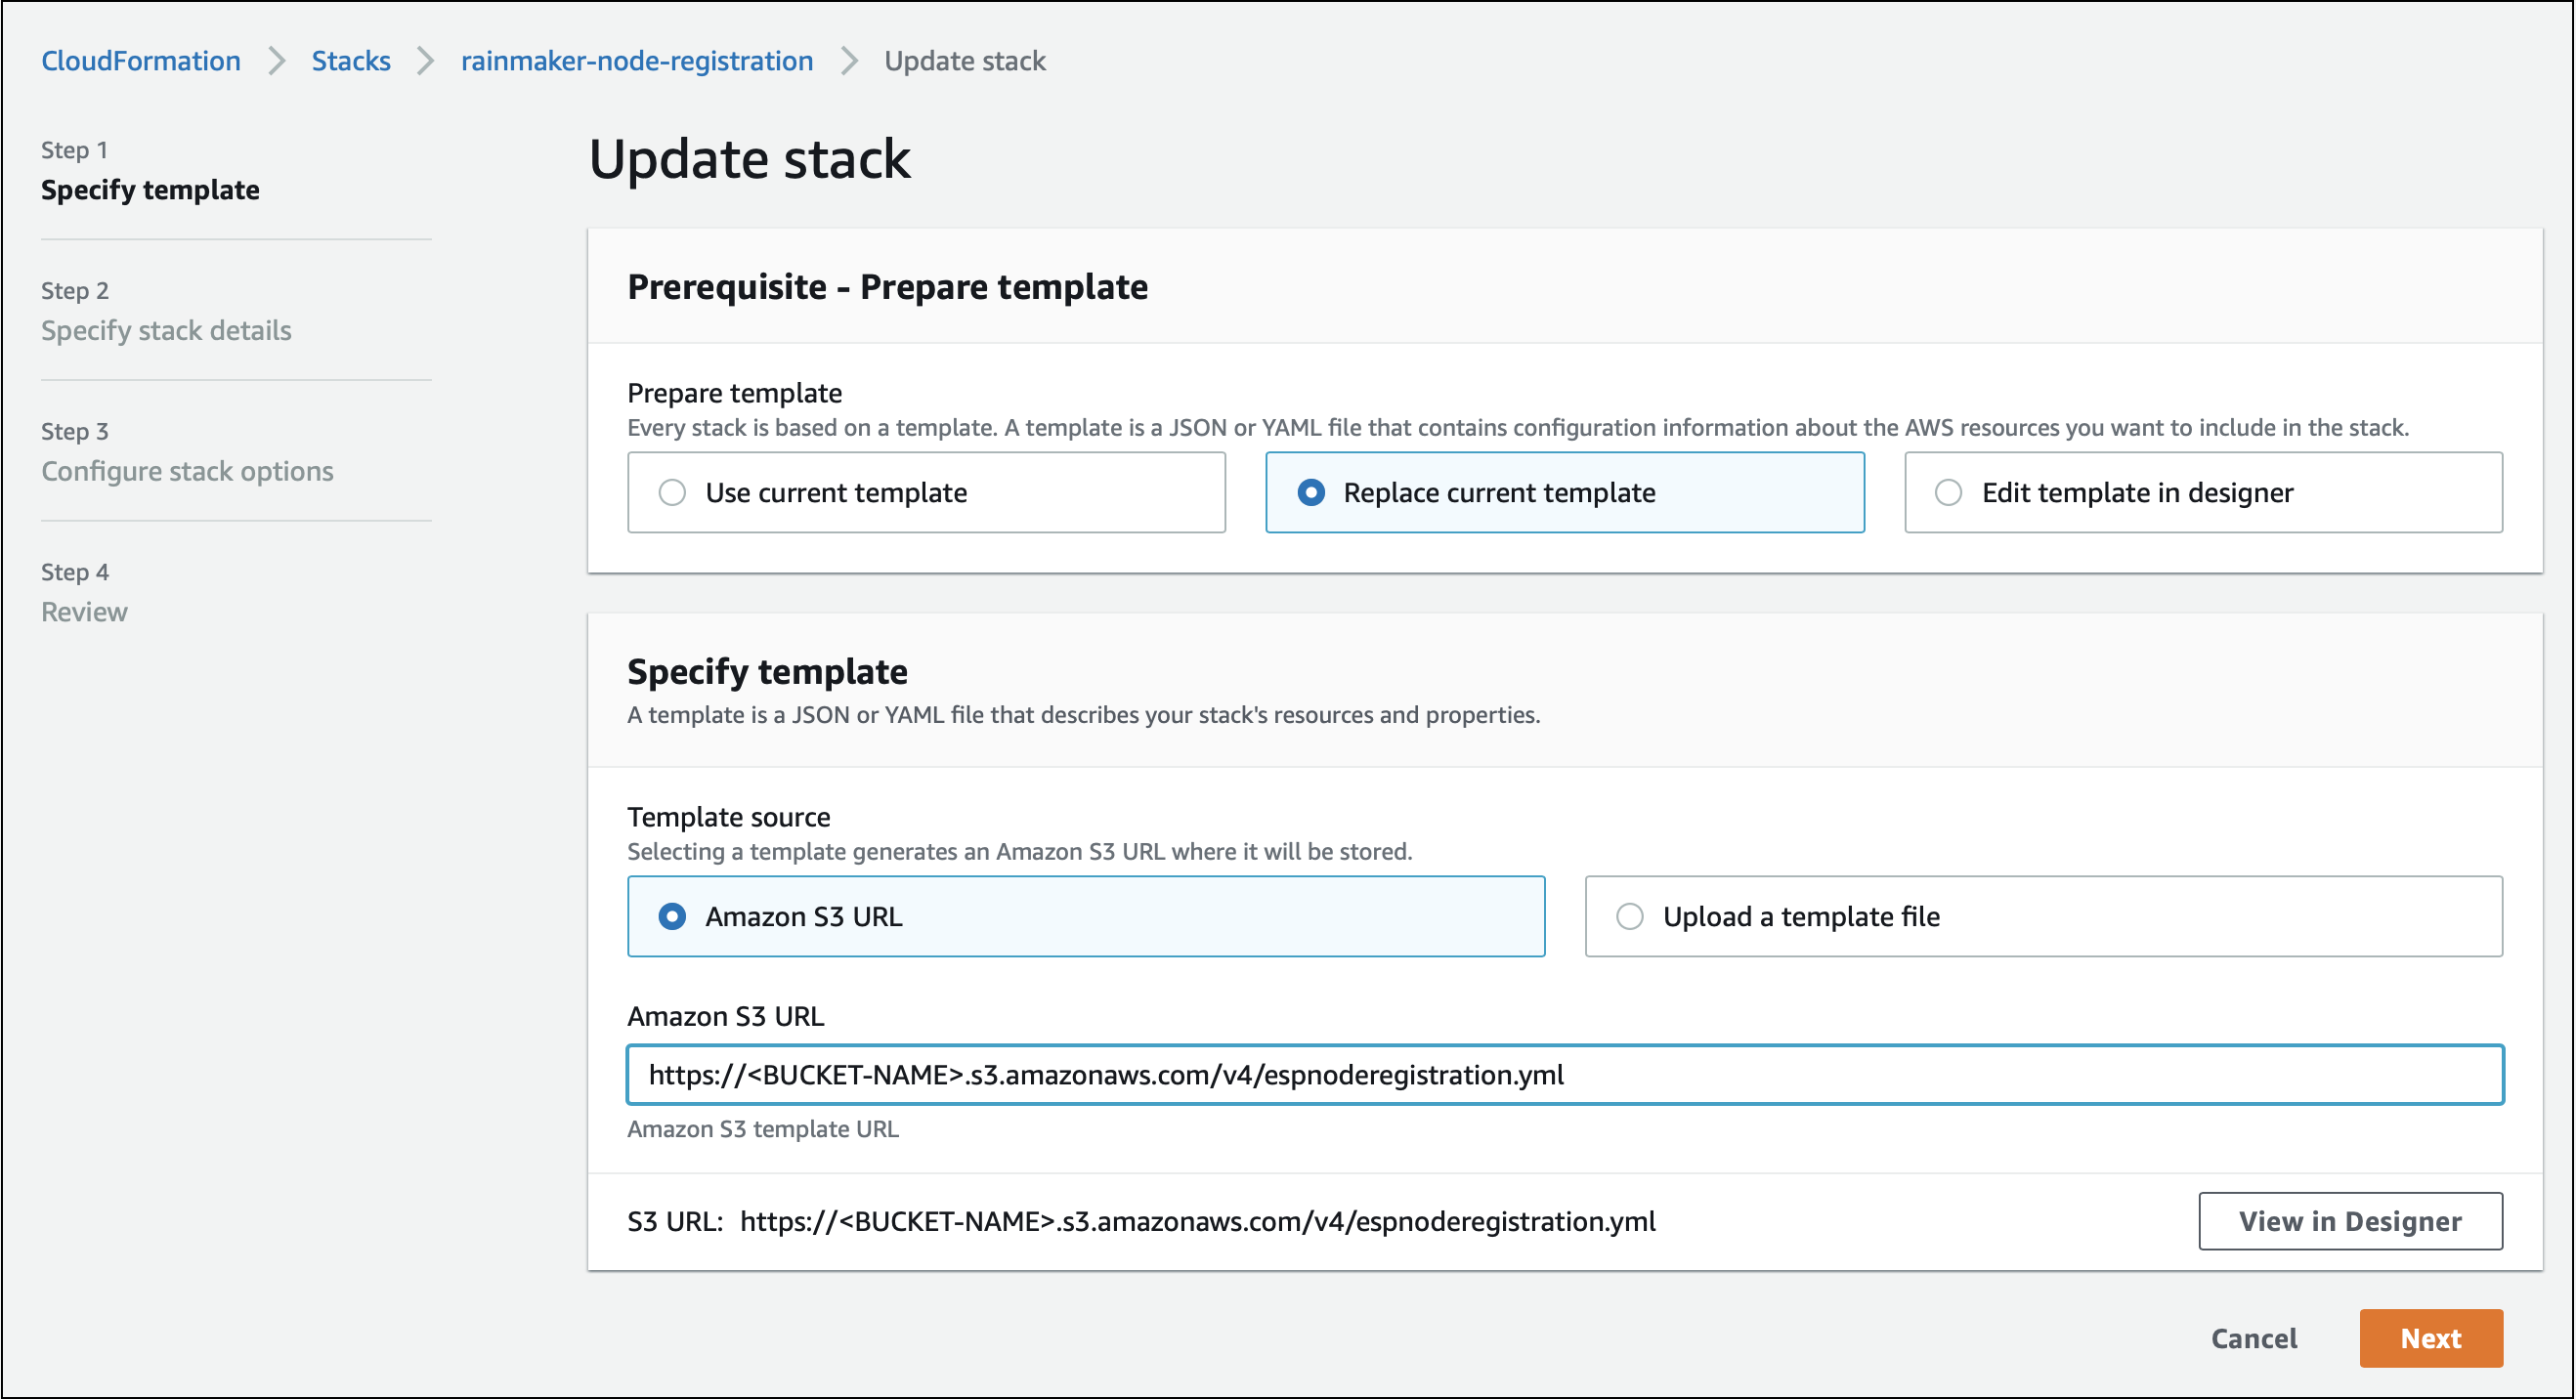
Click Next.
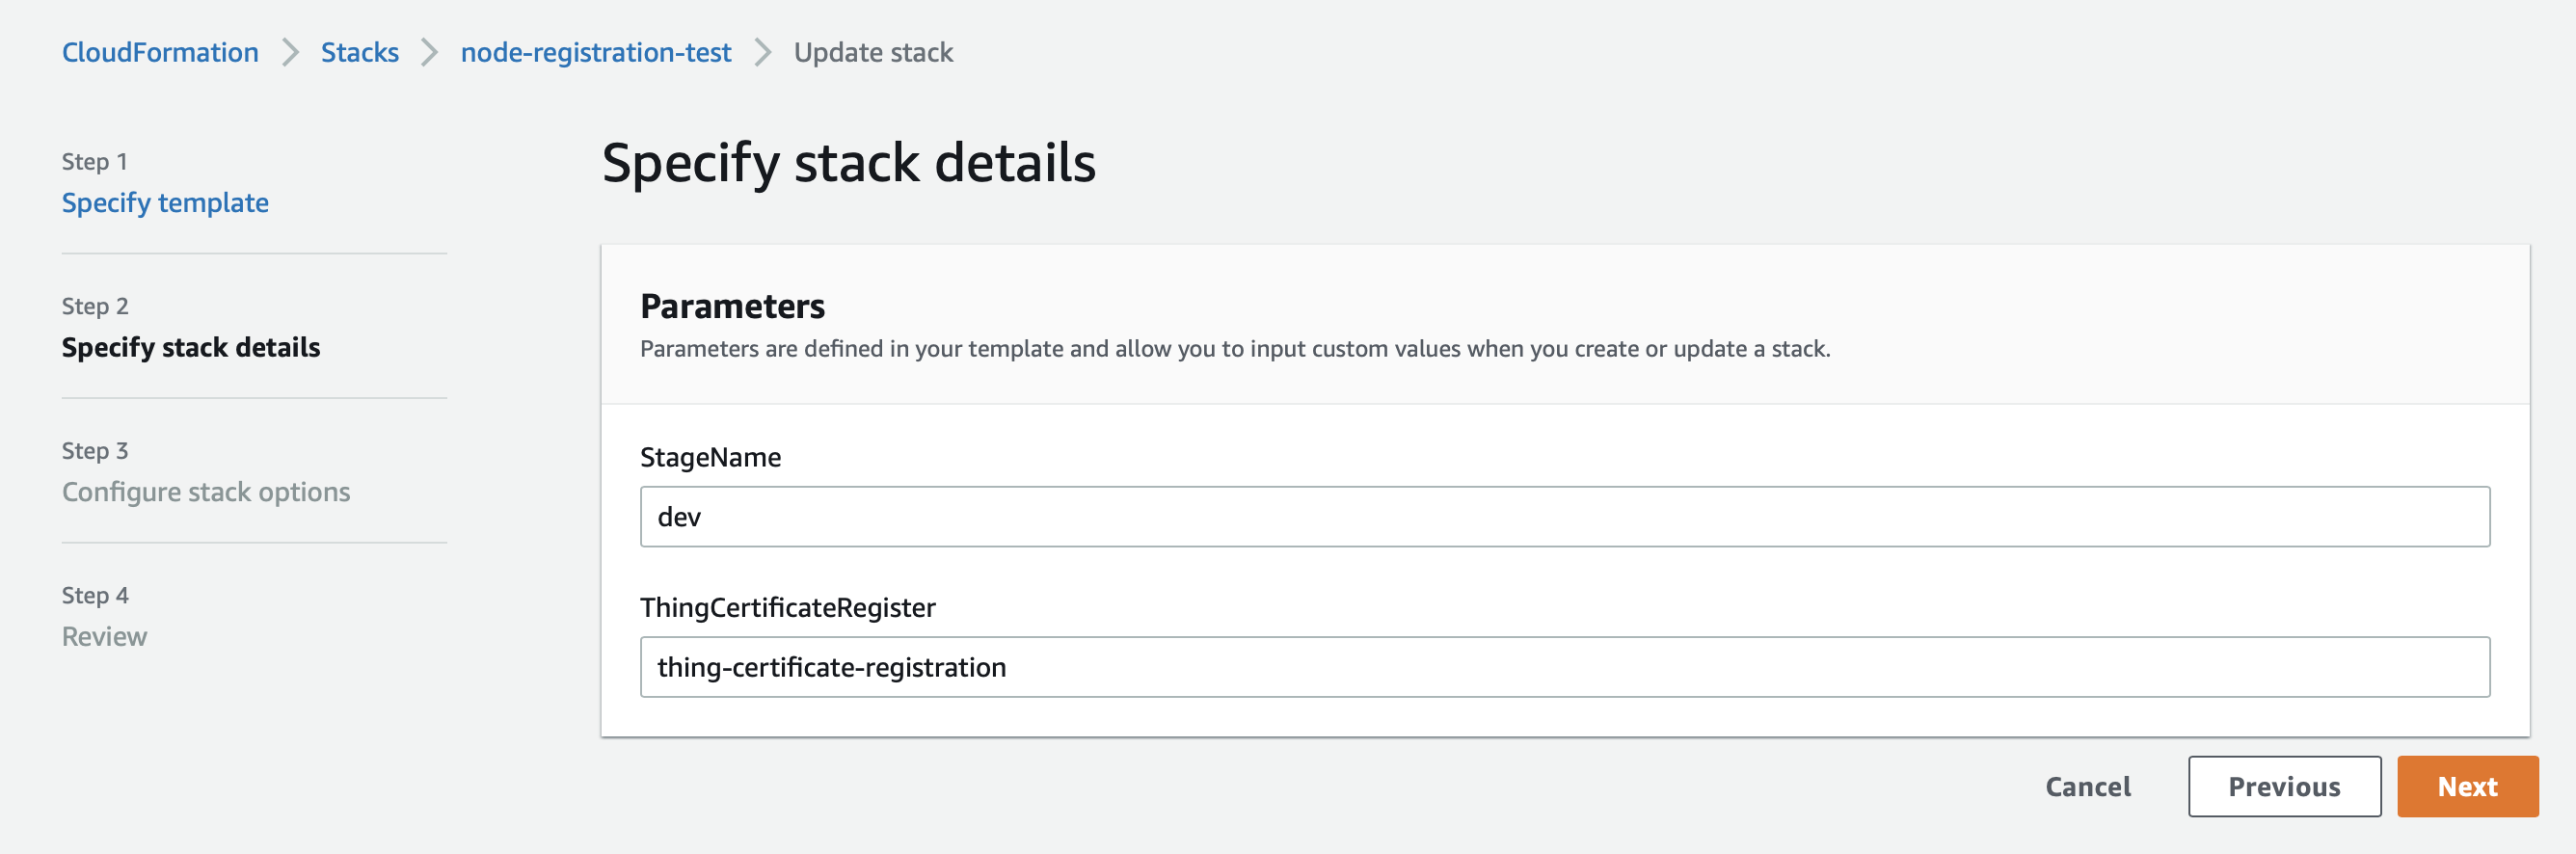
Step 4: Keep all the parameters to the default values and click Next.
Step 5: Enter the version (e.g., v19) and click Next.
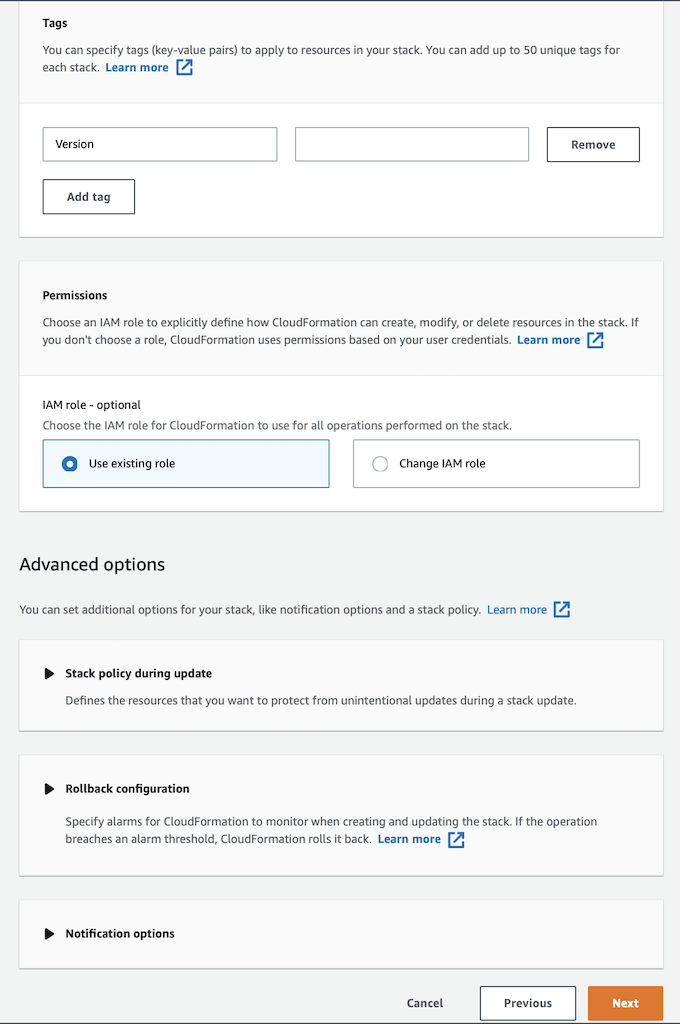
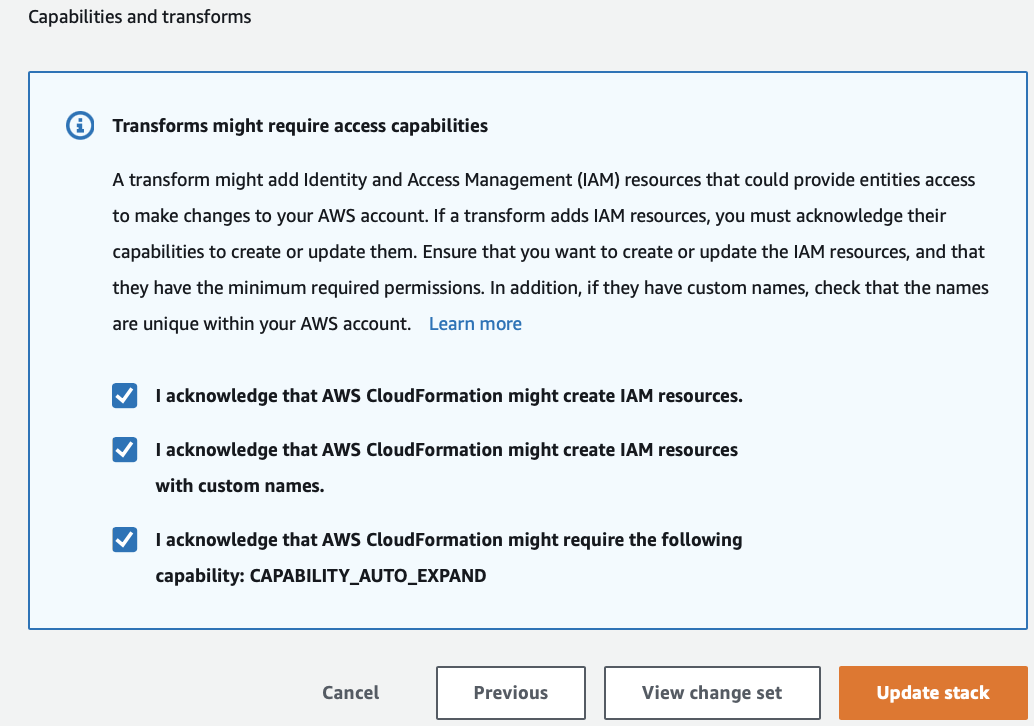
Step 6: Keep default configurations and select below options.
I acknowledge that AWS CloudFormation might create IAM resources.I acknowledge that AWS CloudFormation might create IAM resources with custom names.I acknowledge that AWS CloudFormation might require the following capability: CAPABILITY_AUTO_EXPAND
Click Update stack.
The rainmaker-node-registration stack will be upgraded as shown below:

SAR Upgrades: Voice Assistant Integration
You can upgrade your SAR repositories for voice assistant integration to the latest version by following the steps below.
Upgrading the ESP-RainMaker-3p-CognitoClients Repository
-
Log in to AWS Developer Console
- Open the AWS Developer Console.
- Make sure you are selecting the same region where RainMaker deployed.
-
Go to SAR service
- Navigate to the
Serverless Application Repositoryservice. - In SAR, select
Available applicationsand then choosePrivate applications.
- Navigate to the
-
Select the repository
- Find and click the
ESP-RainMaker-3p-CognitoClientsrepository.
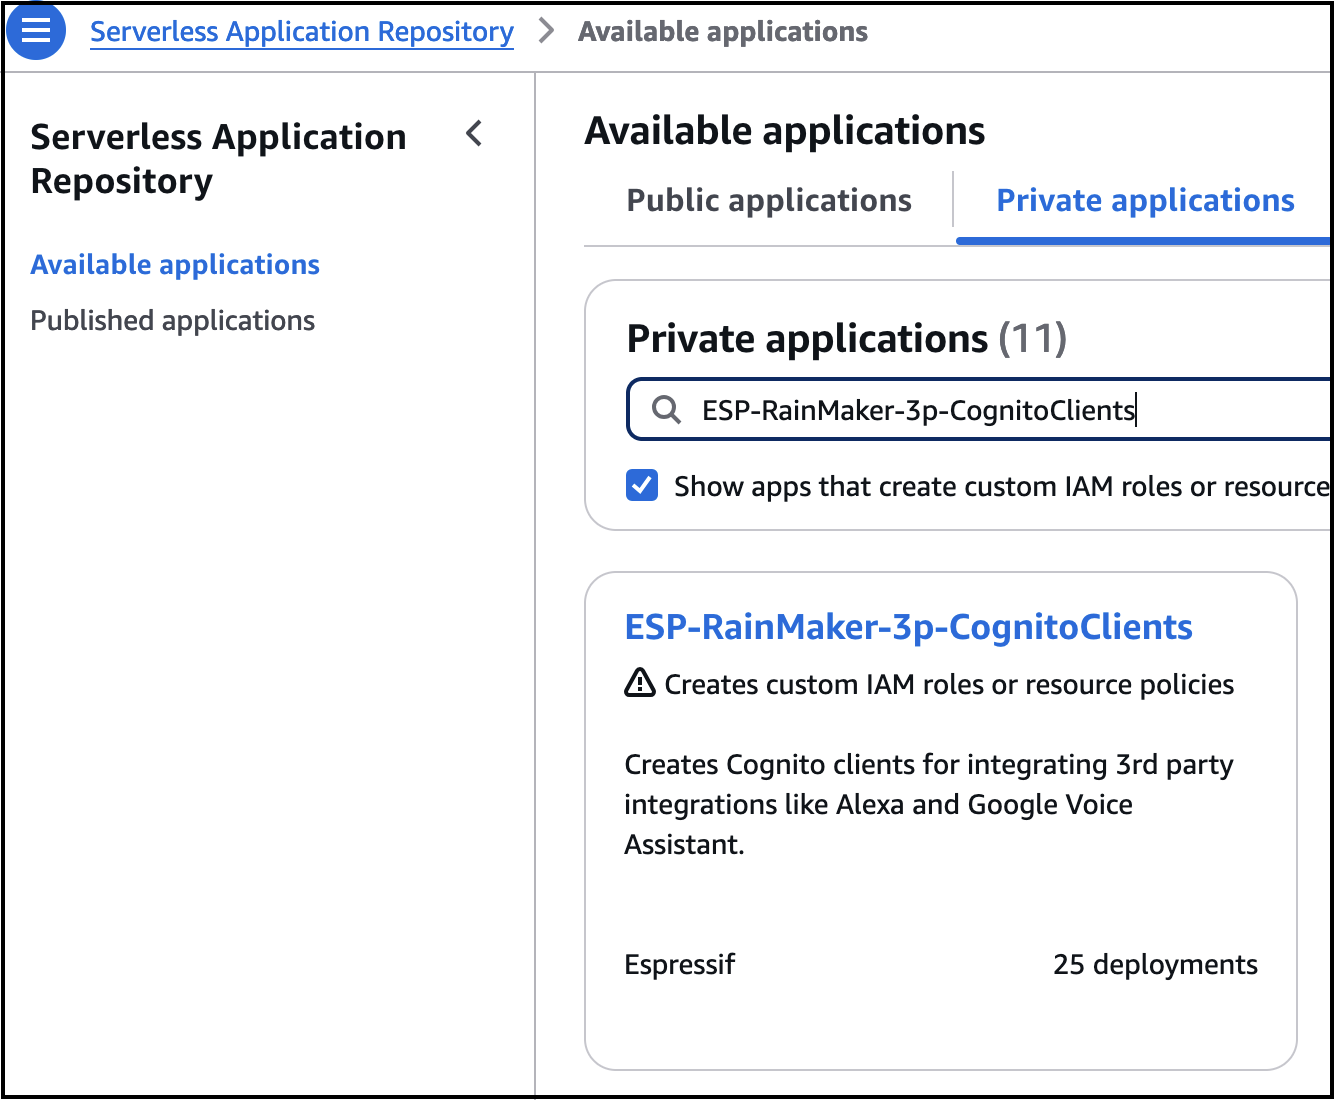
- Find and click the
-
Open CloudFormation in a new tab
- Open a new browser tab and go to the
CloudFormationservice. - Ensure that you are selecting the same region where RainMaker deployed.
- Open a new browser tab and go to the
-
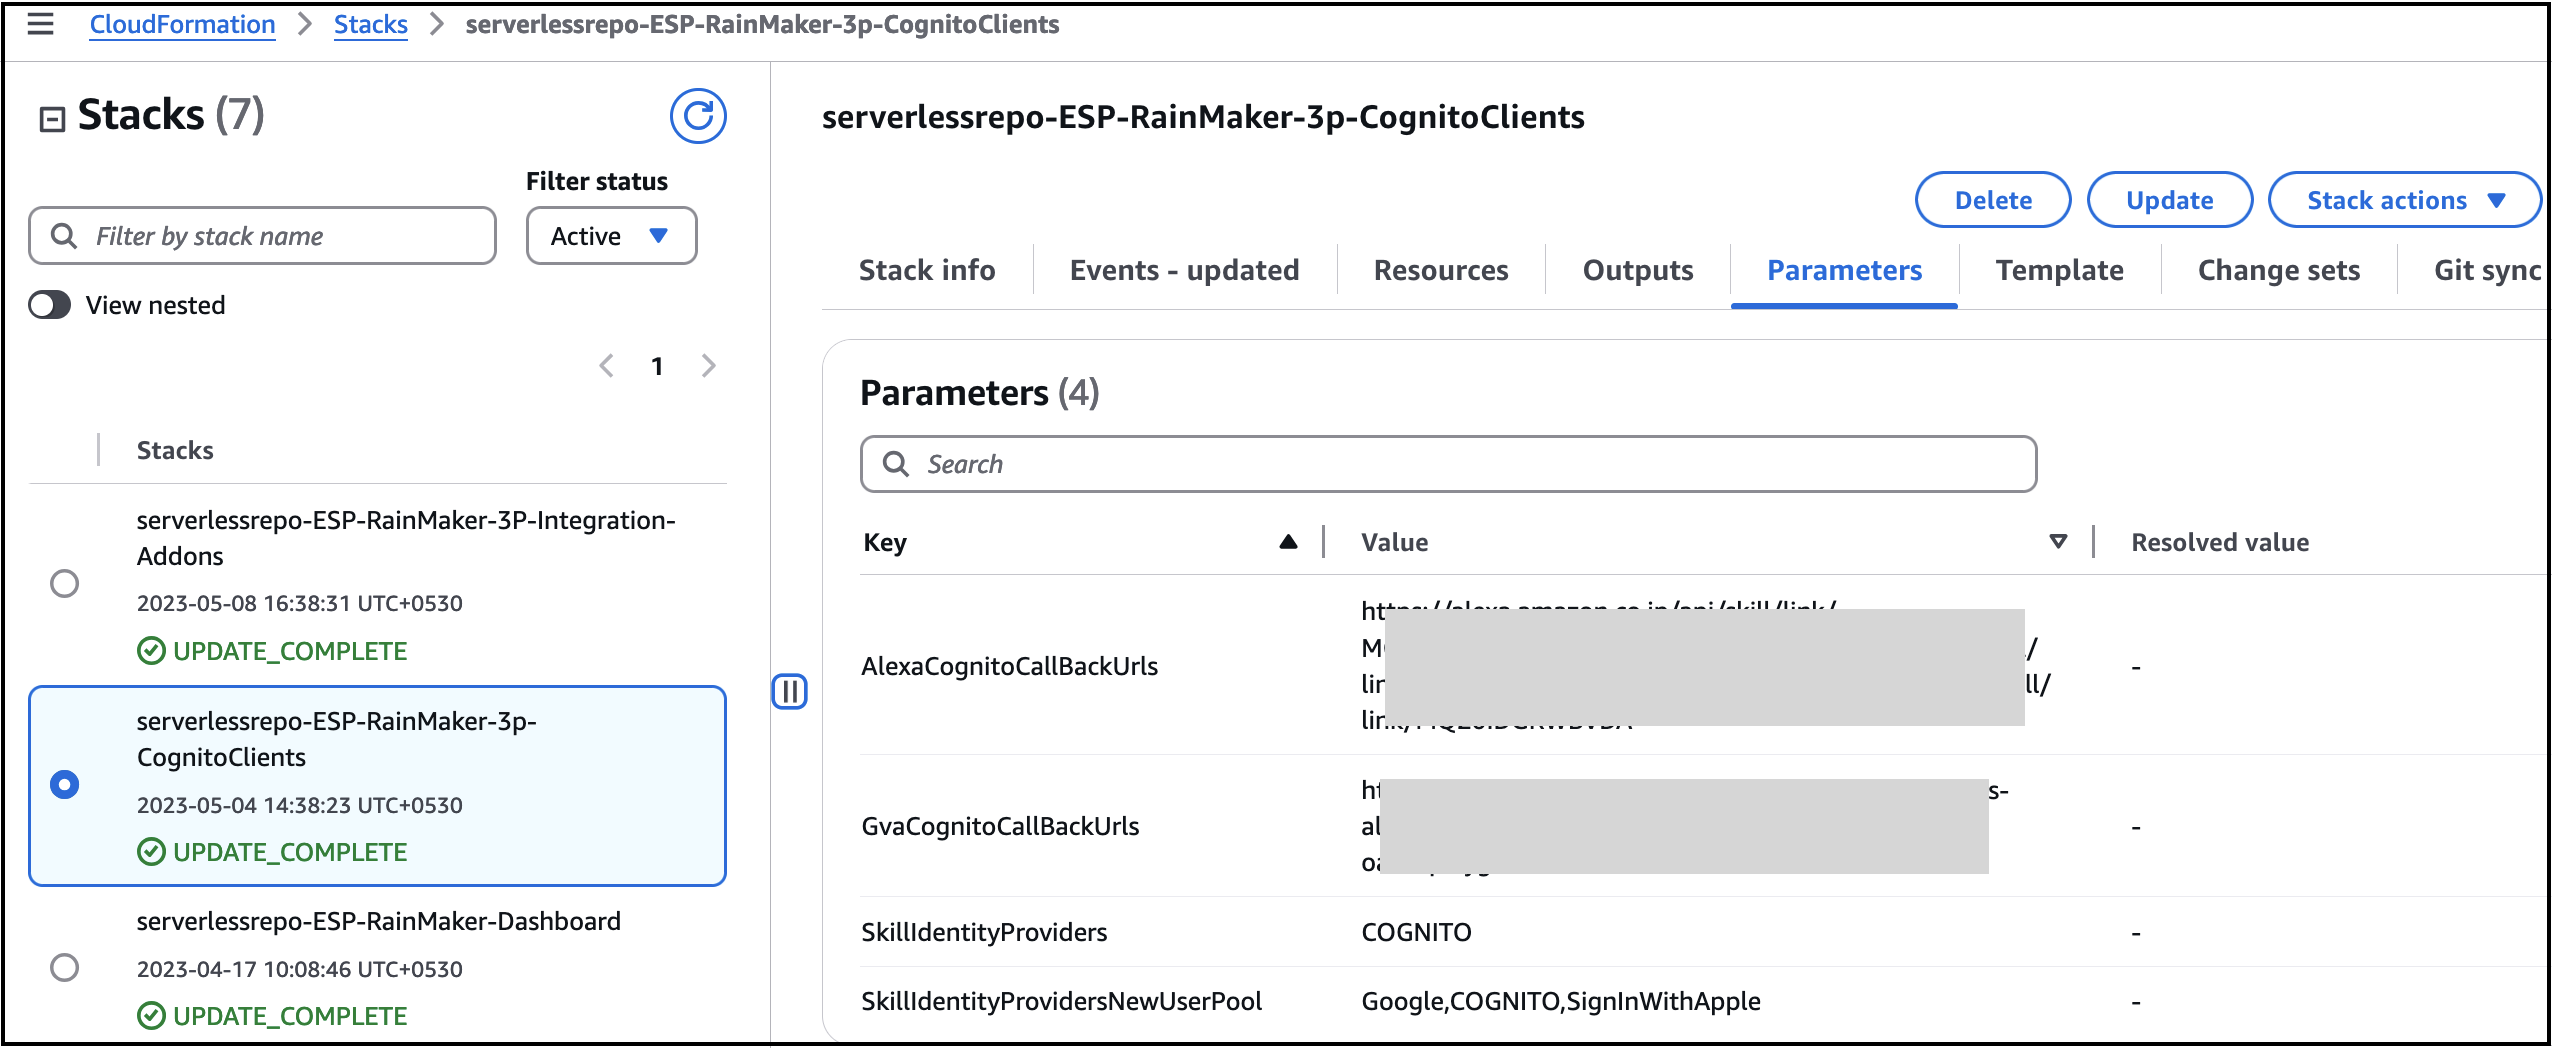
Locate the stack name
- Search for the stack "serverlessrepo-ESP-RainMaker-3P-Integrations".
-
Review CloudFormation parameters
- Go to the
Parameterssection of the CloudFormation stack.
- Go to the
-
Fill SAR parameters
- Return to the SAR tab and check the required parameter values.
- Copy the CloudFormation parameter values and fill them into the respective SAR parameters.
-
Deploy the upgrade
- After filling all parameter values, accept the acknowledgment and click
Deploy.
- After filling all parameter values, accept the acknowledgment and click
Upgrading the ESP-RainMaker-3P-Integrations Repository
-
Log in to AWS Developer Console
- Open the AWS Developer Console.
- Make sure to select the
us-east-1region.
-
Go to SAR service
- Navigate to the
Serverless Application Repositoryservice. - In SAR, select
Available Applicationsand then choosePrivate applications.
- Navigate to the
-
Select the repository
- Find and click the
ESP-RainMaker-3P-Integrationsrepository.
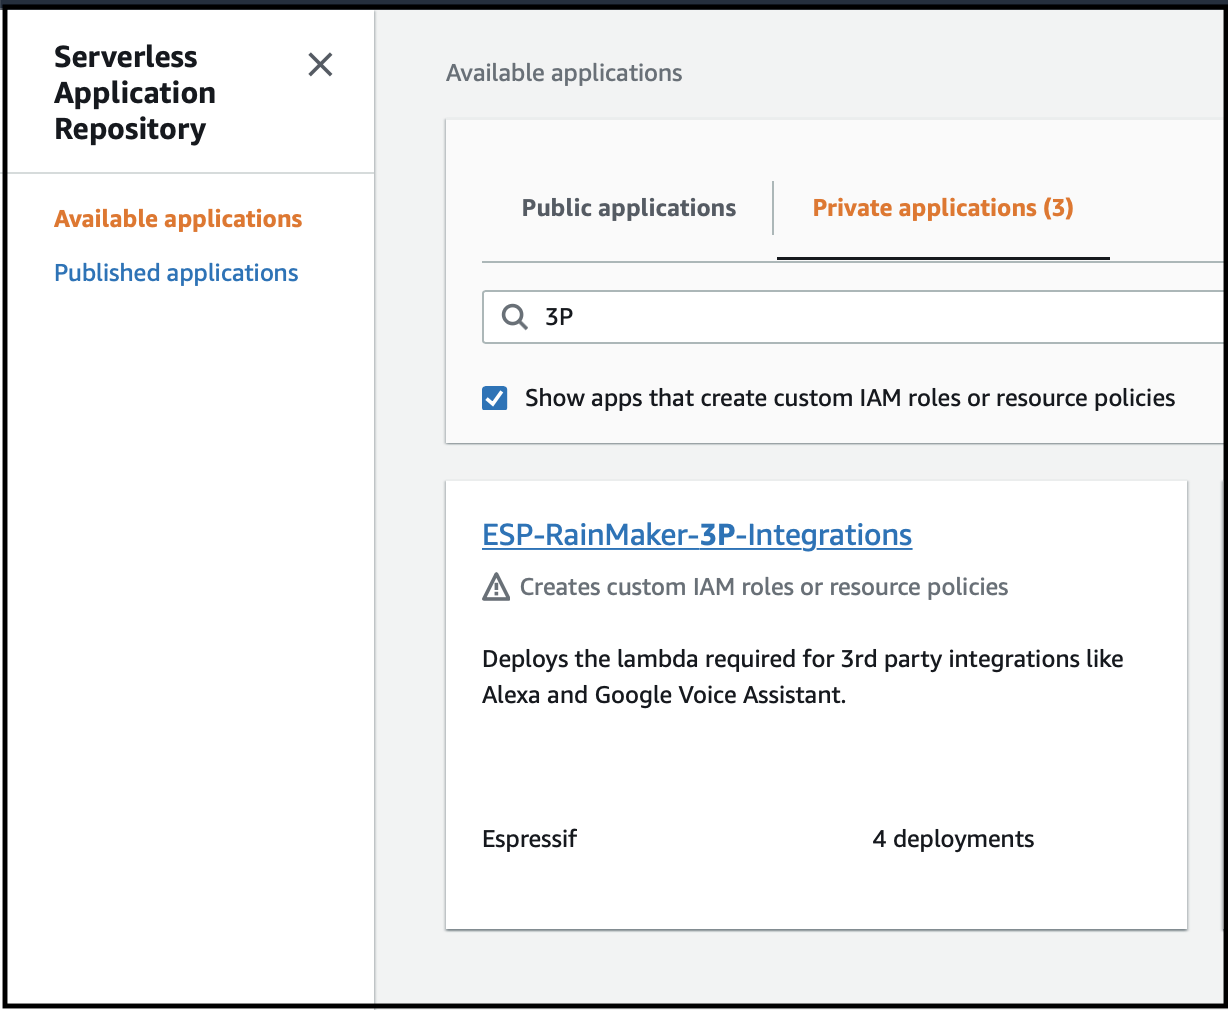
- Find and click the
-
Open CloudFormation in a new tab
- Open a new browser tab and go to the
CloudFormationservice. - Ensure the region is
us-east-1.
- Open a new browser tab and go to the
-
View nested stacks
- Toggle the
View Nestedbutton to see nested stacks.
- Toggle the
-
Locate the stack name
- Search for the "serverlessrepo-ESP-RainMaker-3P-Integrations" stack.
-
Review CloudFormation parameters
- Go to the
Parameterssection of the CloudFormation stack.

- Go to the
-
Fill SAR parameters
- Return to the SAR tab and check the required parameter values.
- Copy the CloudFormation parameter values and fill them into the respective SAR parameters.
-
Deploy the upgrade
- After filling all parameter values, accept the acknowledgment and click
Deploy.
- After filling all parameter values, accept the acknowledgment and click
-
Repeat for other regions
- Upgrade the stack in the following regions:
us-west-2eu-west-1
- Upgrade the stack in the following regions:
Upgrading the ESP-RainMaker-3P-Integration-Addons Repository
To upgrade the ESP-RainMaker-3P-Integration-Addons repository, follow the same steps as for the ESP-RainMaker-3P-Integrations repository. However, note the following:
- The ESP-RainMaker-3P-Integration-Addons repository is deployed in a single region, which is the region where your RainMaker deployment is located.
- Ensure that you select the correct region before starting the upgrade process.