

3. Connect your AWS account
Connecting establishes the trust that lets ESP CloudHub deploy and manage products in your AWS account on your behalf. You choose one of two connection methods — the rest of the deployment flow is identical afterwards.
Choose a connection method
Open the tenant (from the Accounts list) to start the connect flow. You'll be asked to Select Connection Method:
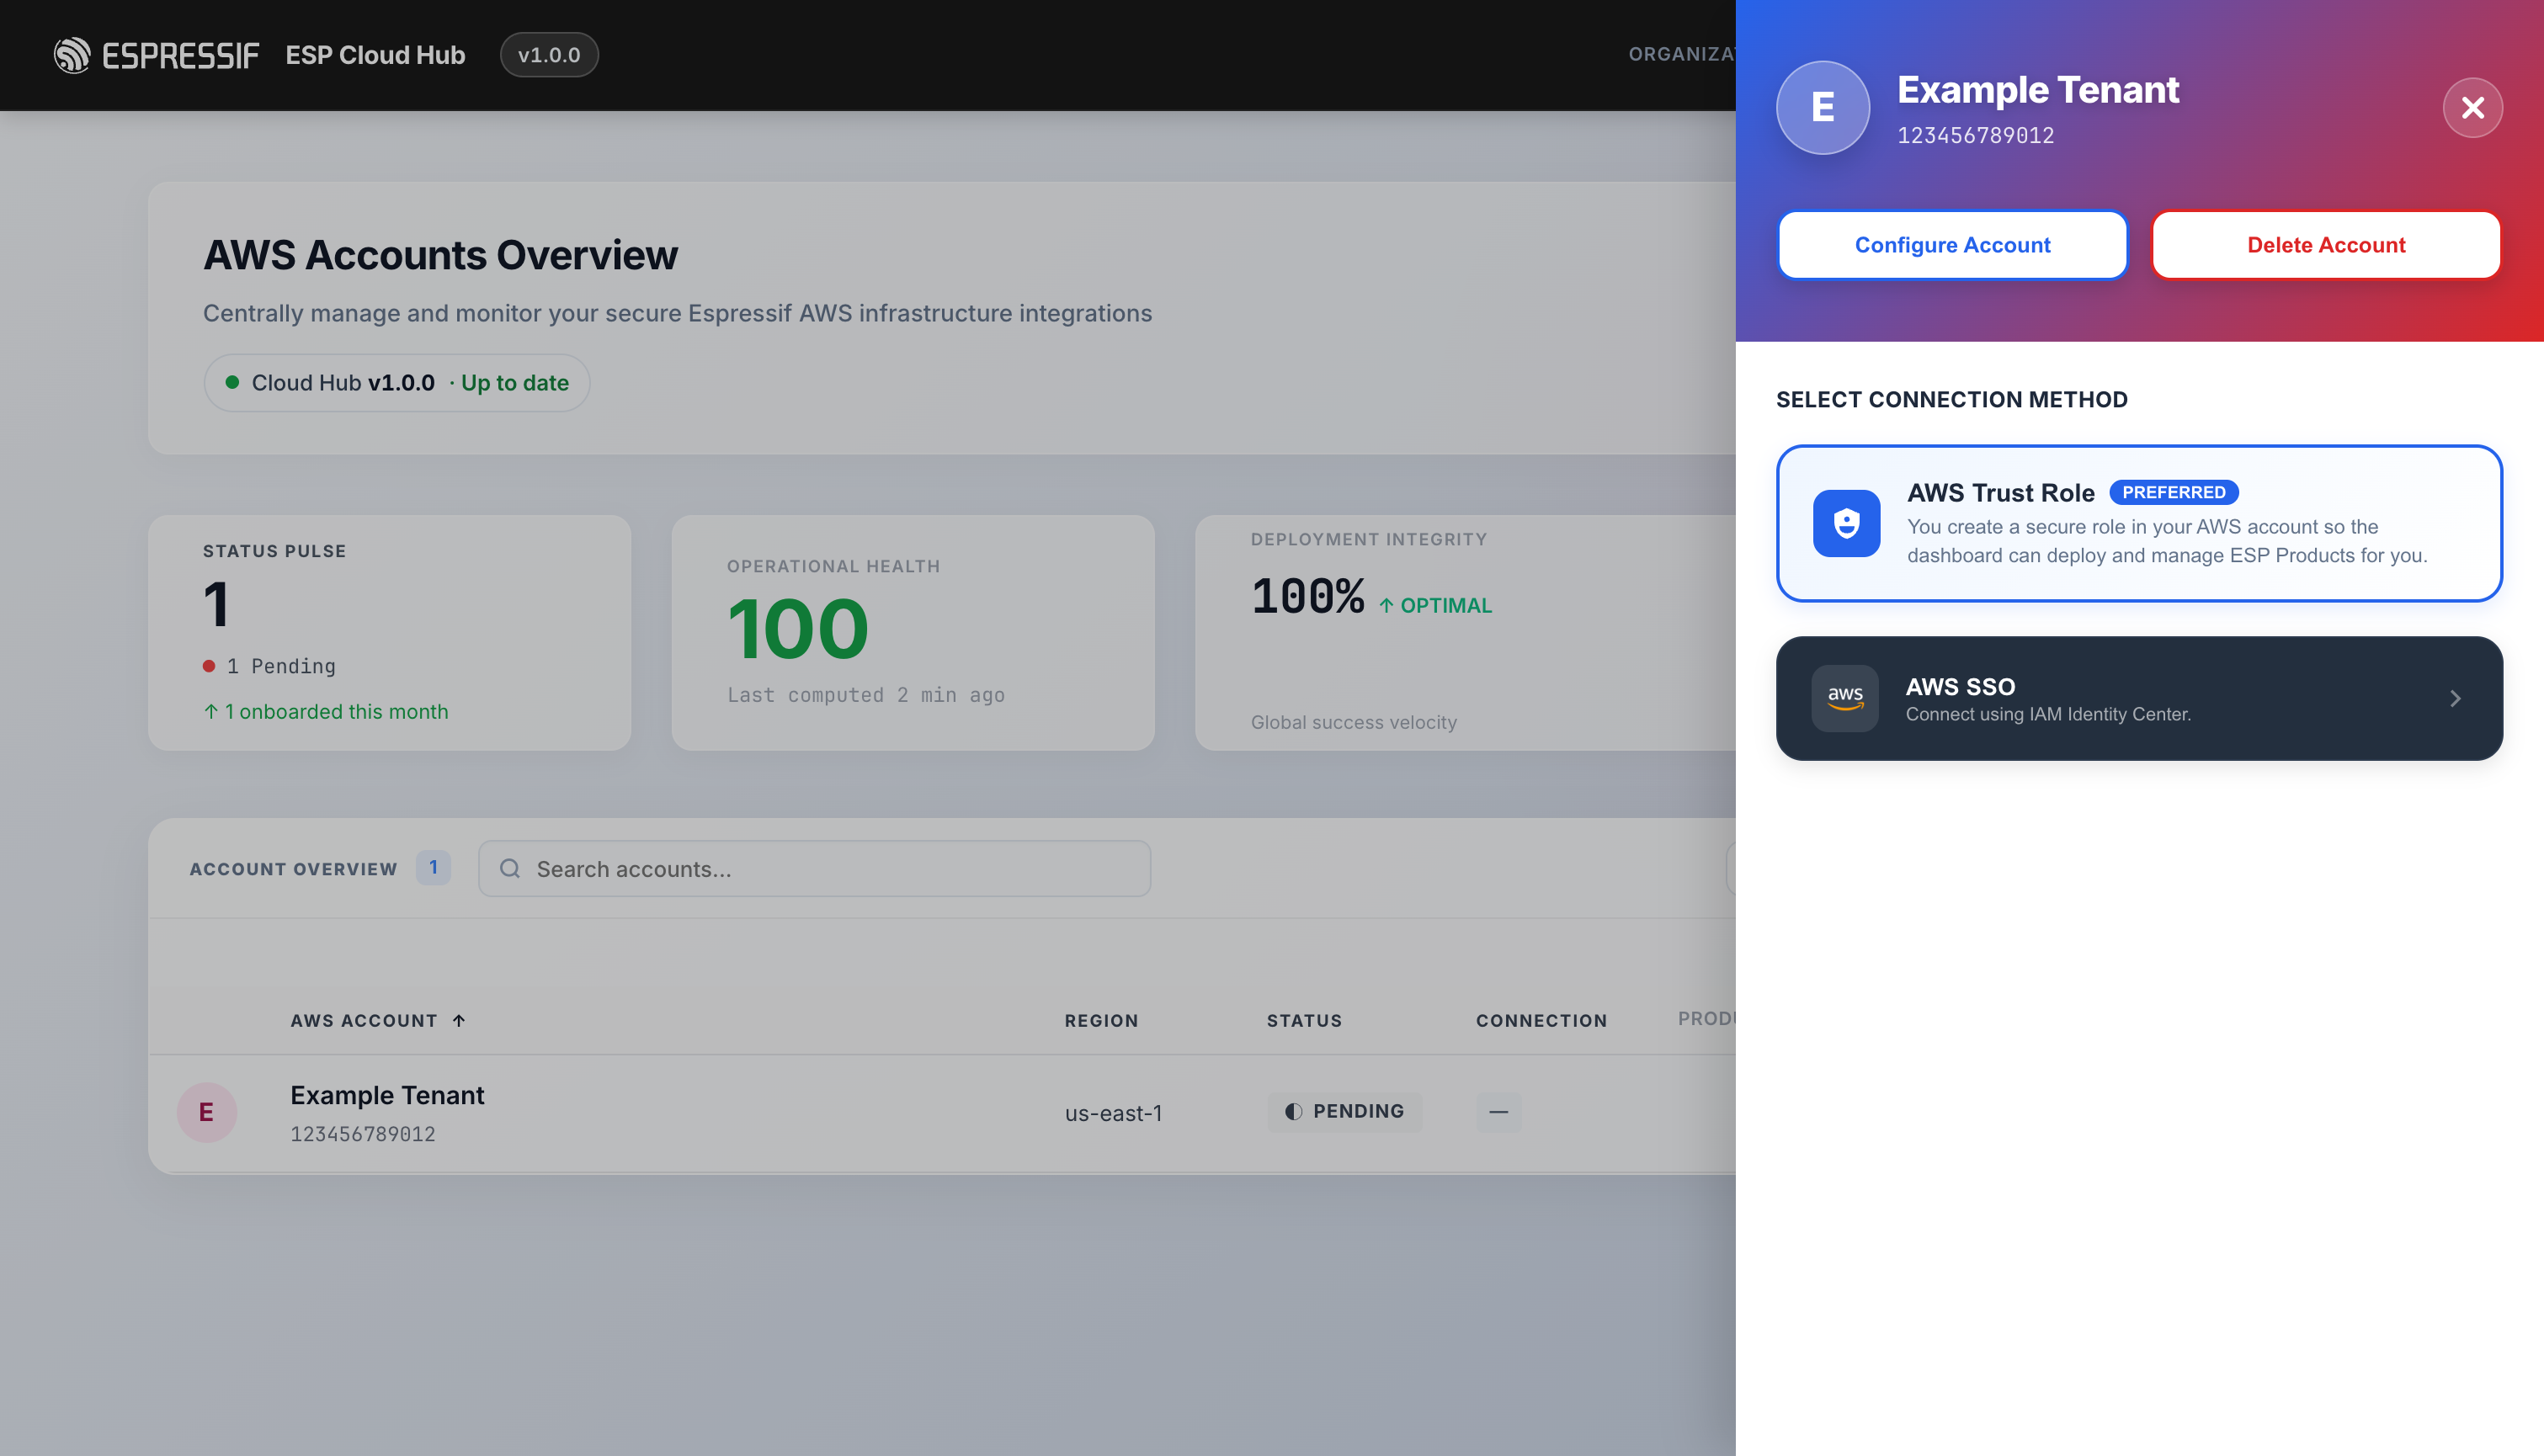
| Method | When to use | Notes |
|---|---|---|
| AWS Trust Role (AssumeRole) | Most accounts. | You create a small IAM role once; the connection is durable (does not expire). |
| AWS SSO (IAM Identity Center) | If your org manages access through IAM Identity Center. | Uses a device-authorization flow. The connection is valid for ~8 hours, then must be reconnected. |
| Self Account | Only shown on your own ESP CloudHub, when the AWS account you add is the one ESP CloudHub runs in. | No extra setup — ESP CloudHub uses its own access. |
What connecting creates in your AWS account
Read this before you connect, so you know exactly what ESP CloudHub can do in your account.
AWS Trust Role
The setup link creates one CloudFormation stack in your AWS account:
| Stack | ESPDeploymentTrustRole |
| IAM role it creates | ESPDeploymentRole |
| Permissions | AdministratorAccess — needed because deploying ESP RainMaker creates many kinds of AWS resources (IAM roles, Lambda functions, Cognito, IoT, S3, API Gateway and more). Plus a small read-only policy, PreDeploymentChecksDiagnosticPolicy, used by the account checks (SES, SNS and Lambda account status). |
| Who can use the role | Only the AWS account that runs your ESP CloudHub, and only with a secret ExternalId. After the first successful connect, ESP CloudHub replaces the ExternalId from the setup link with a permanent one that only ESP CloudHub can compute, so a copied setup link is useless afterwards. |
| How it is used | ESP CloudHub's deployment service takes short sessions on the role (15 minutes to verify, up to 1 hour per deployment step) when someone in your organization connects, runs the account checks, deploys, upgrades or imports. No AWS access keys are stored. |
The role exists only so that ESP CloudHub can deploy and upgrade ESP RainMaker for you. Espressif team members do not use it to sign in to your AWS account.
To see it: in the AWS console, open IAM → Roles → ESPDeploymentRole, or CloudFormation → Stacks → ESPDeploymentTrustRole. In ESP CloudHub, the connect panel also has View role definition and What gets created? links.
To remove ESP CloudHub's access: delete the ESPDeploymentTrustRole stack in your AWS account. ESP CloudHub can then no longer deploy or upgrade in that account. Your RainMaker deployment keeps running.
AWS SSO
Nothing is created in your AWS account.
- When you authorize, ESP CloudHub receives an IAM Identity Center sign-in token. It is stored encrypted on the ESP CloudHub side, is never sent back to your browser, and is deleted automatically when it expires (about 8 hours).
- ESP CloudHub uses it only to get short-lived credentials for the IAM Identity Center role you select in Step 3 — so ESP CloudHub can do exactly what that role allows, and nothing more.
- Disconnecting the account in ESP CloudHub deletes the token immediately. You can also revoke the session in IAM Identity Center at any time.
Deleting the account from ESP CloudHub
Delete Account in the account's details panel does the following:
- Removes ESP CloudHub's access first. For AWS Trust Role, ESP CloudHub changes the trust of
ESPDeploymentRoleso it can no longer use the role. For AWS SSO, the stored sign-in token is deleted. - Removes the account and its connection details from ESP CloudHub.
- Leaves your AWS account as it is. Your ESP RainMaker deployment keeps running, and the
ESPDeploymentTrustRolestack stays. Delete the stack yourself if you no longer need it.
If ESP CloudHub could not remove its access (for example, a policy in your account blocks the change), it tells you after the delete. Delete the ESPDeploymentTrustRole stack to remove it.
To add the same AWS account again later, connect it from the start. The setup panel asks you to update the existing stack's ExternalId or to delete and recreate the stack. A role left from an earlier connection is not accepted as proof that you control the account, whichever ESP CloudHub organization adds it.
Method A — AWS Trust Role
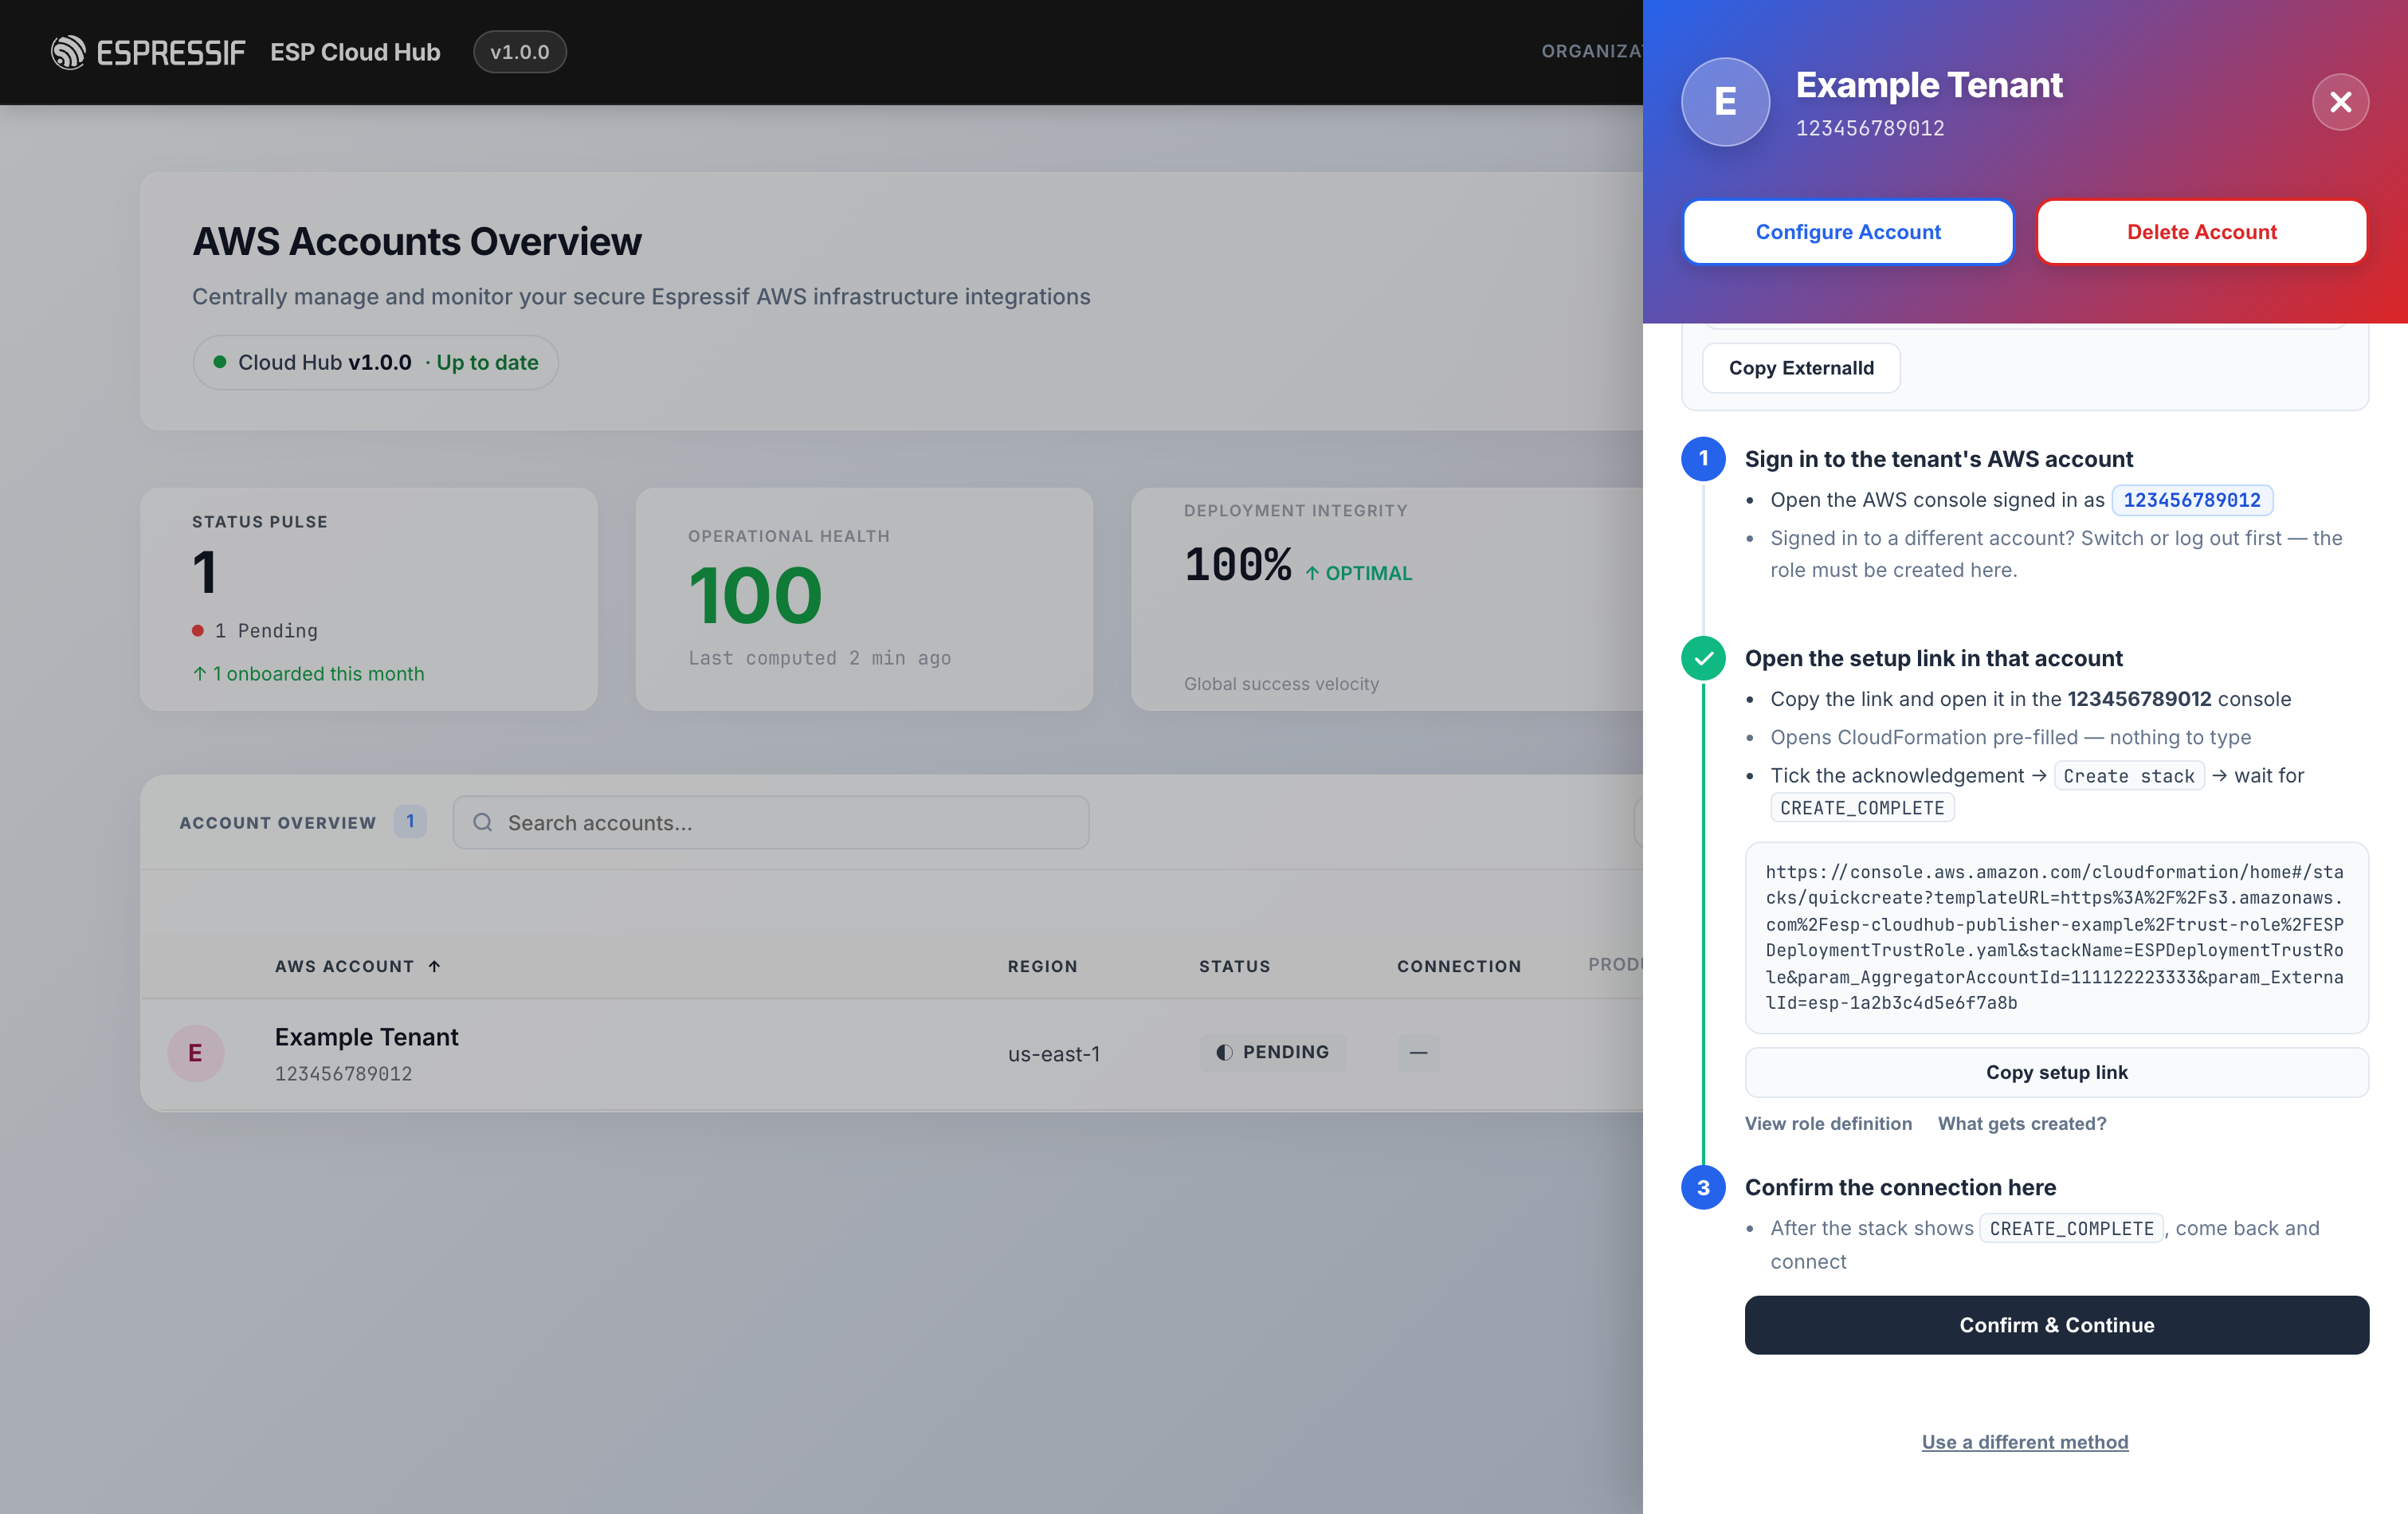
Pick AWS Trust Role. ESP CloudHub shows a short set of steps and generates a pre-filled CloudFormation link for your AWS account. Nothing needs to be typed into AWS.
Step 1 — Copy the setup link
In the connect panel, review the steps and click Copy setup link. This copies a CloudFormation Quick create URL that is pre-filled with the aggregator account ID and a unique ExternalId (a security value that hardens the trust).
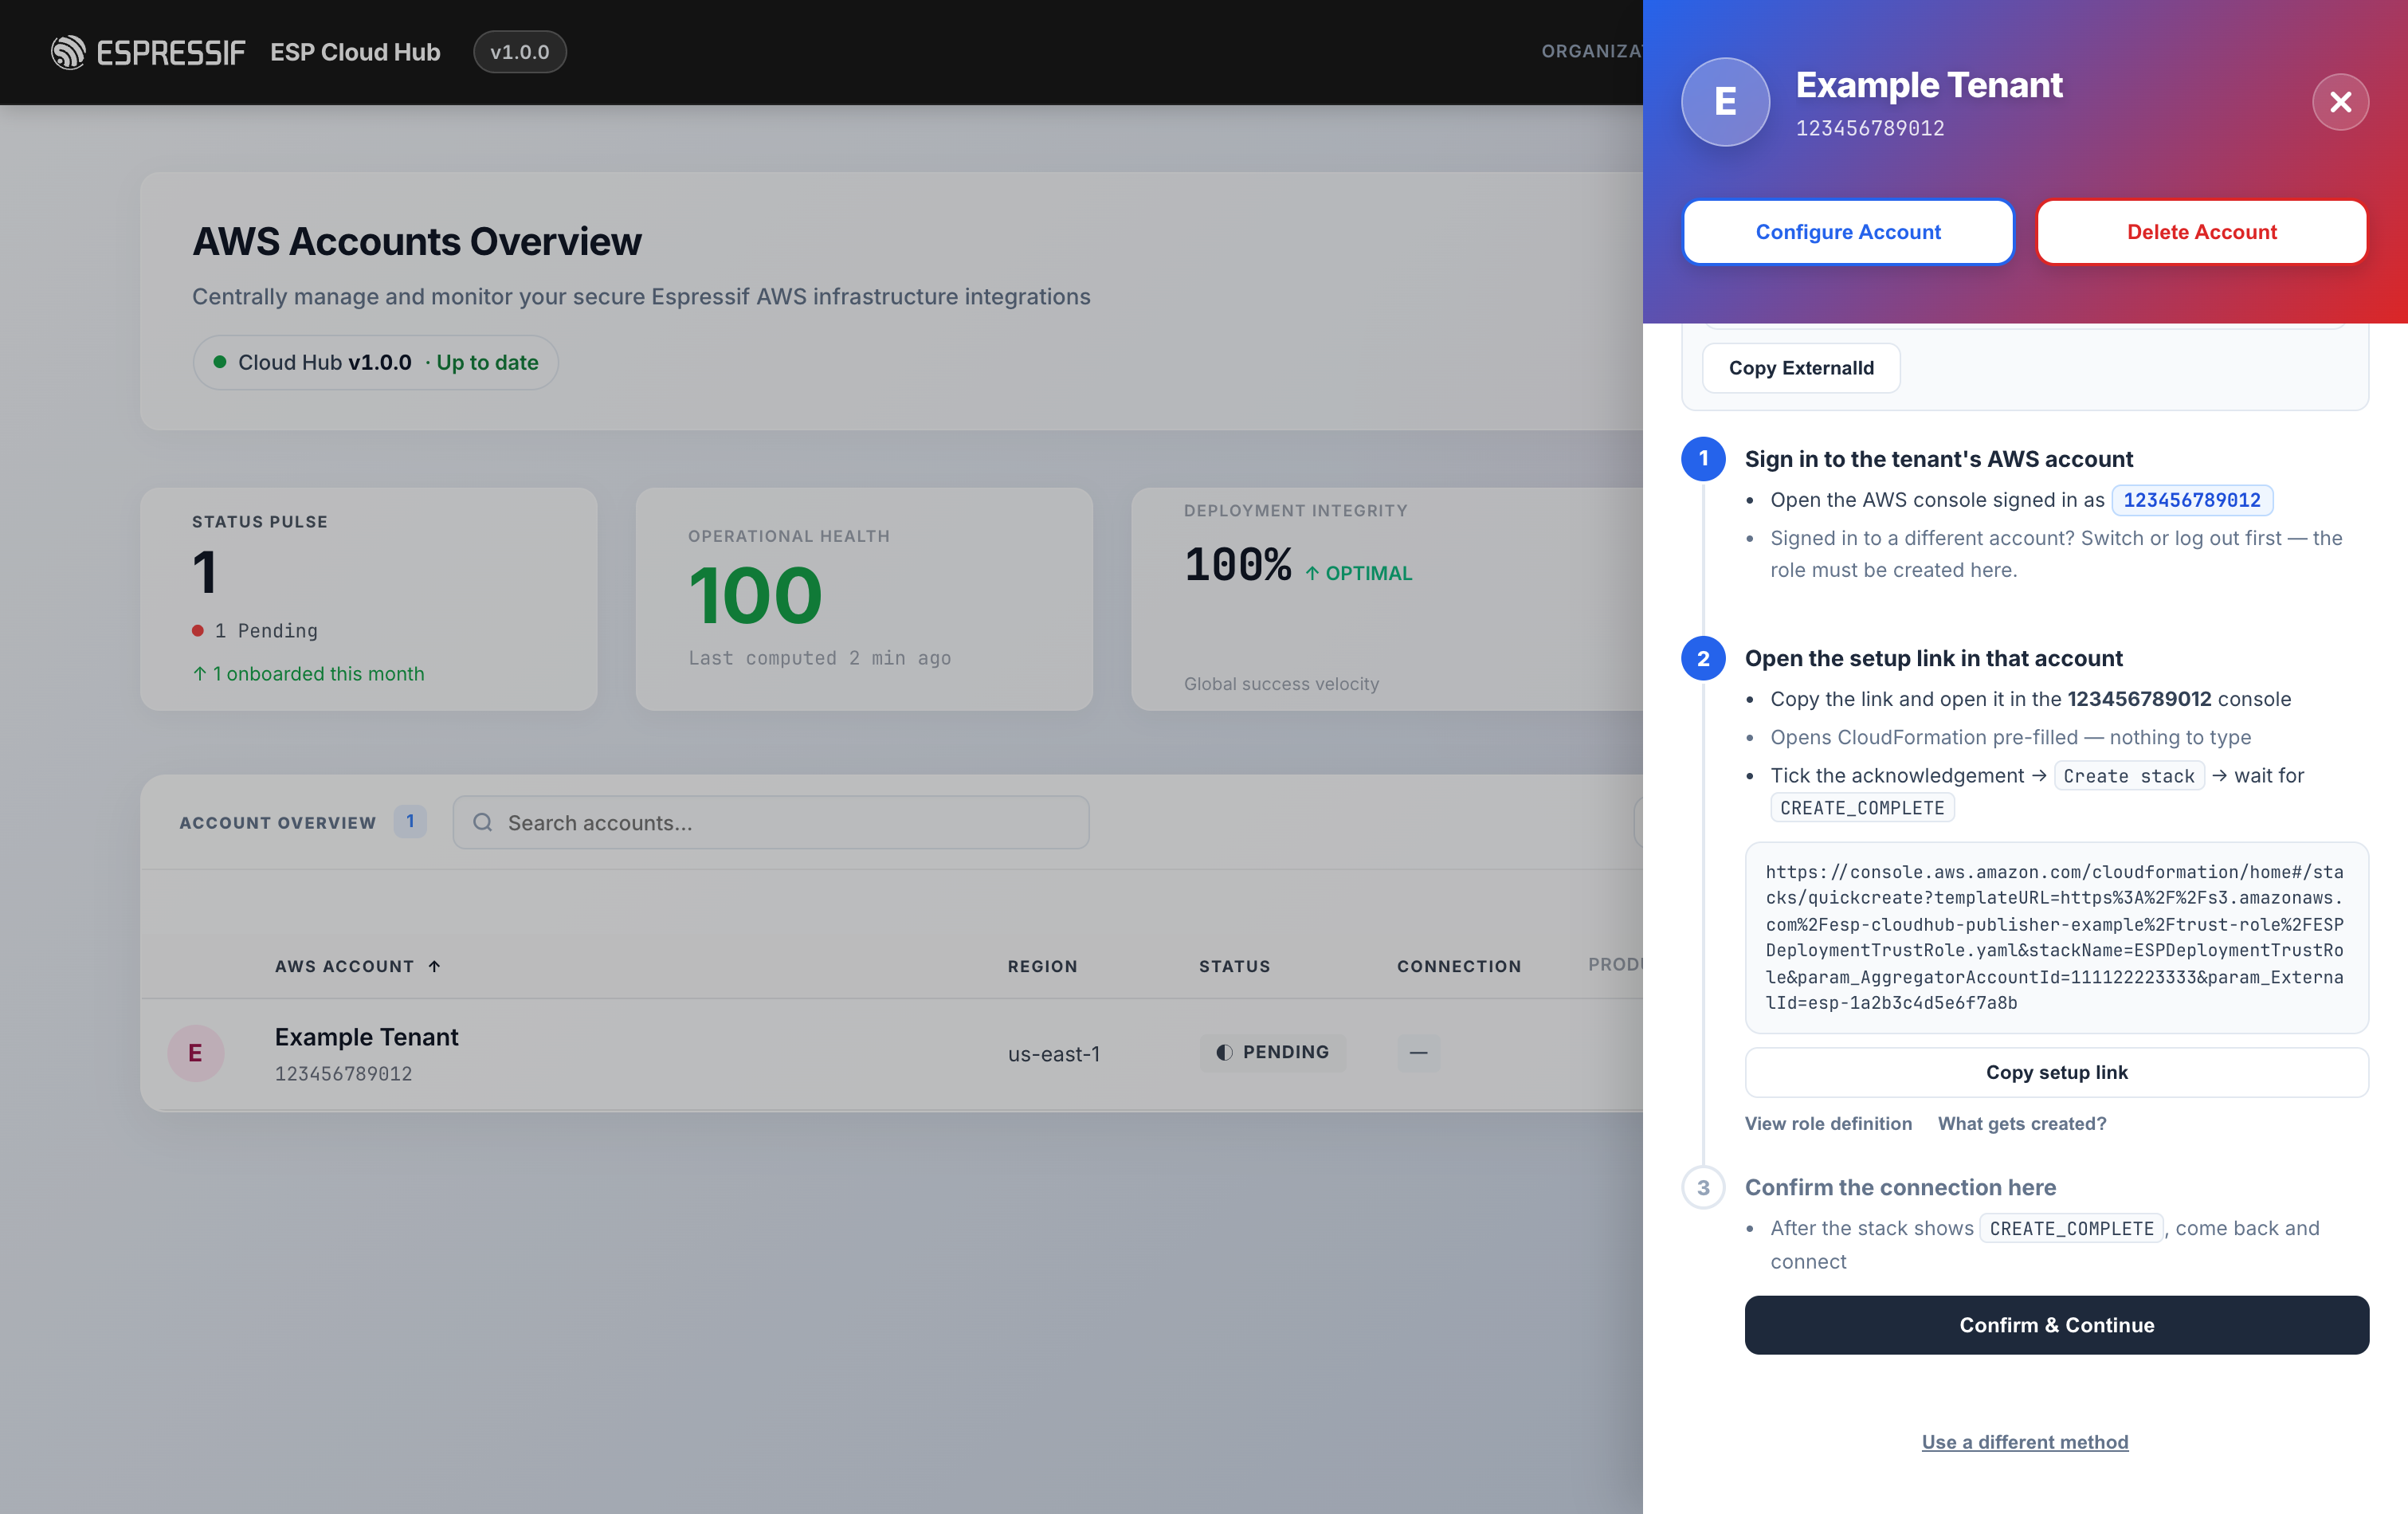
Make sure your AWS console is signed in to the same 12-digit account you registered as the tenant. If you're in a different account, switch or log out first — the role must be created in the tenant account.
Step 2 — Run the pre-filled CloudFormation stack
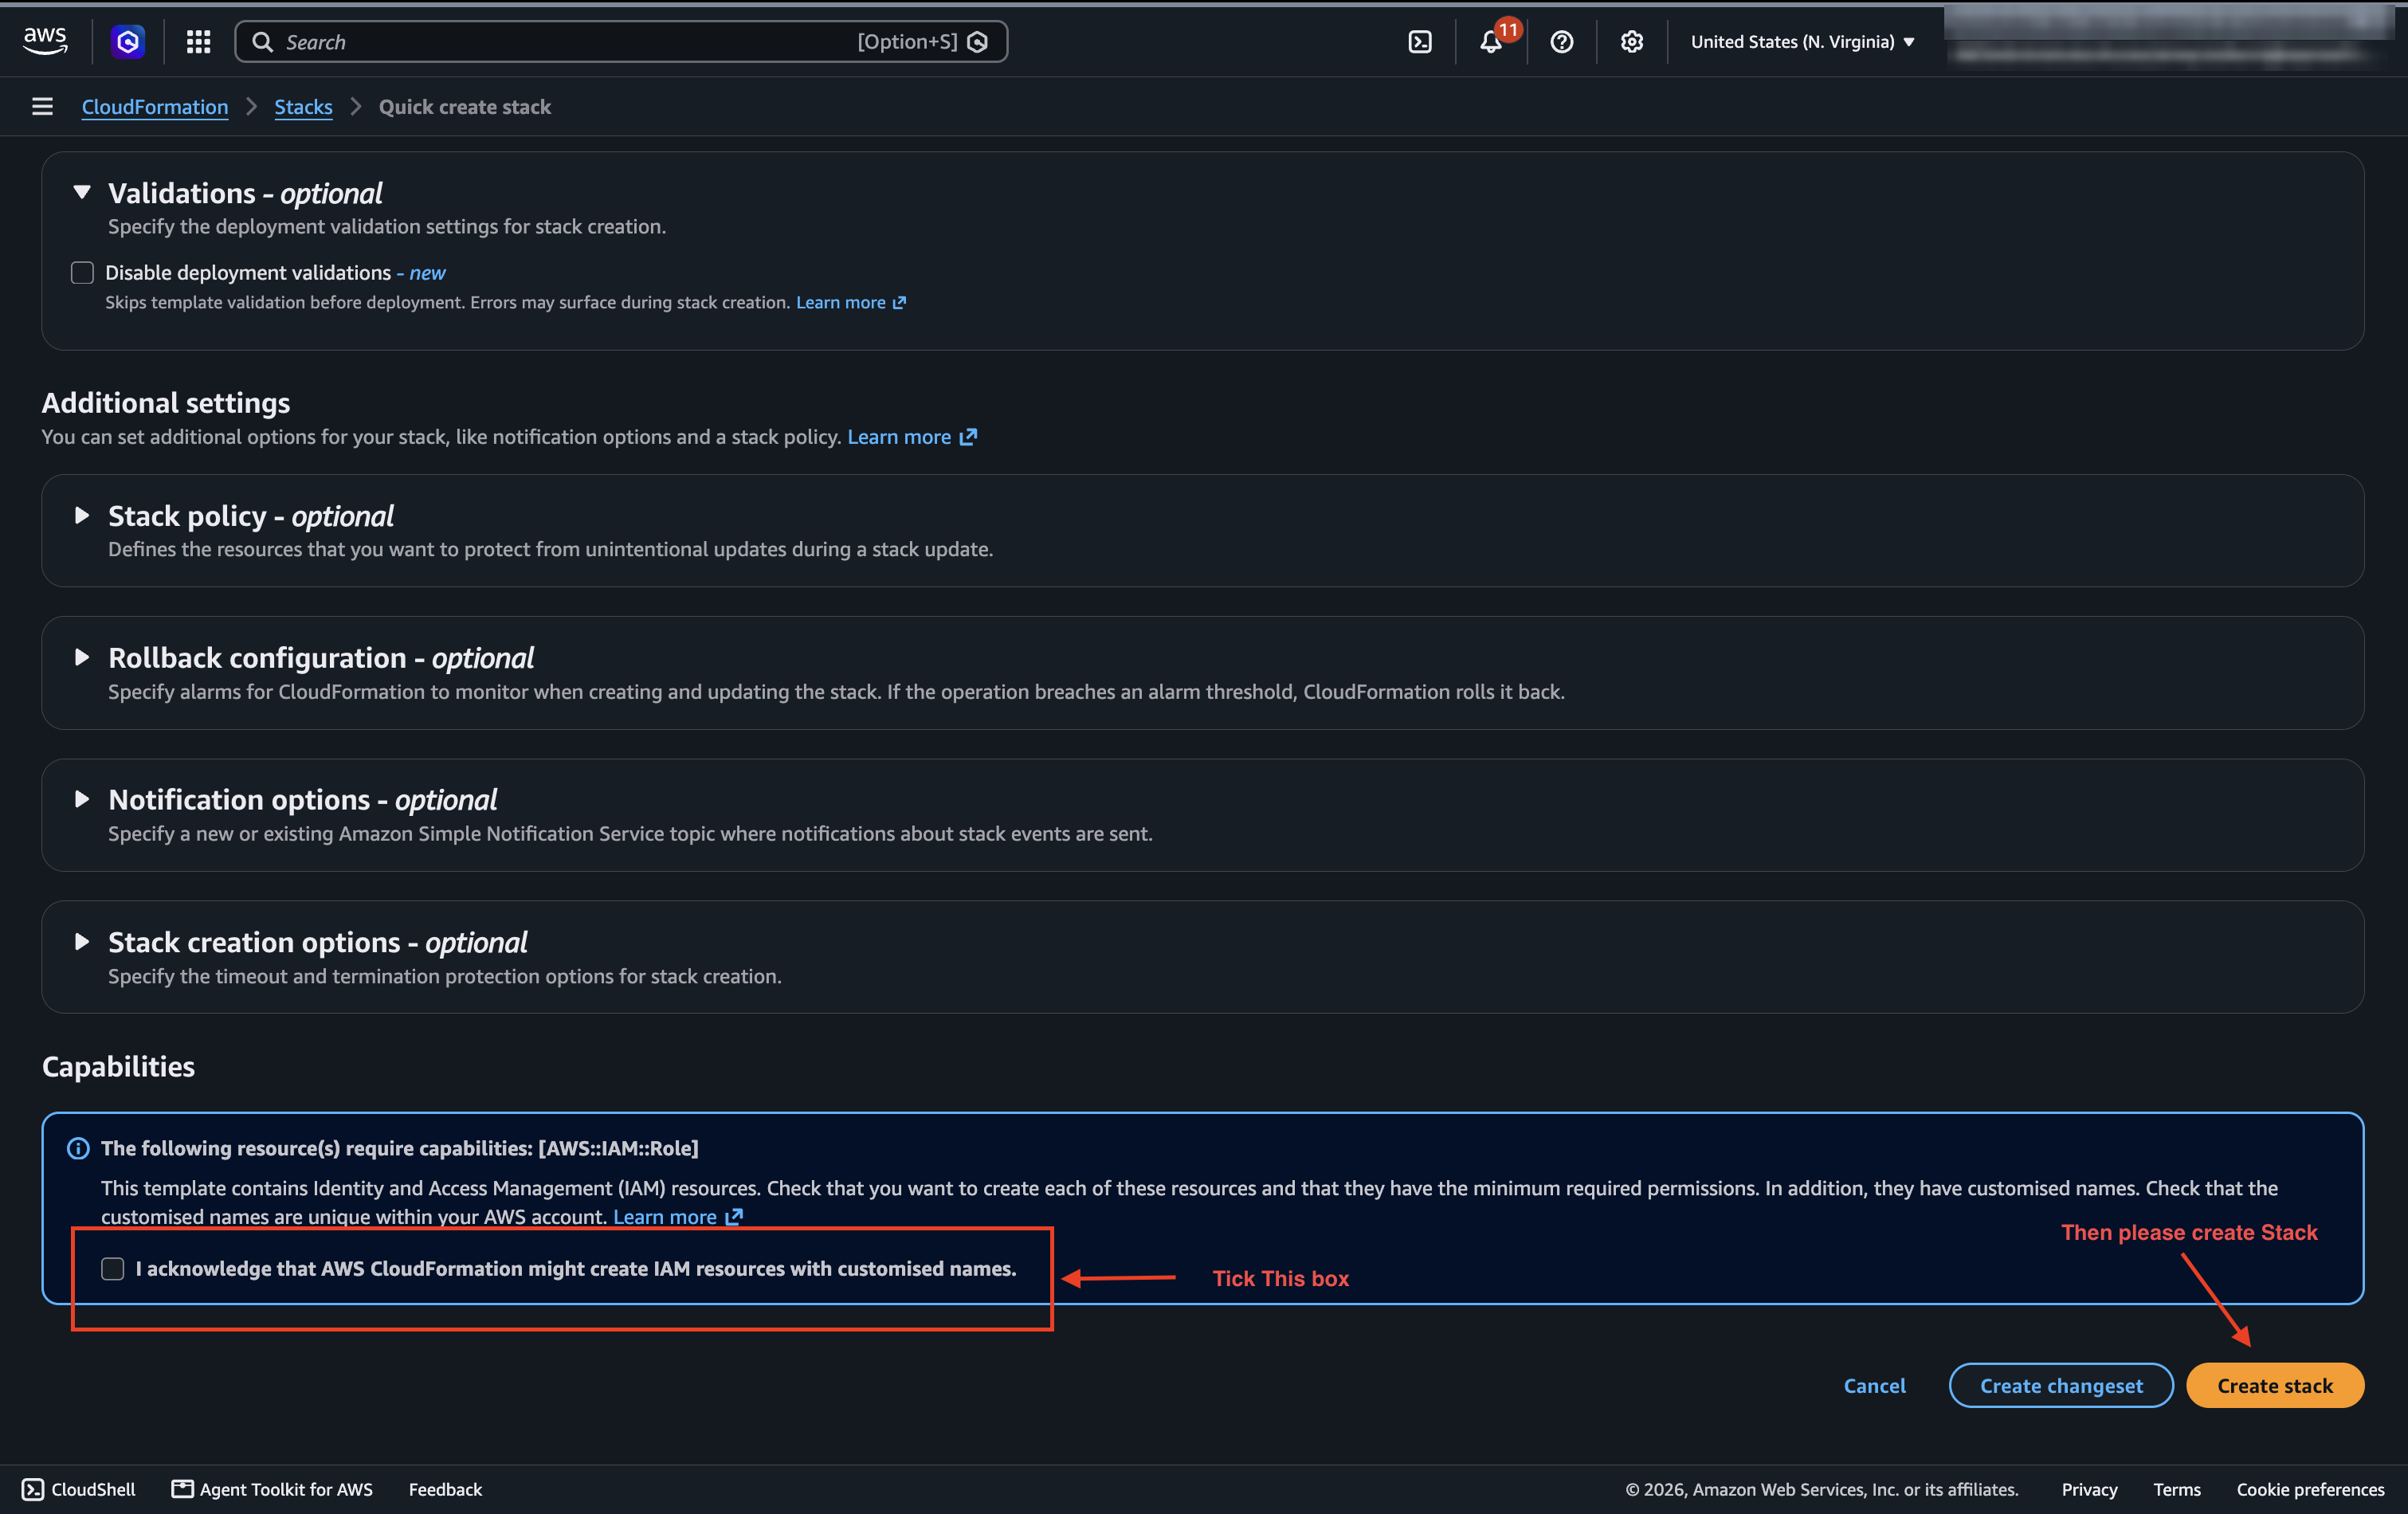
Open the copied link in your tenant's AWS console. It opens CloudFormation's Quick create stack page, already filled in.
- Scroll to the bottom and tick the acknowledgement checkbox (IAM capabilities).
- Click Create stack.
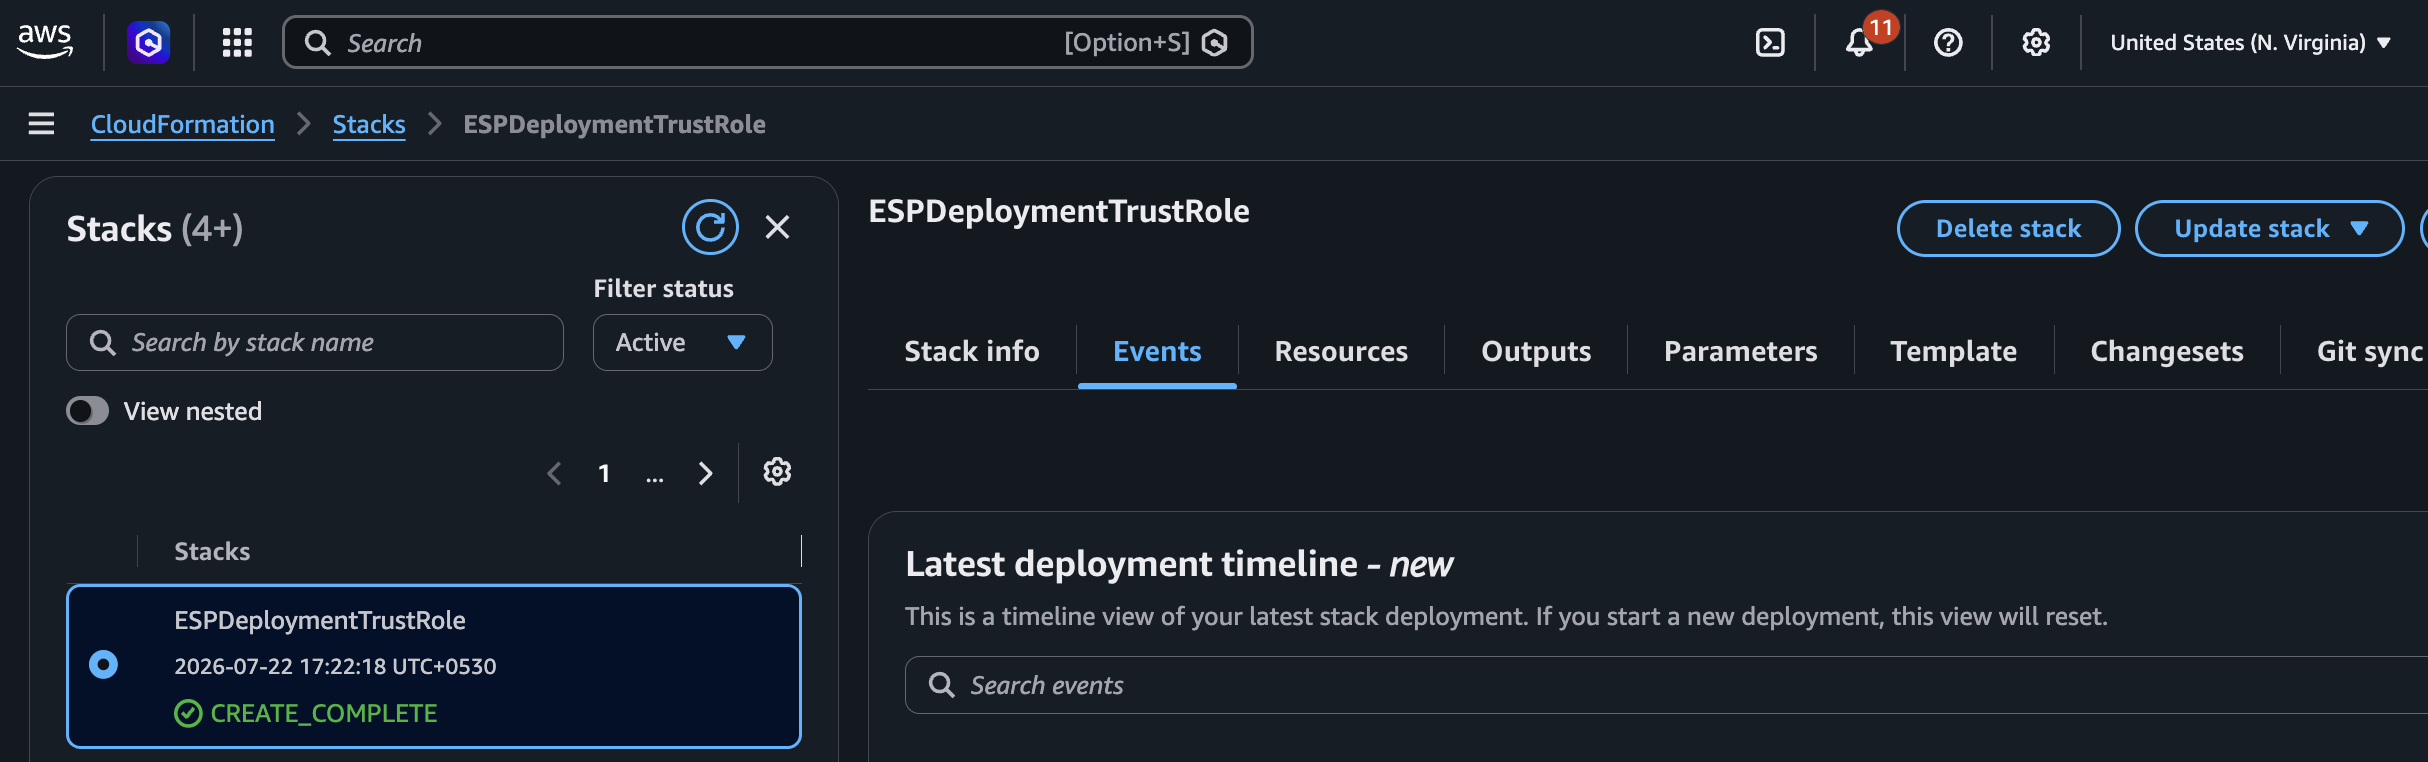
- Wait for the stack to reach CREATE_COMPLETE.
The stack (named ESPDeploymentTrustRole) creates the scoped IAM role ESP CloudHub uses to deploy for you.
Step 3 — Confirm the connection in ESP CloudHub
Return to ESP CloudHub connect panel and click Confirm & Continue. ESP CloudHub verifies the trust by performing one short, disposable role assumption.
On success, the tenant becomes VERIFIED / Connected.
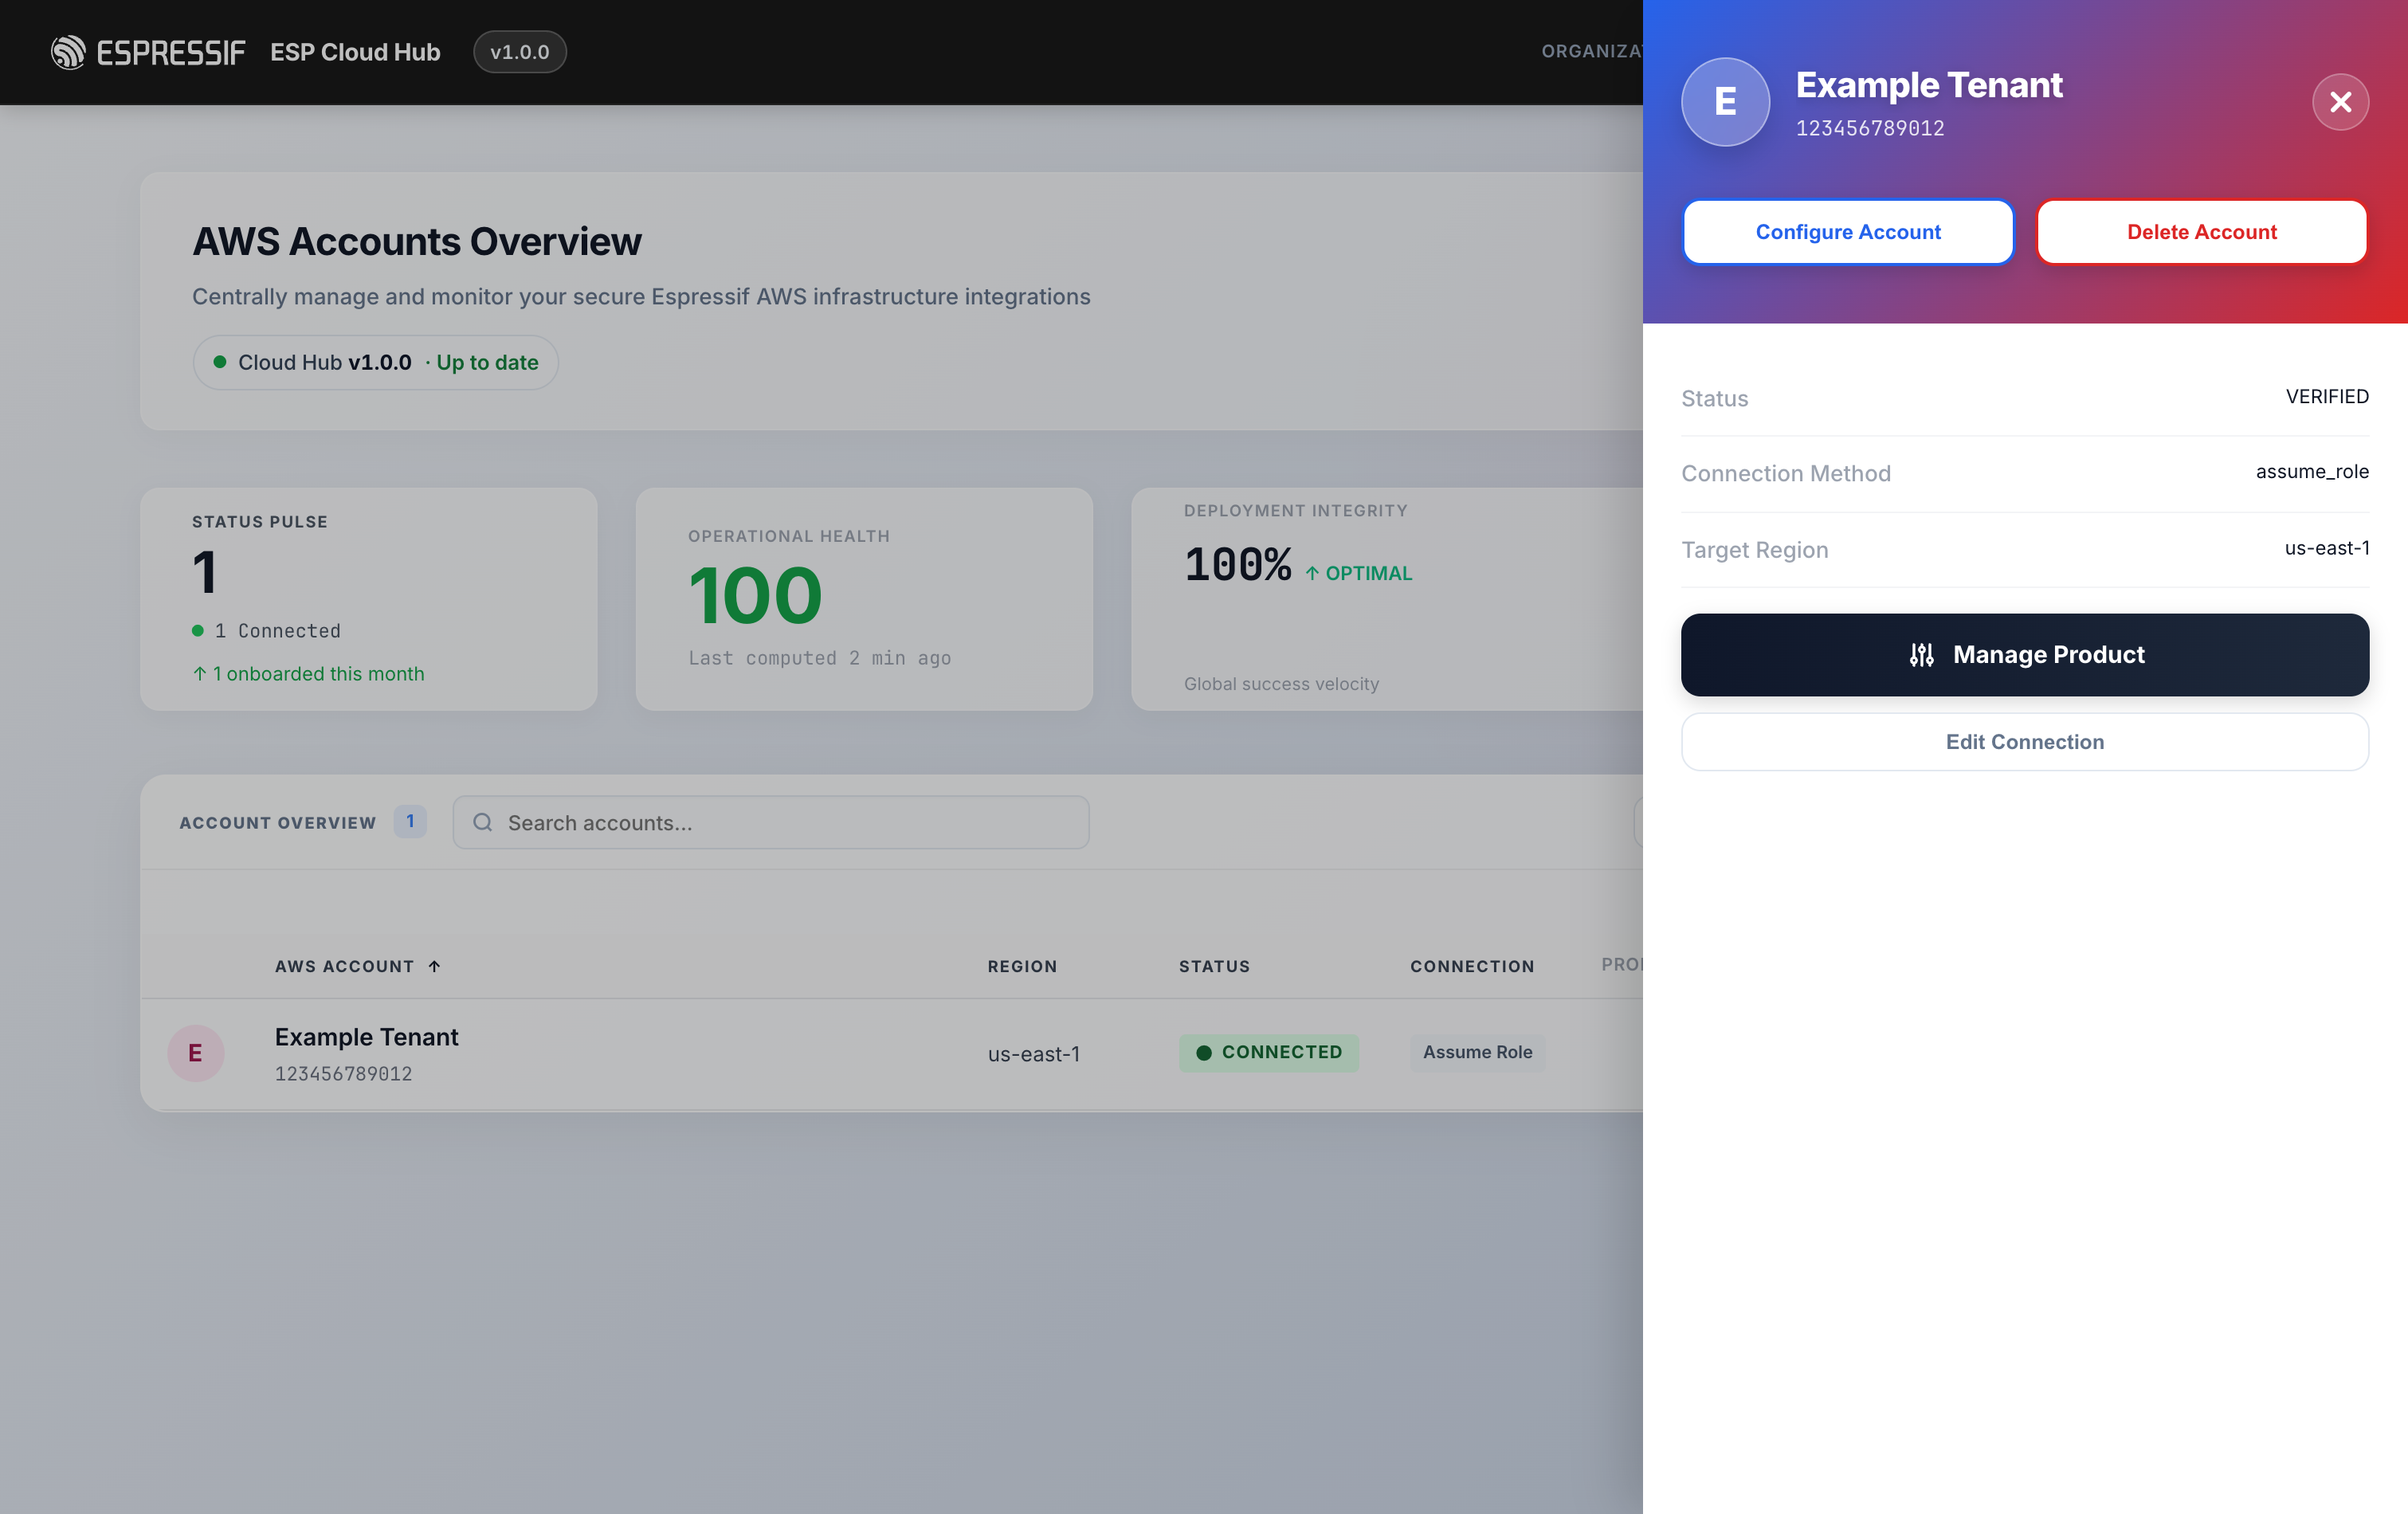
➡️ The tenant is connected — skip to After connecting.
Method B — AWS SSO (IAM Identity Center)
Pick AWS SSO if your organization uses IAM Identity Center.
Step 1 — Prerequisites, access portal URL and region
ESP CloudHub lists the prerequisites:
- Enable IAM Identity Center in your AWS account (choose your region and an Account instance).
- Create a user with AdministratorAccess.
- Retrieve the Start URL — copy the AWS access-portal URL from your Identity Center dashboard.
Then fill in both fields and click Start SSO Login:
- AWS access portal URL: the access portal URL you copied, for example
https://d-xxxxxxxxxx.awsapps.com/start. - IAM Identity Center Region: the region where you enabled IAM Identity Center.
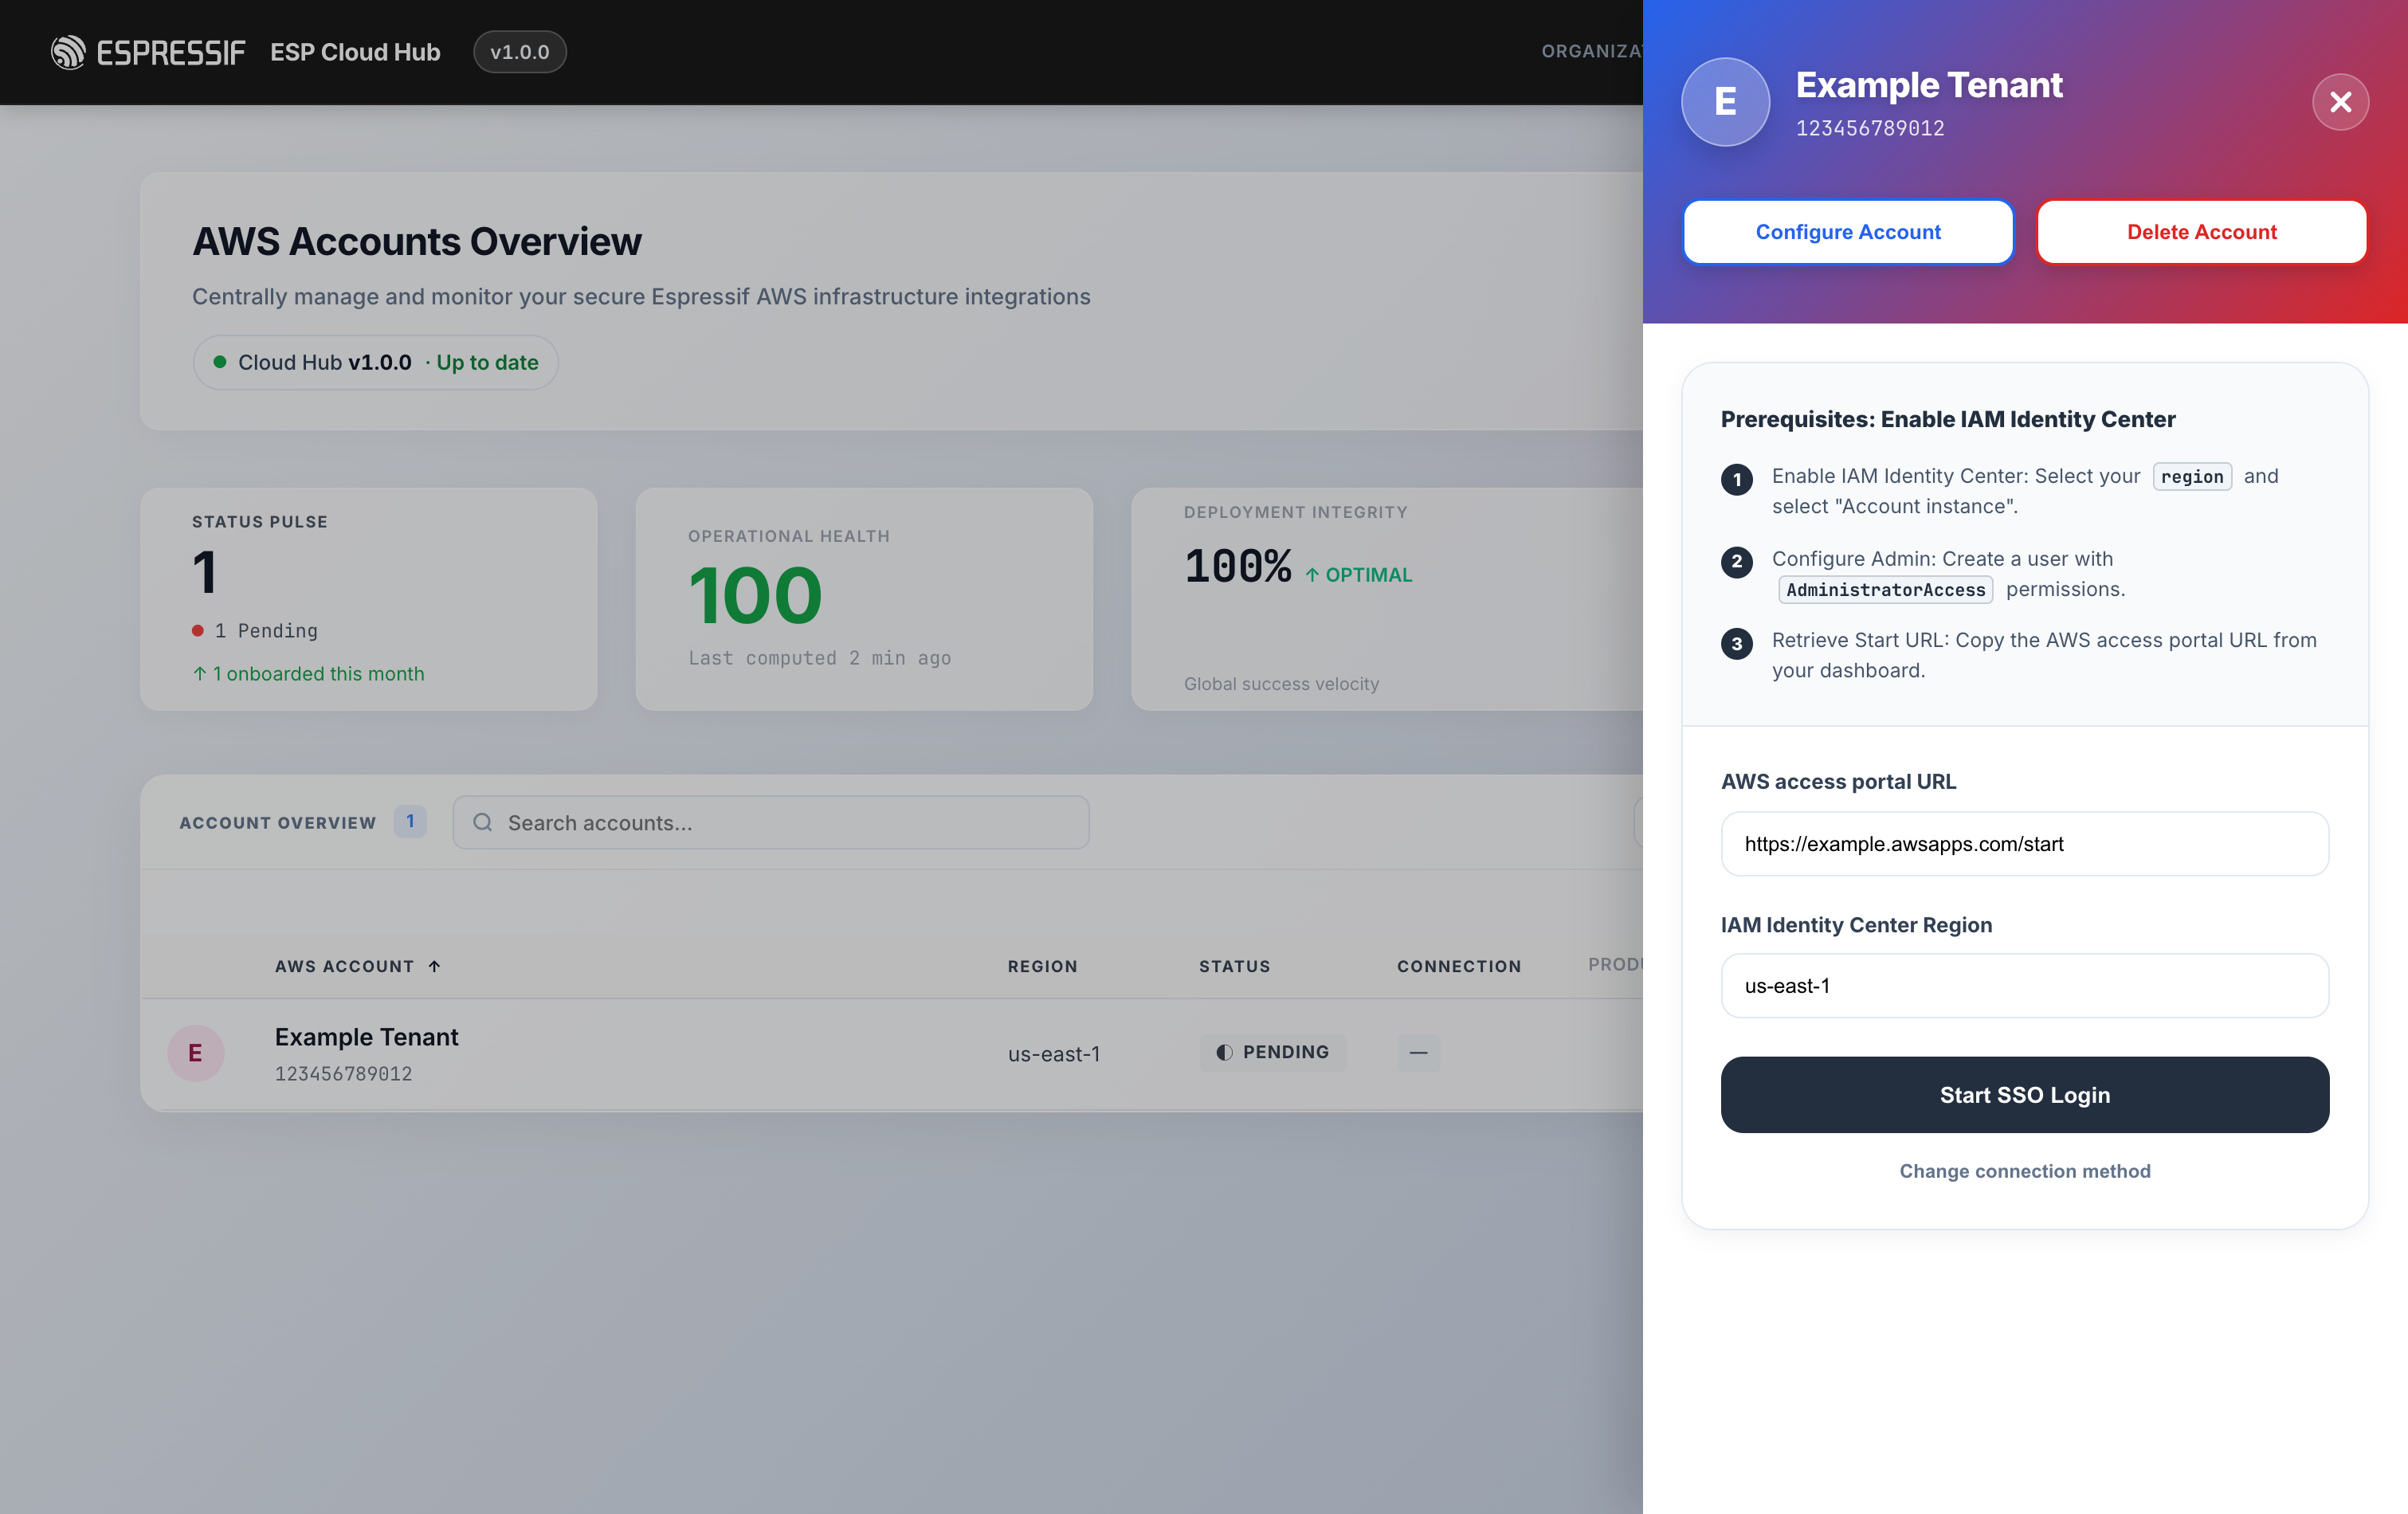
Step 2 — Authorize on the AWS device page
ESP CloudHub opens the AWS device-authorization page in a new tab. Confirm the request:
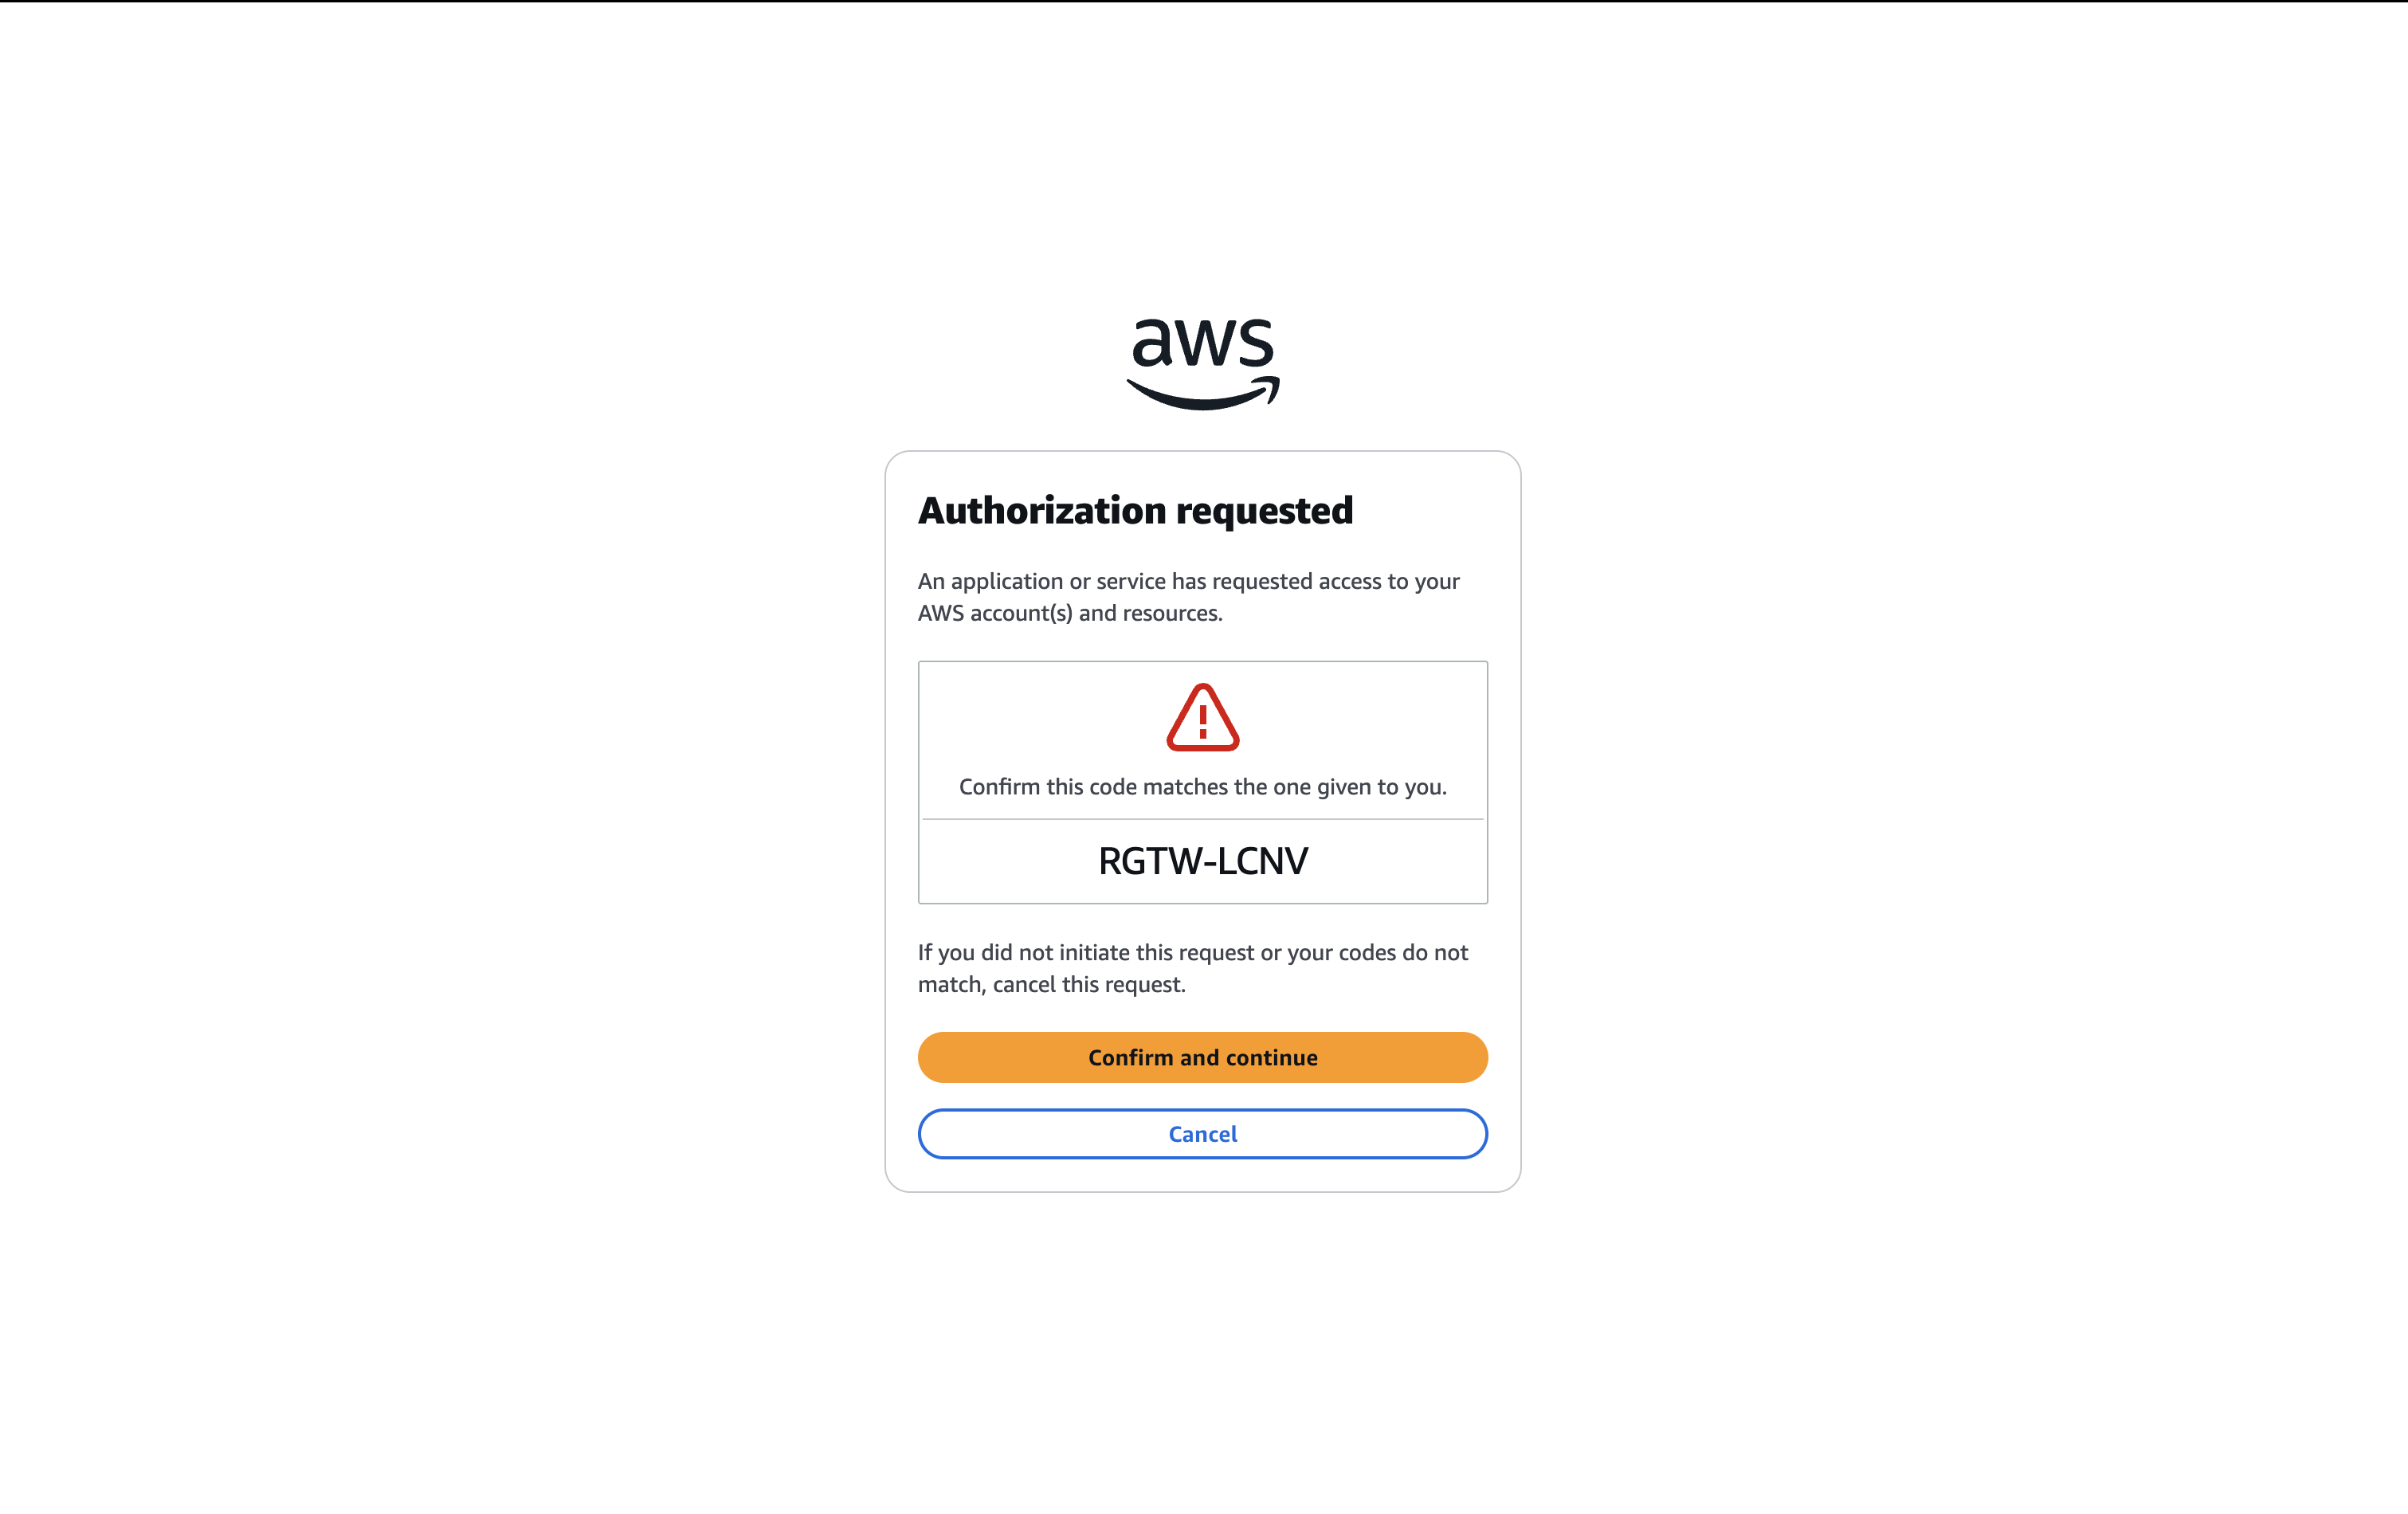
Then AWS asks you to grant access. On the "Allow access to your data?" screen, click Allow.
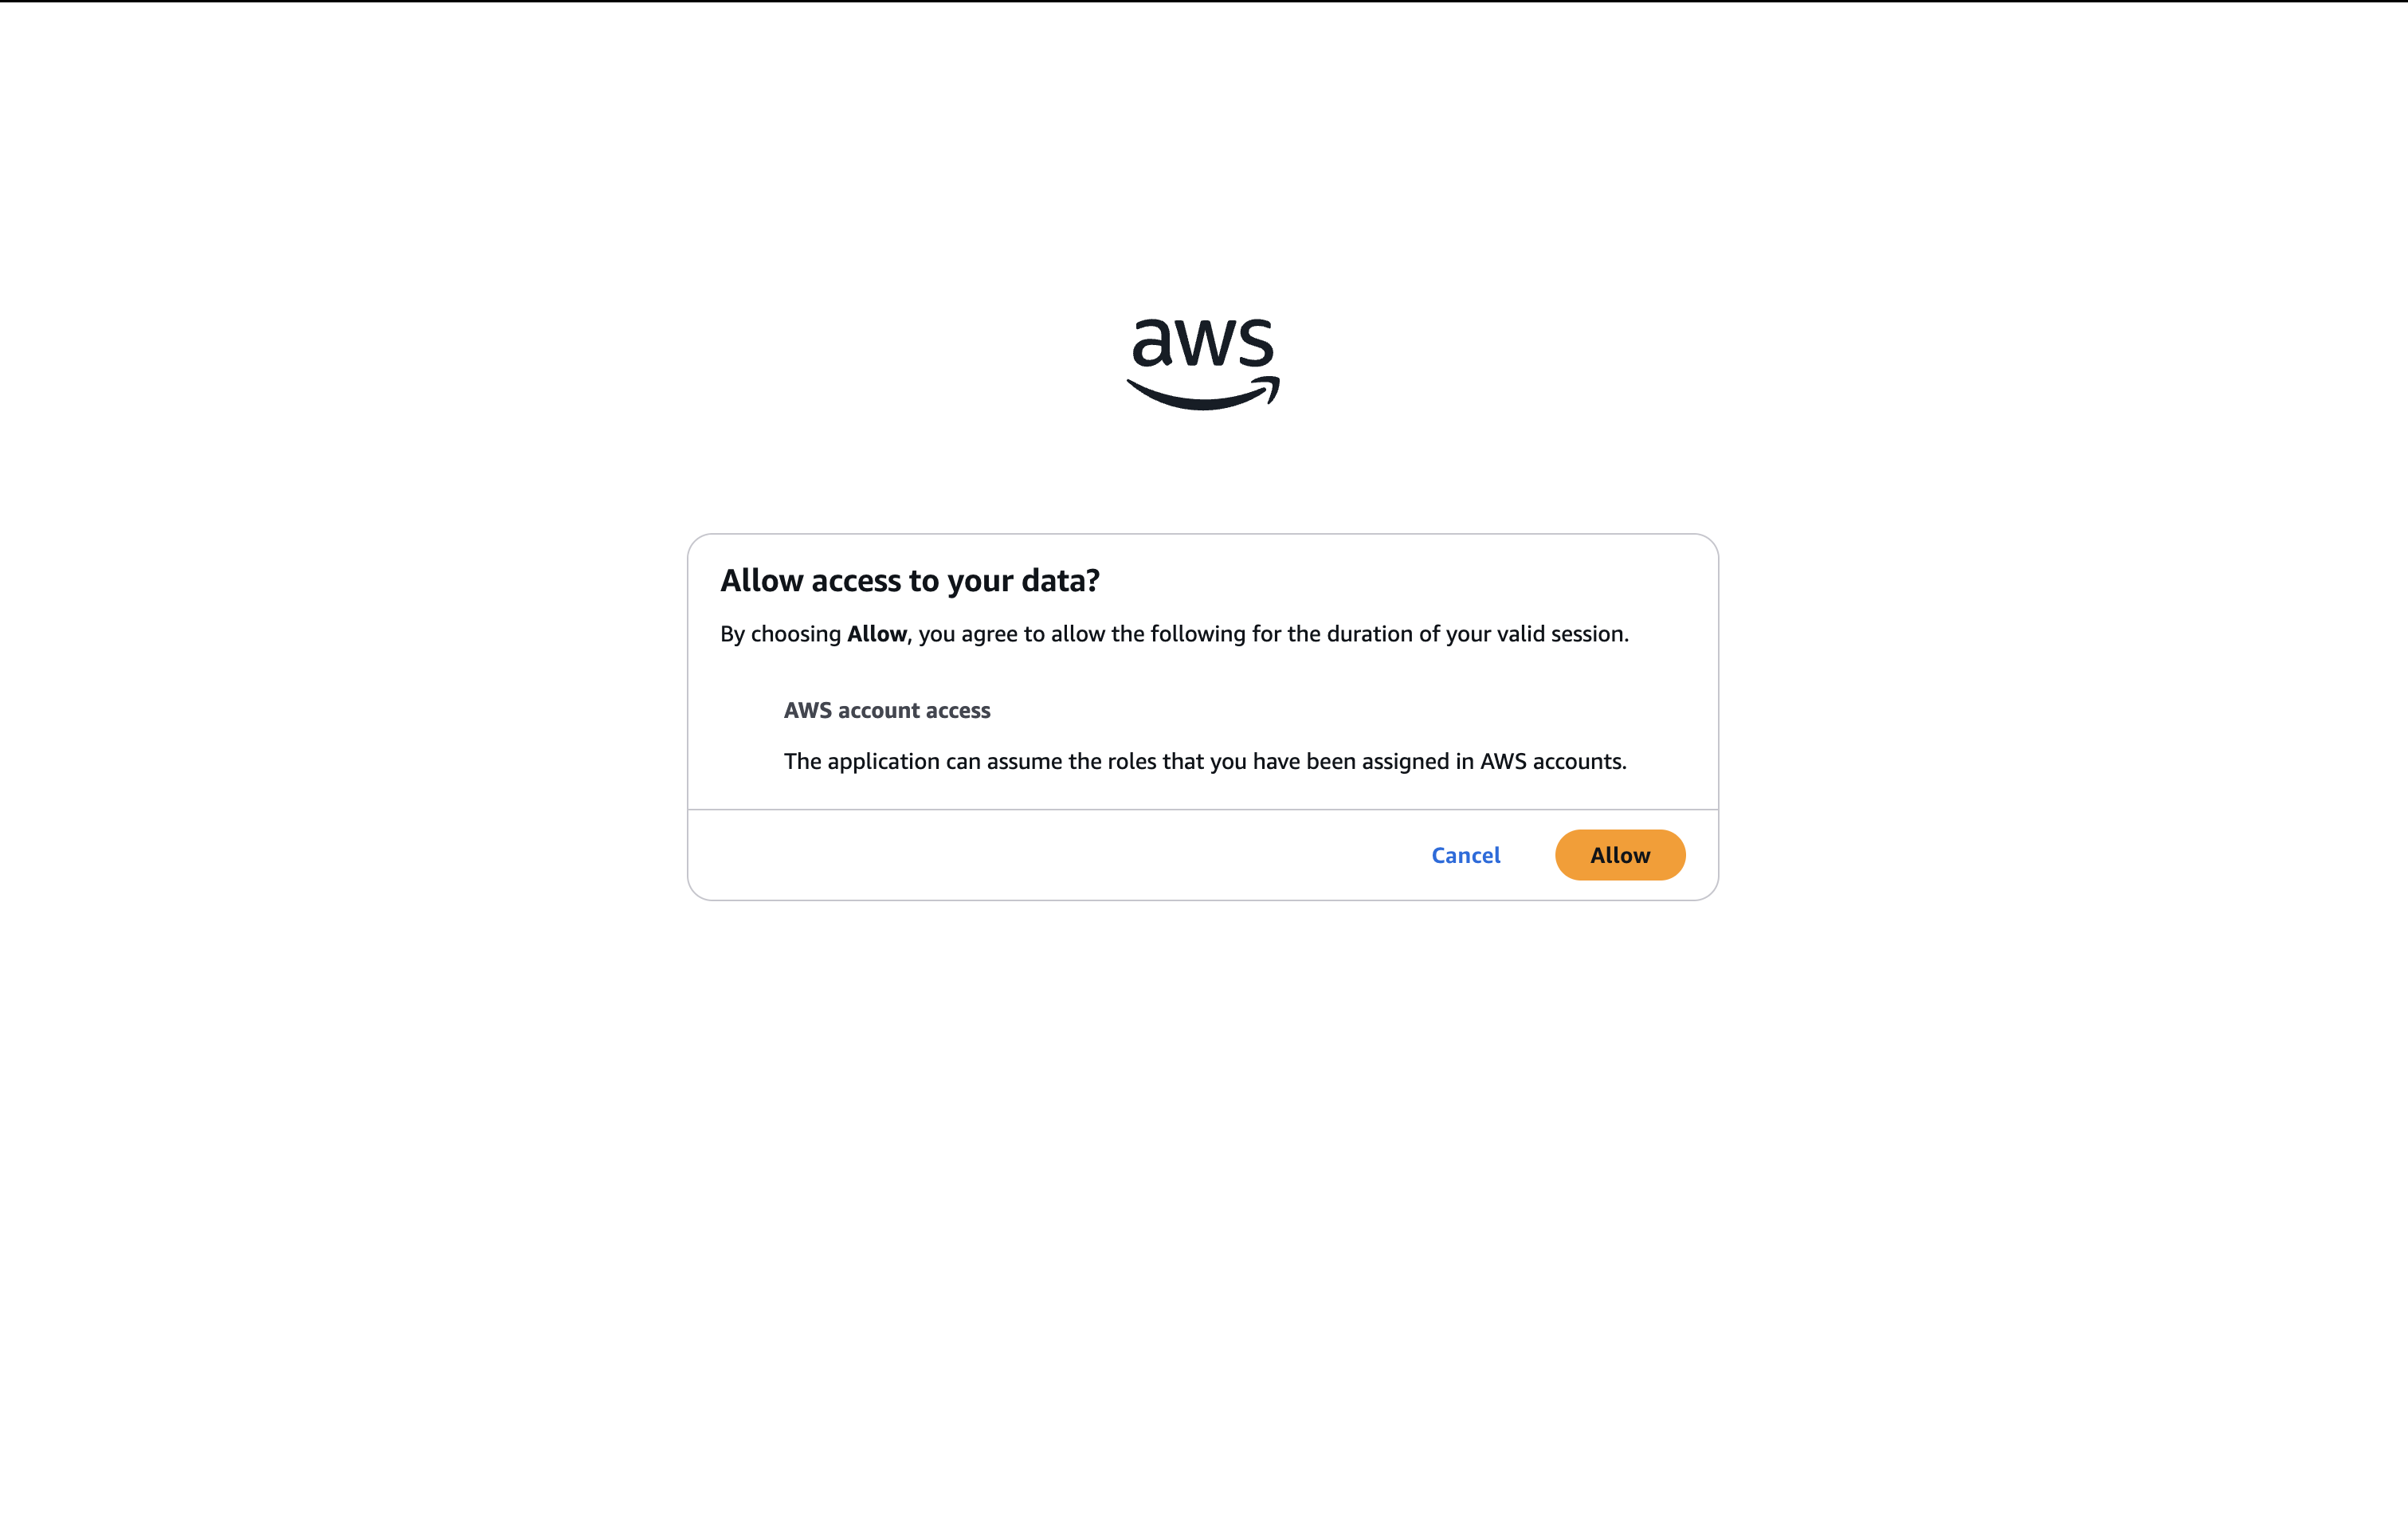
The access token is stored securely by ESP CloudHub (server-side) and is never returned to your browser.
Step 3 — Select the SSO role
Back in ESP CloudHub, choose the SSO role to bind this tenant to.
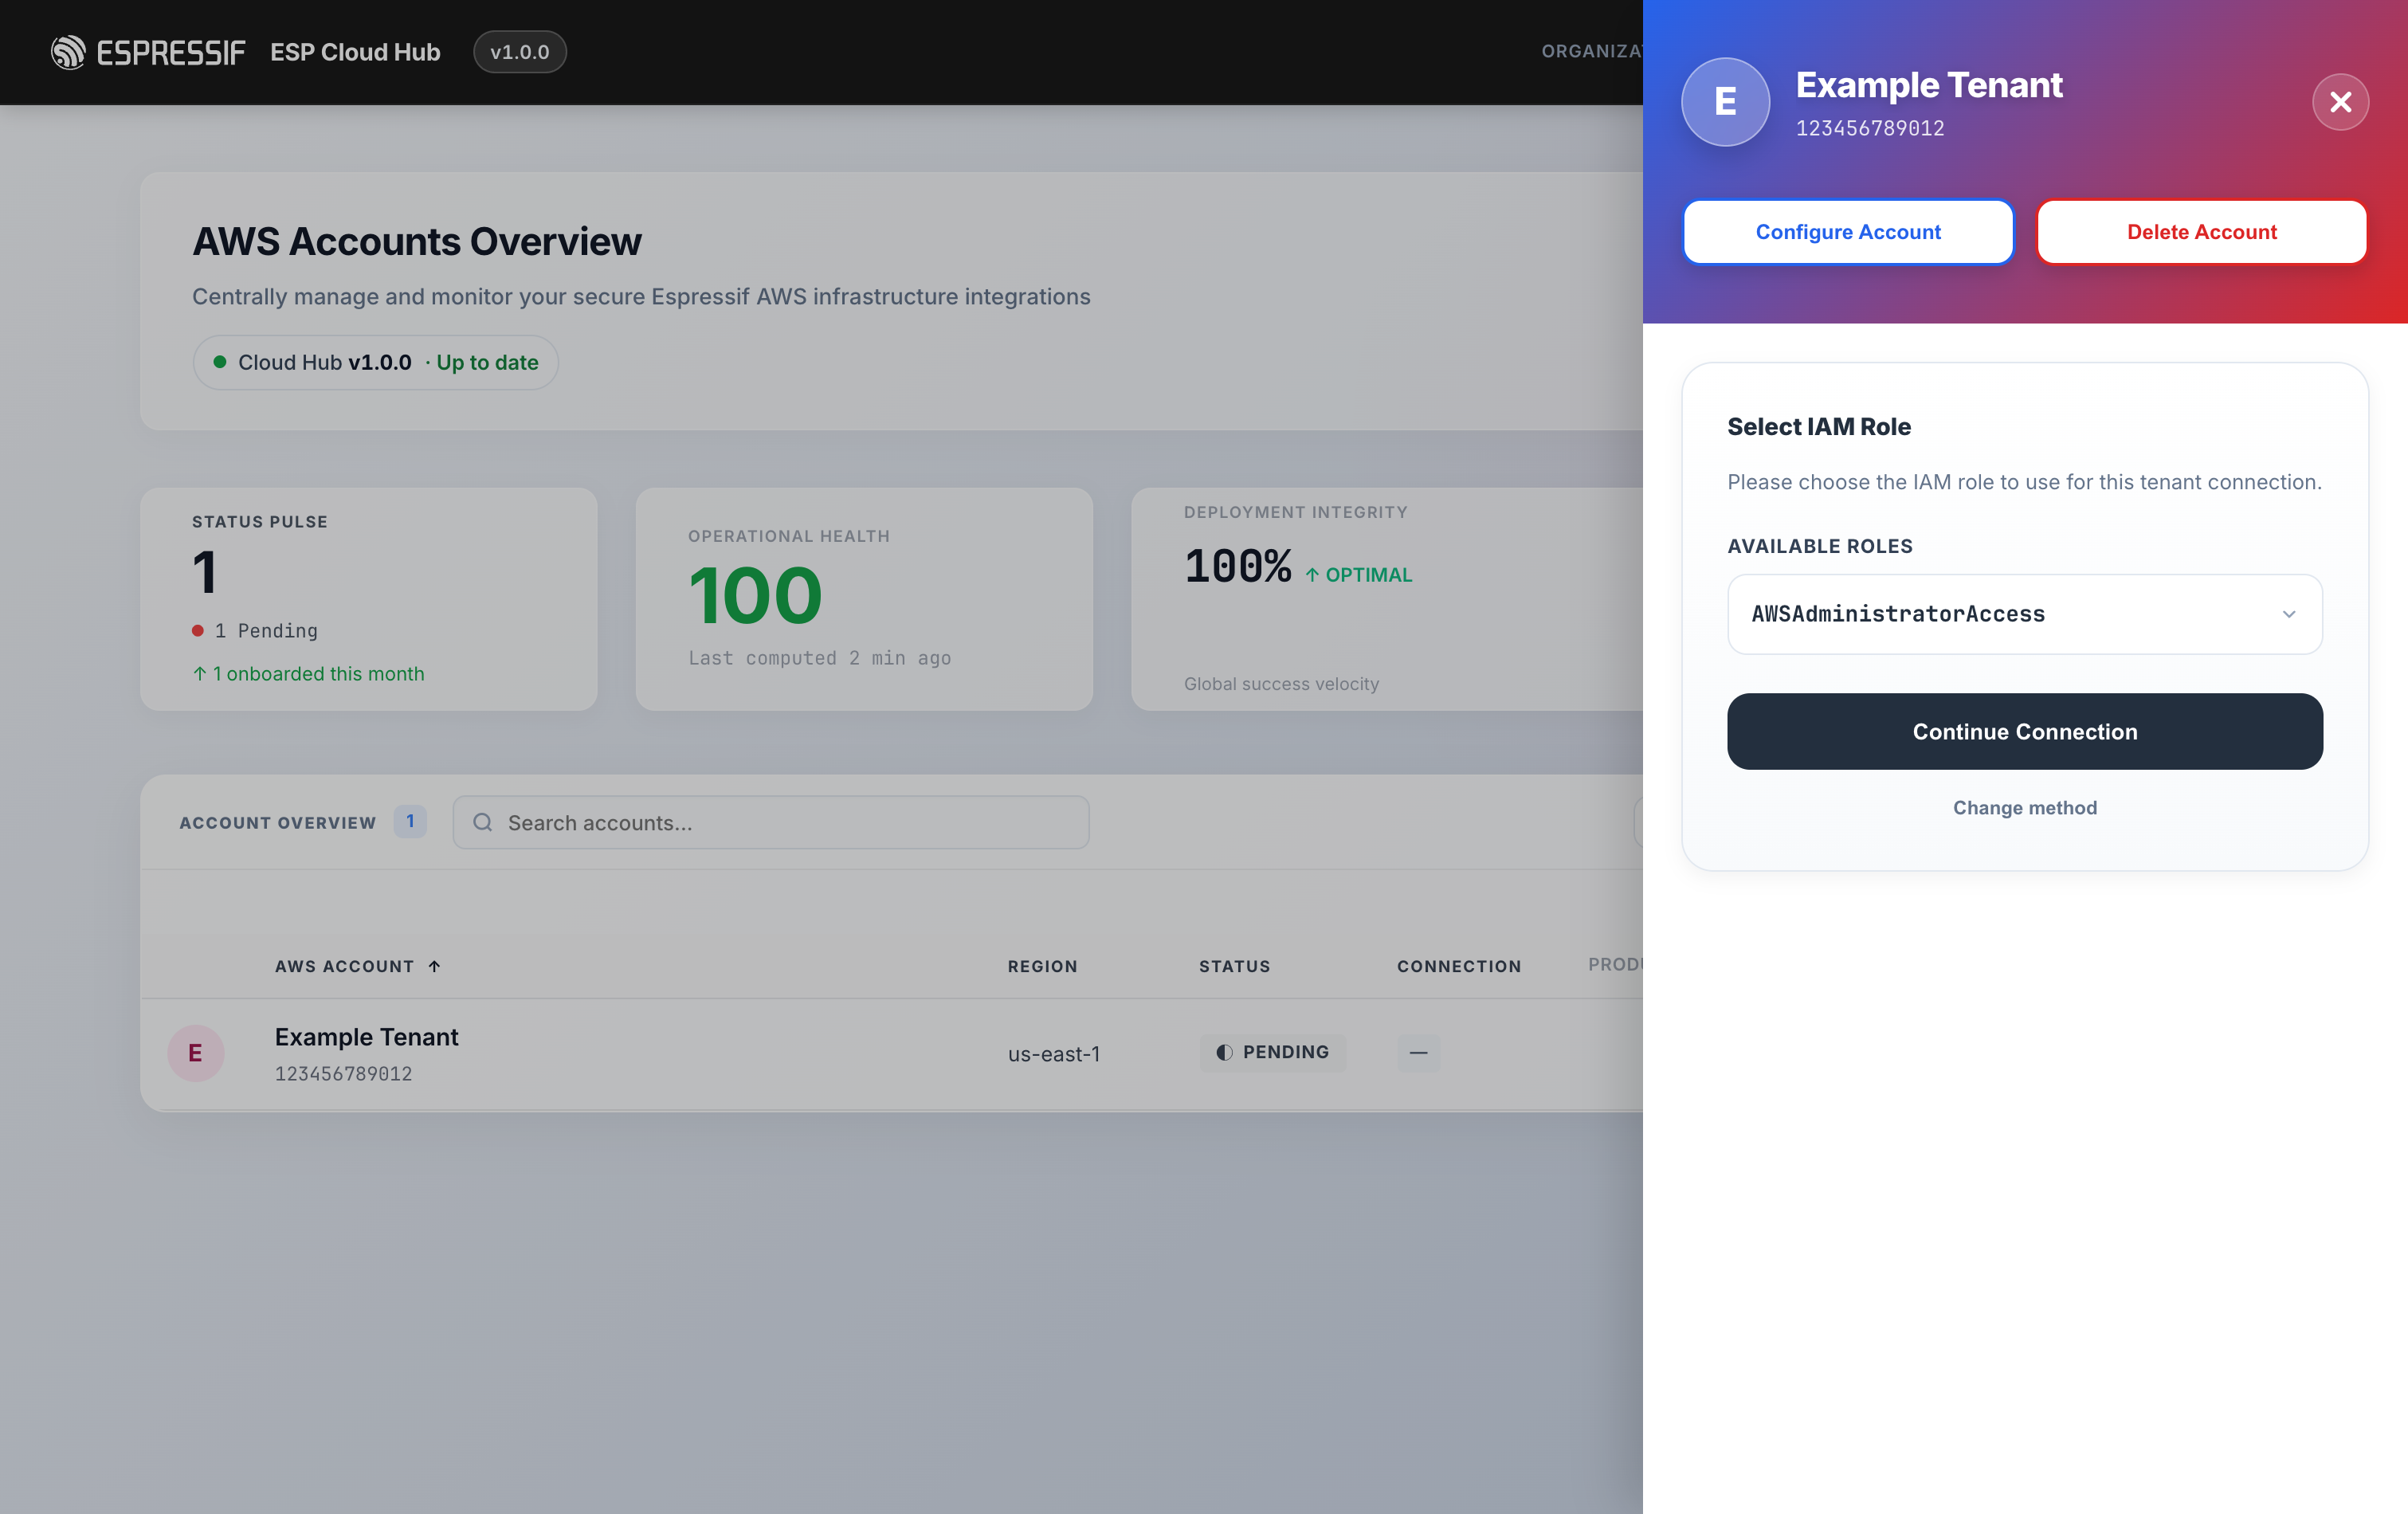
The tenant is now connected via SSO.
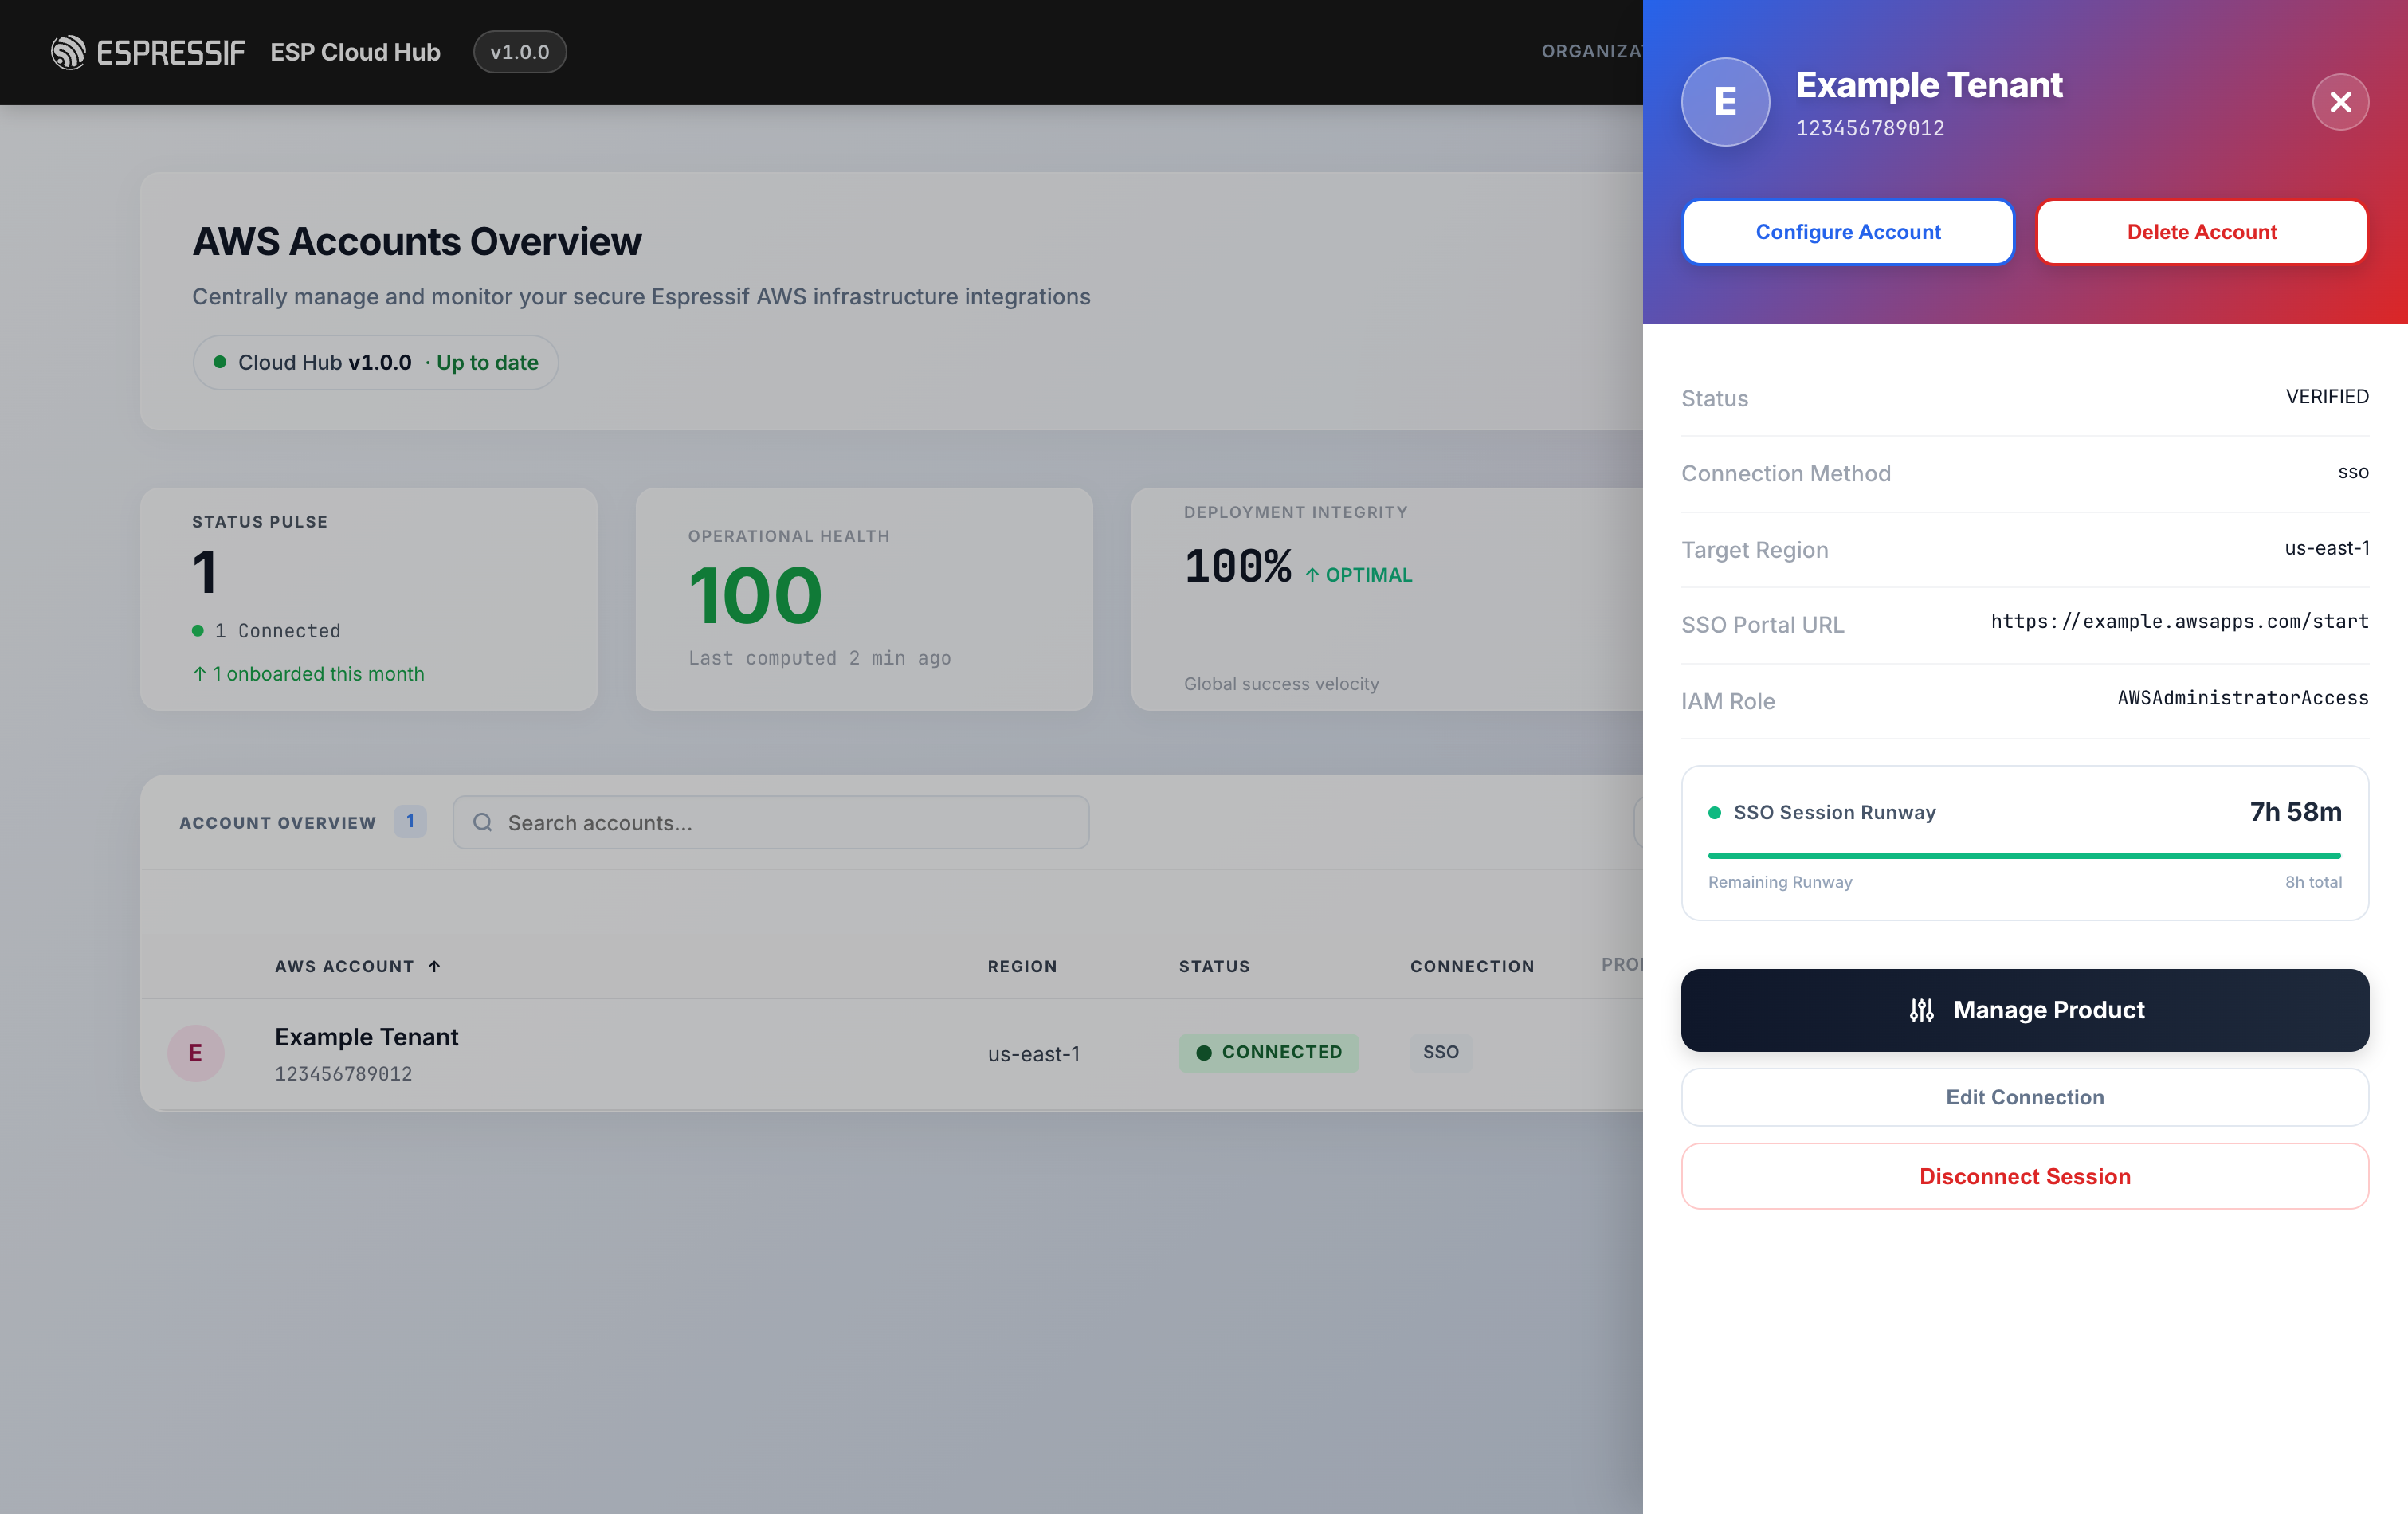
An SSO connection is valid for about 8 hours. After it expires, ESP CloudHub shows a message such as "SSO accessToken has expired. Please re-login." and cannot deploy until you reconnect.
To reconnect: open the tenant again, choose AWS SSO, and repeat the authorize step (Start URL → Authorize → Allow → select role). Reconnection re-establishes the session for another ~8 hours.
If you want a connection that does not expire, use AWS Trust Role instead (Method A).
After connecting
Whichever method you used, check that the account shows CONNECTED in the Status column of the accounts list. The Connection column shows the method (Assume Role or SSO).
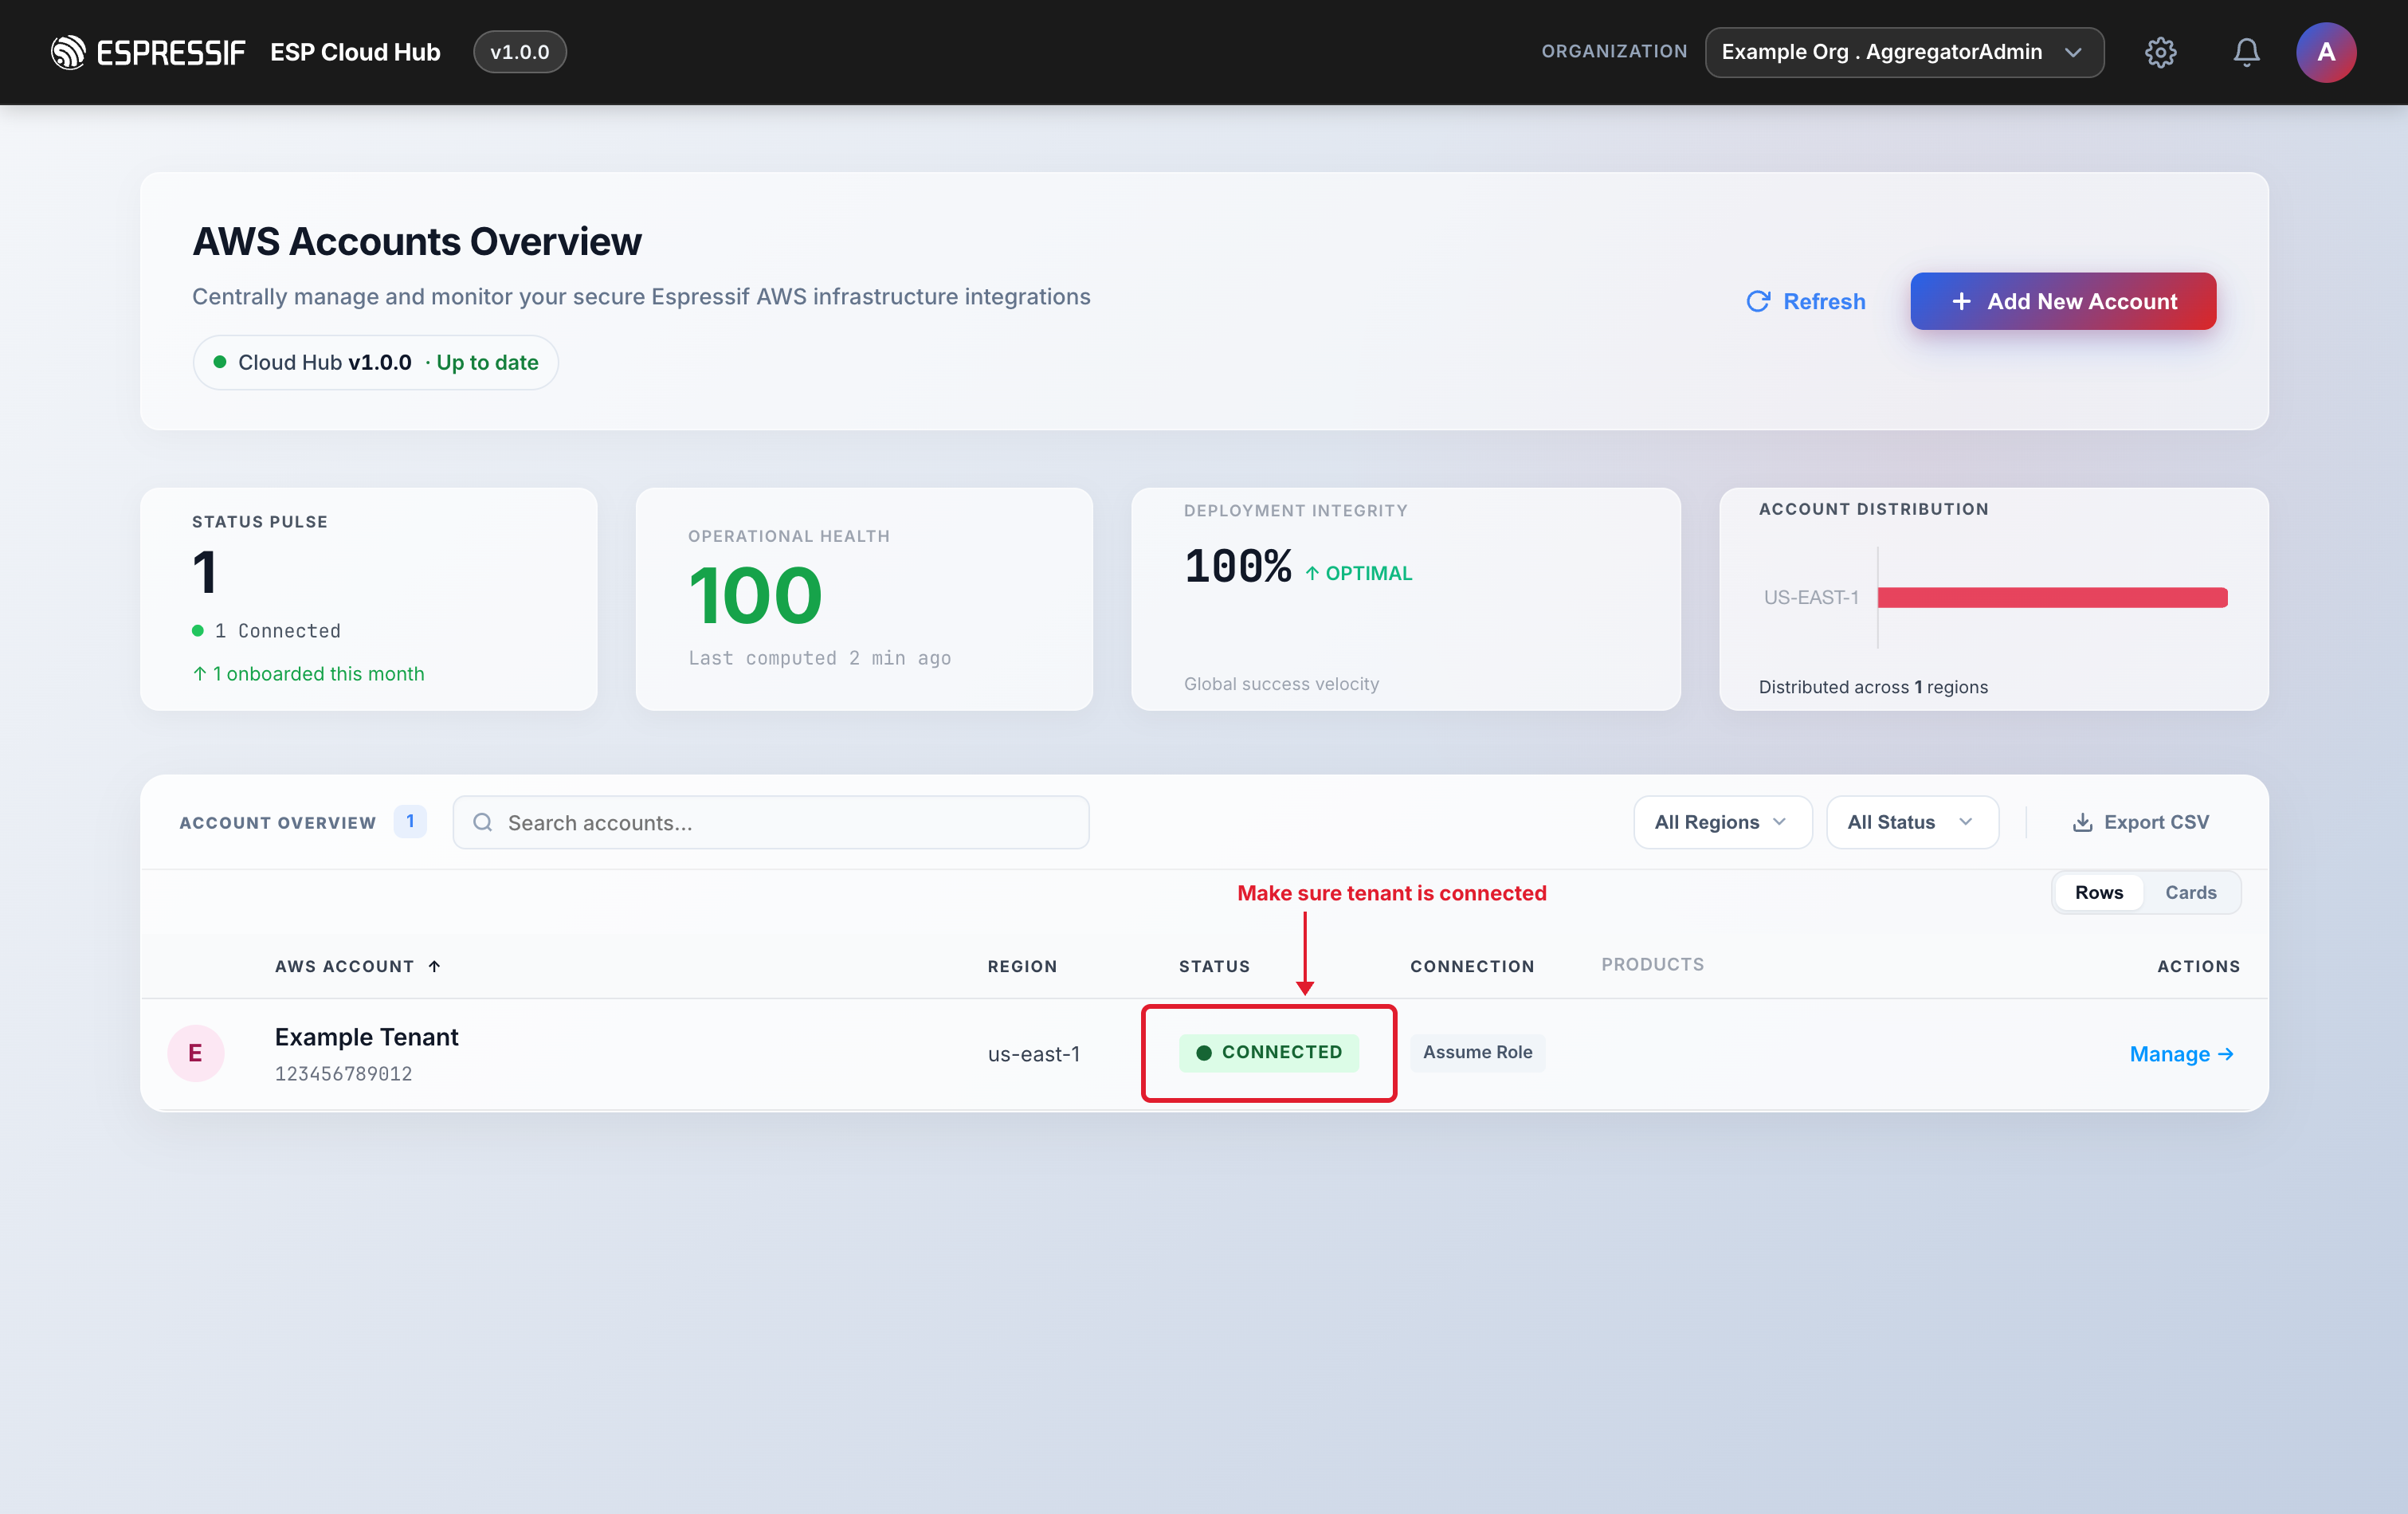
From here the flow is the same for both methods.
If the connection fails
If verification fails, ESP CloudHub shows an error state with a message and a Try Again button. What to do depends on the message:
| Symptom / message | Cause | What to do |
|---|---|---|
| Error right after Confirm & Continue (AssumeRole) | The CloudFormation stack isn't finished yet, or the role wasn't created in the right account. | Confirm the stack shows CREATE_COMPLETE in the same 12-digit tenant account, then click Confirm & Continue — try again. |
| "You do not have permission to connect this account…" | Your role lacks tenant:connect in the current organization. | Ask an administrator to grant you connect permission, or switch to an org where you have it. |
| "Select an active organization…" | You belong to more than one org and none is active. | Use the organization switcher in the top navigation to pick an org, then try again. |
| "SSO accessToken has expired. Please re-login." | The ~8-hour SSO session ended. | Reconnect via AWS SSO (see the warning above), or switch to AWS Trust Role. |
| Generic connect failure | Transient error, wrong account, or trust not yet propagated. | Click Try Again to return to the method picker and retry. For AssumeRole, re-check the account ID and ExternalId in the setup link. |
You can always click Change connection method to switch between AWS Trust Role and AWS SSO.