Introduction
The ESP RainMaker Home App aims to provide end users with a great experience for controlling smart home appliances.
The Home App allows end users to:
- Conveniently and quickly connect smart devices.
- Remotely control home appliances from anywhere.
- Schedule devices to perform multiple functions.
Salient Features
Some of the key features of the ESP RainMaker Home App include:
- Product-specific, user-friendly UI: Built for common use cases such as lights and switches.
- Simple Setup: Since the firmware to be used with the ESP RainMaker Home App is pre-built, the setup process is easy.
Overall, ESP RainMaker Home App and firmware, together provide a user-friendly and accessible way for non-developers to experience ESP RainMaker features. However, for production use, please contact our sales team.
Internally, the ESP RainMaker Home App is a hybrid app built using React Native. It leverages the ESP RainMaker App SDK and CDF components to seamlessly connect to the ESP RainMaker Cloud.
The following sections talk about how to quickly set up a device and start using the app.
Quick Start
To get started, you need to prepare a suitable development kit as the device hardware. The subsequent instructions use an LED firmware example and recommend the ESP32-C3-DevKit and ESP32-S3-DevKit for experimentation. You can also flash your own custom firmware, provided that its architecture complies with the ESP RainMaker firmware development framework.
App Download
Please use the installation links below to download the ESP RainMaker Home App according to your phone’s operating system.
(e.g., Android or iOS)
For this getting started guide, please download the "Global Region" version of the ESP RainMaker Home app.
- Global Region
- China Region

Installation Reference Links
Android

Huawei AppGallery

Mi App Store

OPPO App Market
OPPO 应用商店 — search for ESP RainMaker in the store app (link varies by device).

vivo App Store

Honor App Market
Direct APK
Please note that for Android users, the ESP RainMaker Home app APK is not yet available on Android app marketplaces in China, which currently still reference the legacy ESP RainMaker app. To use ESP Private Agents in our app, please download and install the global version of the ESP RainMaker Home app.
iOS
App Store (China region)
Set iPhone region to China mainland under Settings → General → Language & Region, then install from the iOS app listing.

Reference repository
Note that there are two versions for ESP RainMaker Home. Mainly the 'Global' version and 'China' version. However, the respective reference code for ESP RainMaker home app is the same regardless of region.
If you would like to switch regions (between Global and China) to evaluate ESP RainMaker. Please take note of the following:
-
To switch regions in Android, please uninstall the app and then visit the app store of your selected region to download it again, according to the table above.
-
To switch regions in iOS, go to your phone's settings:
Settings > General > Language & Region, and select eitherChina mainlandor a specific global region (e.g.,Singapore) following this set your iOS region guide.
Prepare the Hardware
Make use of ESP LaunchPad for flashing the firmware example on the development kit. ESP LaunchPad is an online tool provided by Espressif that includes built-in sample firmware images, so you can directly select and flash firmware for testing. The specific steps are as follows:
1. Connect the Development Kit to LaunchPad
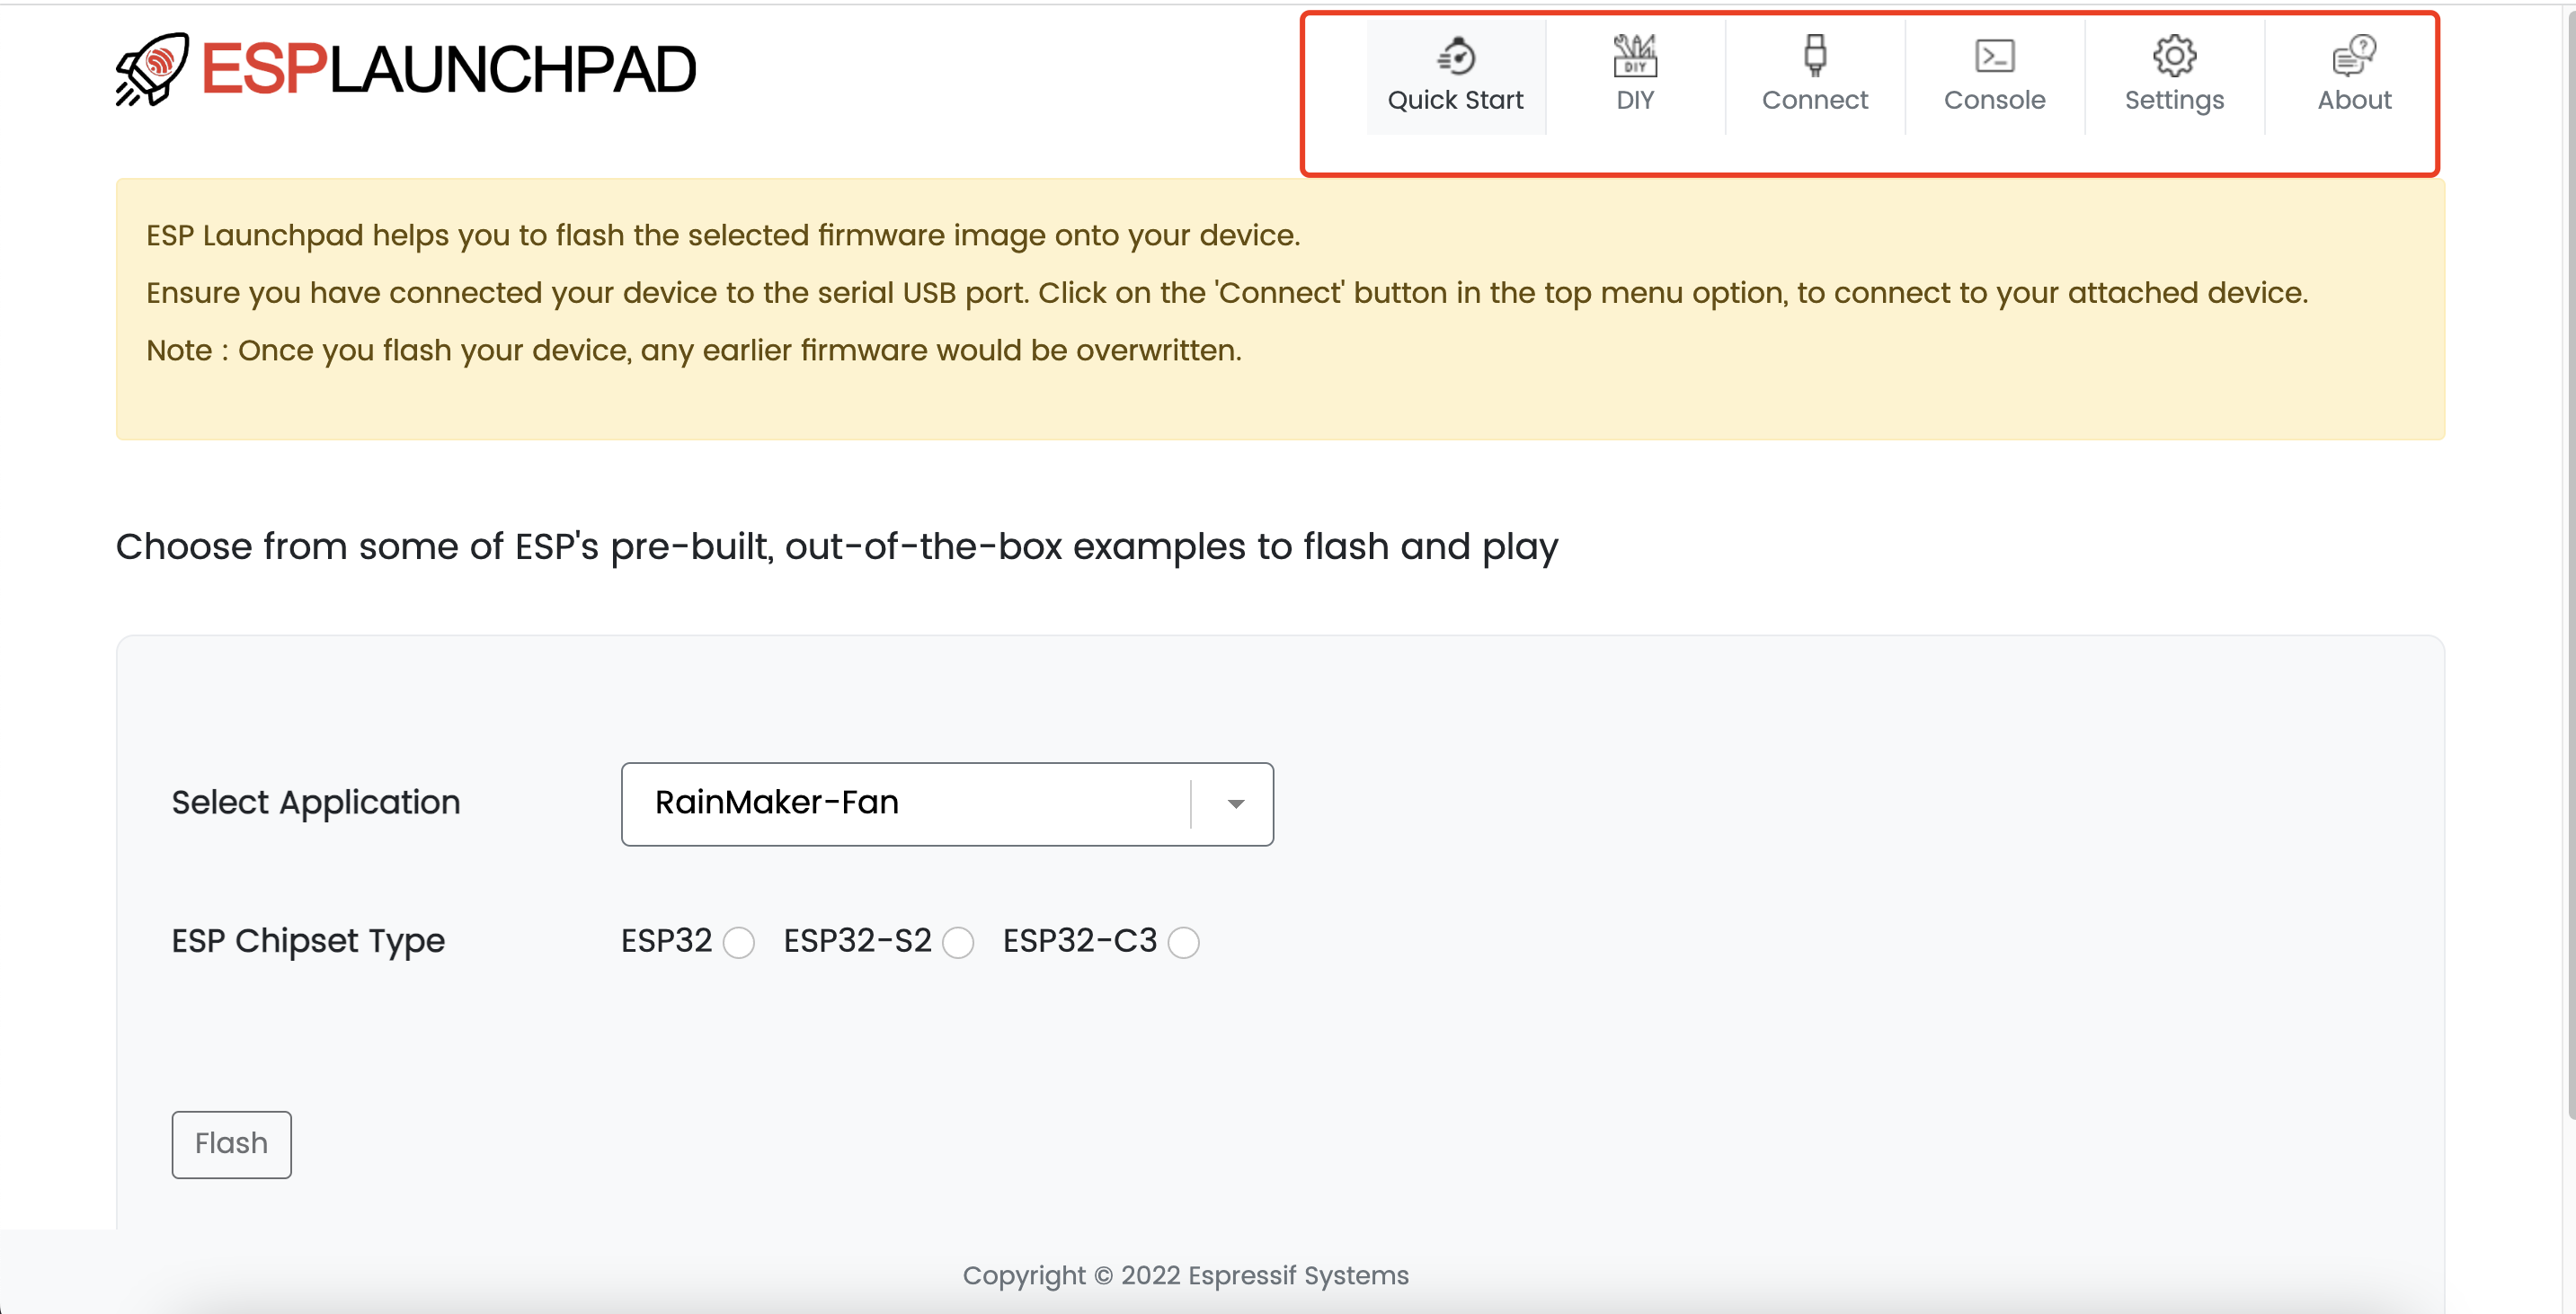
Firstly, connect the development kit to your computer via the USB port, and open the ESP LaunchPad website, as shown below:
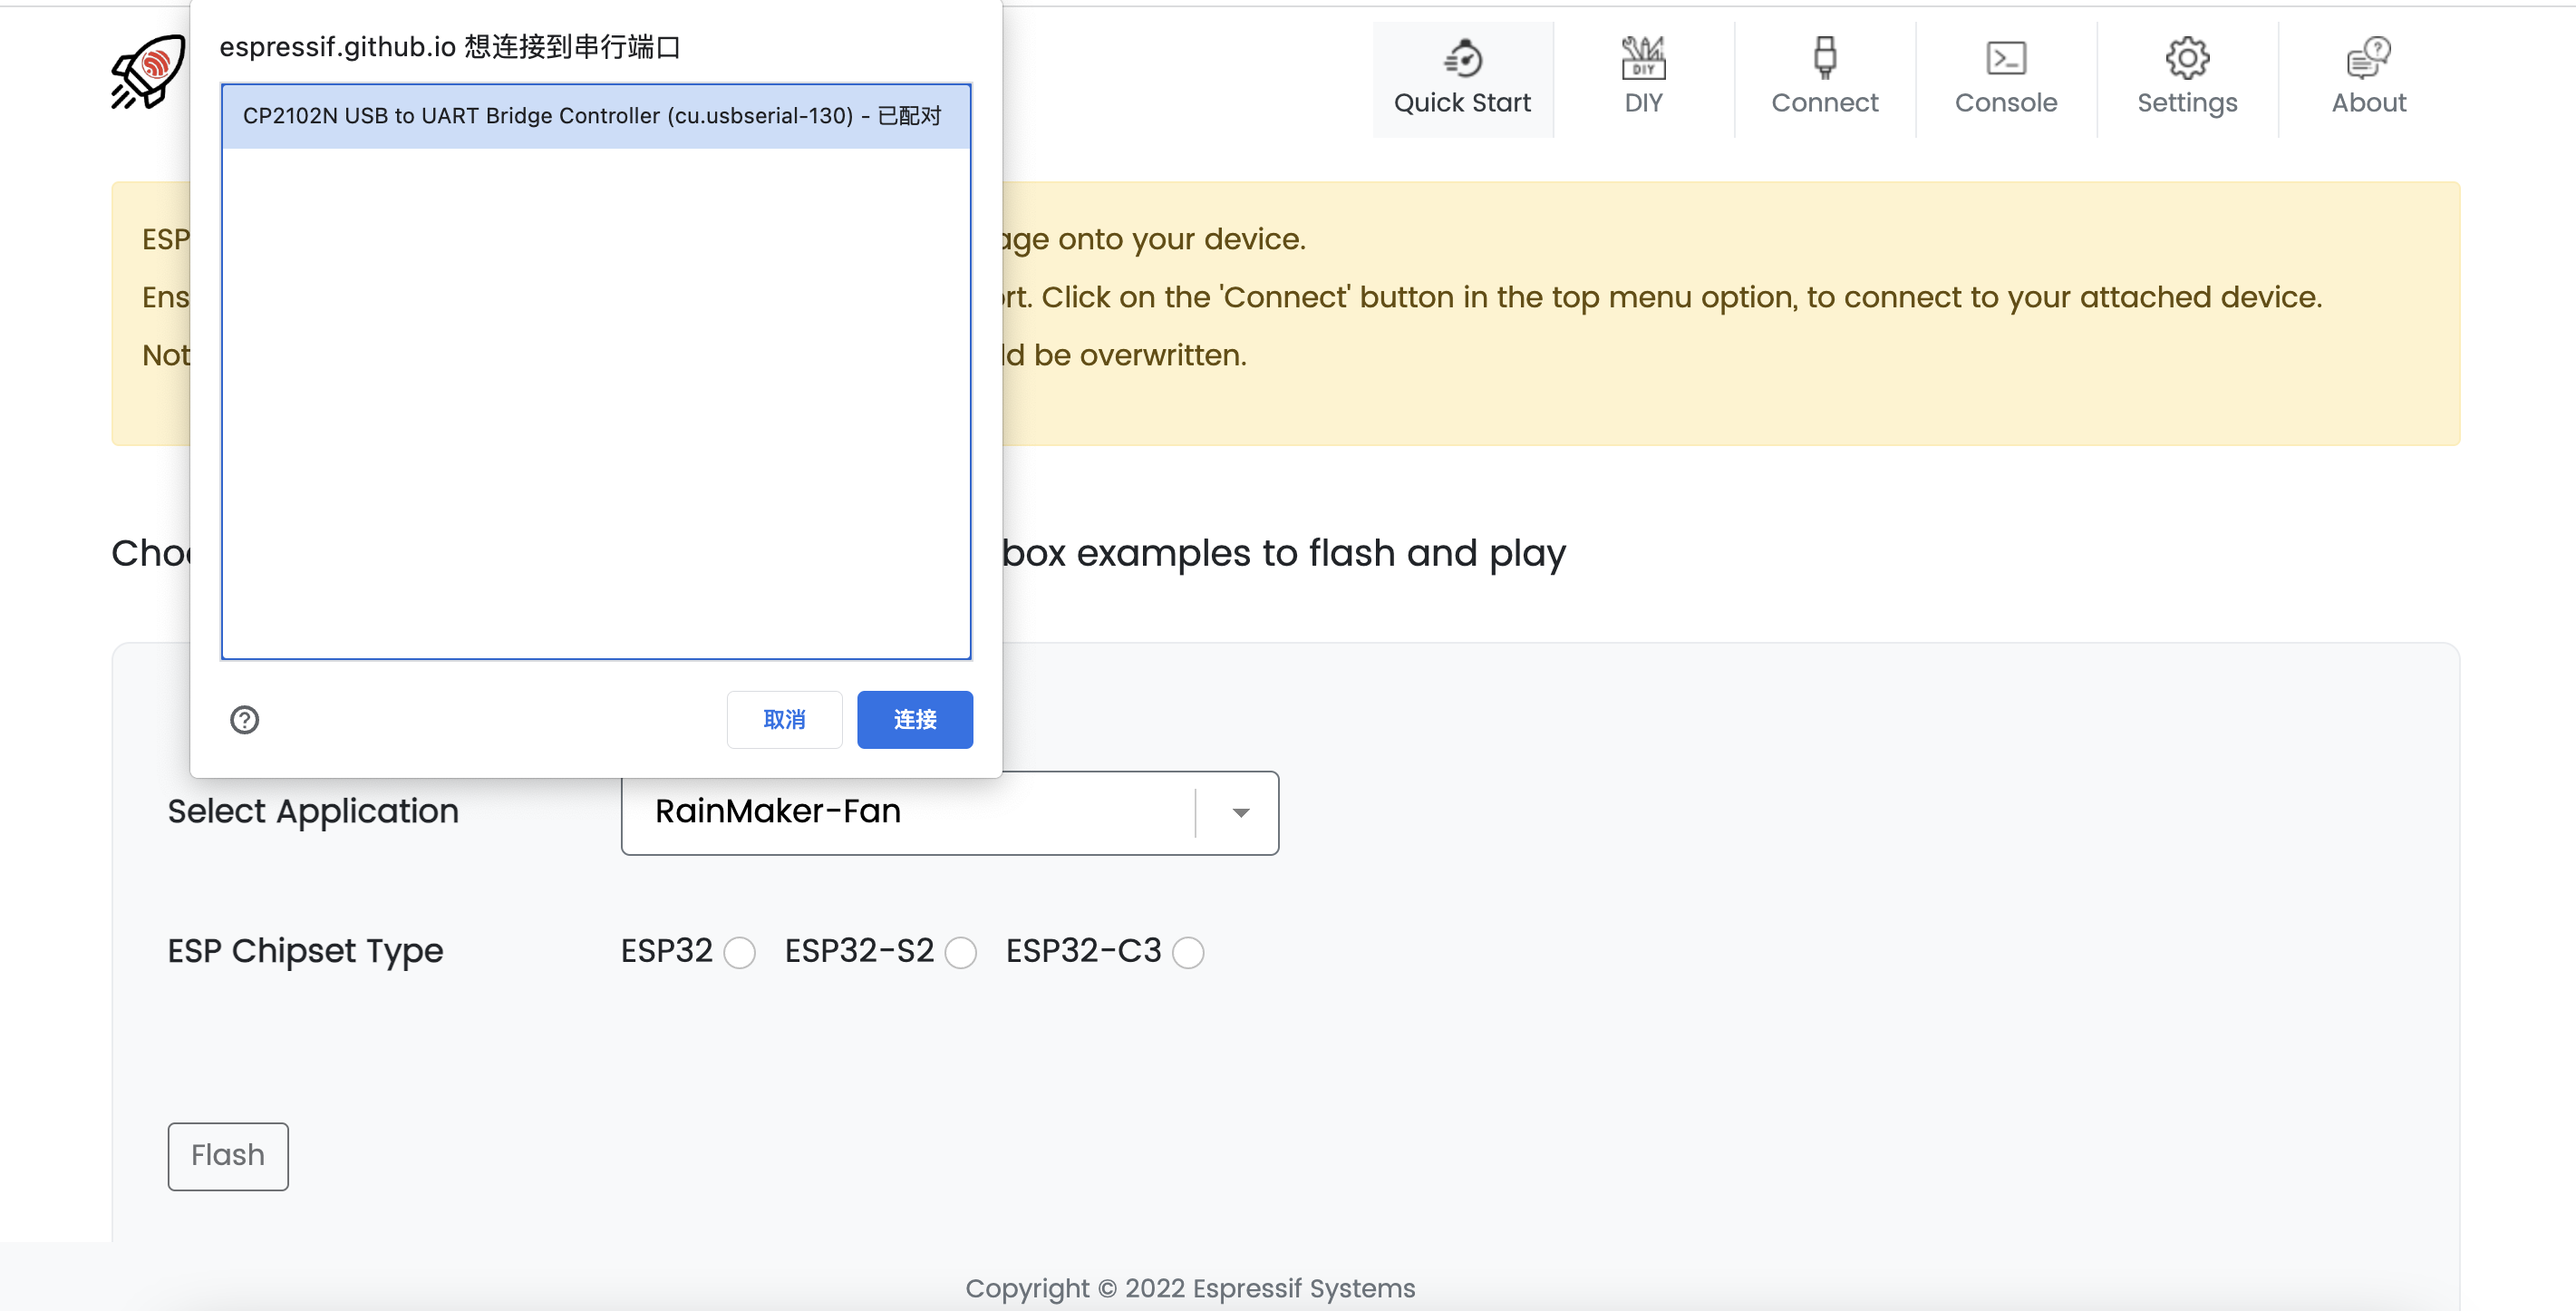
Click the Connect button in the upper-right corner. A dialog will appear showing available USB serial ports. Then select the serial port connected to the development kit and click Confirm:
2. Flash the Firmware
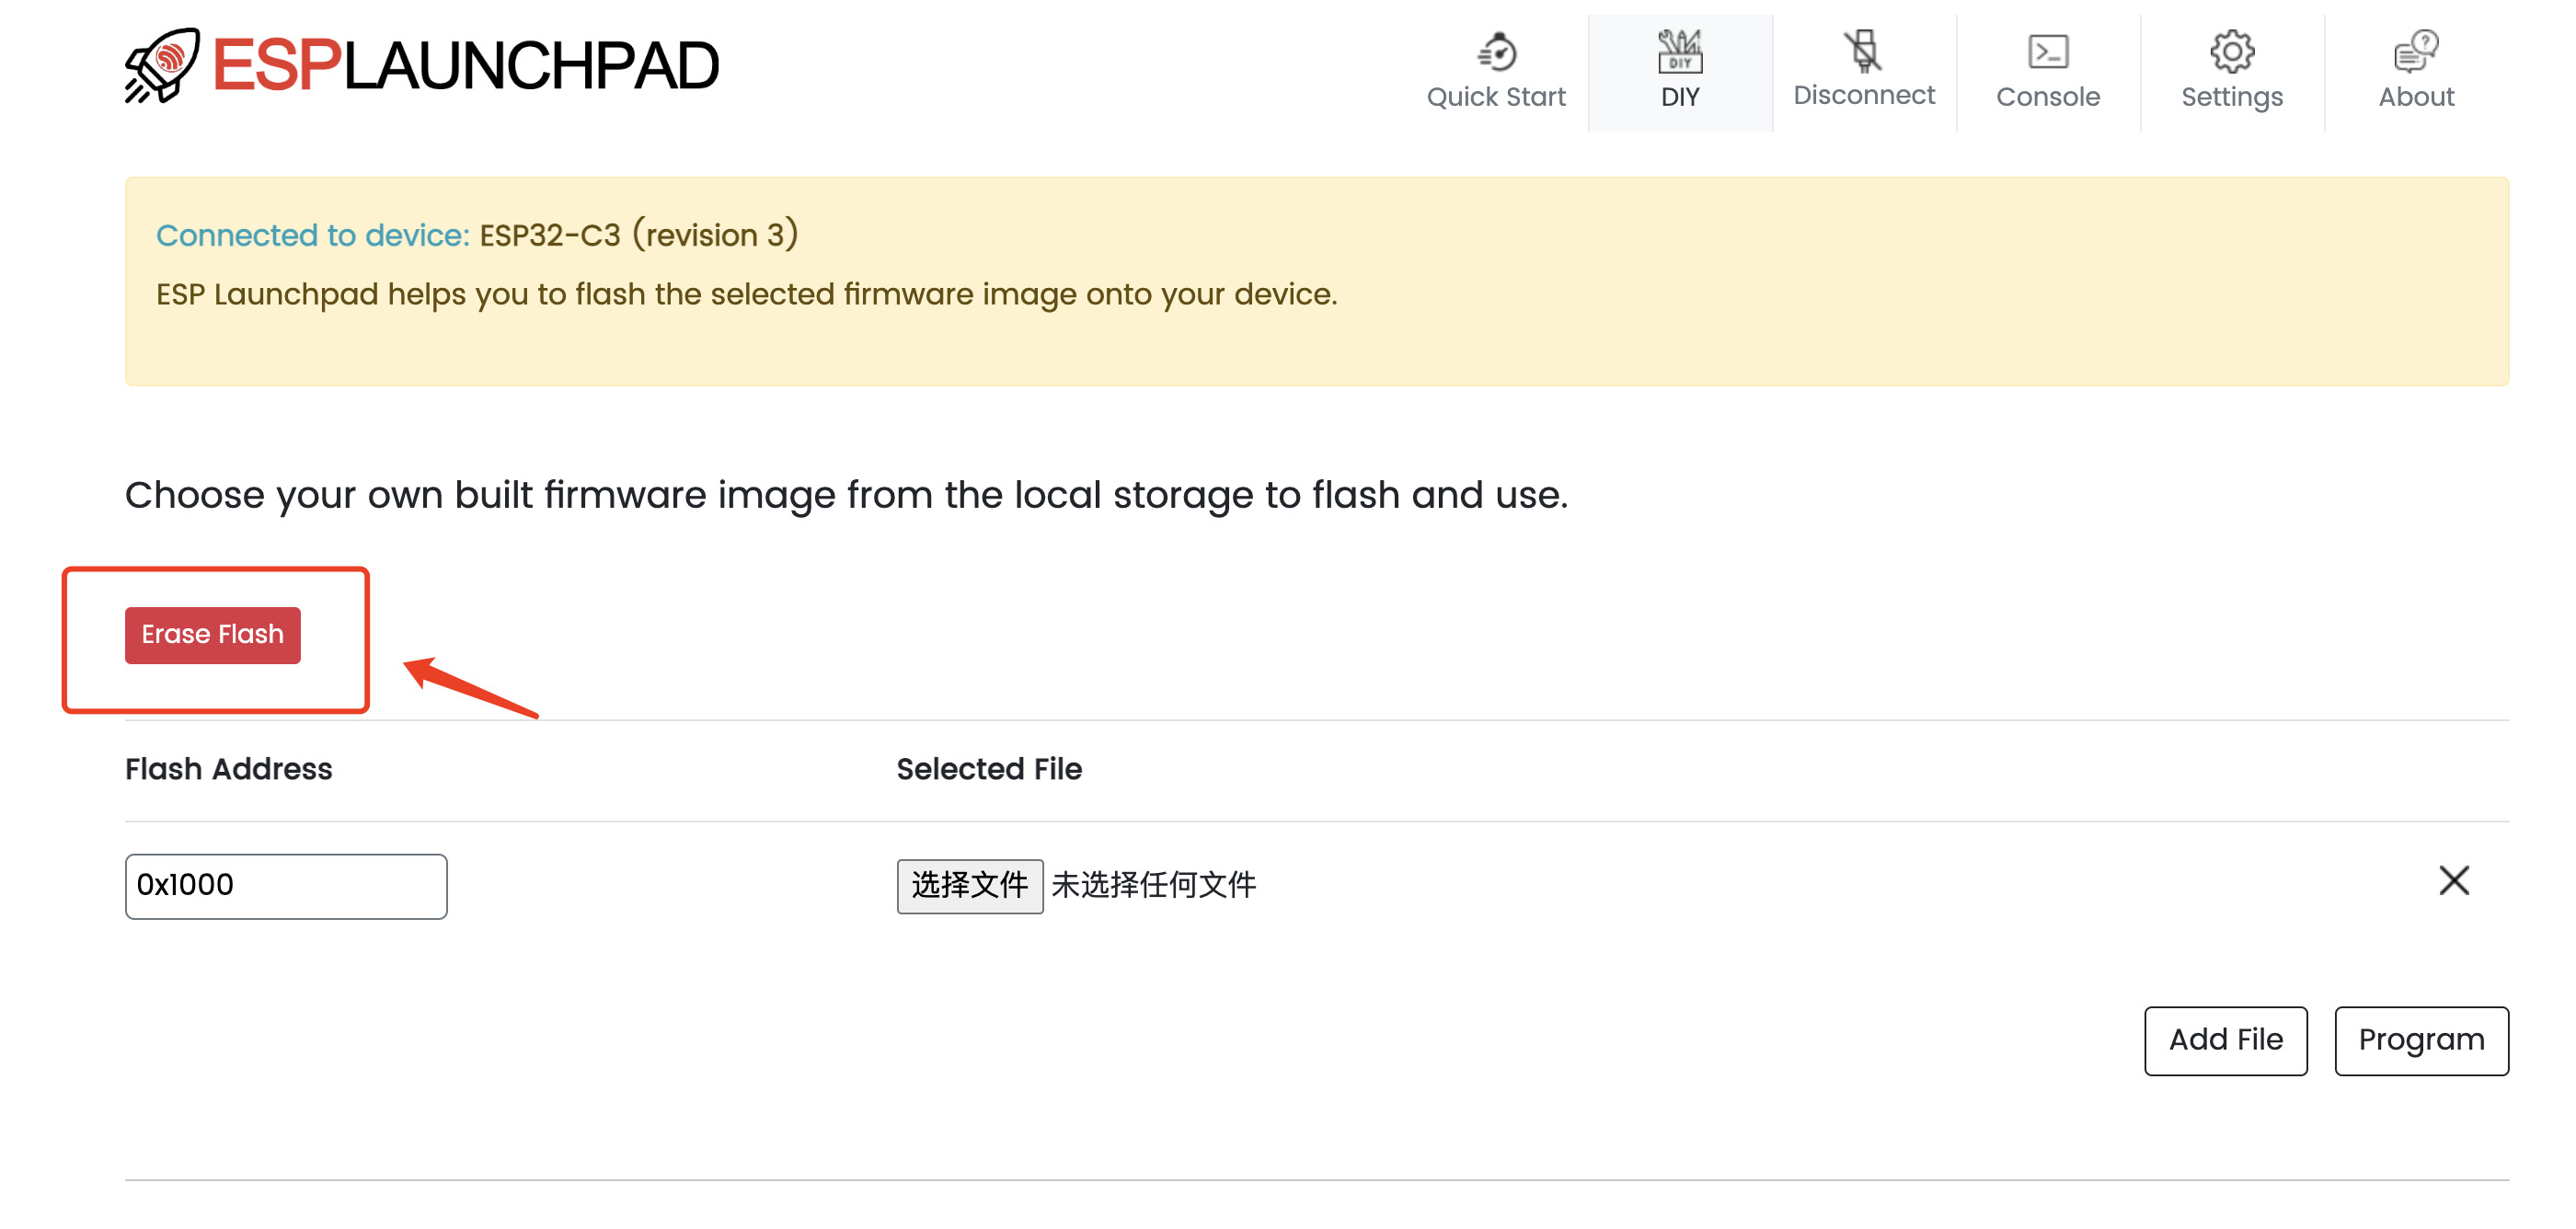
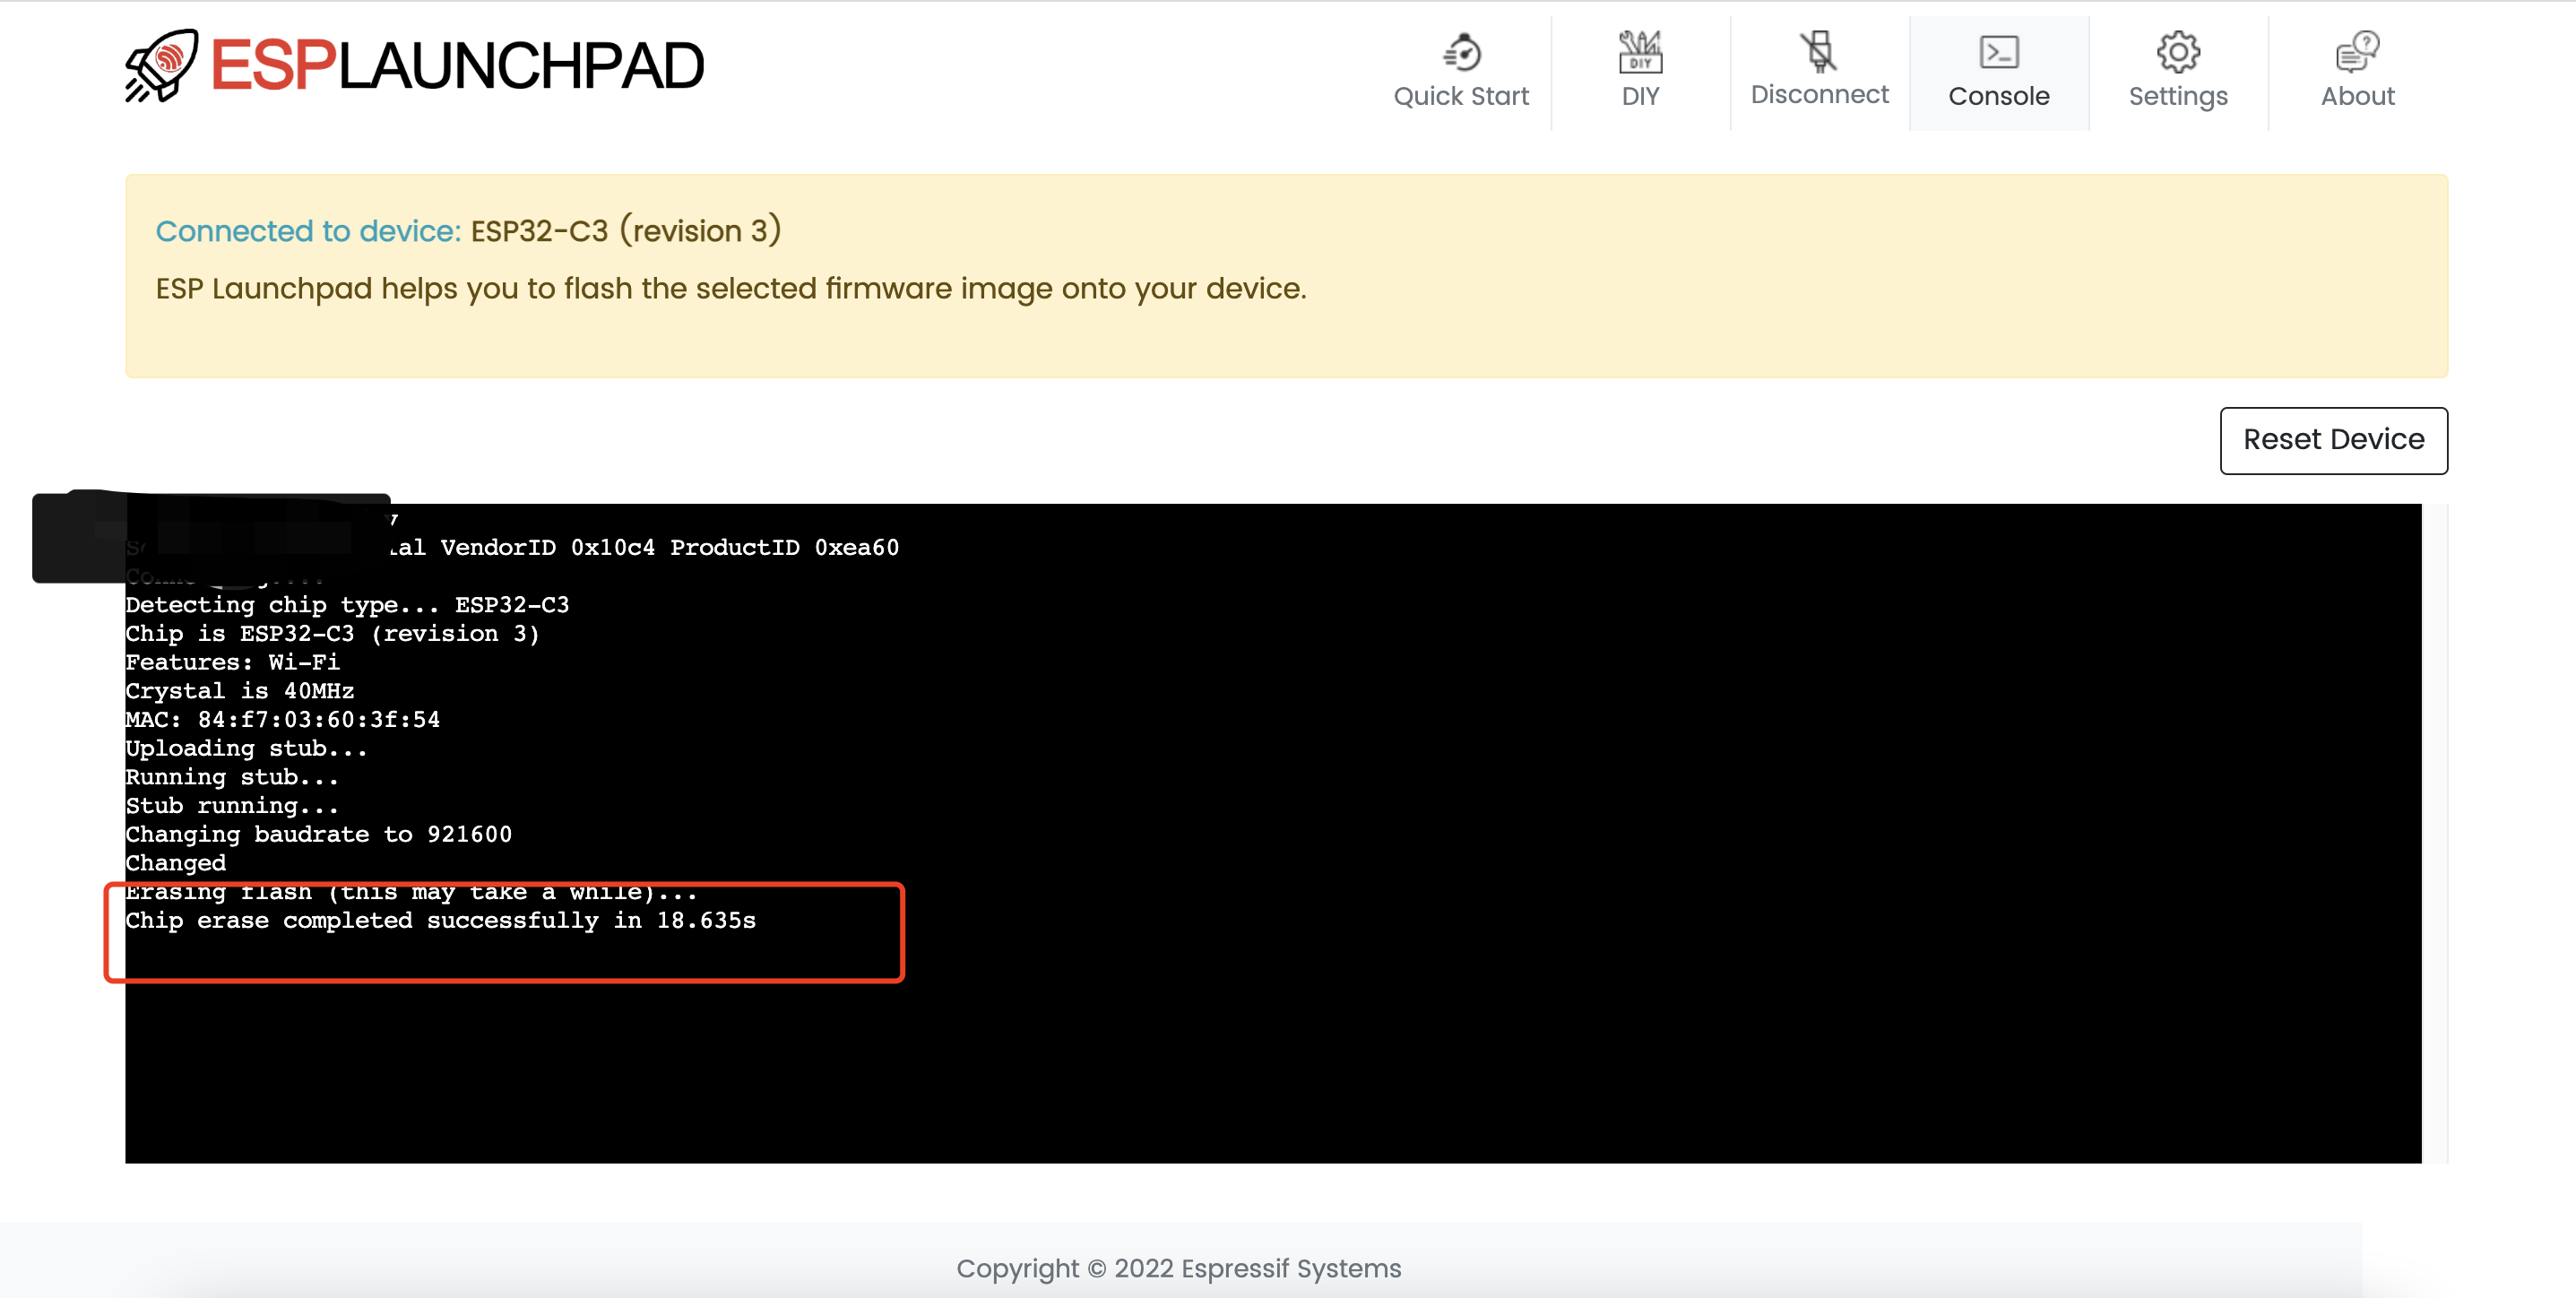
After connecting the board to the LaunchPad, you need to erase the existing firmware on the development kit to prevent flashing failure. You need to click DIY, and then click Erase Flash. You can verify whether the erase operation was successful on the Console page.
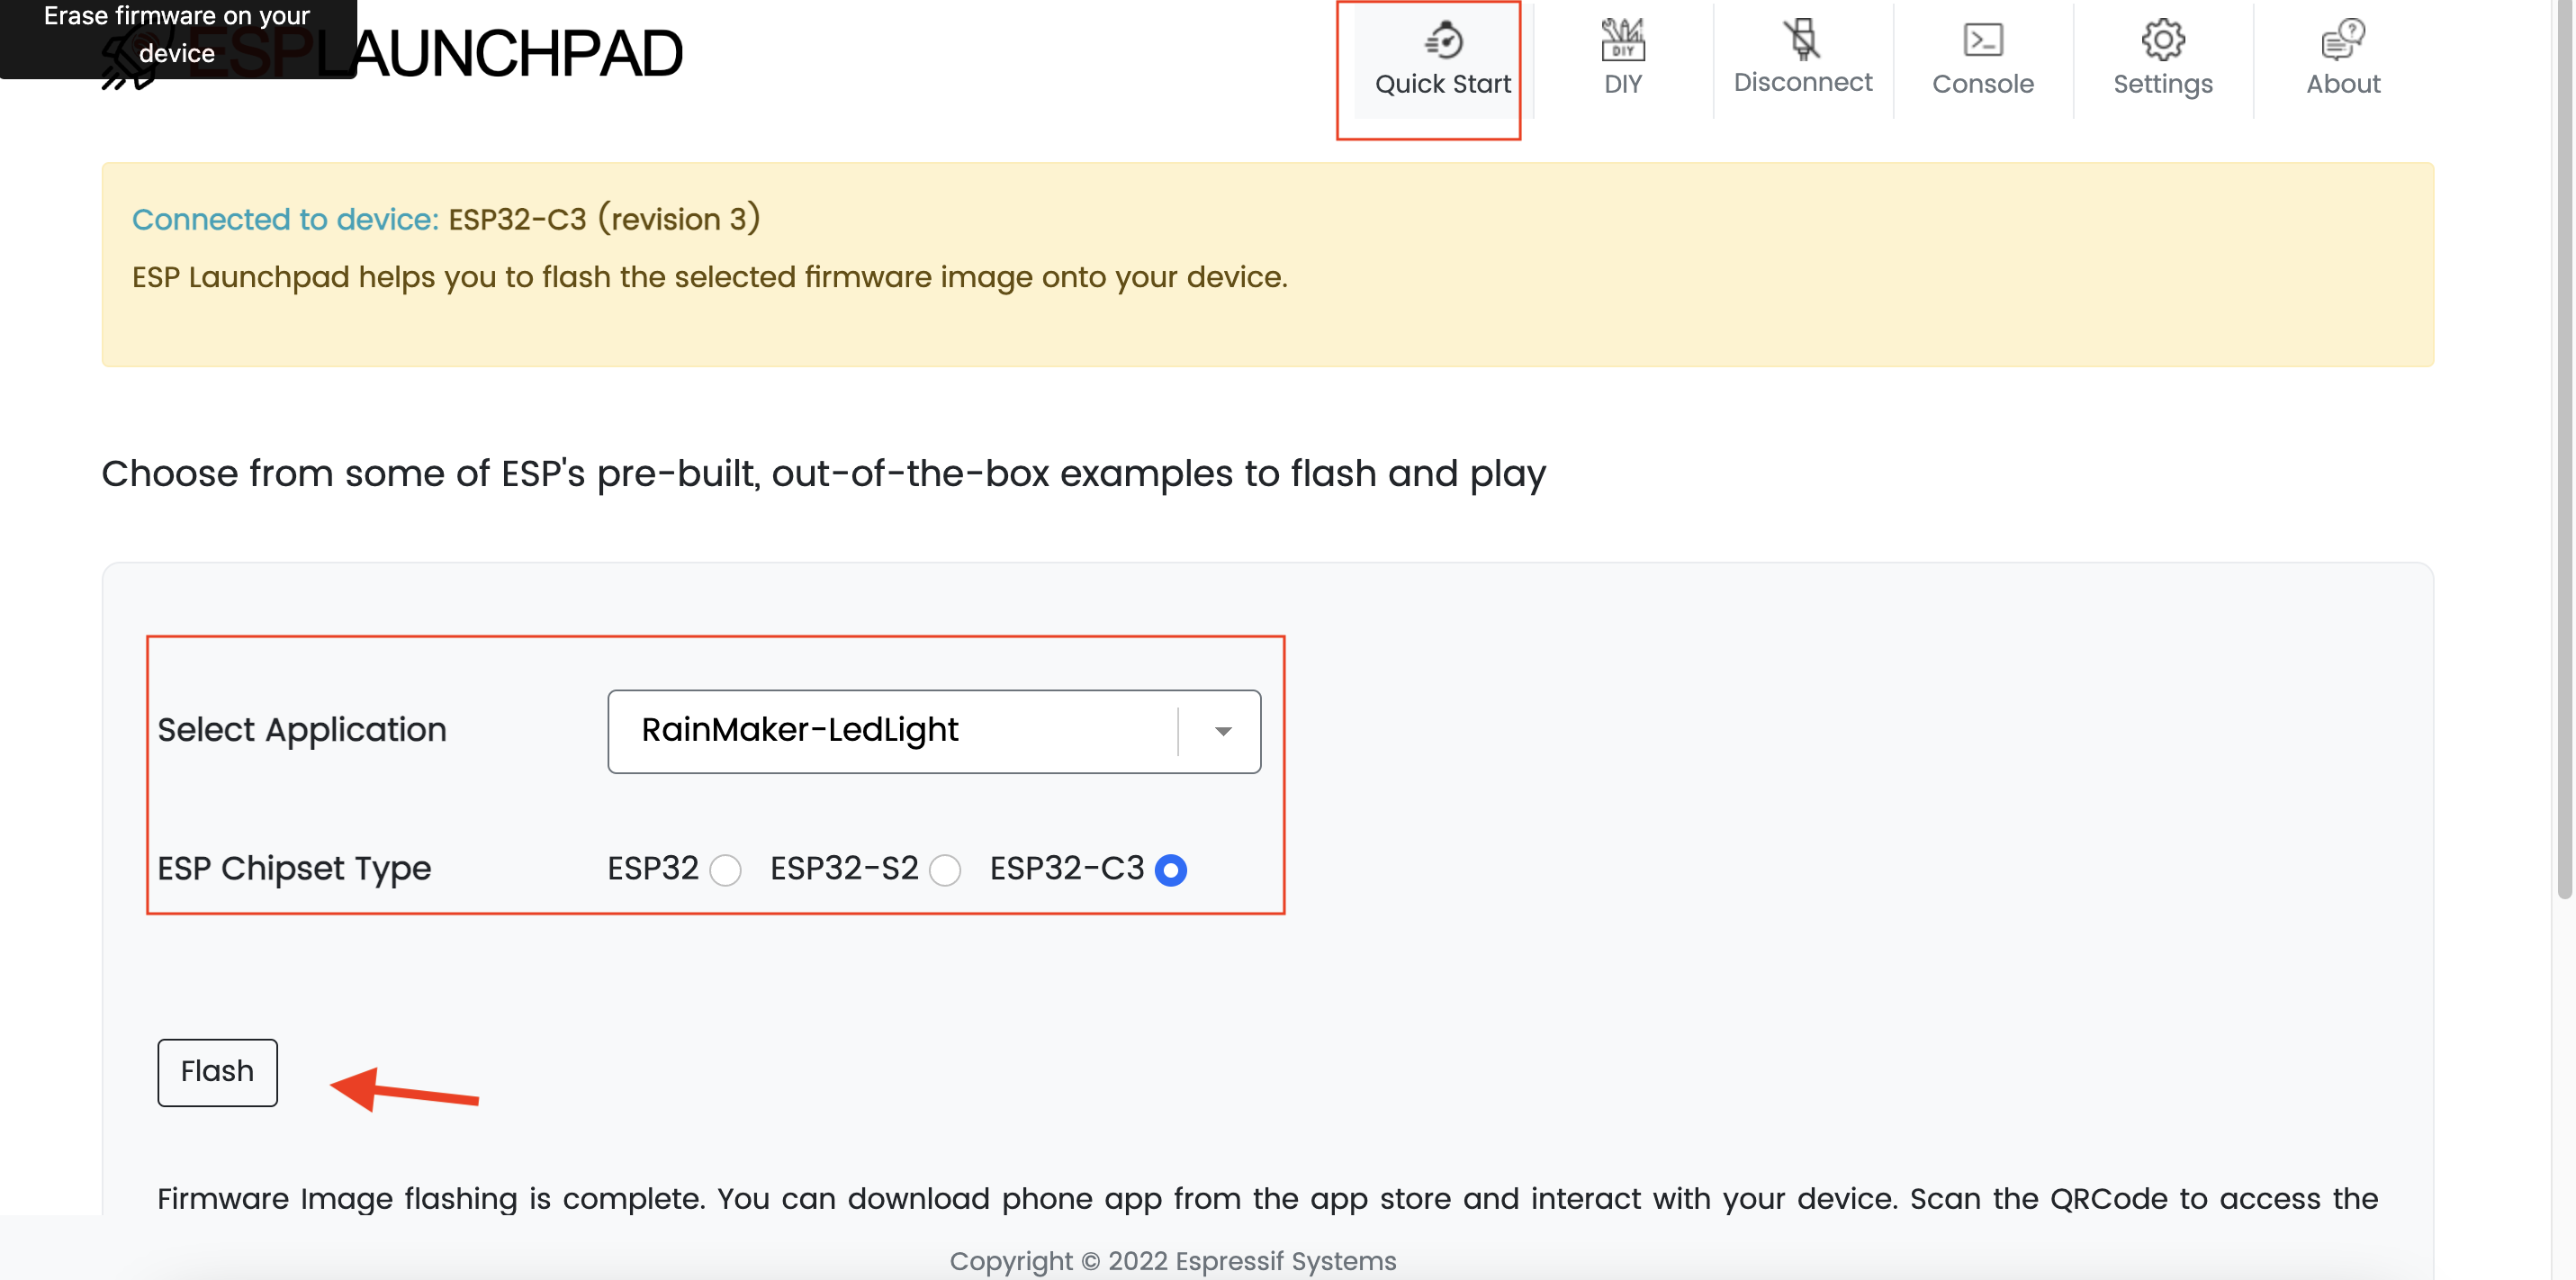
Once the erase process is complete, return to the home page and click the Quick Start tab in the top menu. Use Select Application to choose the firmware. Then choose ESP32-C3 in ESP Chipset Type, and click Flash.
On successful completion of the flash operation, a popup window will indicate that the example project has been flashed successfully.
3. Prepare for Configuration
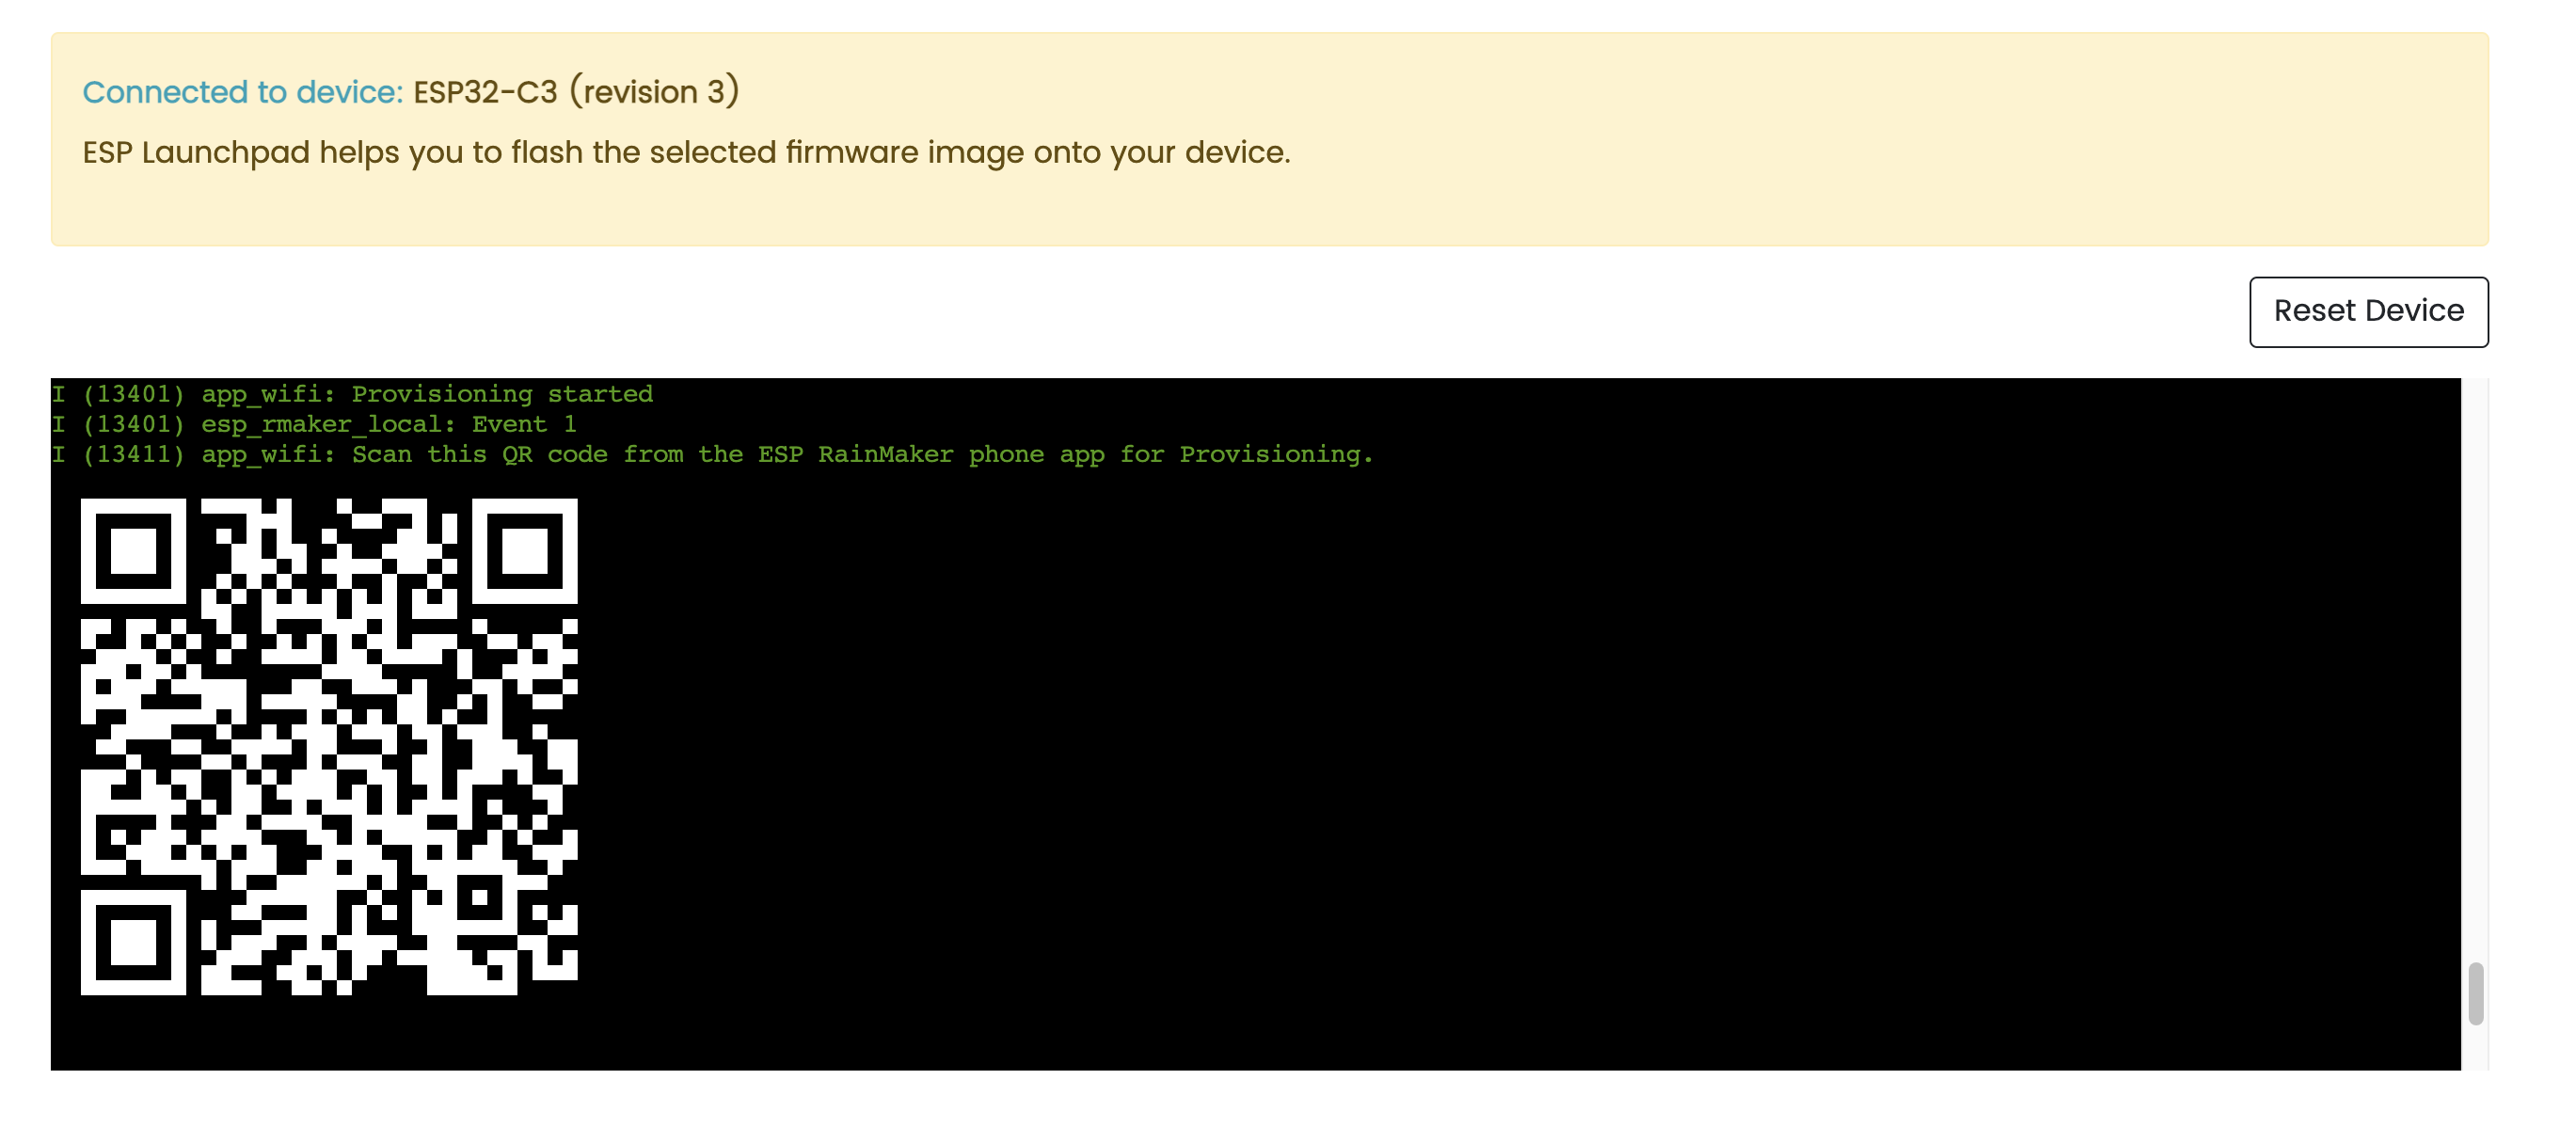
Go to the Console page, and click Reset Device to reset the development kit, which is required after flashing new firmware. The terminal console will show the booting progress and the device QR Code will appear, as shown below.
Device Configuration
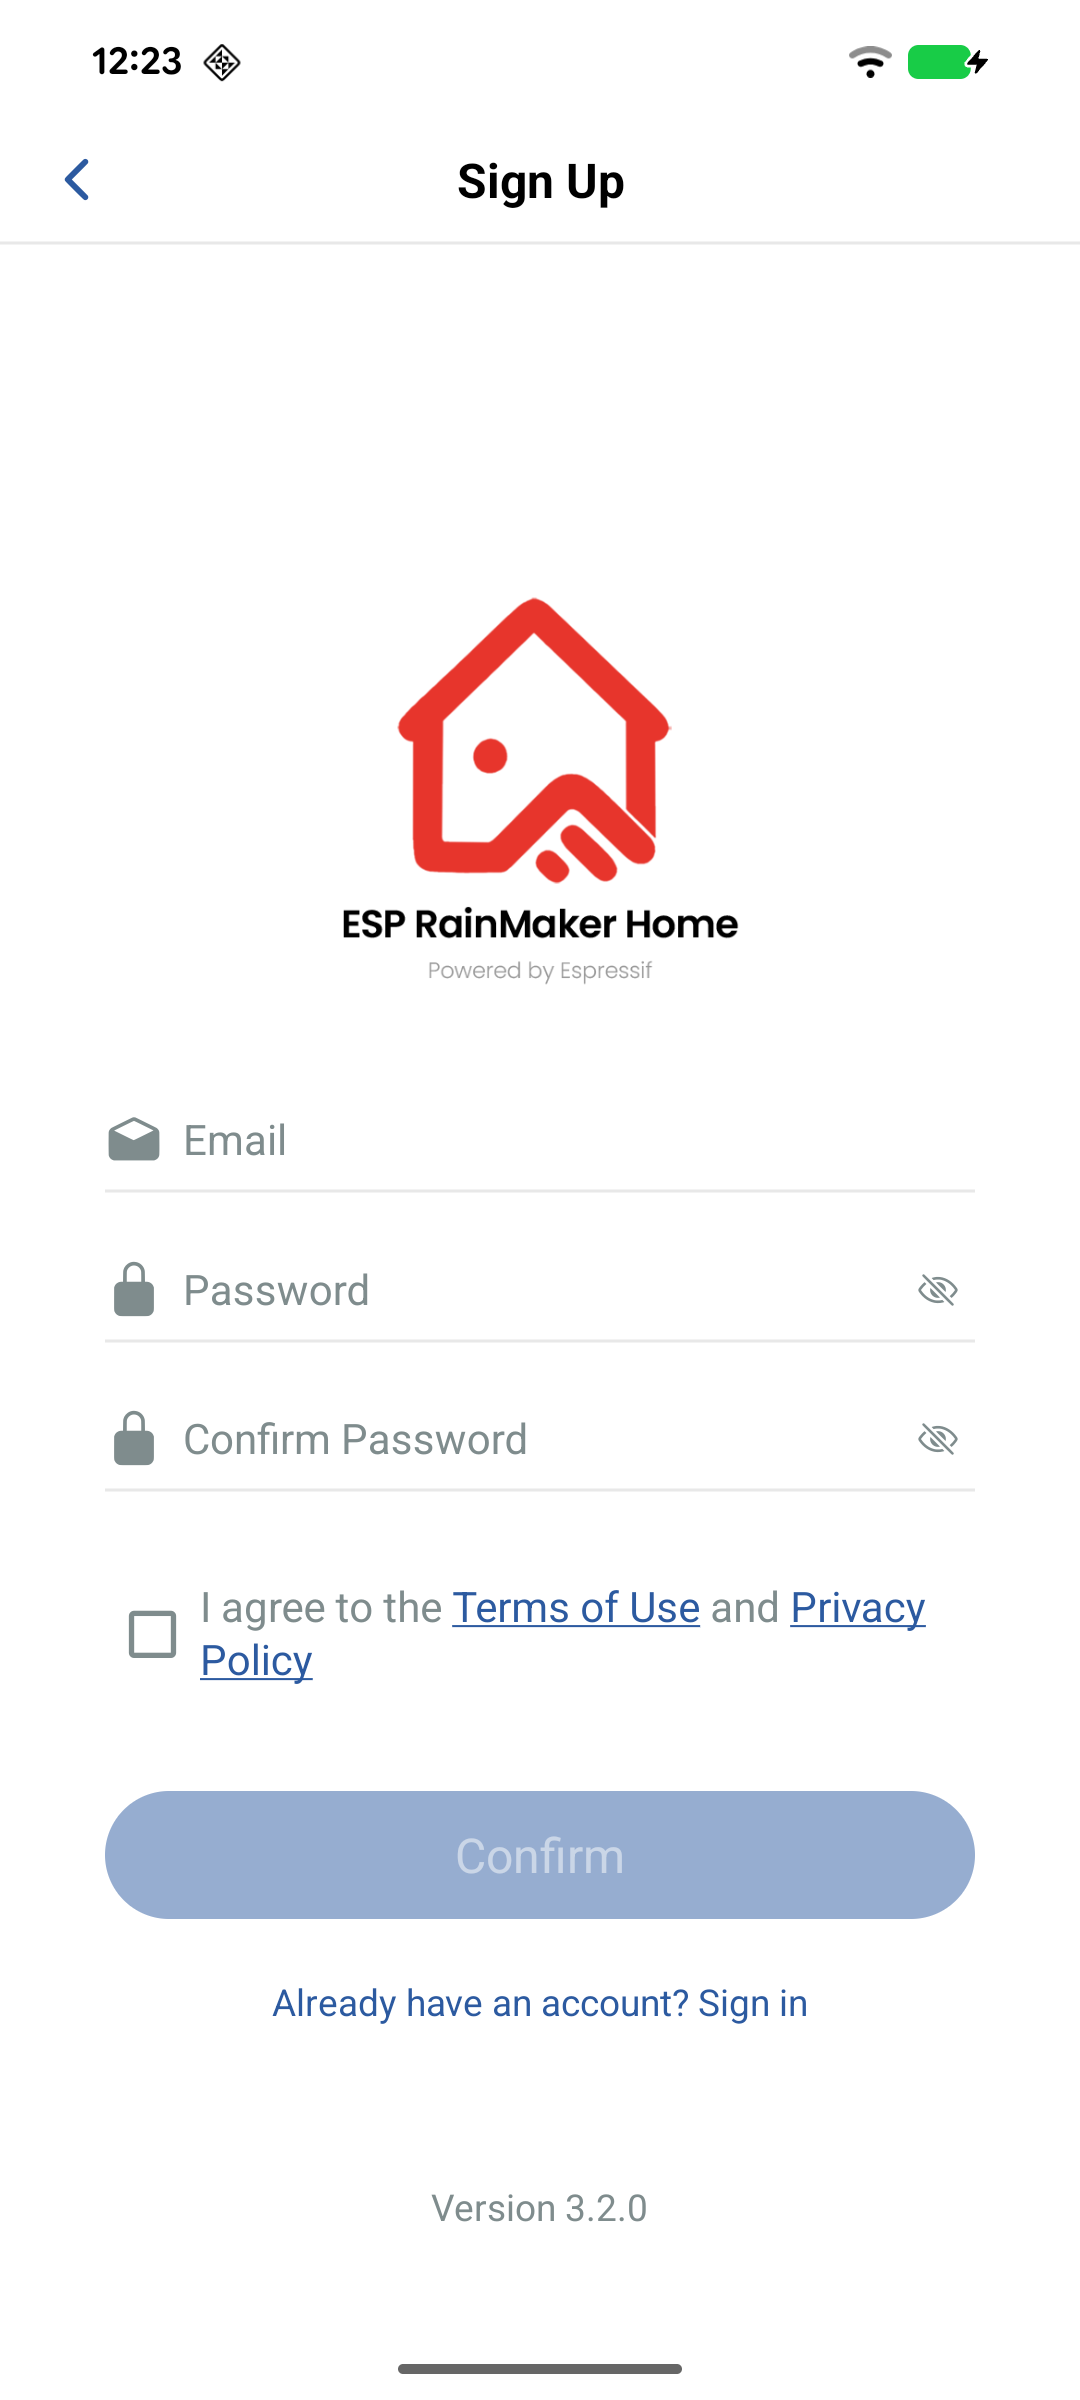
To configure the device, you need to first sign up for an account. If you already have an ESP RainMaker account, you can proceed directly to sign in.
As shown below, enter your email address, set a password, and verify your email address to complete the account creation process.
Thereafter, follow these steps:
- Log in to the app, and click
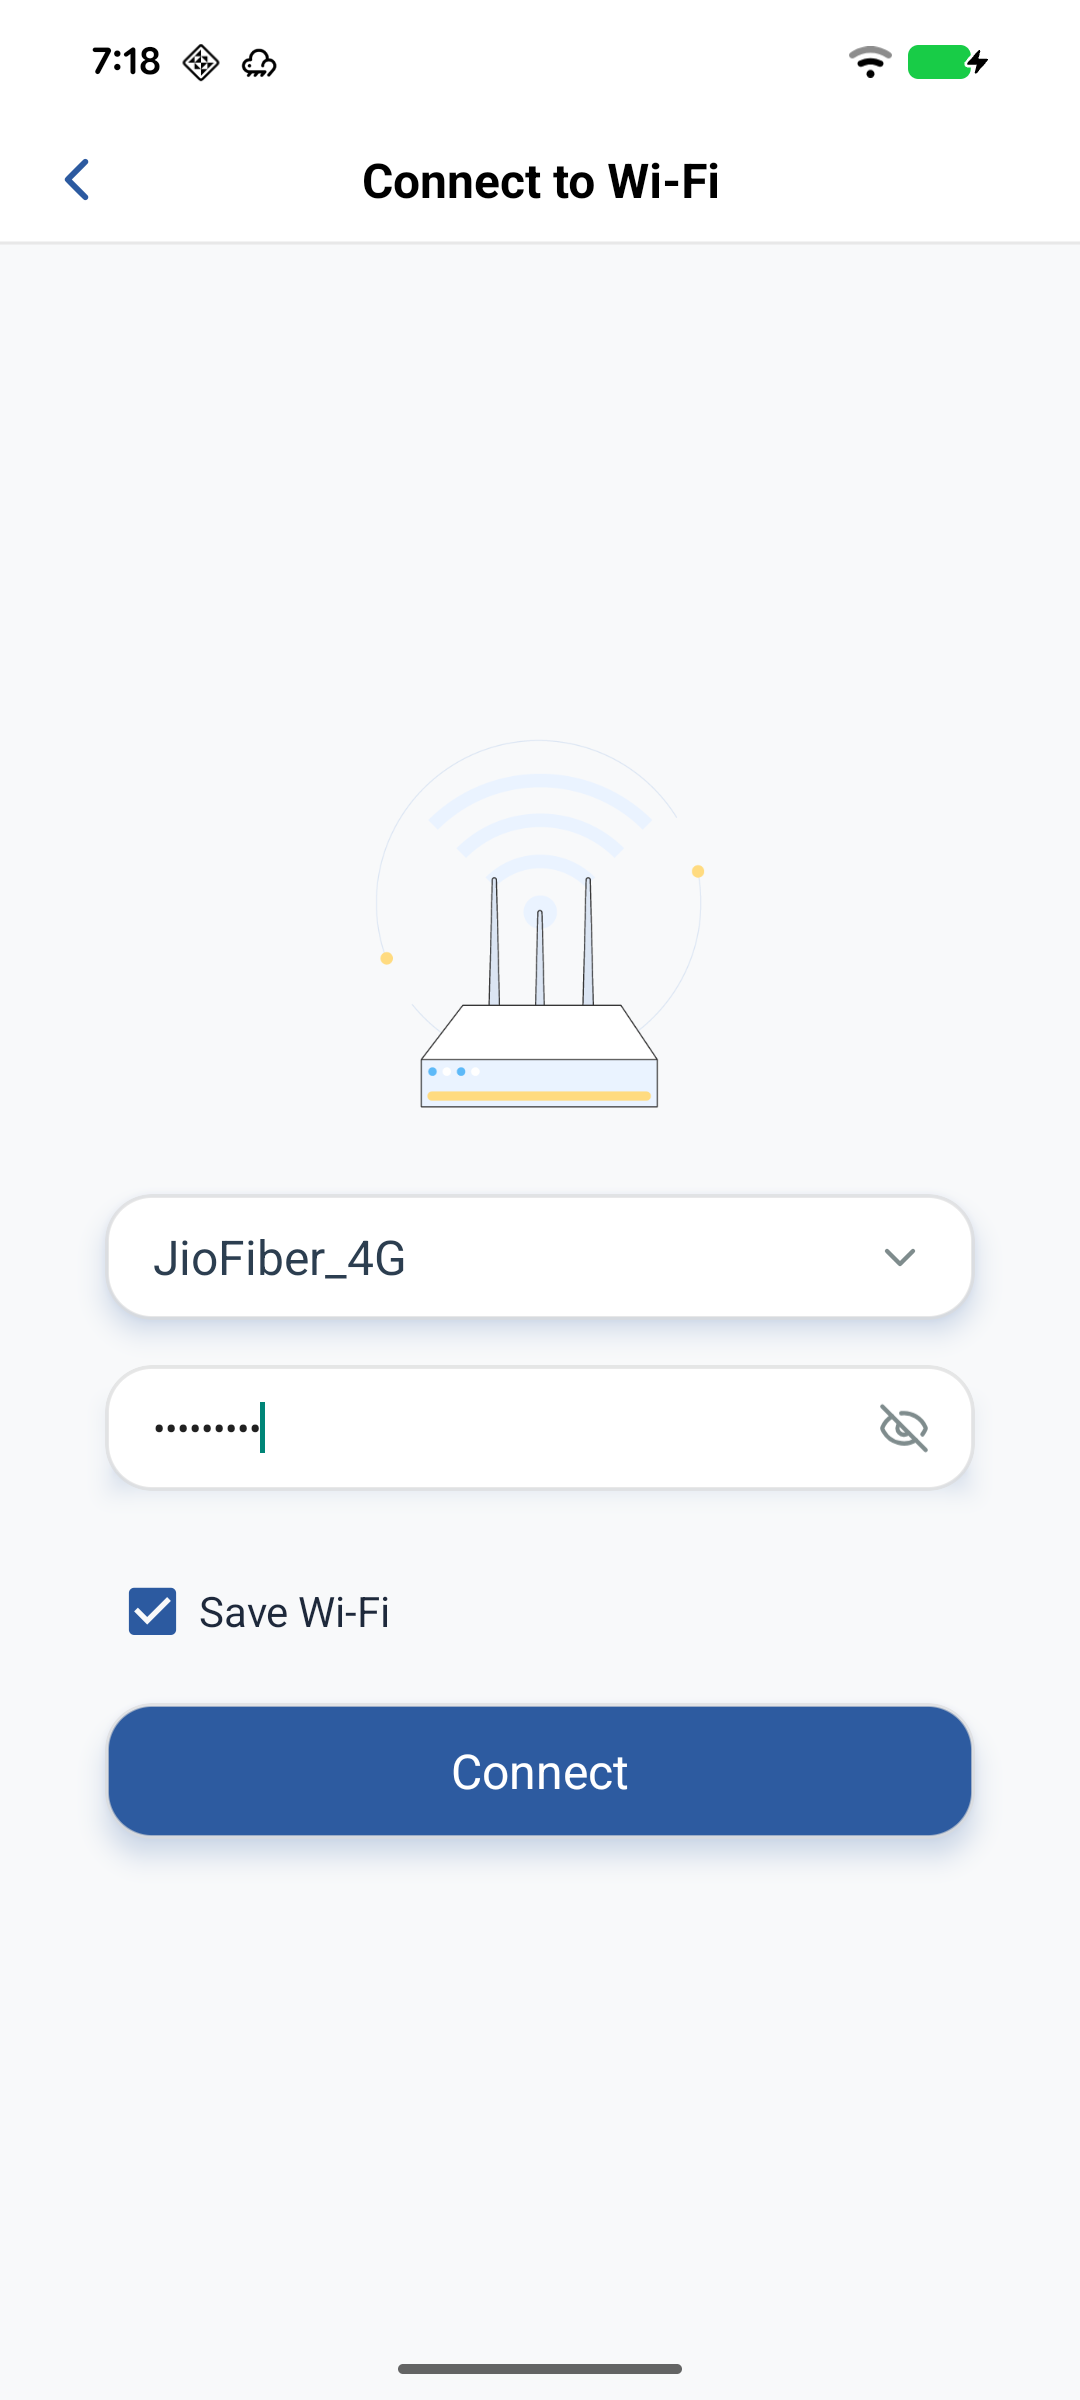
+in the top-right corner of the home page, then chooseScan QR code. - After the scan is completed, you will enter the device network interface. Select the network that the device will join. Click
Nextto begin configuration. - After completing the configuration, enter the device setup interface. You need to name the added devices.
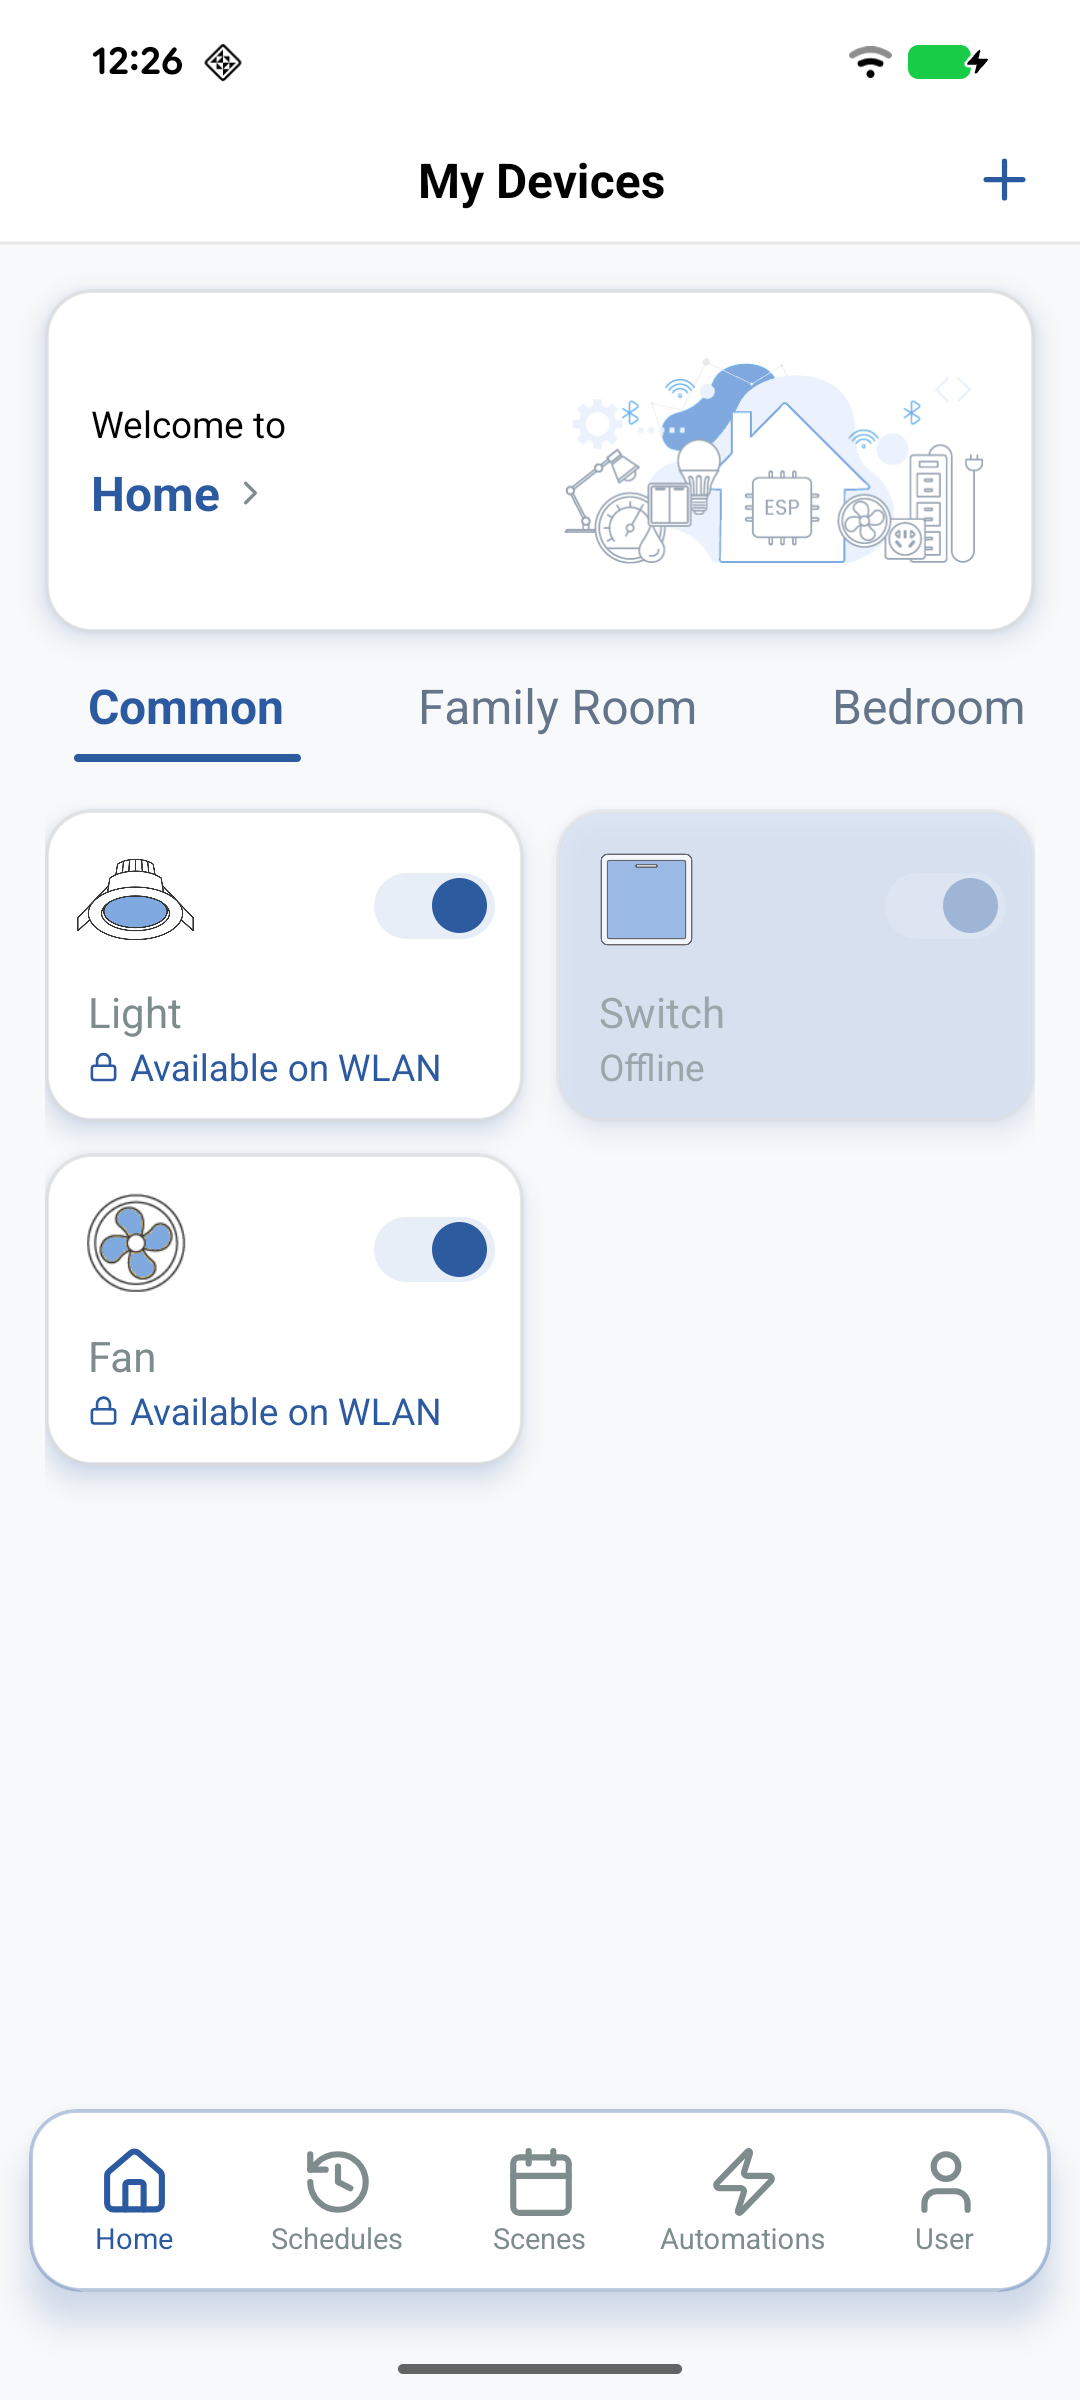
- After saving the information, return to the main interface. The device control card will now appear on the home page.
- Click the
Switchbutton to control the device status. You can also click the device card to explore additional ESP Rainmaker features.
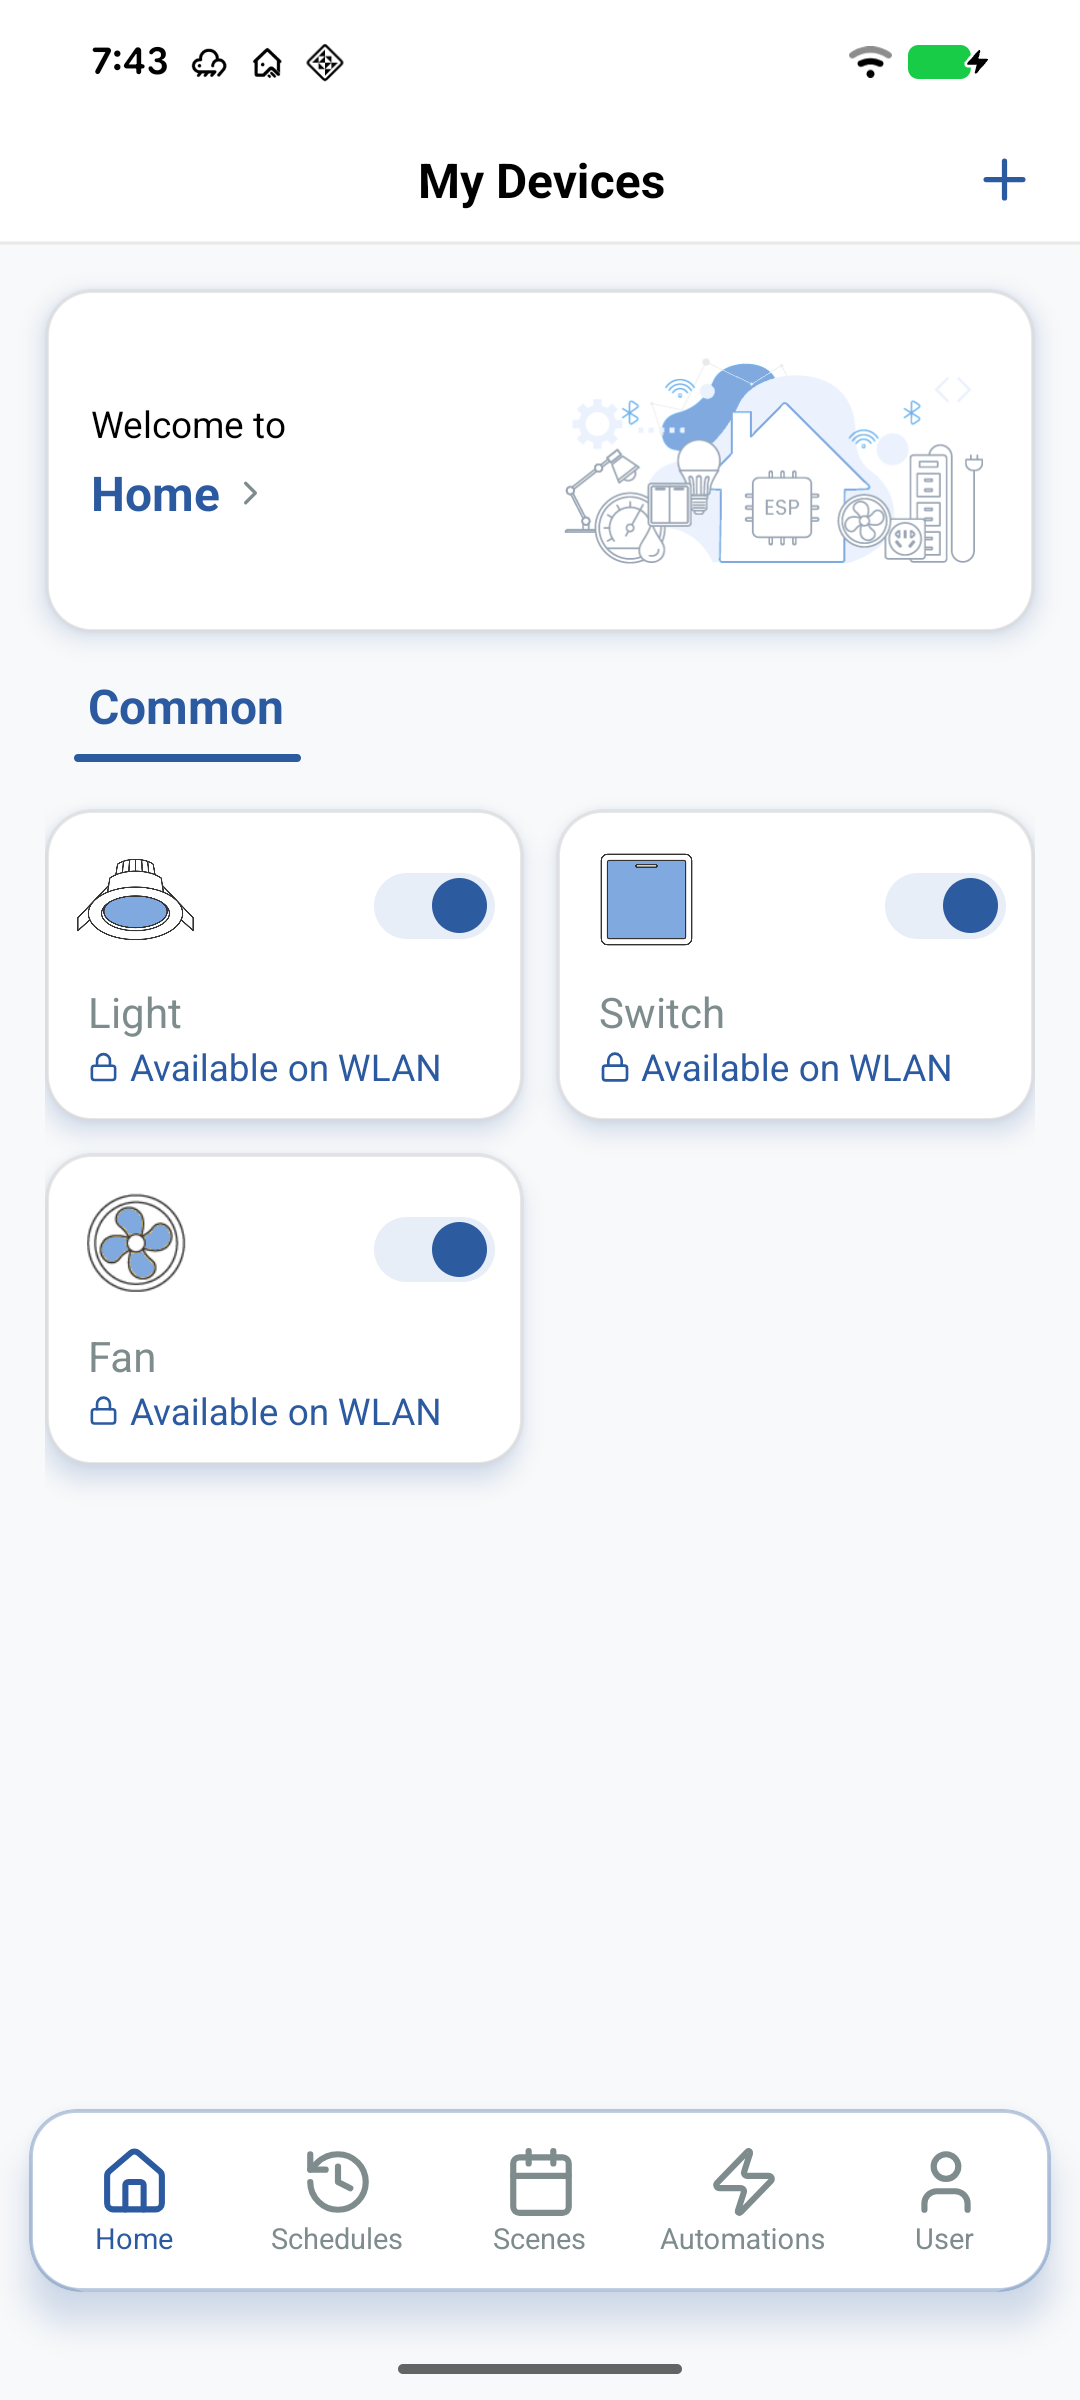

At this point you have completed the entire ESP RainMaker workflow, from firmware flashing to network configuration. You can continue exploring ESP RainMaker features and services by flashing different firmware images using LaunchPad.
For more information, refer to the app usage guide.