

Team access & roles
Every member of your organization has a role. The role decides which AWS accounts they can see and what they can do there — view, connect, deploy, manage users. A new member has almost no access until you give them a role.
All of this is under the gear icon (top right) → System configurations:
| Tab | Use it to |
|---|---|
| Role management | See the built-in roles, and create your own. |
| Assign access | Give a person a role (adds them to your organization if needed). |
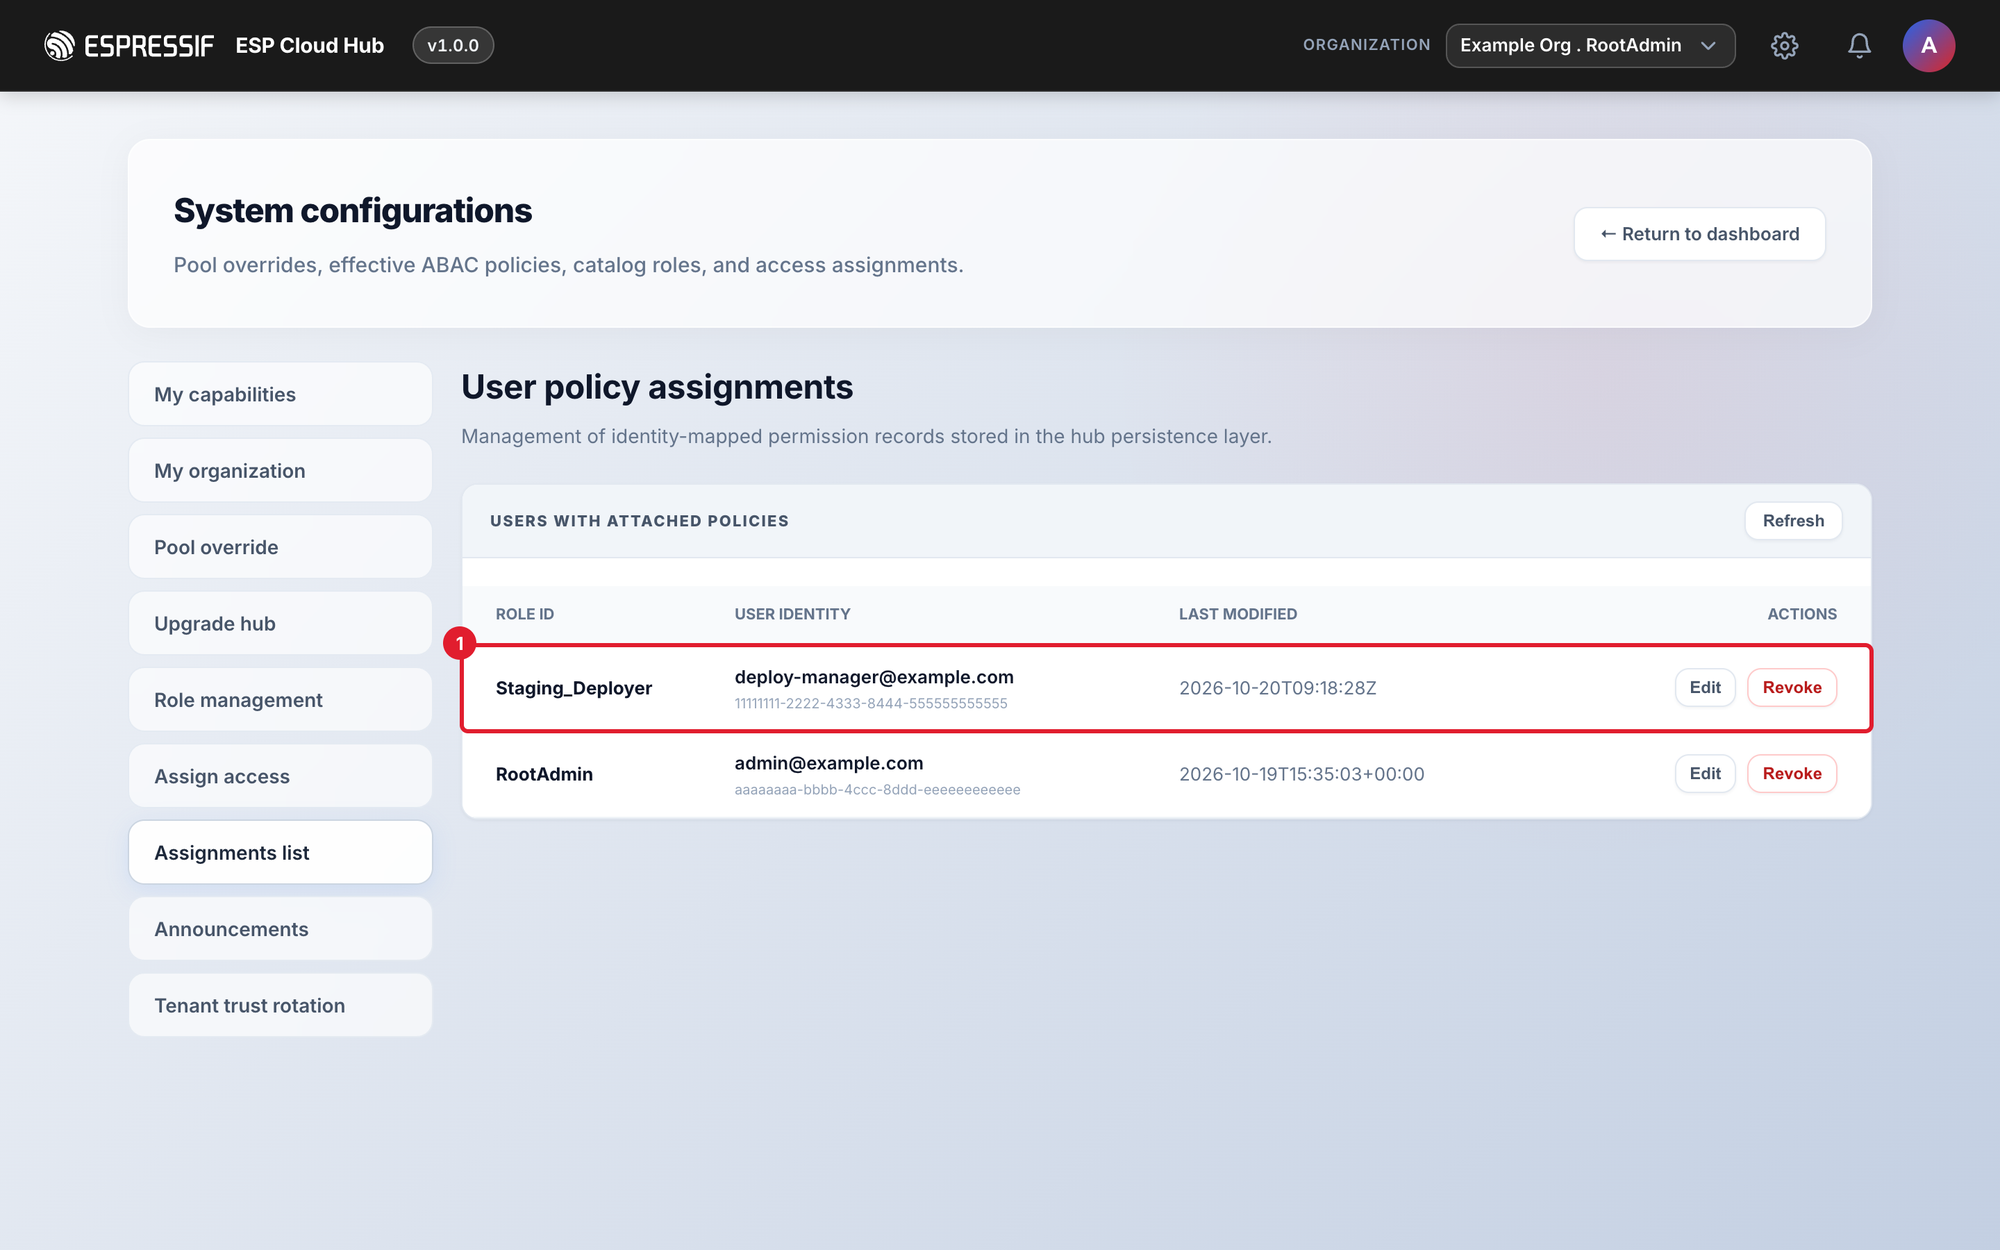
| Assignments list | See who has which role; Edit or Revoke it. |
| My capabilities | See exactly what you can do. |
Built-in roles
| Role | What the person can do |
|---|---|
| RootAdmin | Everything, including upgrading ESP CloudHub. Given to the administrators named when ESP CloudHub was deployed. |
| AggregatorAdmin | Run the organization: add, connect and delete AWS accounts, deploy and upgrade products, add people and give them roles. |
| Client_Manager | Connect AWS accounts and deploy, read and delete products, on all accounts in the organization. |
| Rainmaker_Specialist | View accounts and deploy / read ESP RainMaker only, on all accounts in the organization. |
| Agents_Specialist | Same as Rainmaker_Specialist, for the Agents product. |
| Auditor | Read-only: see accounts and products, change nothing. |
| CloudHub_Operator | ESP CloudHub settings and user management only — no access to AWS accounts or products. |
Need something narrower — for example, only some AWS accounts? Create a custom role (scenario 1).
Scenario 1 — Let someone deploy on only some AWS accounts
Example: your organization has a Production and a Staging AWS account. A teammate should deploy ESP RainMaker to Staging only, and must not see Production.
Before you start: add both AWS accounts in ESP CloudHub. Connect Staging yourself — this role can deploy but not connect accounts.
1. Create the role
Open Role management → + Create role and fill in:
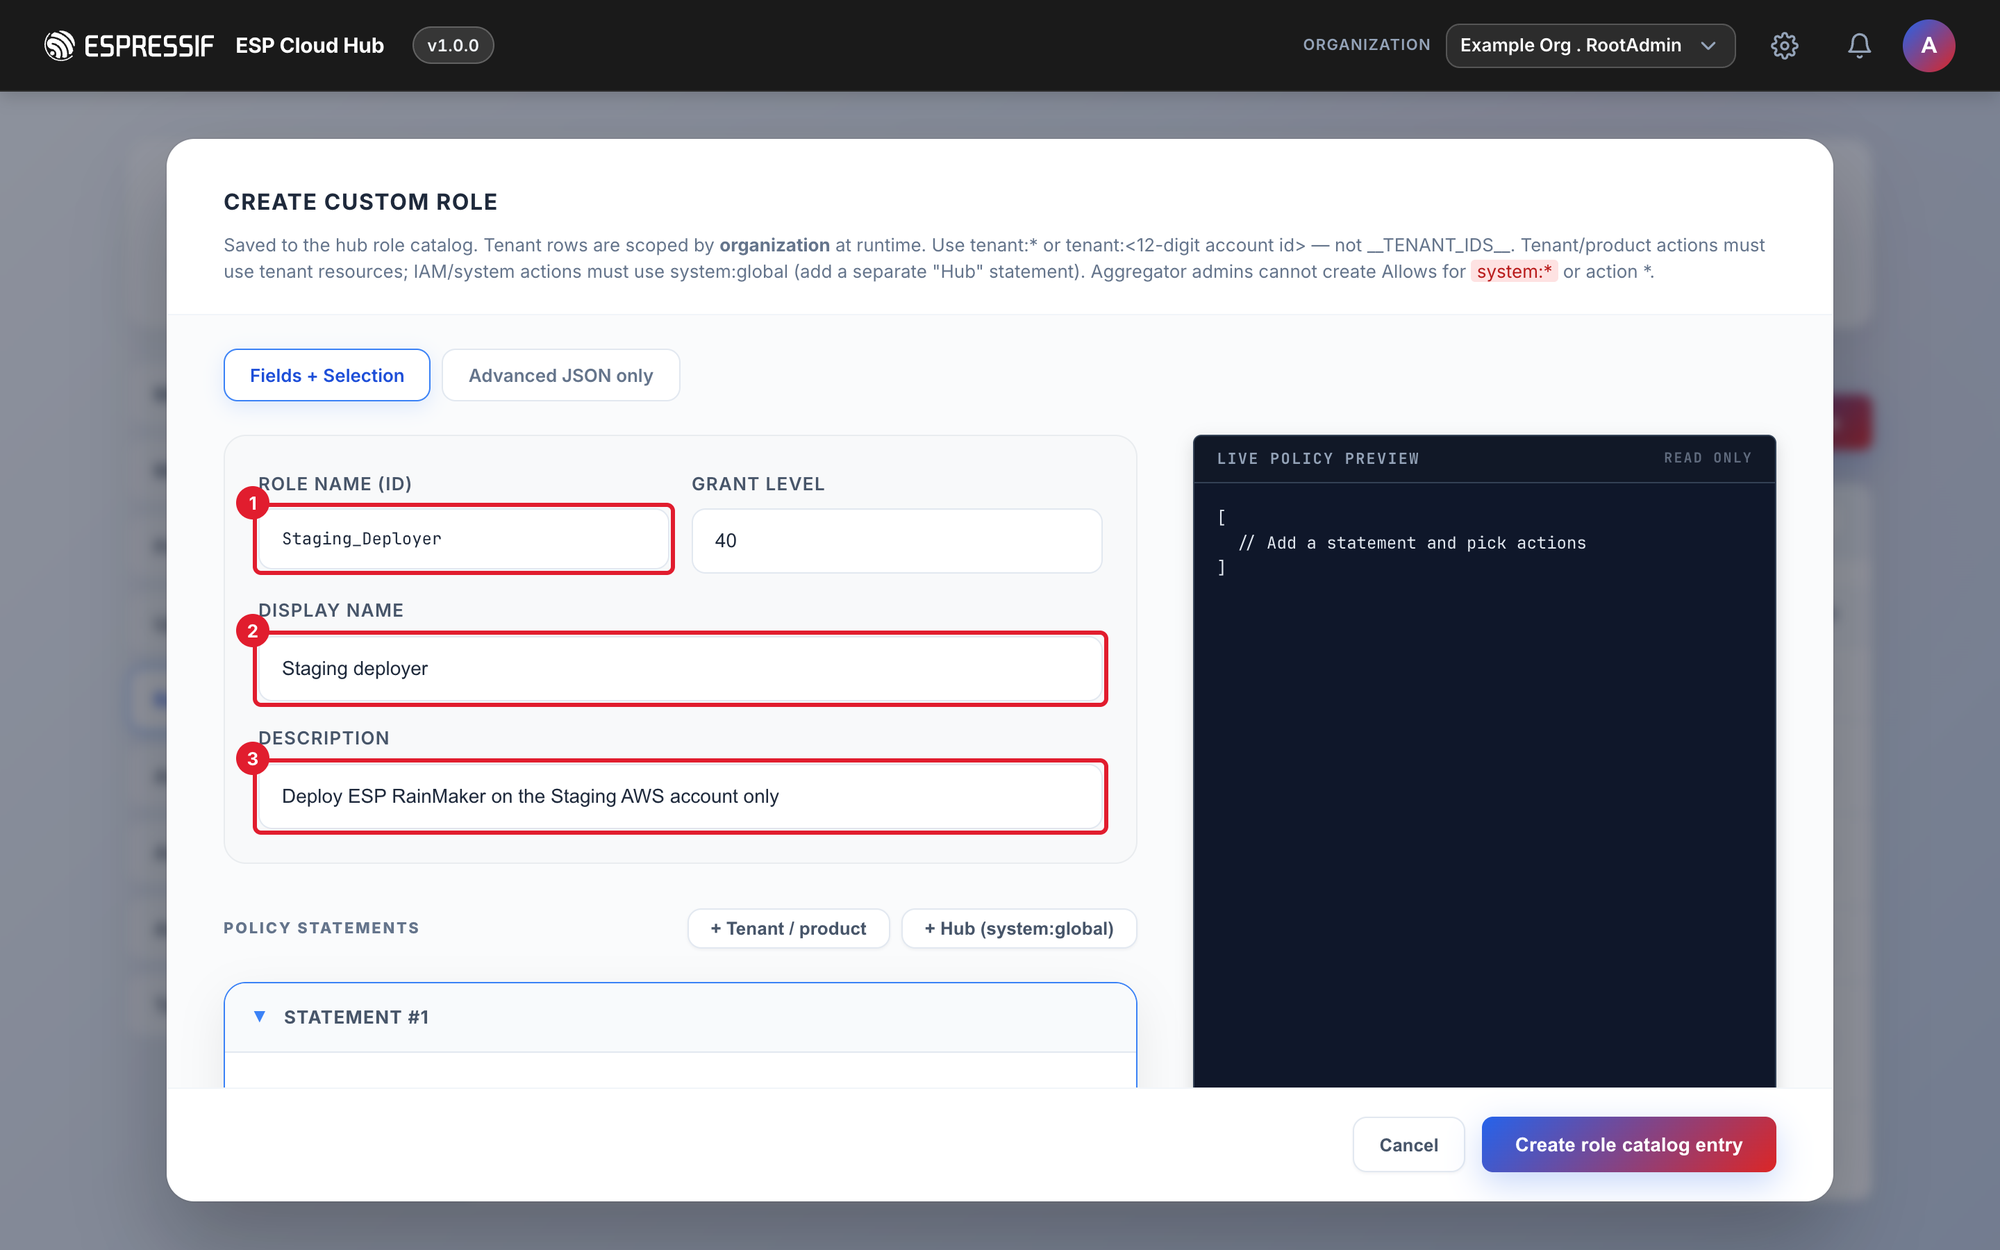
- Role name (ID) — e.g.
Staging_Deployer(no spaces). - Display name — e.g. Staging deployer.
- Description — what the role is for.
Leave Grant level at 40.
2. Choose what the role can do, and where
Scroll down to Statement #1 (type Tenant & product):
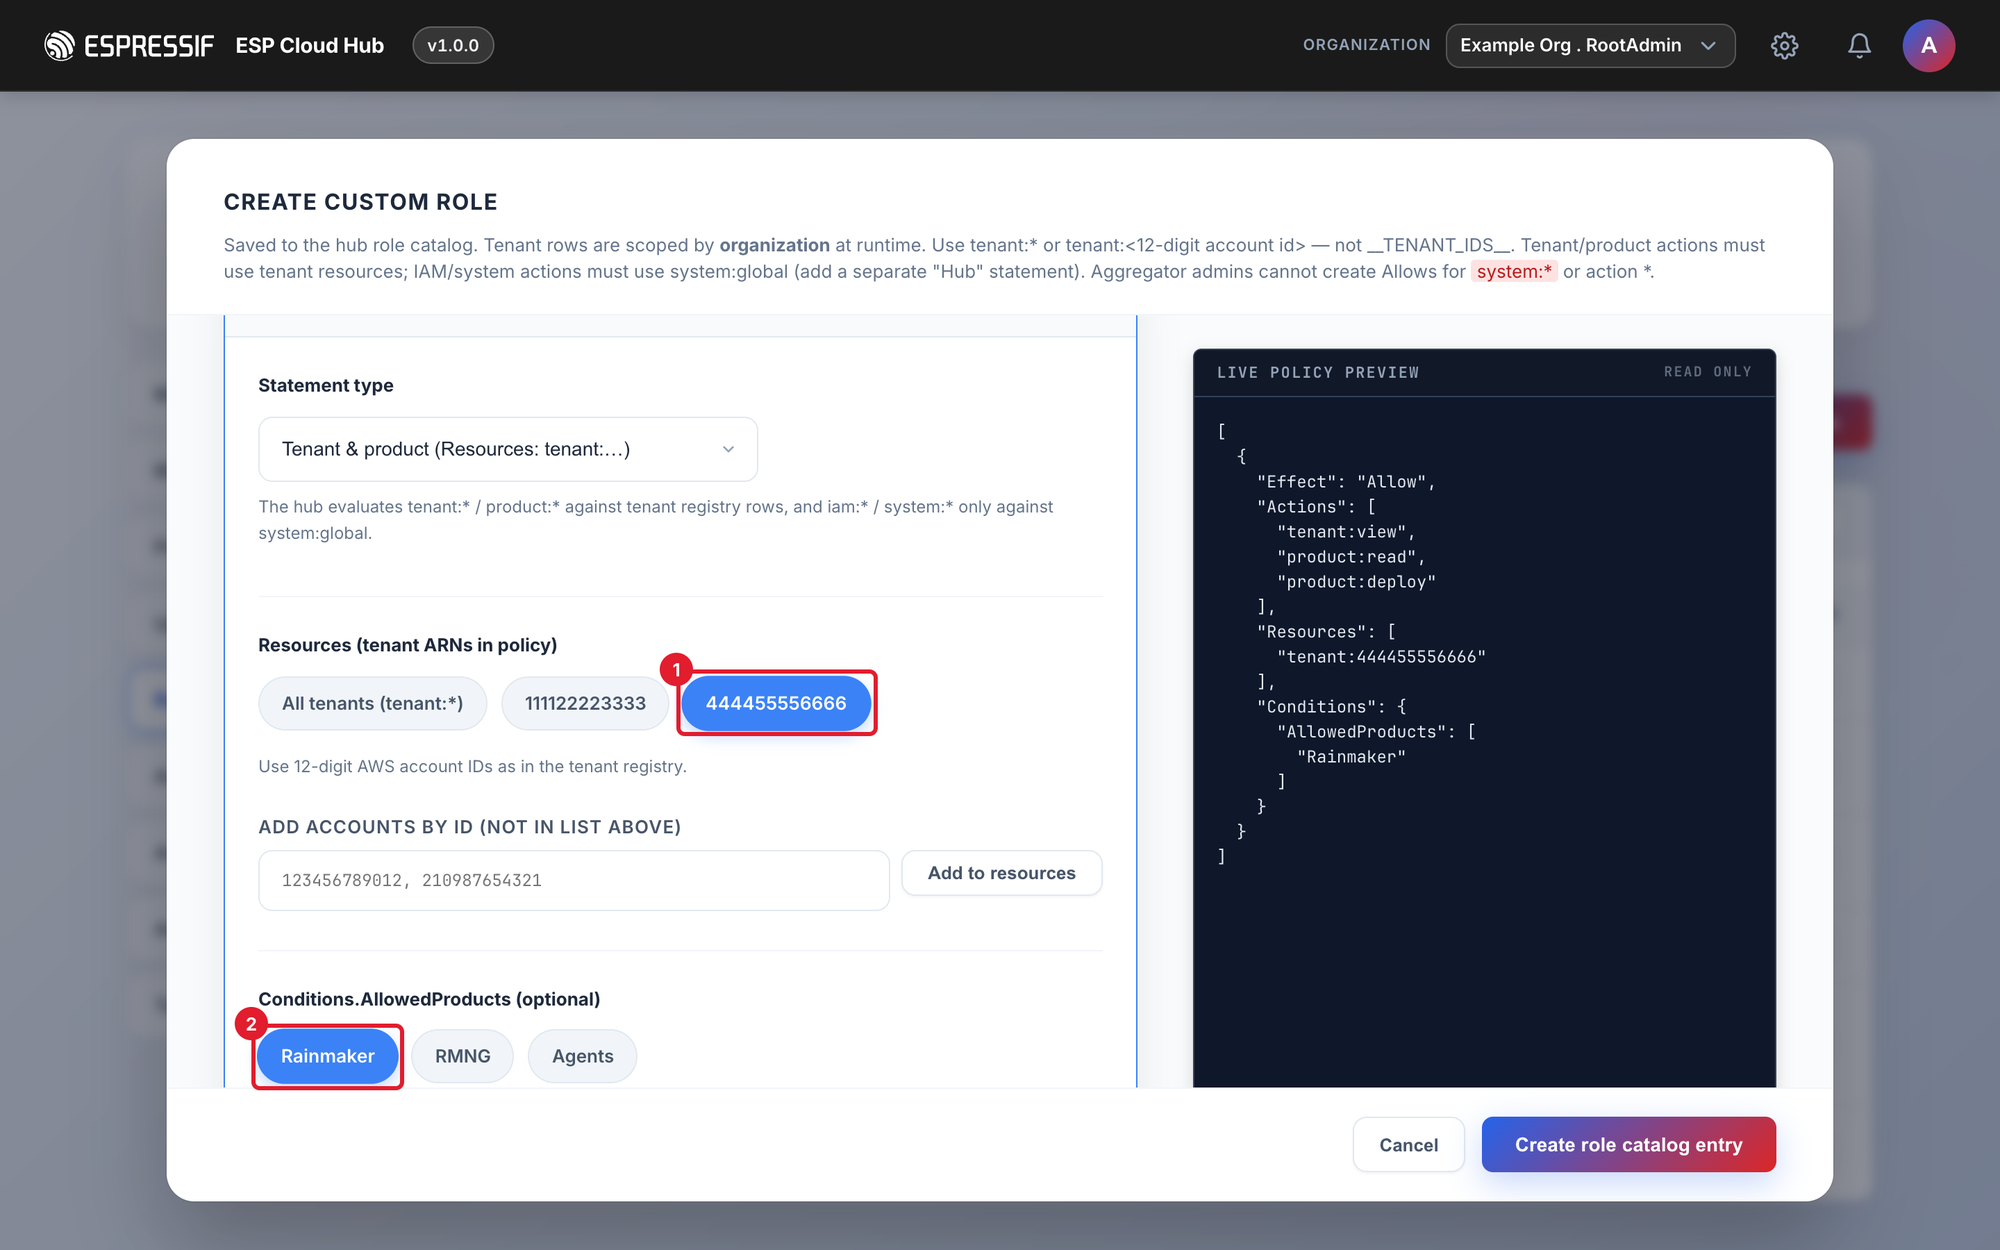
- Under Resources, select only the Staging account (not All tenants).
- Under AllowedProducts, select Rainmaker.
- Under Actions, tick
tenant:view,product:readandproduct:deploy.
Check the Live Policy Preview on the right, then click Create role catalog entry. The new role appears in the list.
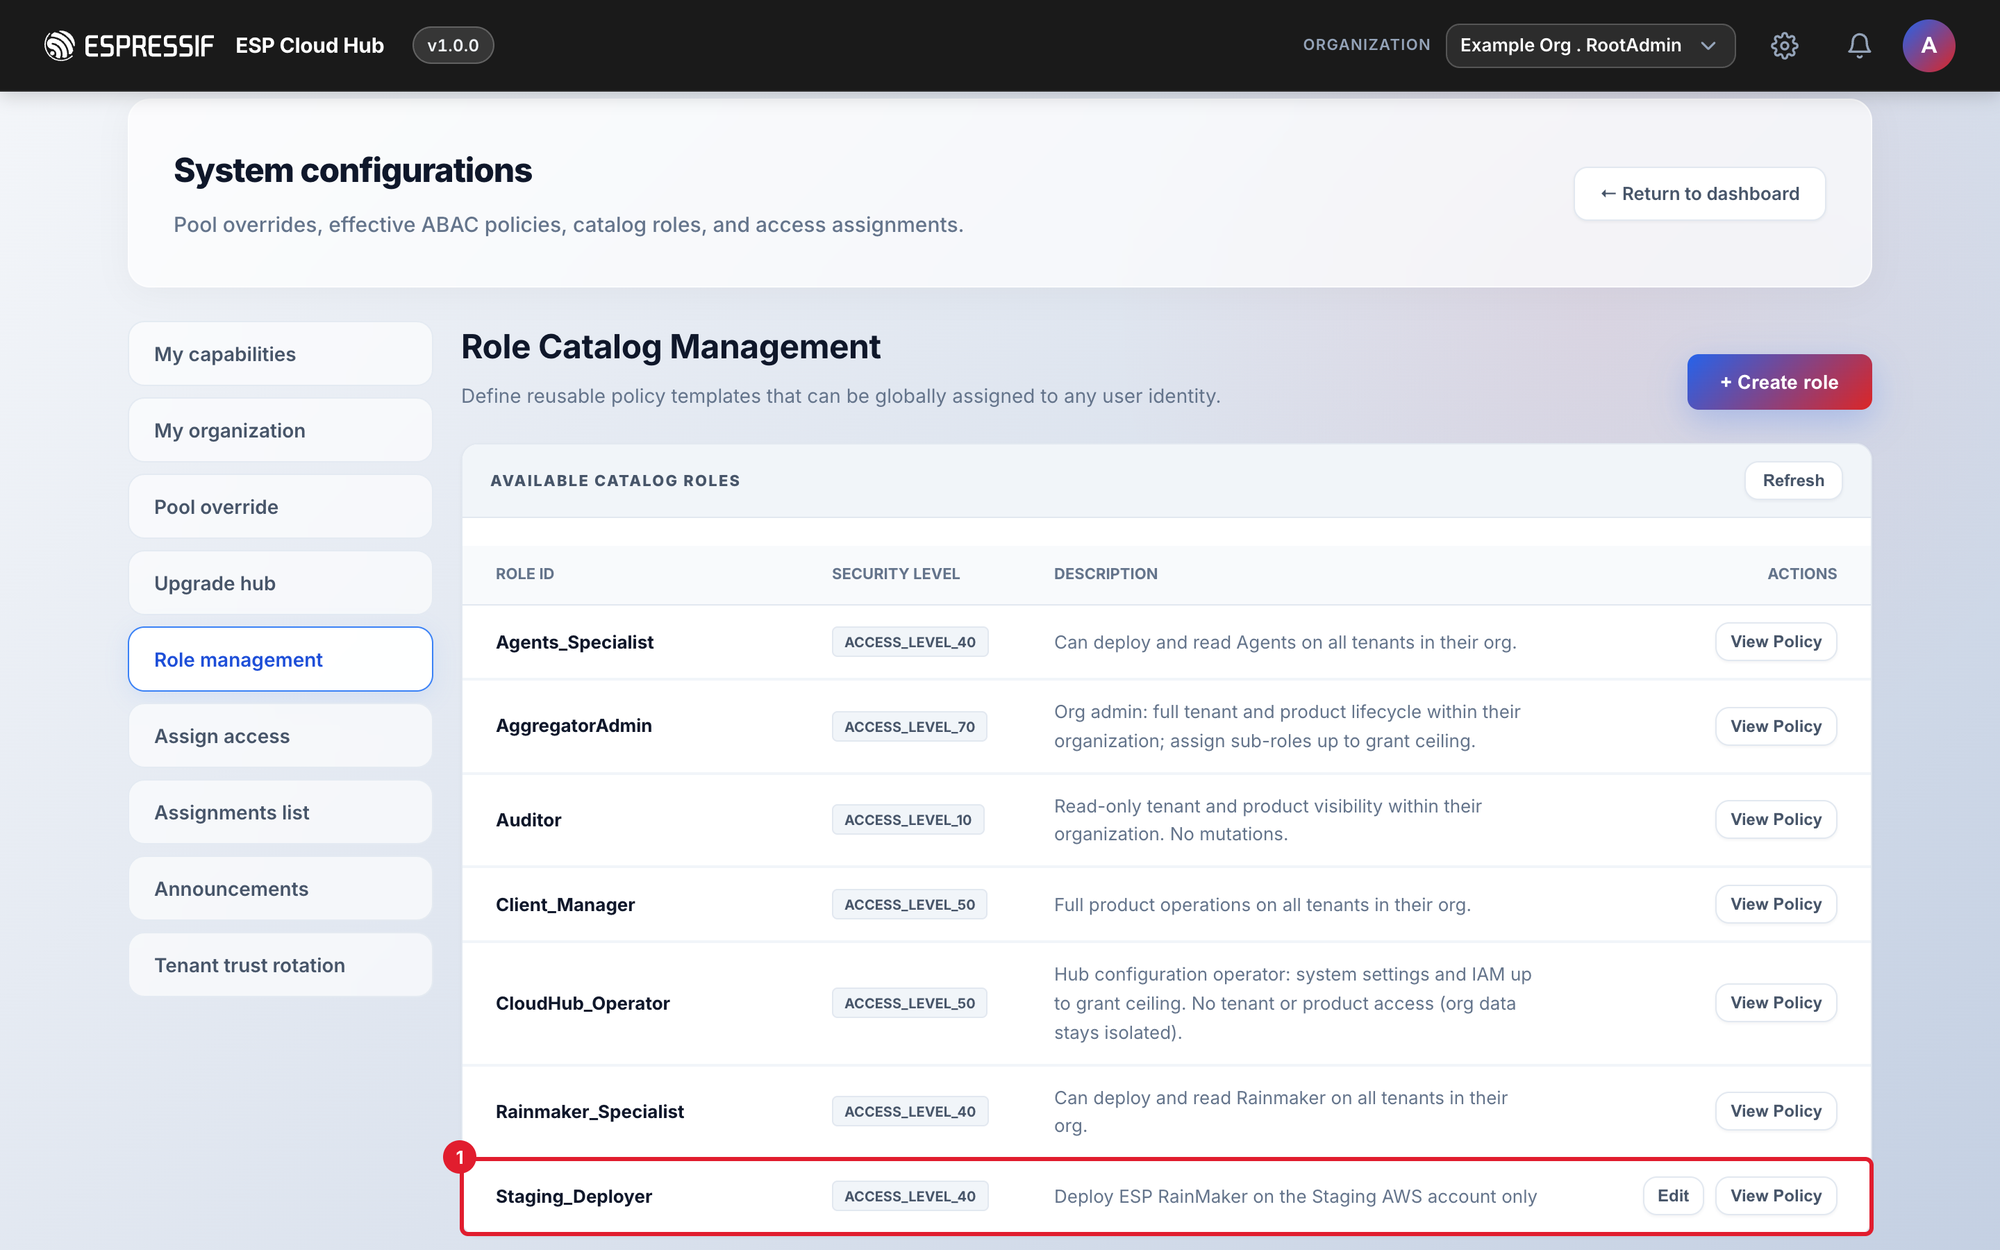
3. Give the role to your teammate
Open Assign access:
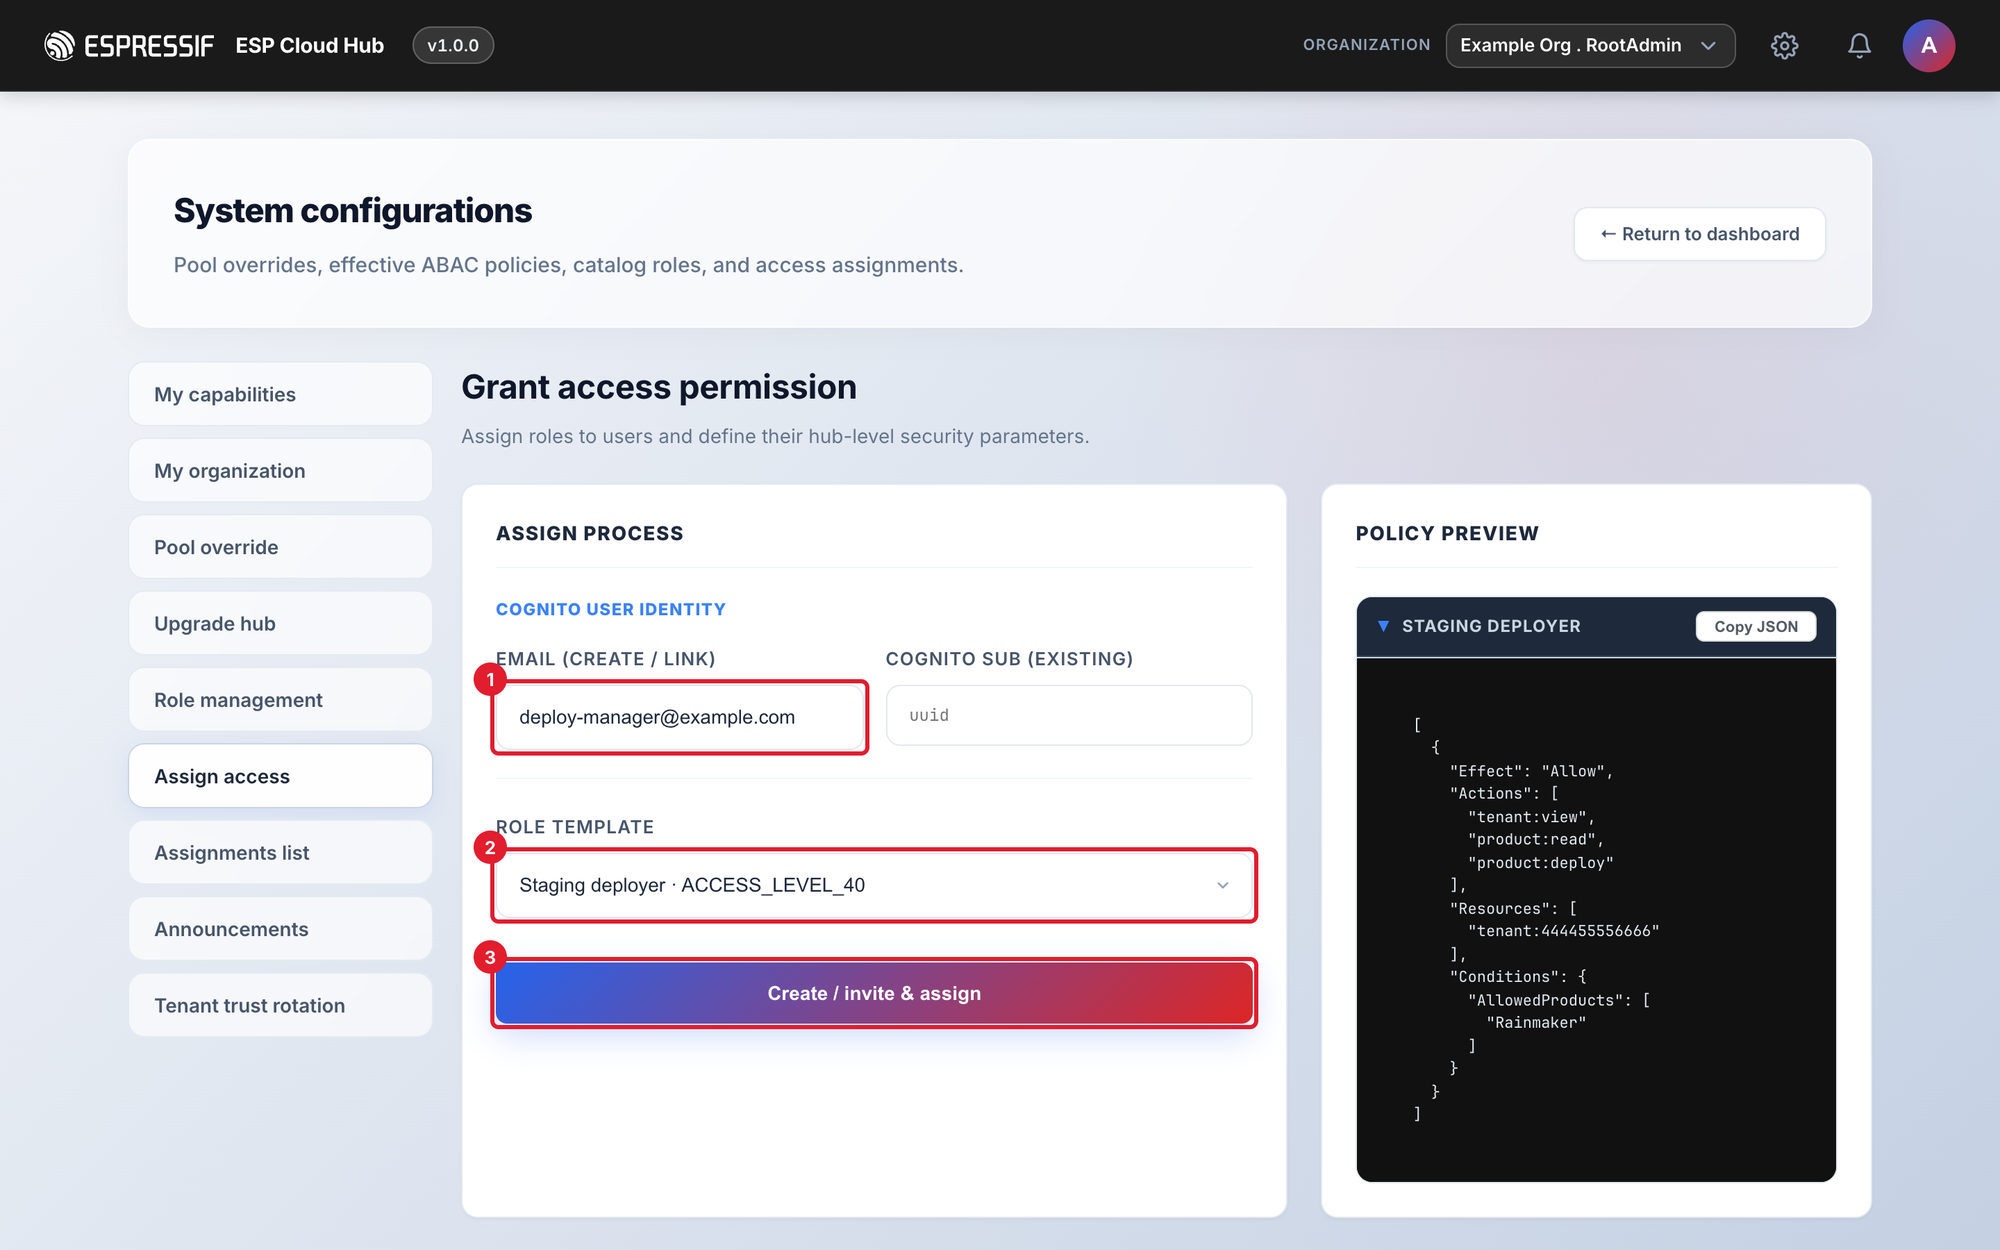
- Enter your teammate's email.
- Choose Staging deployer under Role template.
- Click Create / invite & assign.
They now appear in Assignments list with the new role.
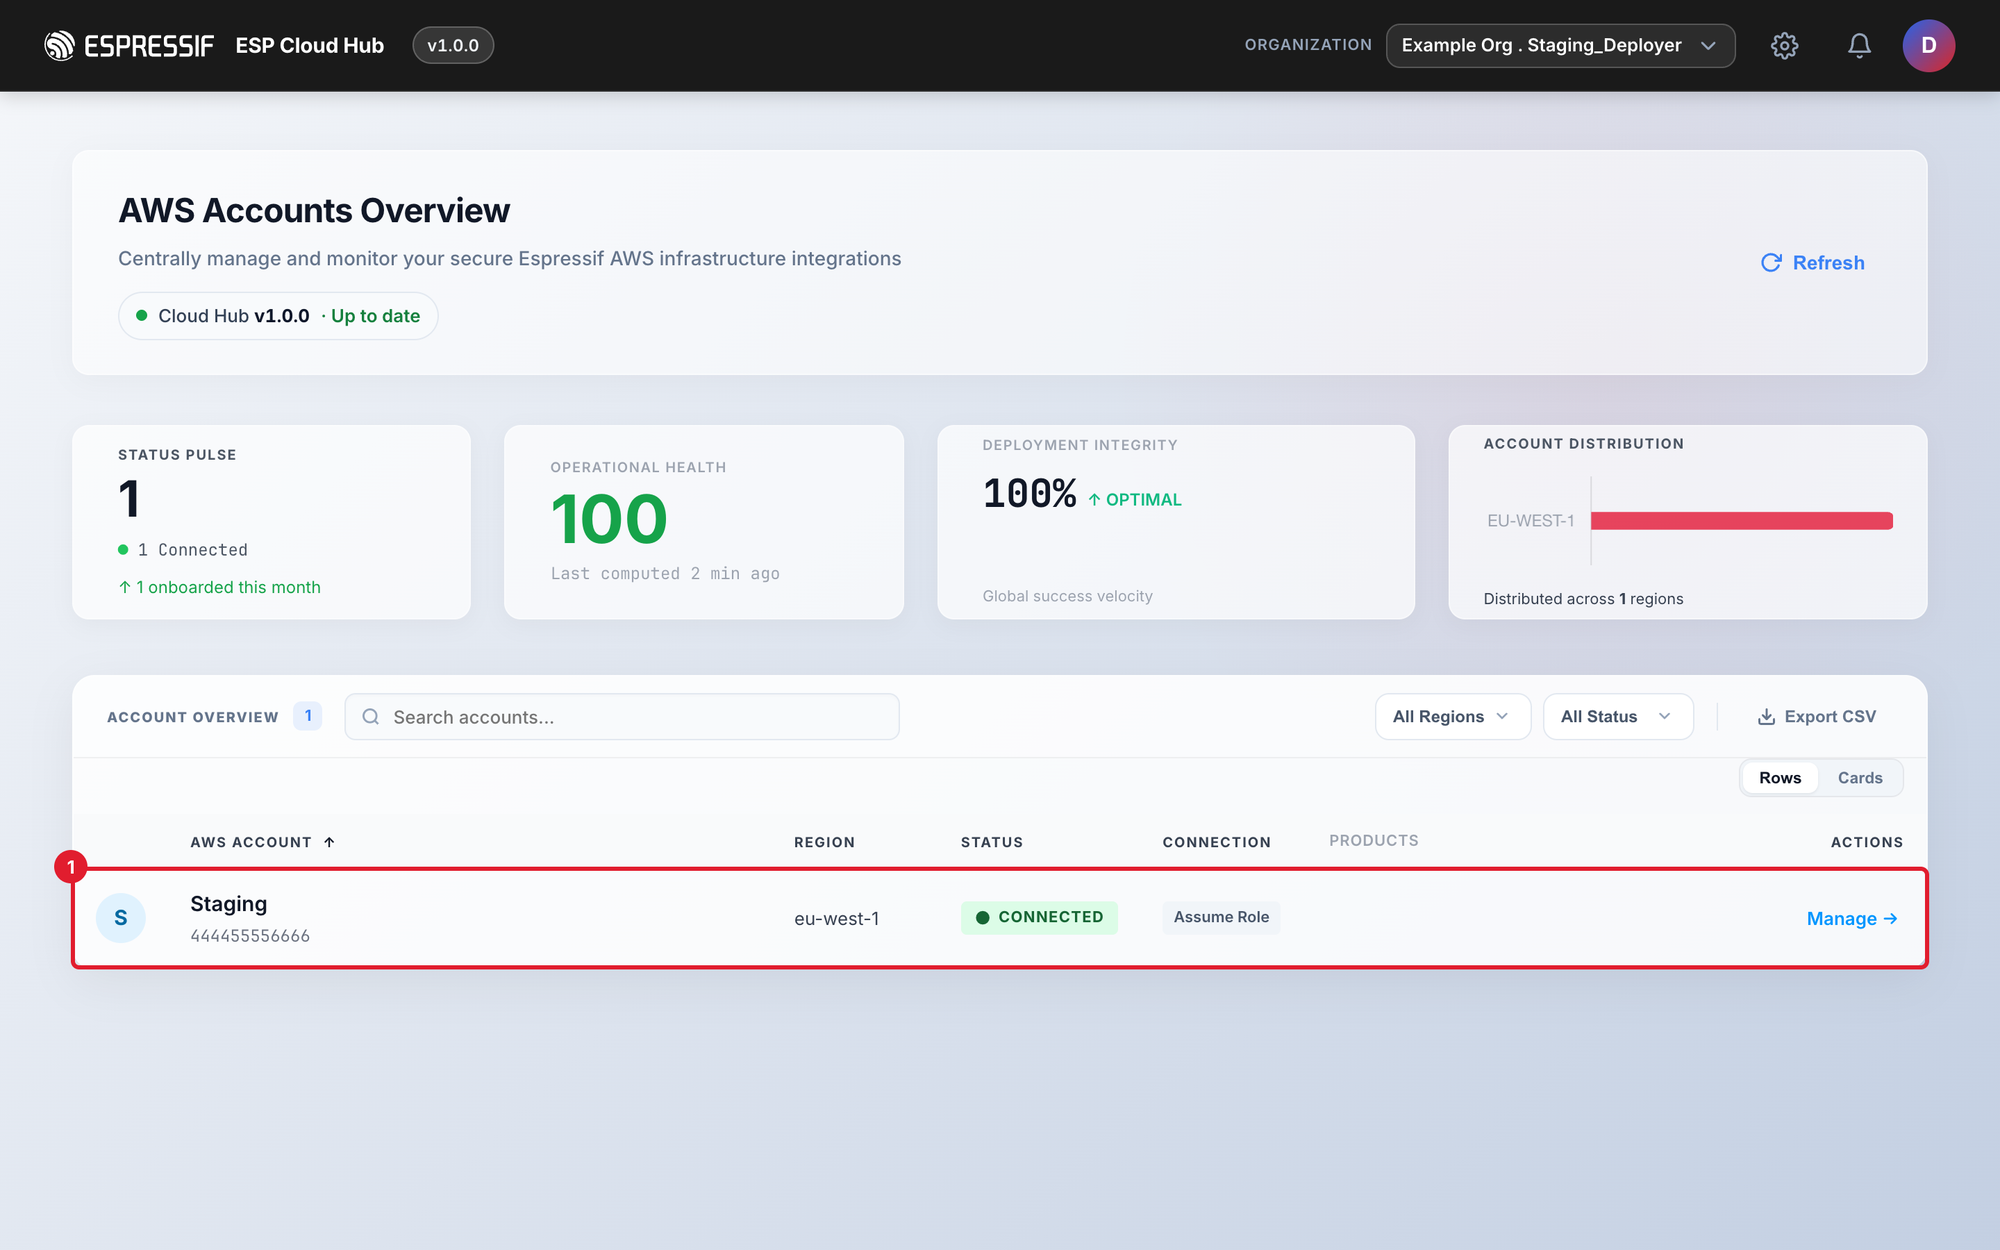
4. What your teammate sees
When your teammate signs in, they see only the Staging account:
Under My capabilities, Tenant Account Scope shows the one account and Product Categories shows Rainmaker:
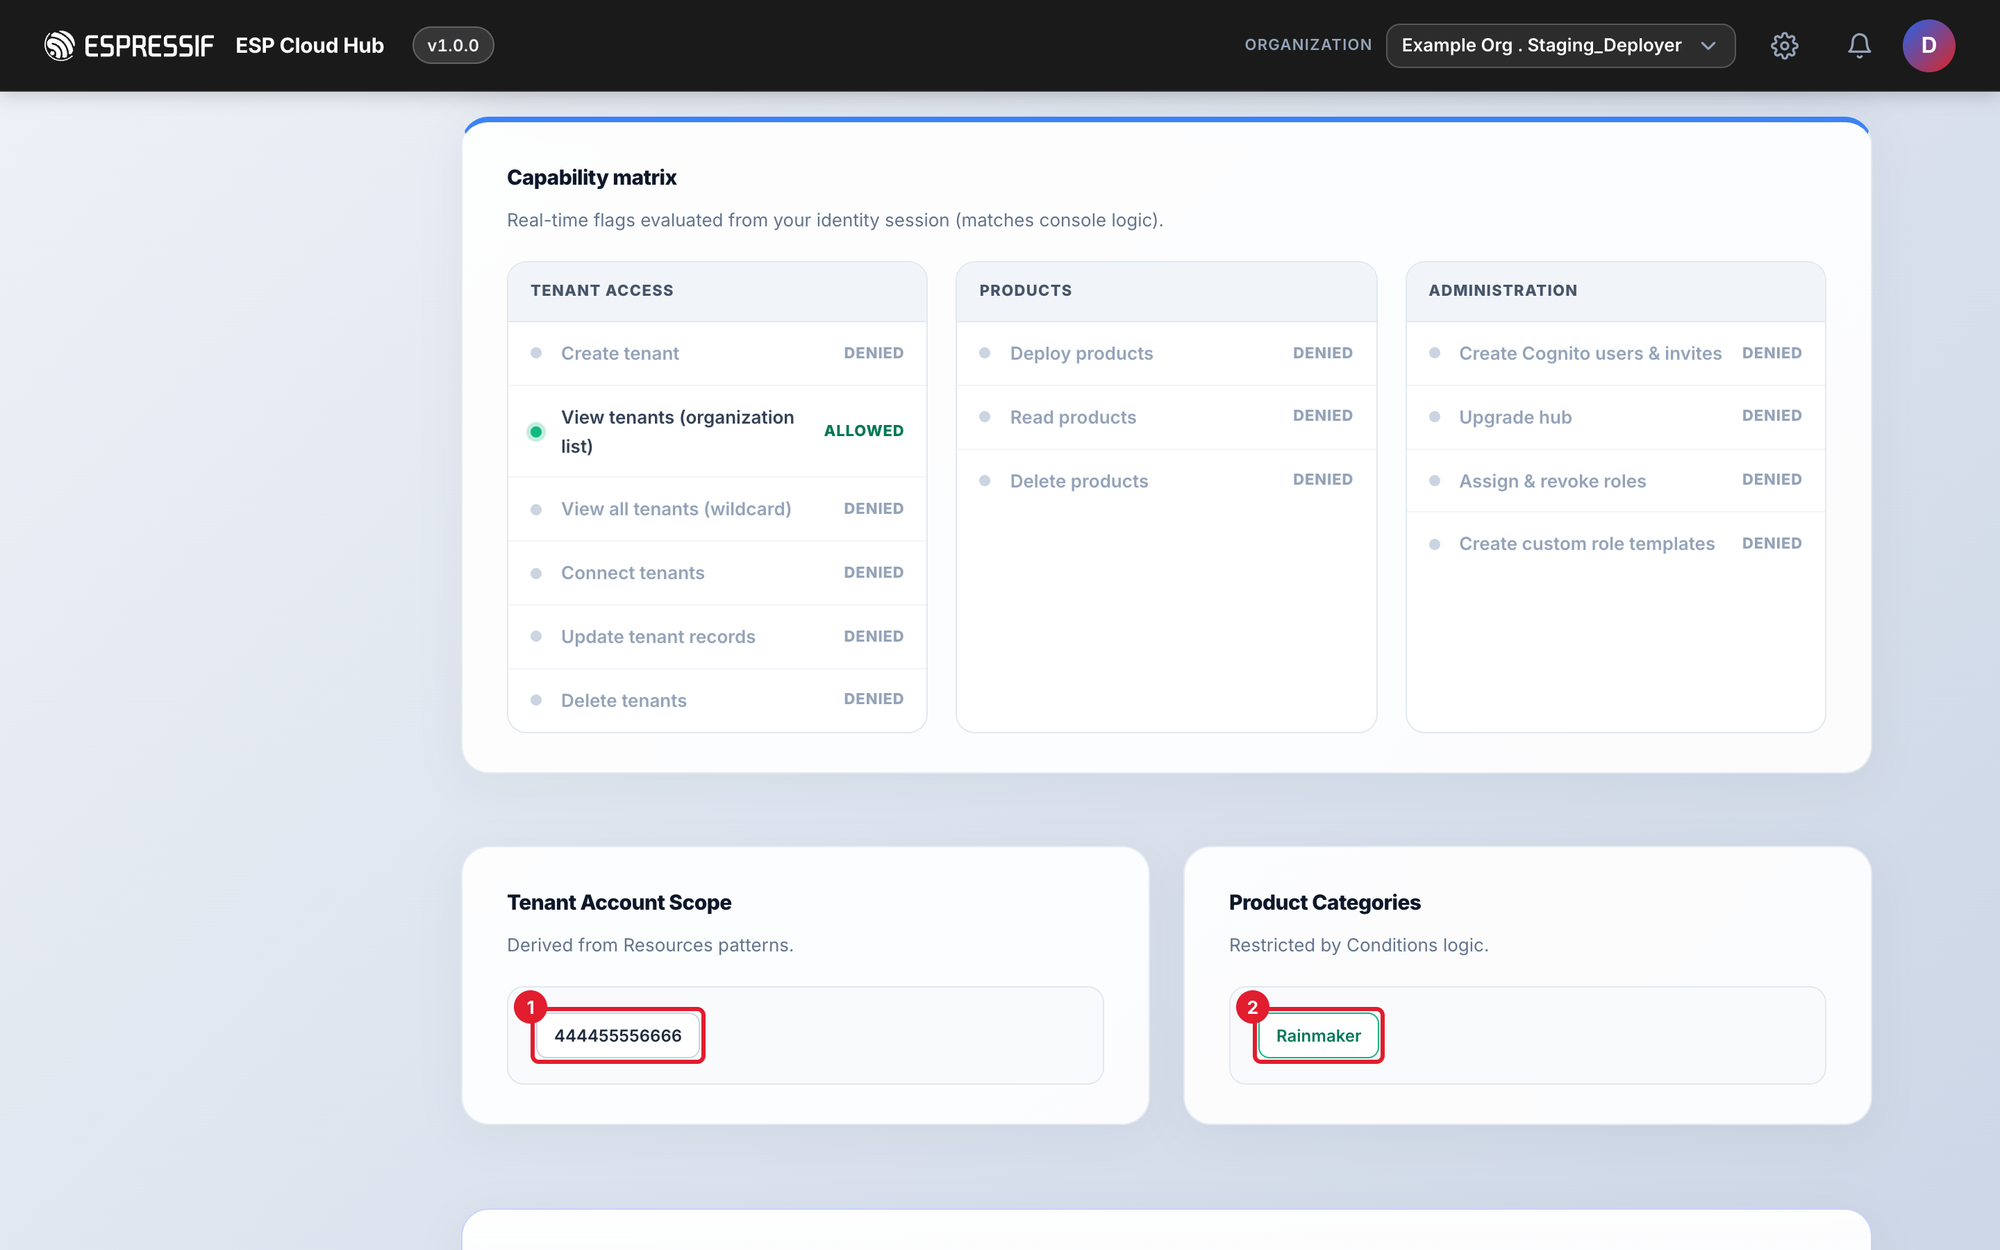
The Capability matrix at the top of My capabilities shows permissions across all accounts, so a role limited to one account shows Deploy products: DENIED there. The account-specific permission is shown under Tenant Account Scope.
To add more accounts later, click Edit next to the role in Role management (only your own roles can be edited). Everyone with the role gets the change.
Scenario 2 — Give someone read-only access
Example: an auditor or manager should see the accounts and deployments, but change nothing.
Assign access → enter their email → Role template: Auditor → Create / invite & assign.
Scenario 3 — Let someone deploy ESP RainMaker on every account
Assign access → Role template: Rainmaker_Specialist. For full control of the organization instead (including adding people), choose AggregatorAdmin.
Scenario 4 — Remove someone's access
Assignments list → find the person → Revoke. To change their role instead, click Edit and pick another role. Changes take effect within about a minute.
Adding people
| ESP CloudHub you use | How a new person gets in |
|---|---|
| Espressif-hosted | Ask them to sign up at espcloudhub.rainmaker.espressif.com first. Then add them with Assign access (their email), or send them your invite code and give them a role once they've joined. |
| Your own | There is no sign-up. Add them with Assign access (their email). No email is sent, so set a temporary password for them with the AWS CLI (same command as resetting an administrator's password) and send it to them. They set their own password at first sign-in. |
You can only give roles up to your own level — for example, an AggregatorAdmin can't make someone a RootAdmin.
Advanced: writing a role as JSON
In + Create role, Advanced JSON only lets you paste a policy directly. The role from scenario 1 looks like this:
[
  {
    "Effect": "Allow",
    "Actions": ["tenant:view", "product:read", "product:deploy"],
    "Resources": ["tenant:444455556666"],
    "Conditions": { "AllowedProducts": ["Rainmaker"] }
  }
]
- Resources —
tenant:*for all accounts, ortenant:<12-digit AWS account ID>for specific ones. - Actions —
tenant:view,tenant:create,tenant:update,tenant:connect,tenant:delete,product:read,product:deploy,product:delete. - Conditions.AllowedProducts — optional; limits the role to
Rainmaker,RMNGorAgents. - An explicit Deny always wins over an Allow; anything not allowed is denied.