Set up ESP CloudHub in your AWS account
Use this page only if ESP CloudHub must run in an AWS account you control. Using the Espressif-hosted ESP CloudHub? Skip to 1. Sign in.
You deploy ESP CloudHub once, from a CloudFormation Quick Create link. It takes about 10 minutes.
You need:
- an AWS account for ESP CloudHub, and a user in it who can create IAM roles (administrator access);
- the email addresses of the people who will administer ESP CloudHub.
ESP CloudHub runs in region us-east-1, one per AWS account. (RainMaker itself can go to another region — you choose that later.)
Step 1 — Sign in to the right AWS account
The Quick Create link deploys into whichever AWS account your browser is signed in to. Open the AWS console and make sure you are signed in to the account you chose for ESP CloudHub — not a personal or test account.
Step 2 — Open the Quick Create link
In the same browser, open ESP CloudHub Releases and click Quick Create on the Latest version. The AWS Quick create stack page opens.
Step 3 — Check the account and region
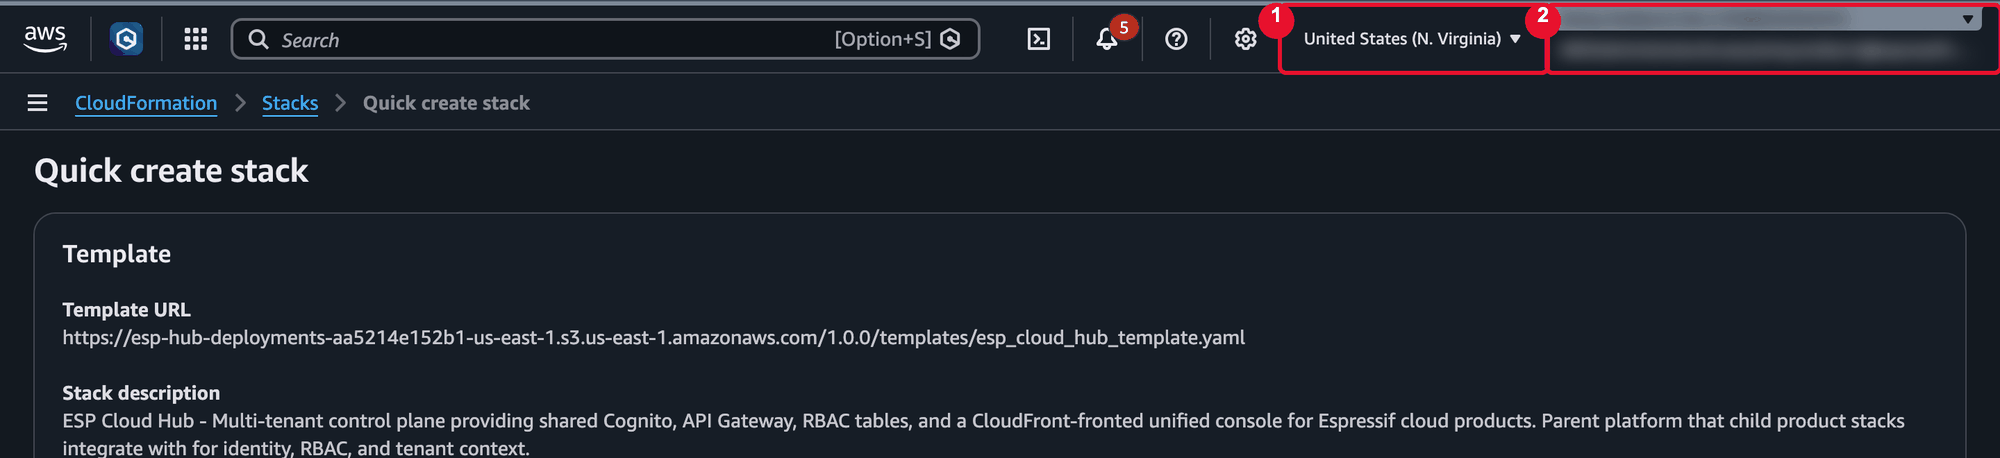
- Region must be United States (N. Virginia).
- Account — click it and check the account ID. Wrong account? Close the page and go back to Step 1.
Step 4 — Leave the template and stack name as they are
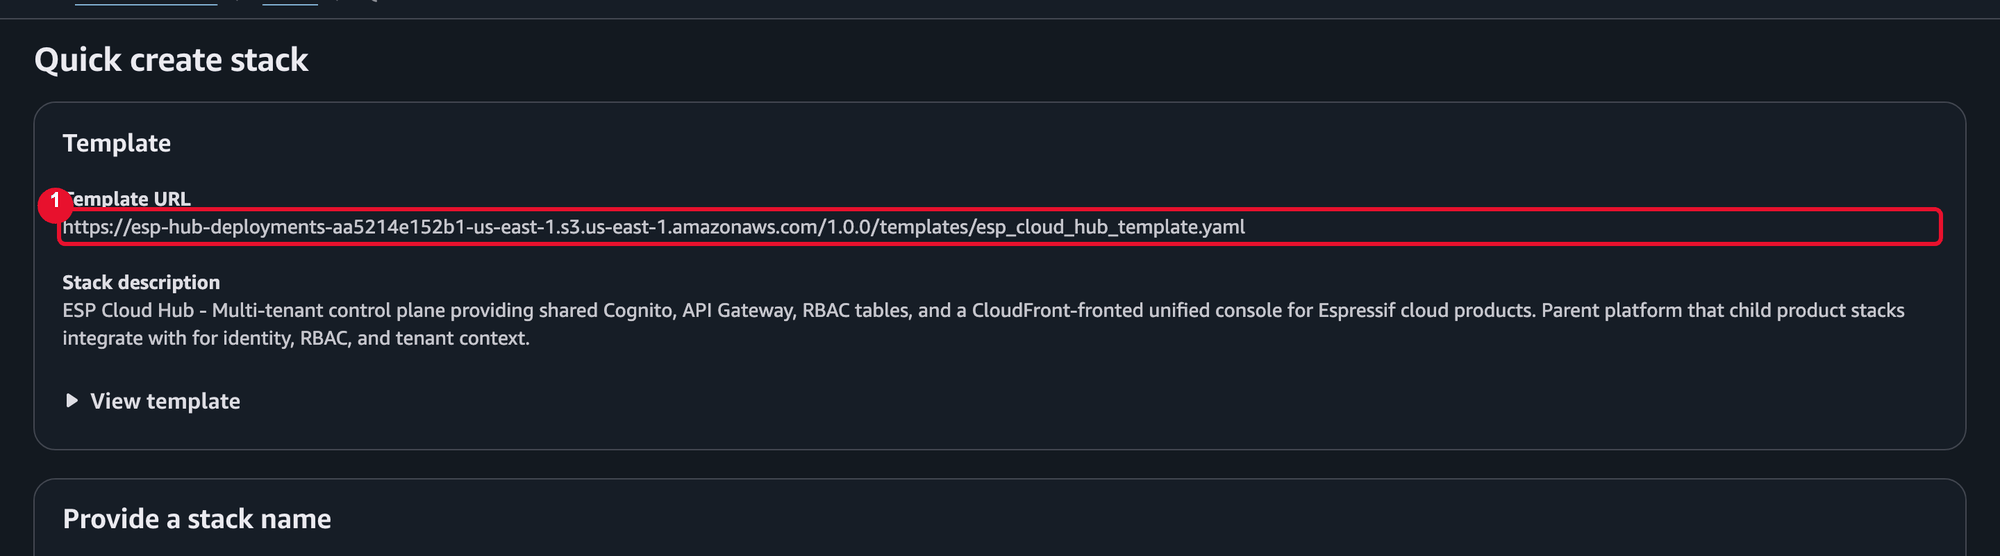
- The Template URL shows the ESP CloudHub version, for example
/1.0.0/. - Keep the Stack name
esp-cloud-hub. Don't rename it.
Step 5 — Fill in the two parameters
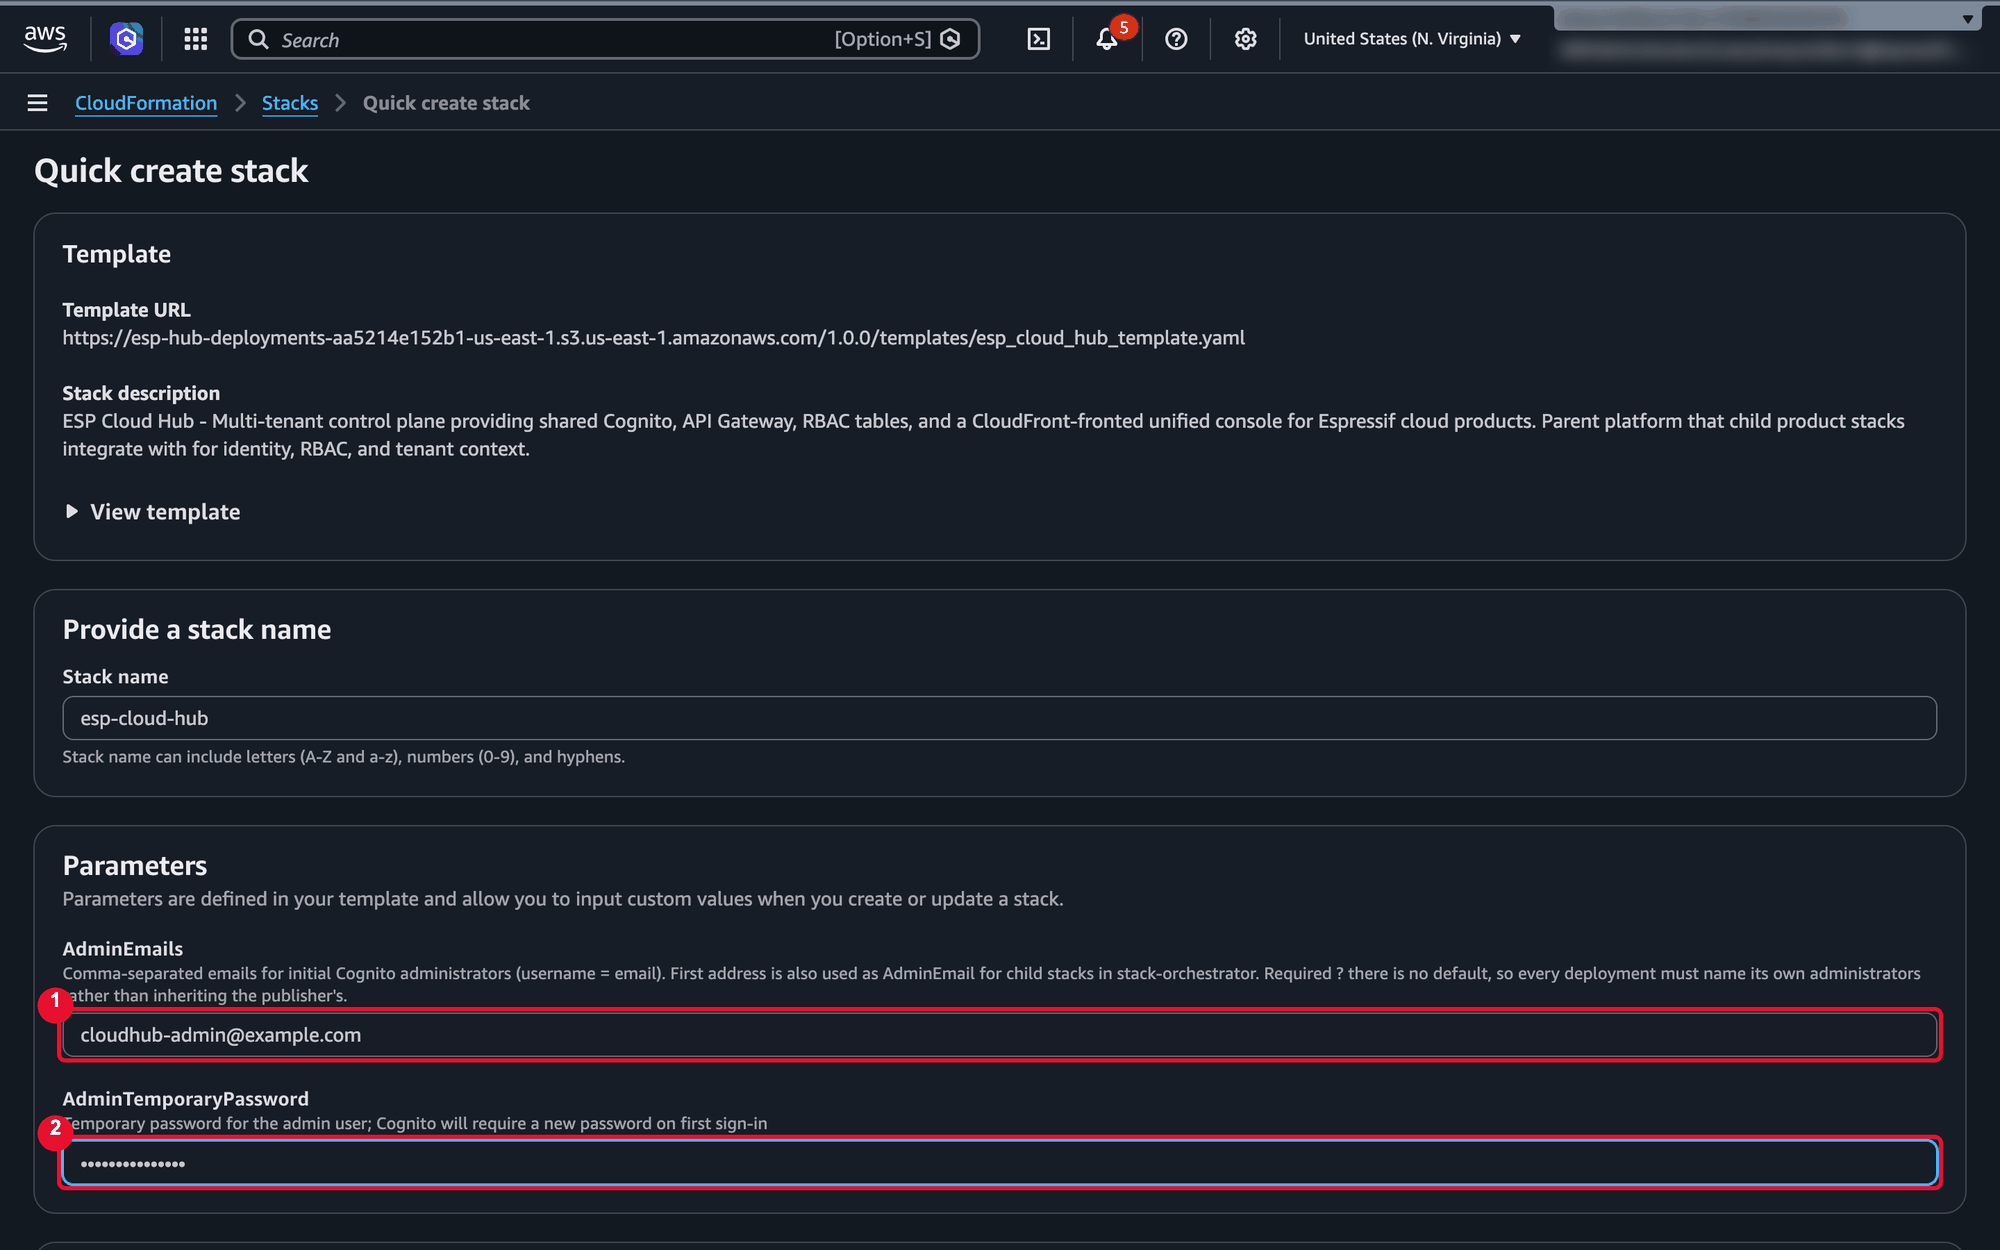
| Parameter | What to enter |
|---|---|
| AdminEmails (1) | The administrators' email addresses, separated by commas, e.g. alice@yourcompany.com,bob@yourcompany.com. Each one becomes a sign-in username with full administrator rights. |
| AdminTemporaryPassword (2) | A password for everyone's first sign-in. At least 8 characters, with an uppercase letter, a lowercase letter, a number and a symbol. |
AdminTemporaryPassword is pre-filled with the default Admin@1234. Clear it and enter your own.
Leave everything else on the page as it is.
Step 6 — Acknowledge and create
Scroll to the bottom.
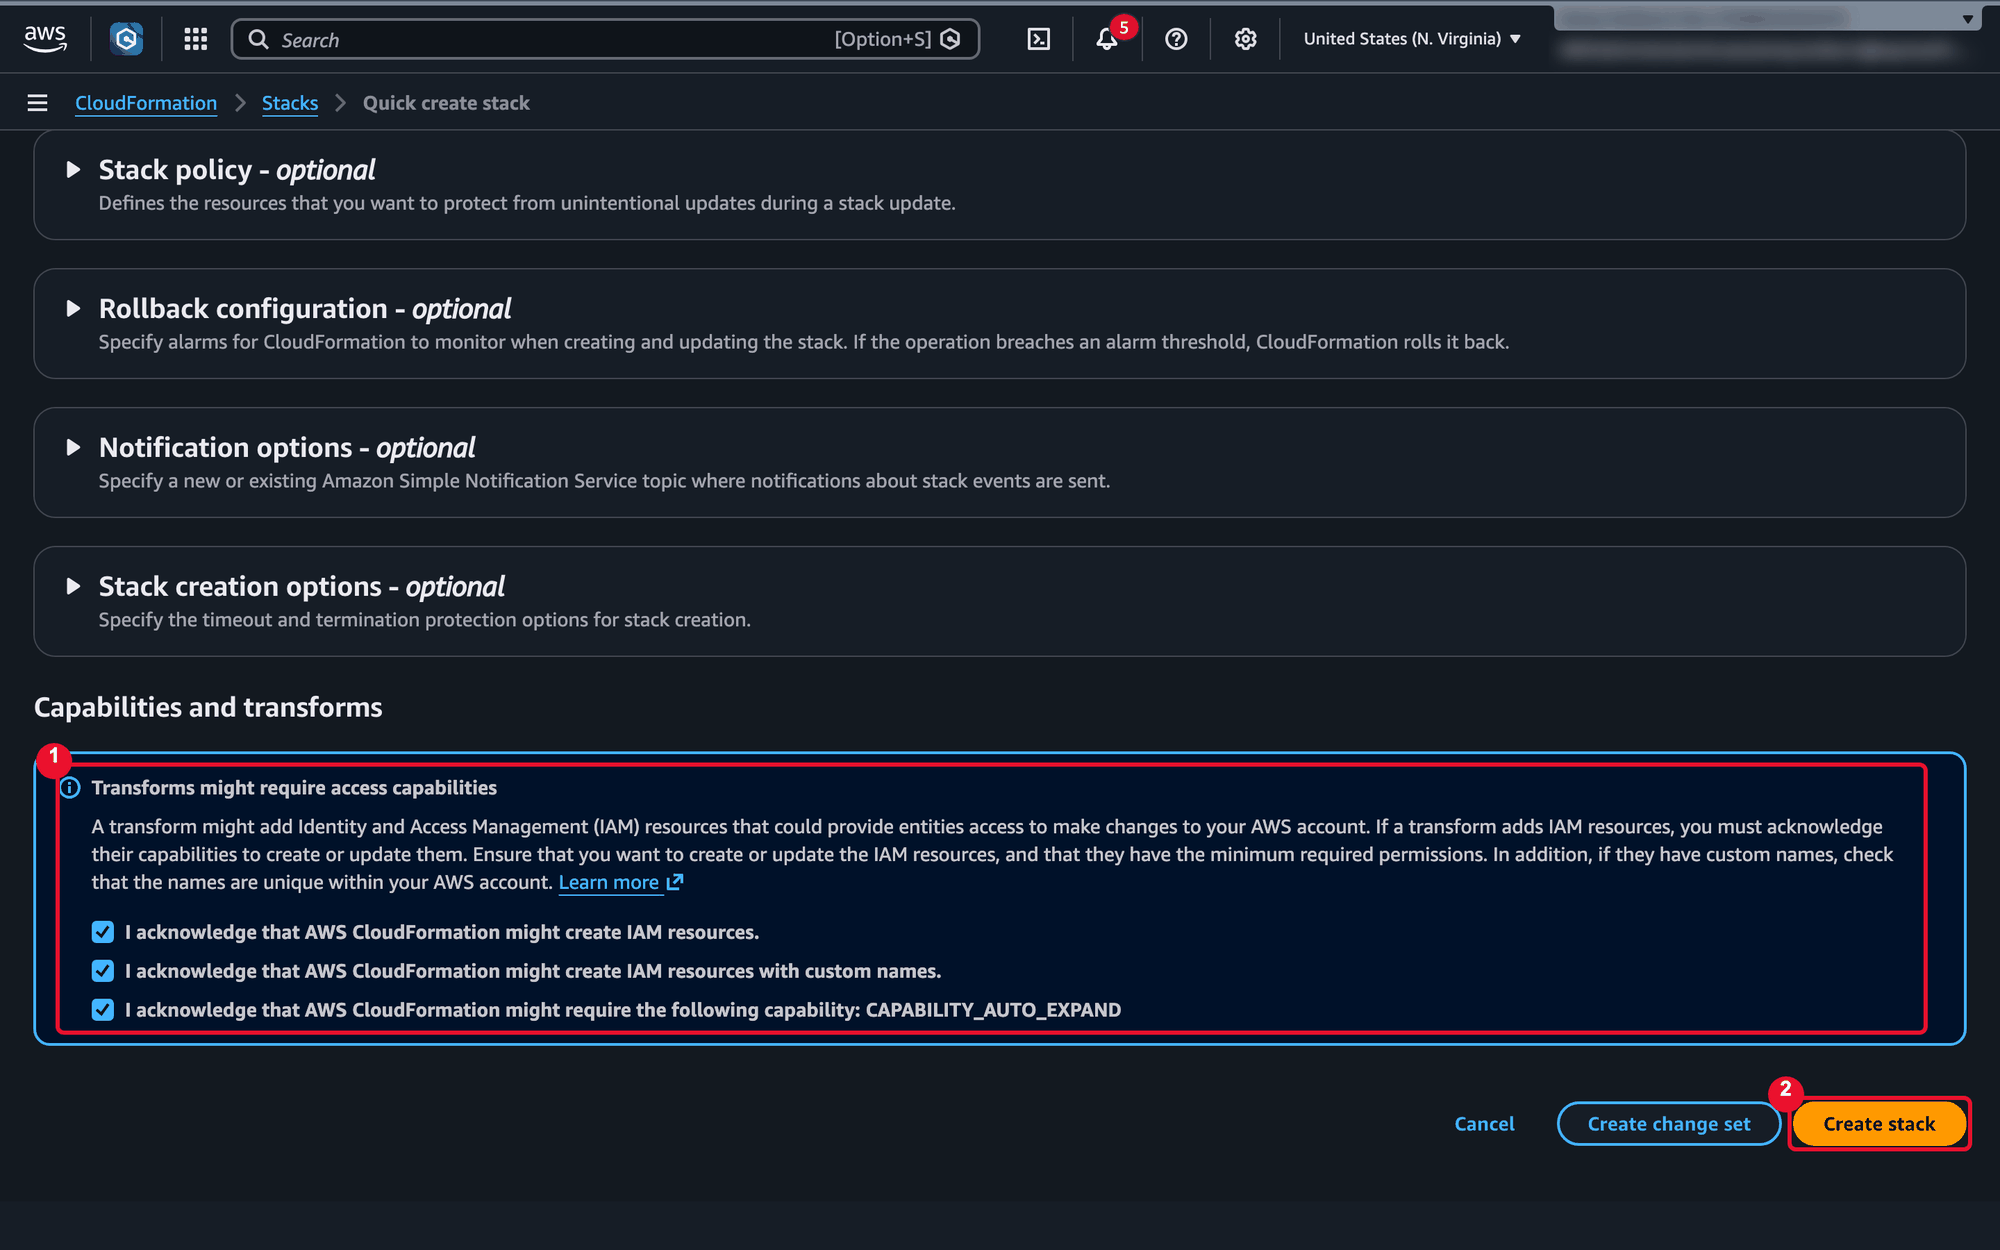
- Tick all three checkboxes under Capabilities and transforms.
- Click Create stack.
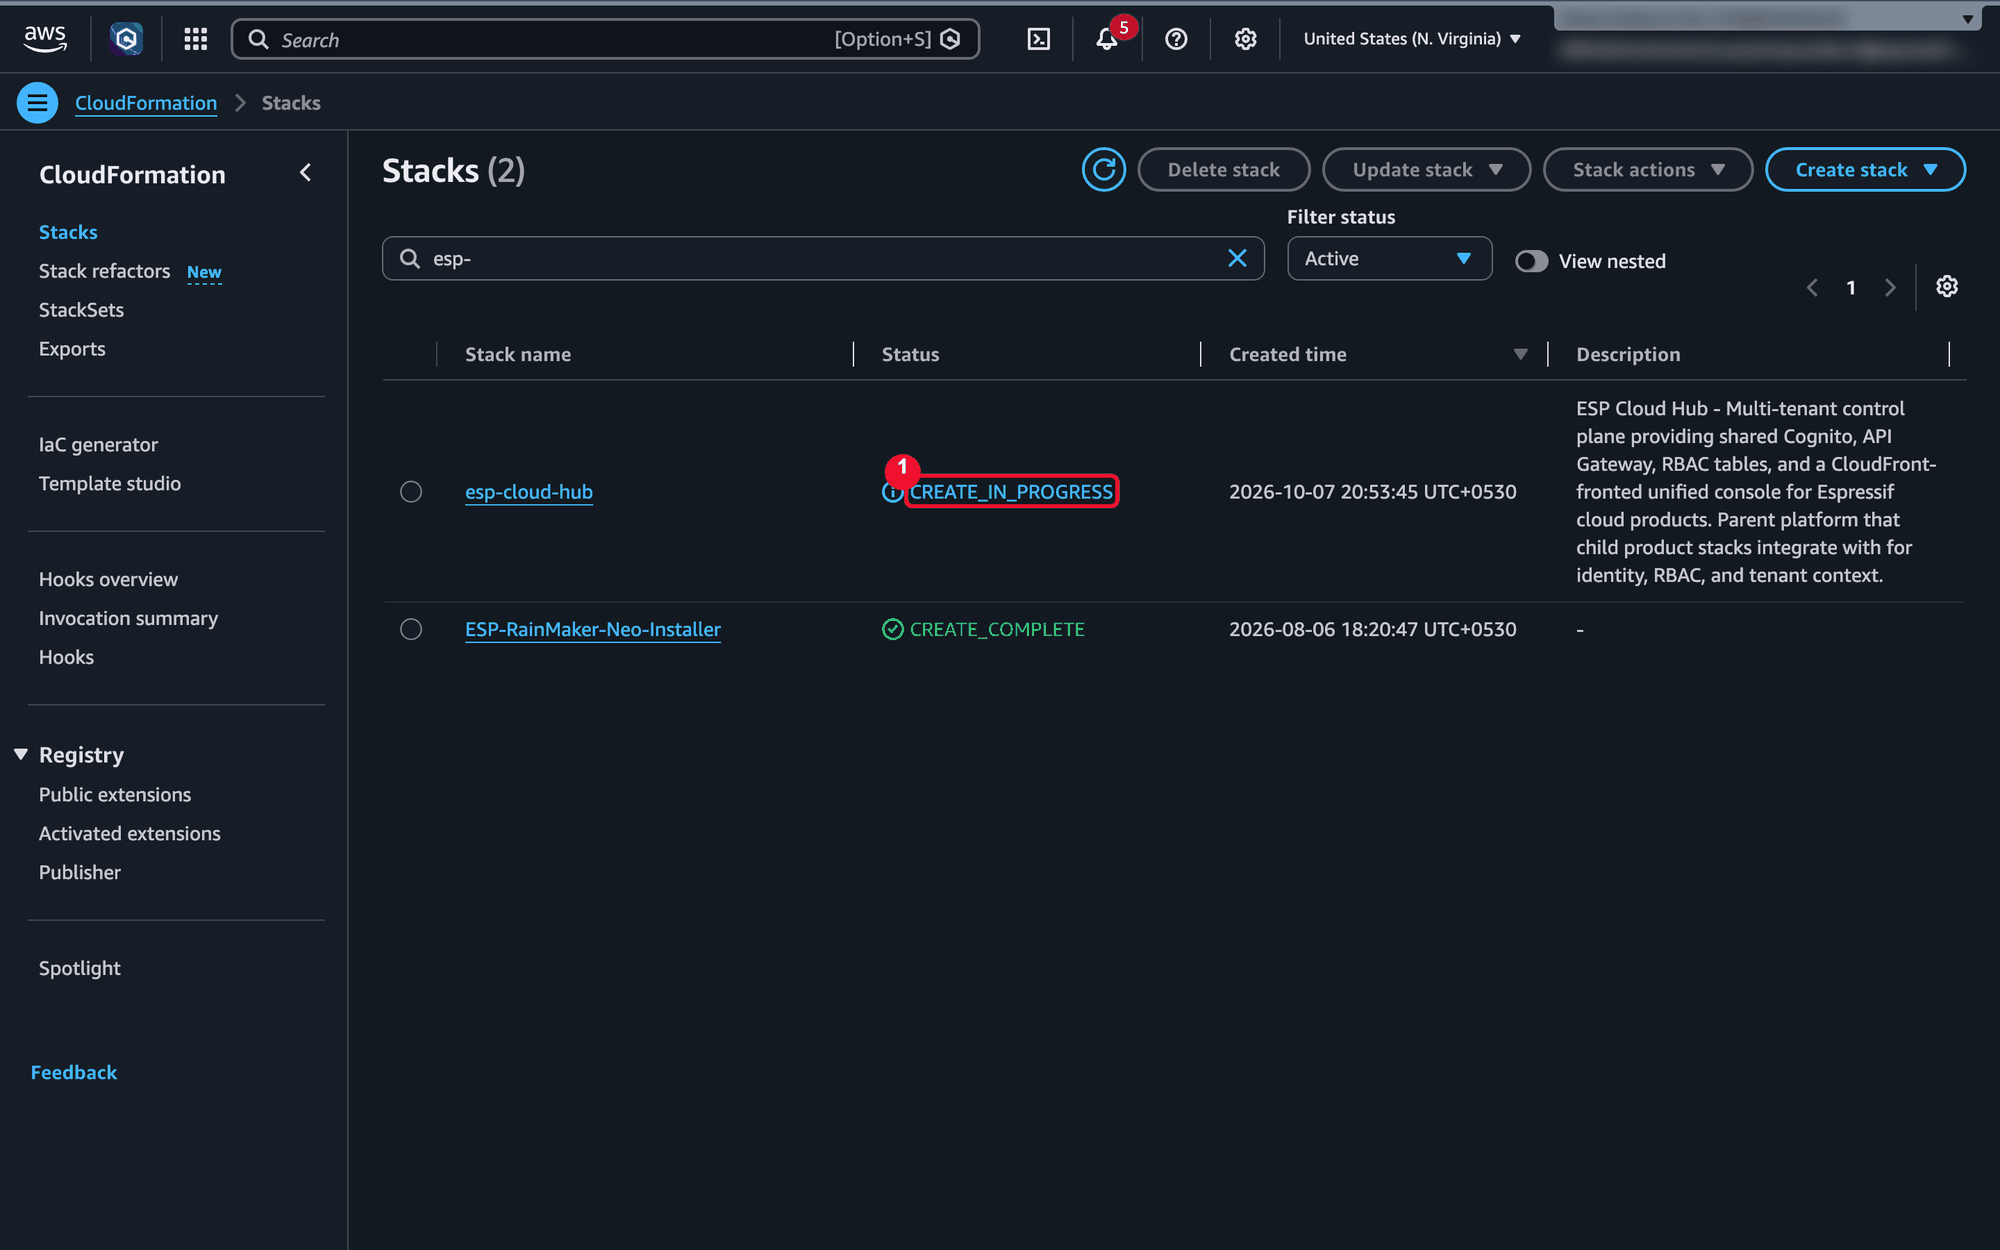
Step 7 — Wait for CREATE_COMPLETE
The stack starts as CREATE_IN_PROGRESS.
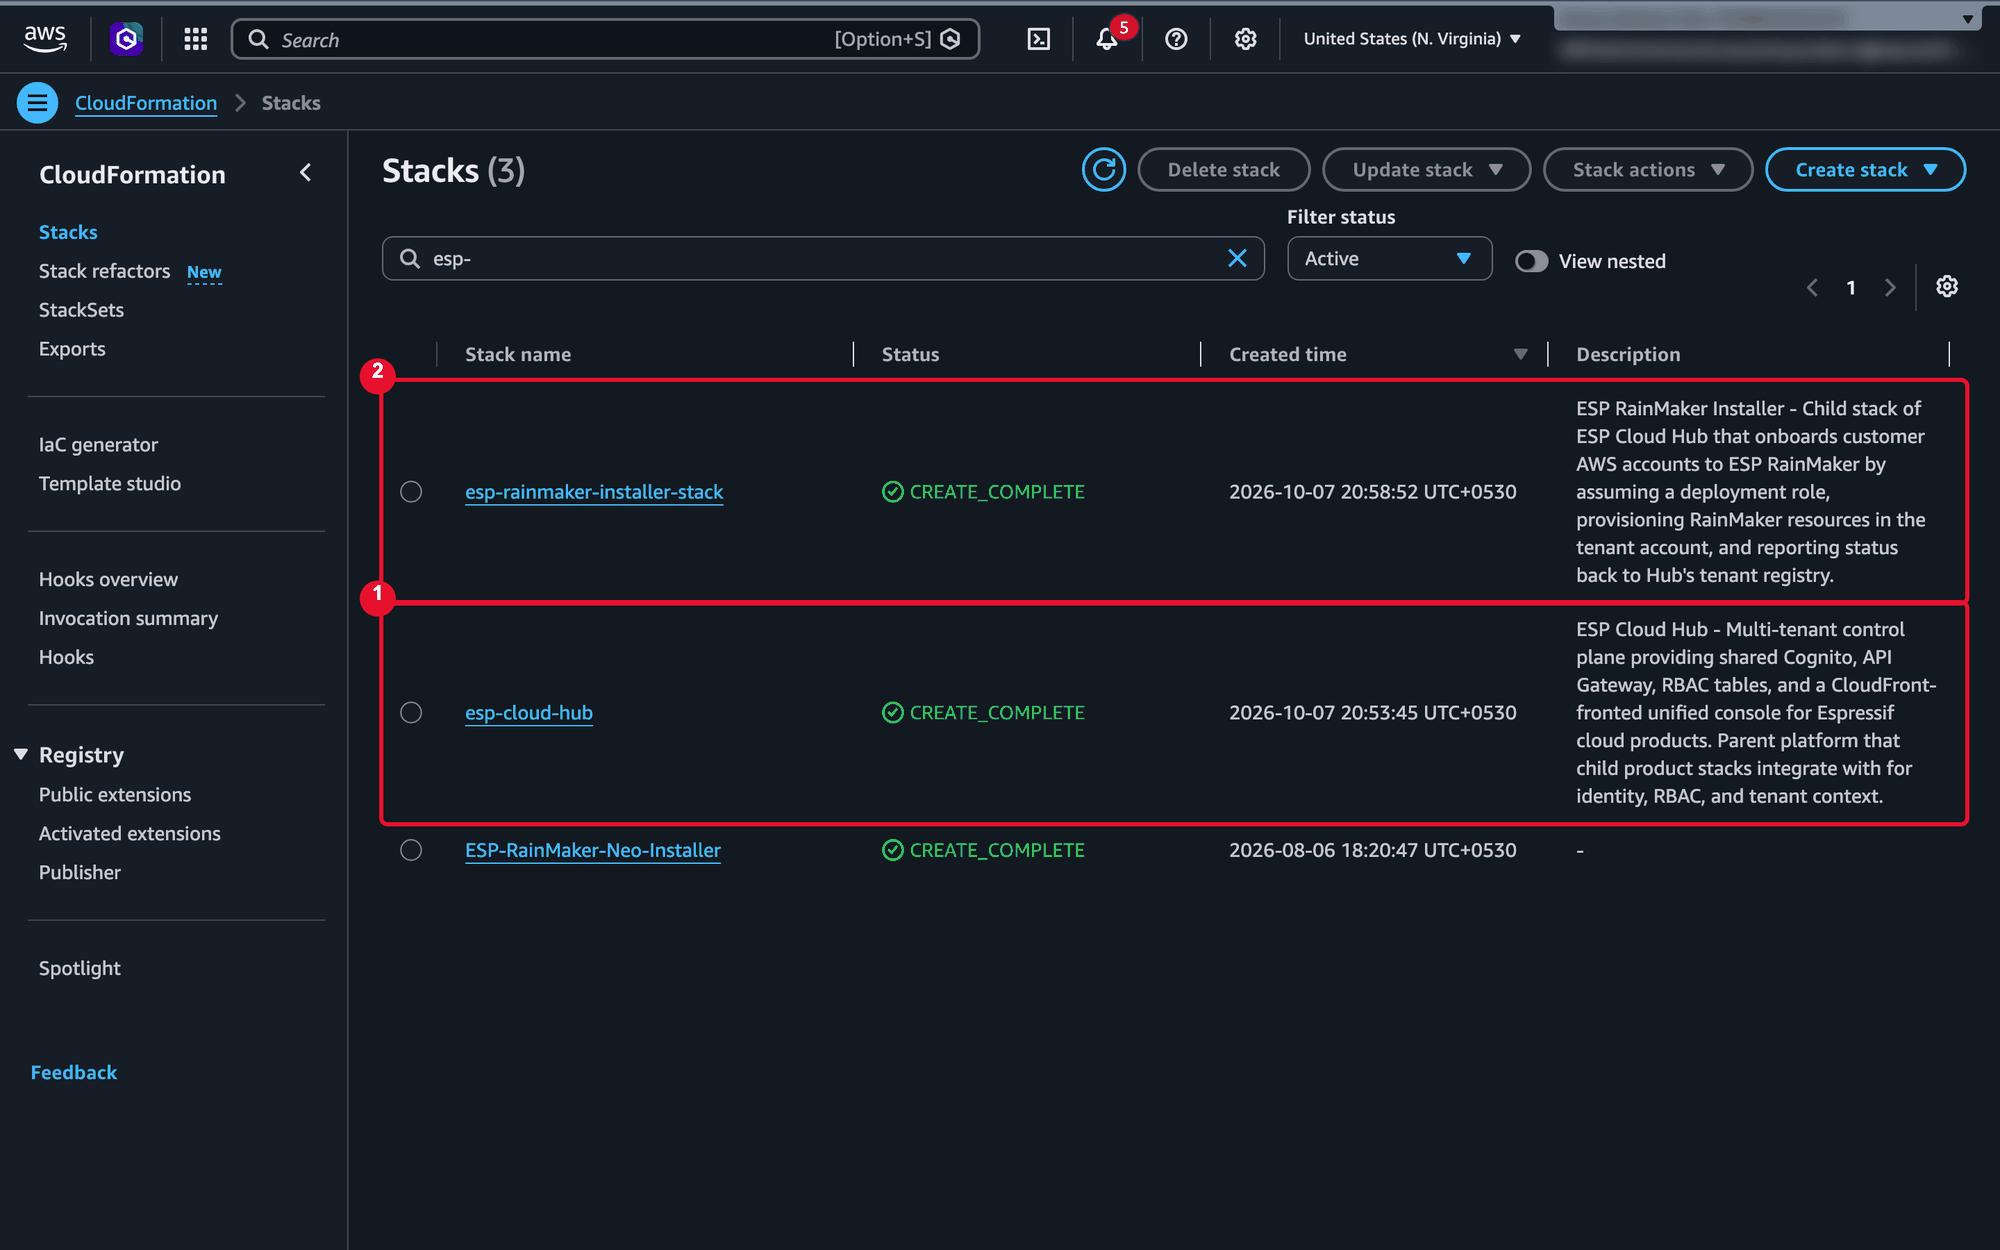
After about 10 minutes, esp-cloud-hub shows CREATE_COMPLETE. A second stack, esp-rainmaker-installer-stack, is created along the way — that's expected; leave it alone.
Stack failed (ROLLBACK_COMPLETE)? See Troubleshooting.
Step 8 — Copy your ESP CloudHub address
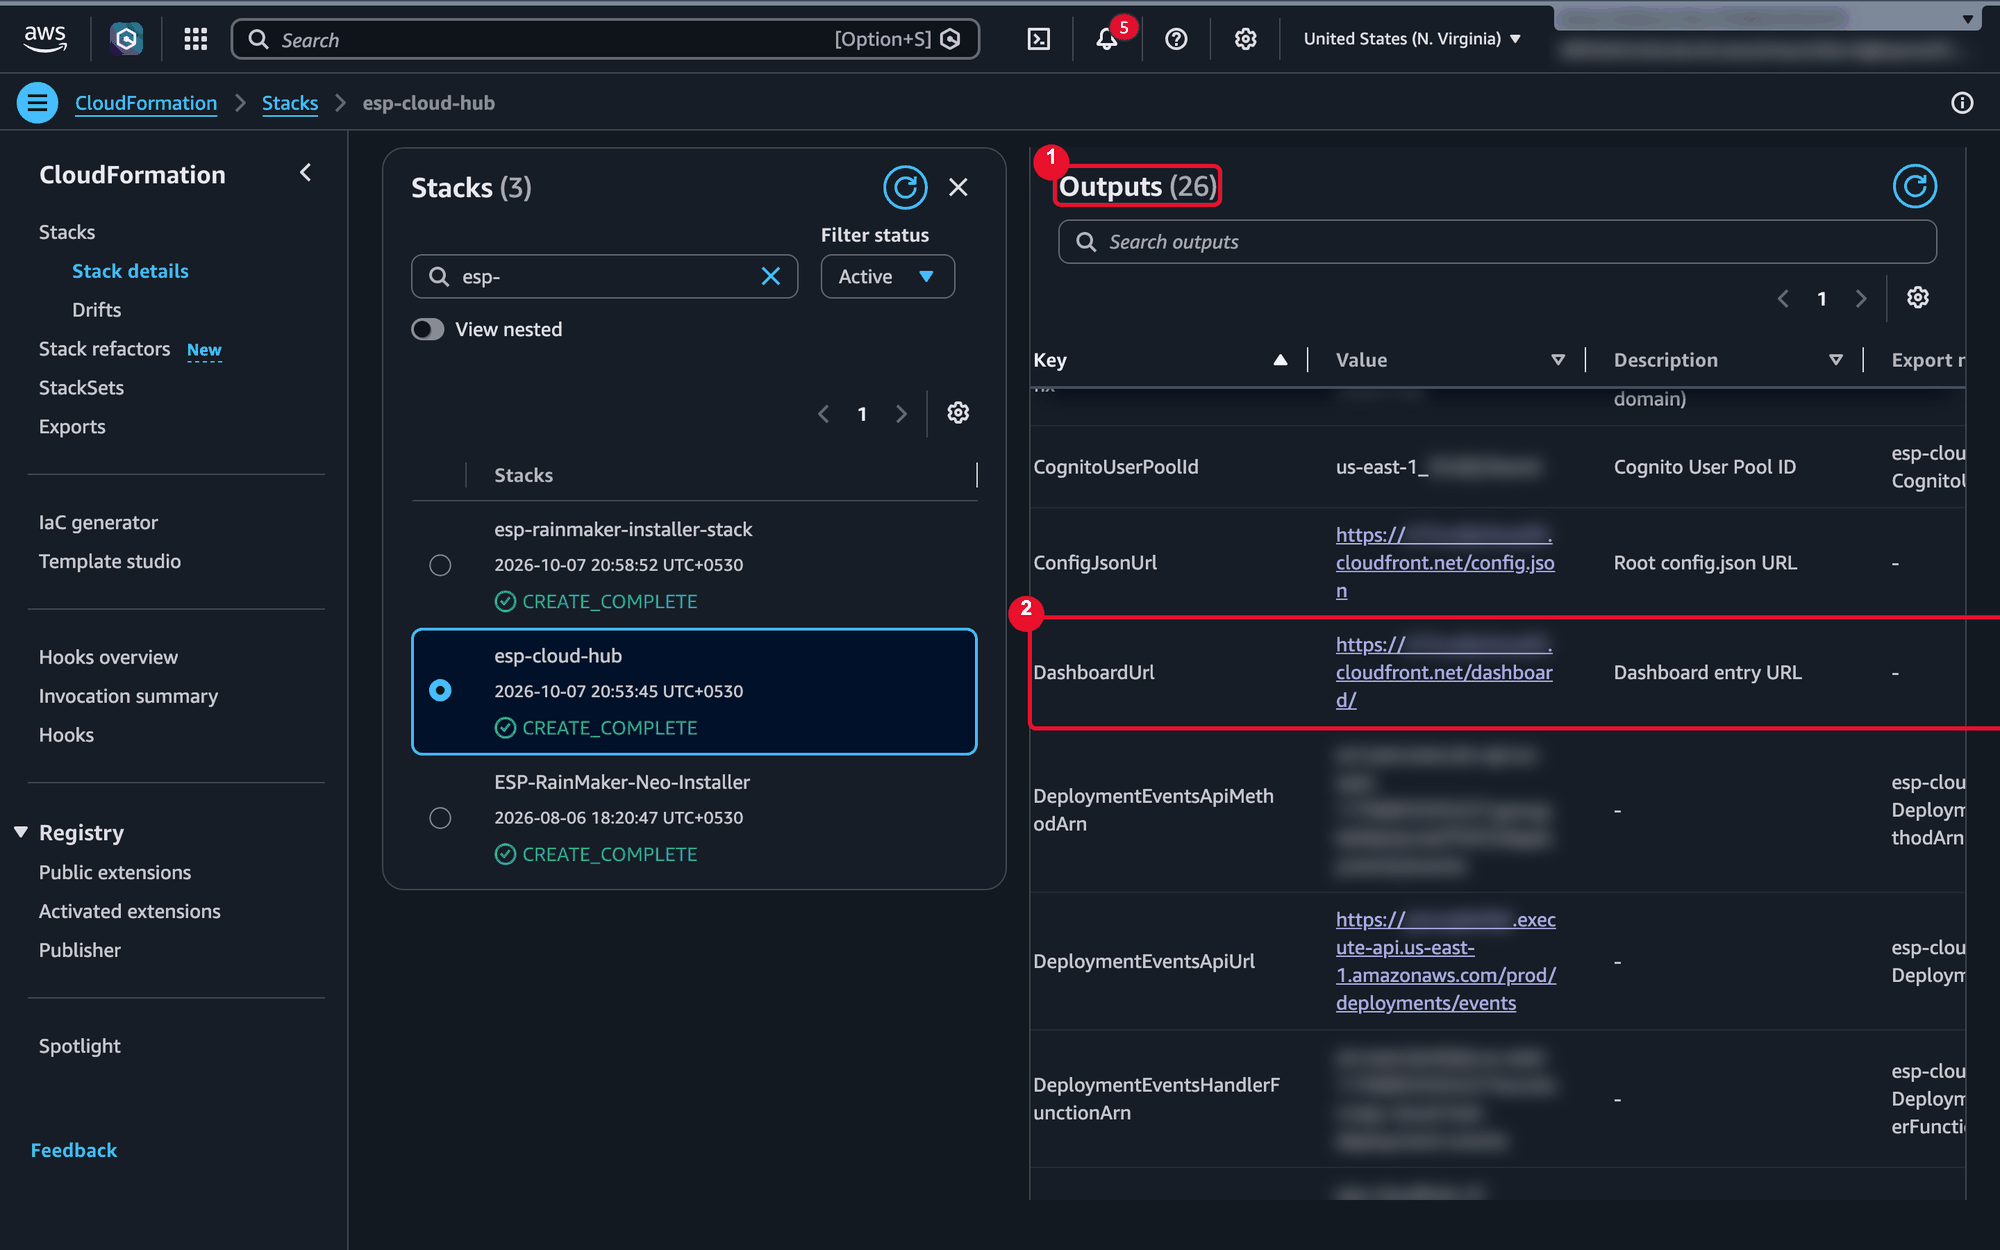
Open the esp-cloud-hub stack → Outputs tab, and copy DashboardUrl (for example https://d1234abcd.cloudfront.net/dashboard/). This is your ESP CloudHub address — bookmark it.
Step 9 — Sign in and set your password
-
Open the
DashboardUrladdress and sign in with an AdminEmails address and the temporary password.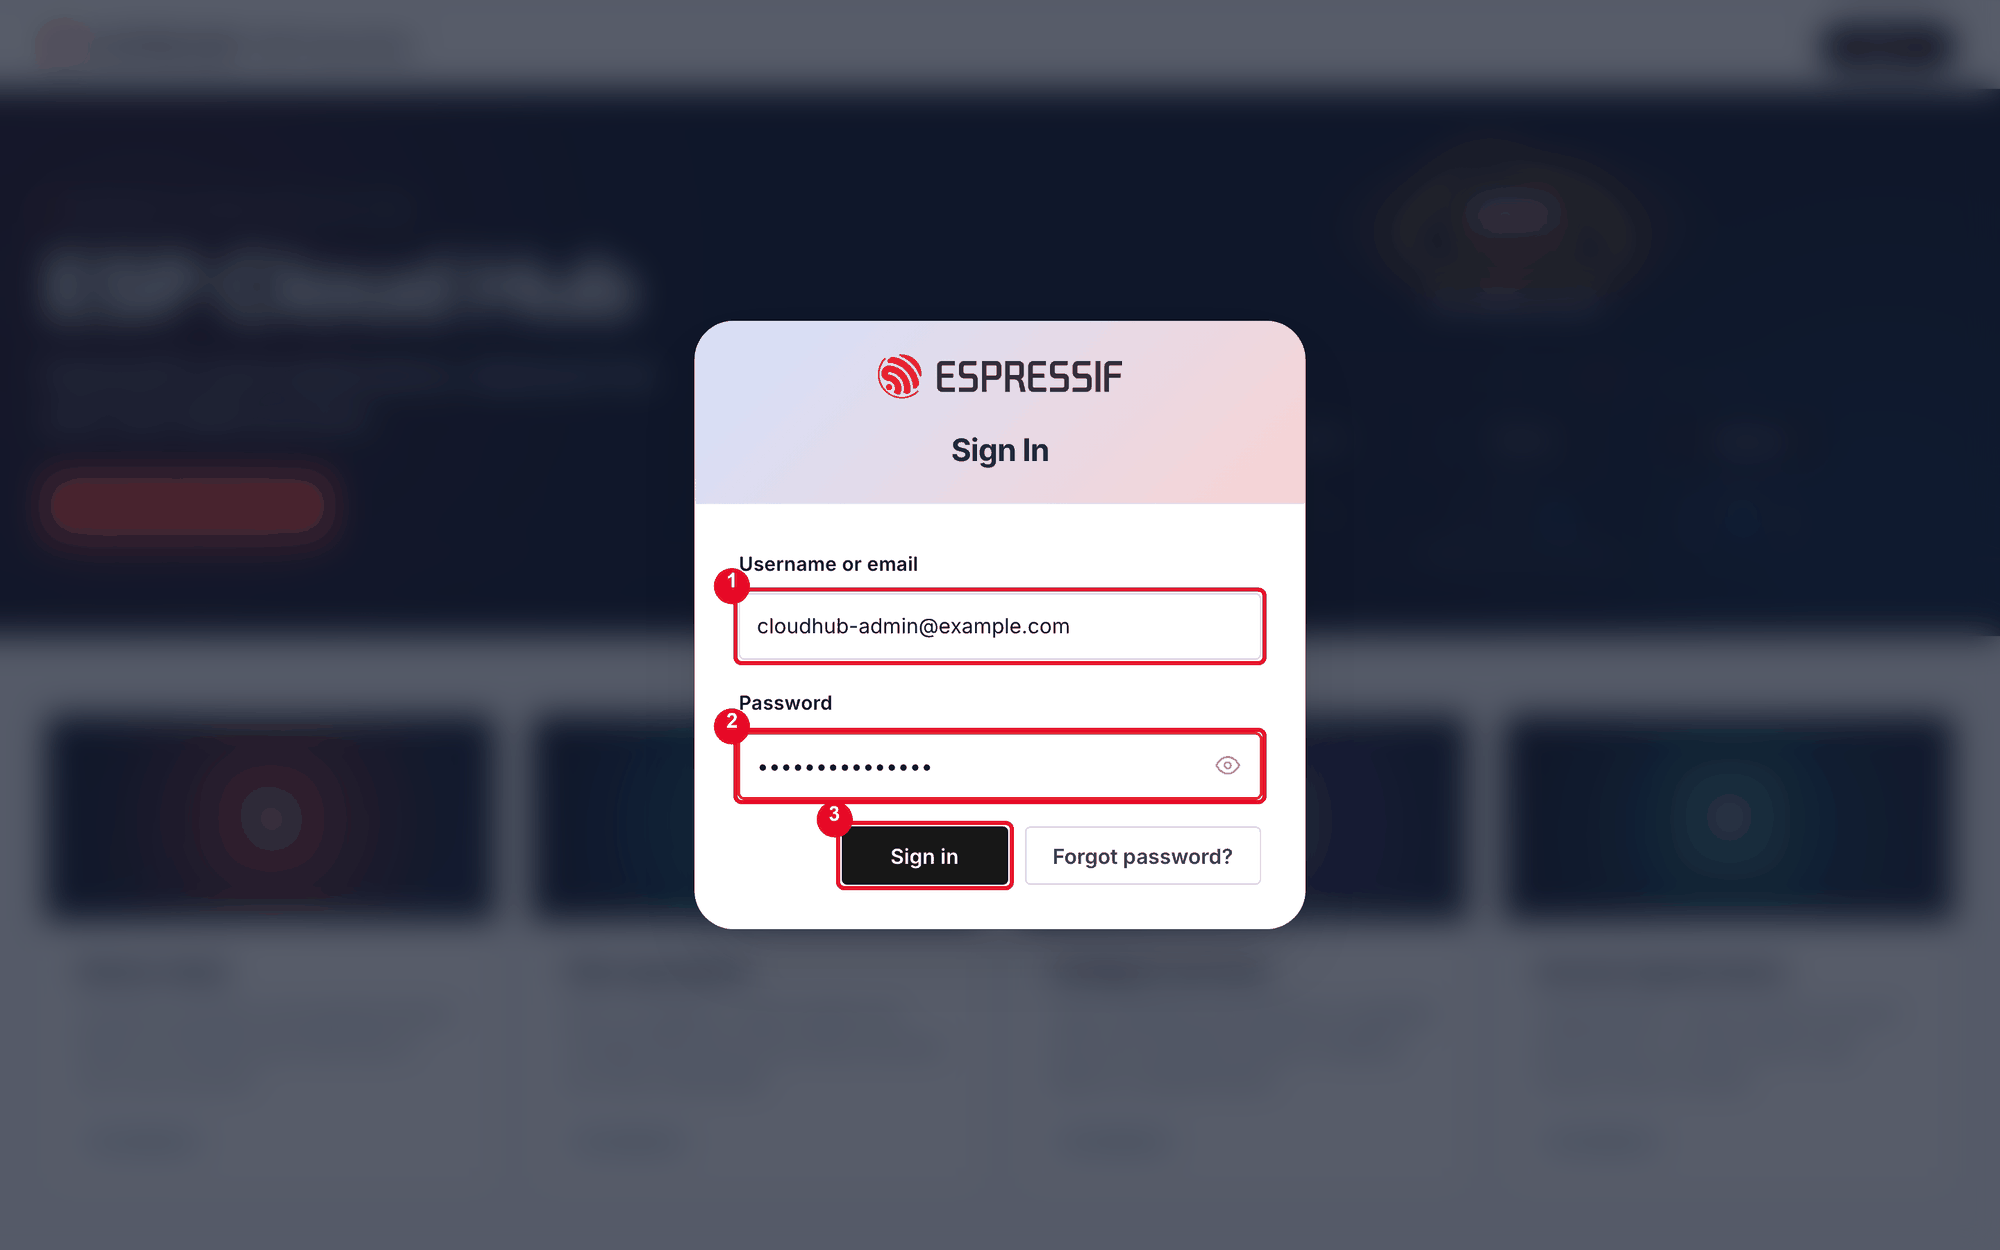
-
Set a new password when asked.
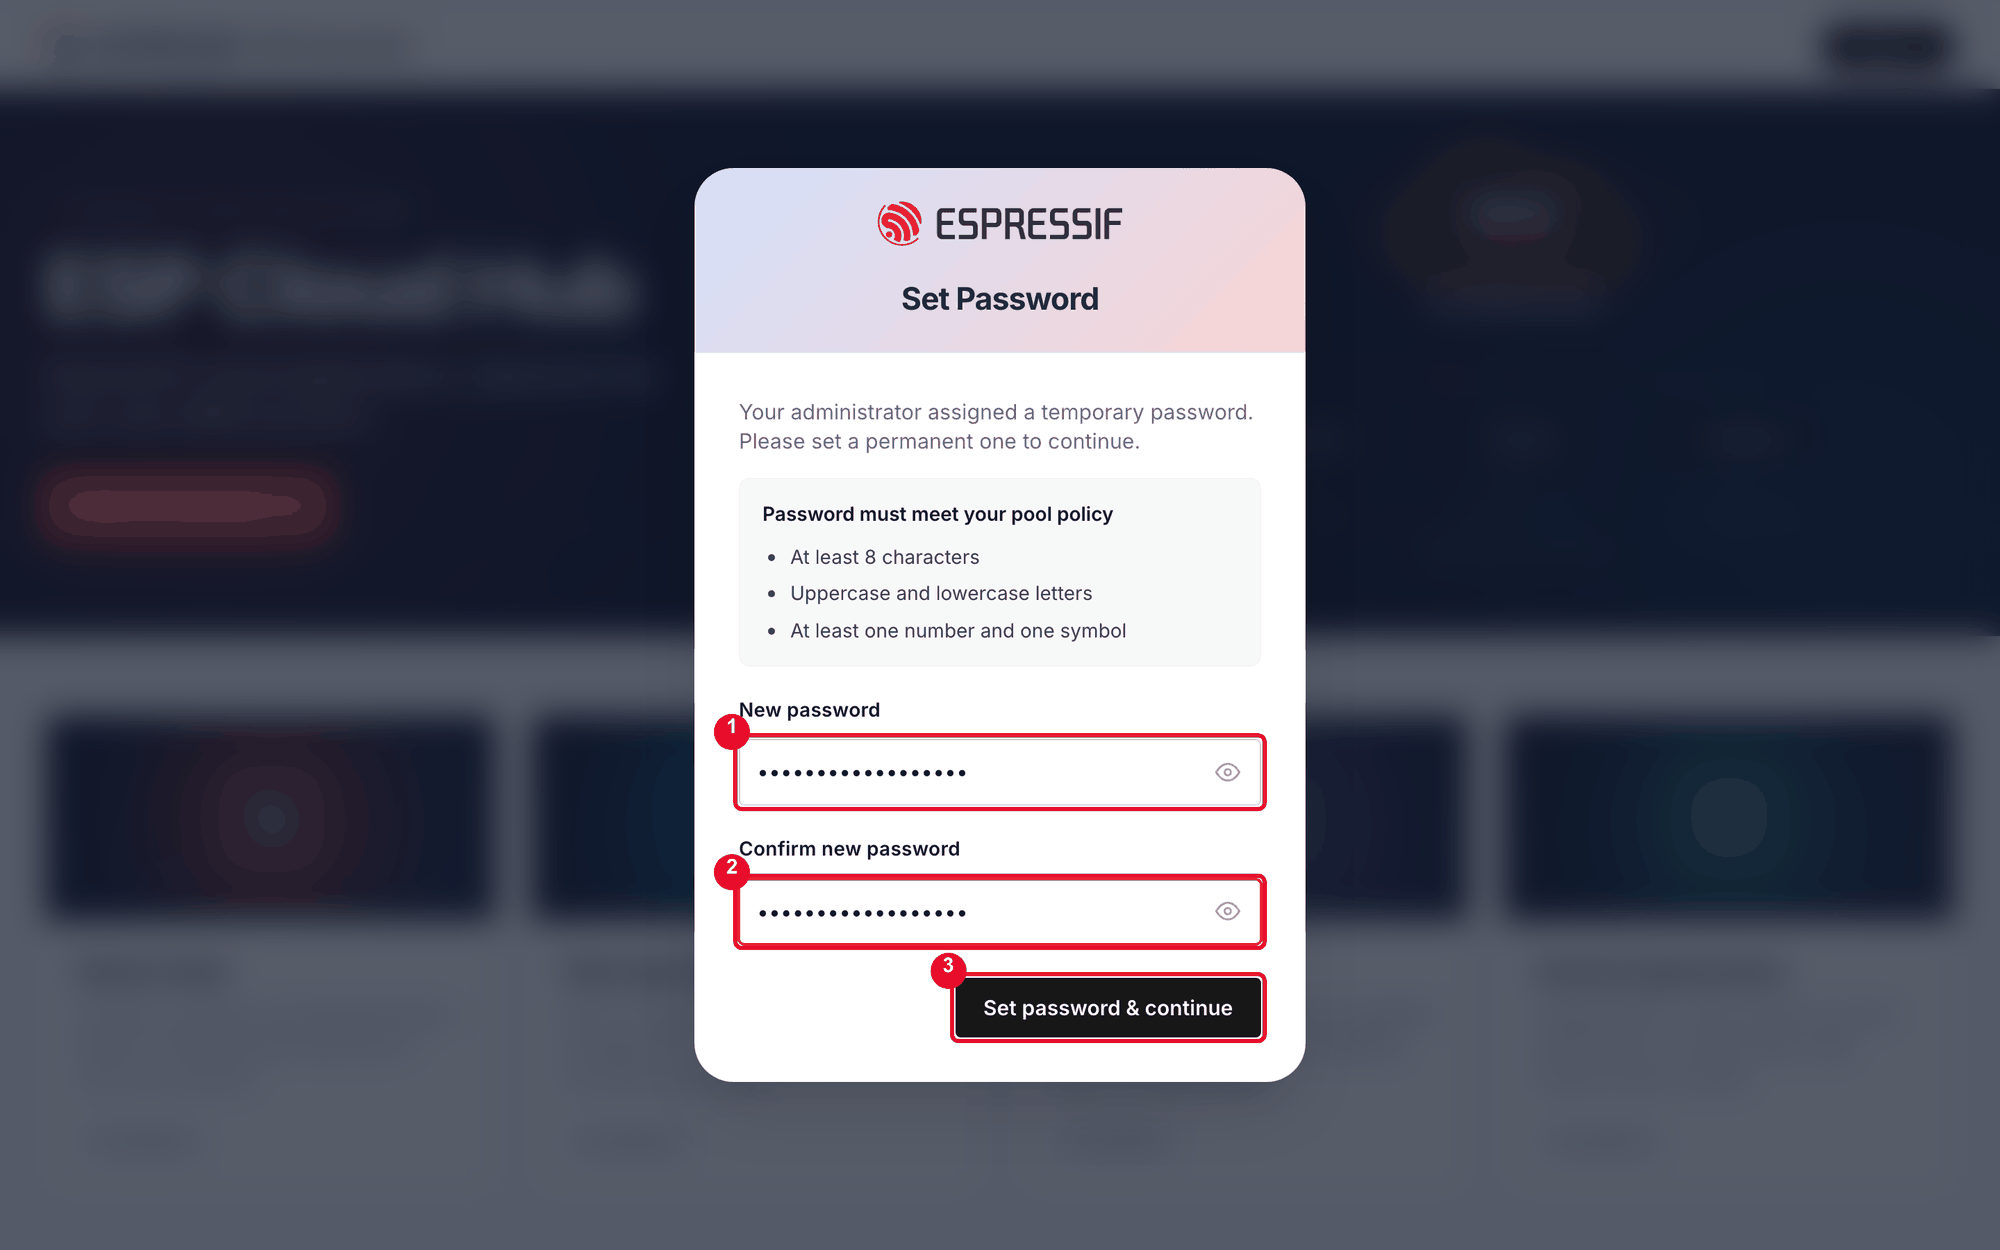
-
You're in the ESP CloudHub console.
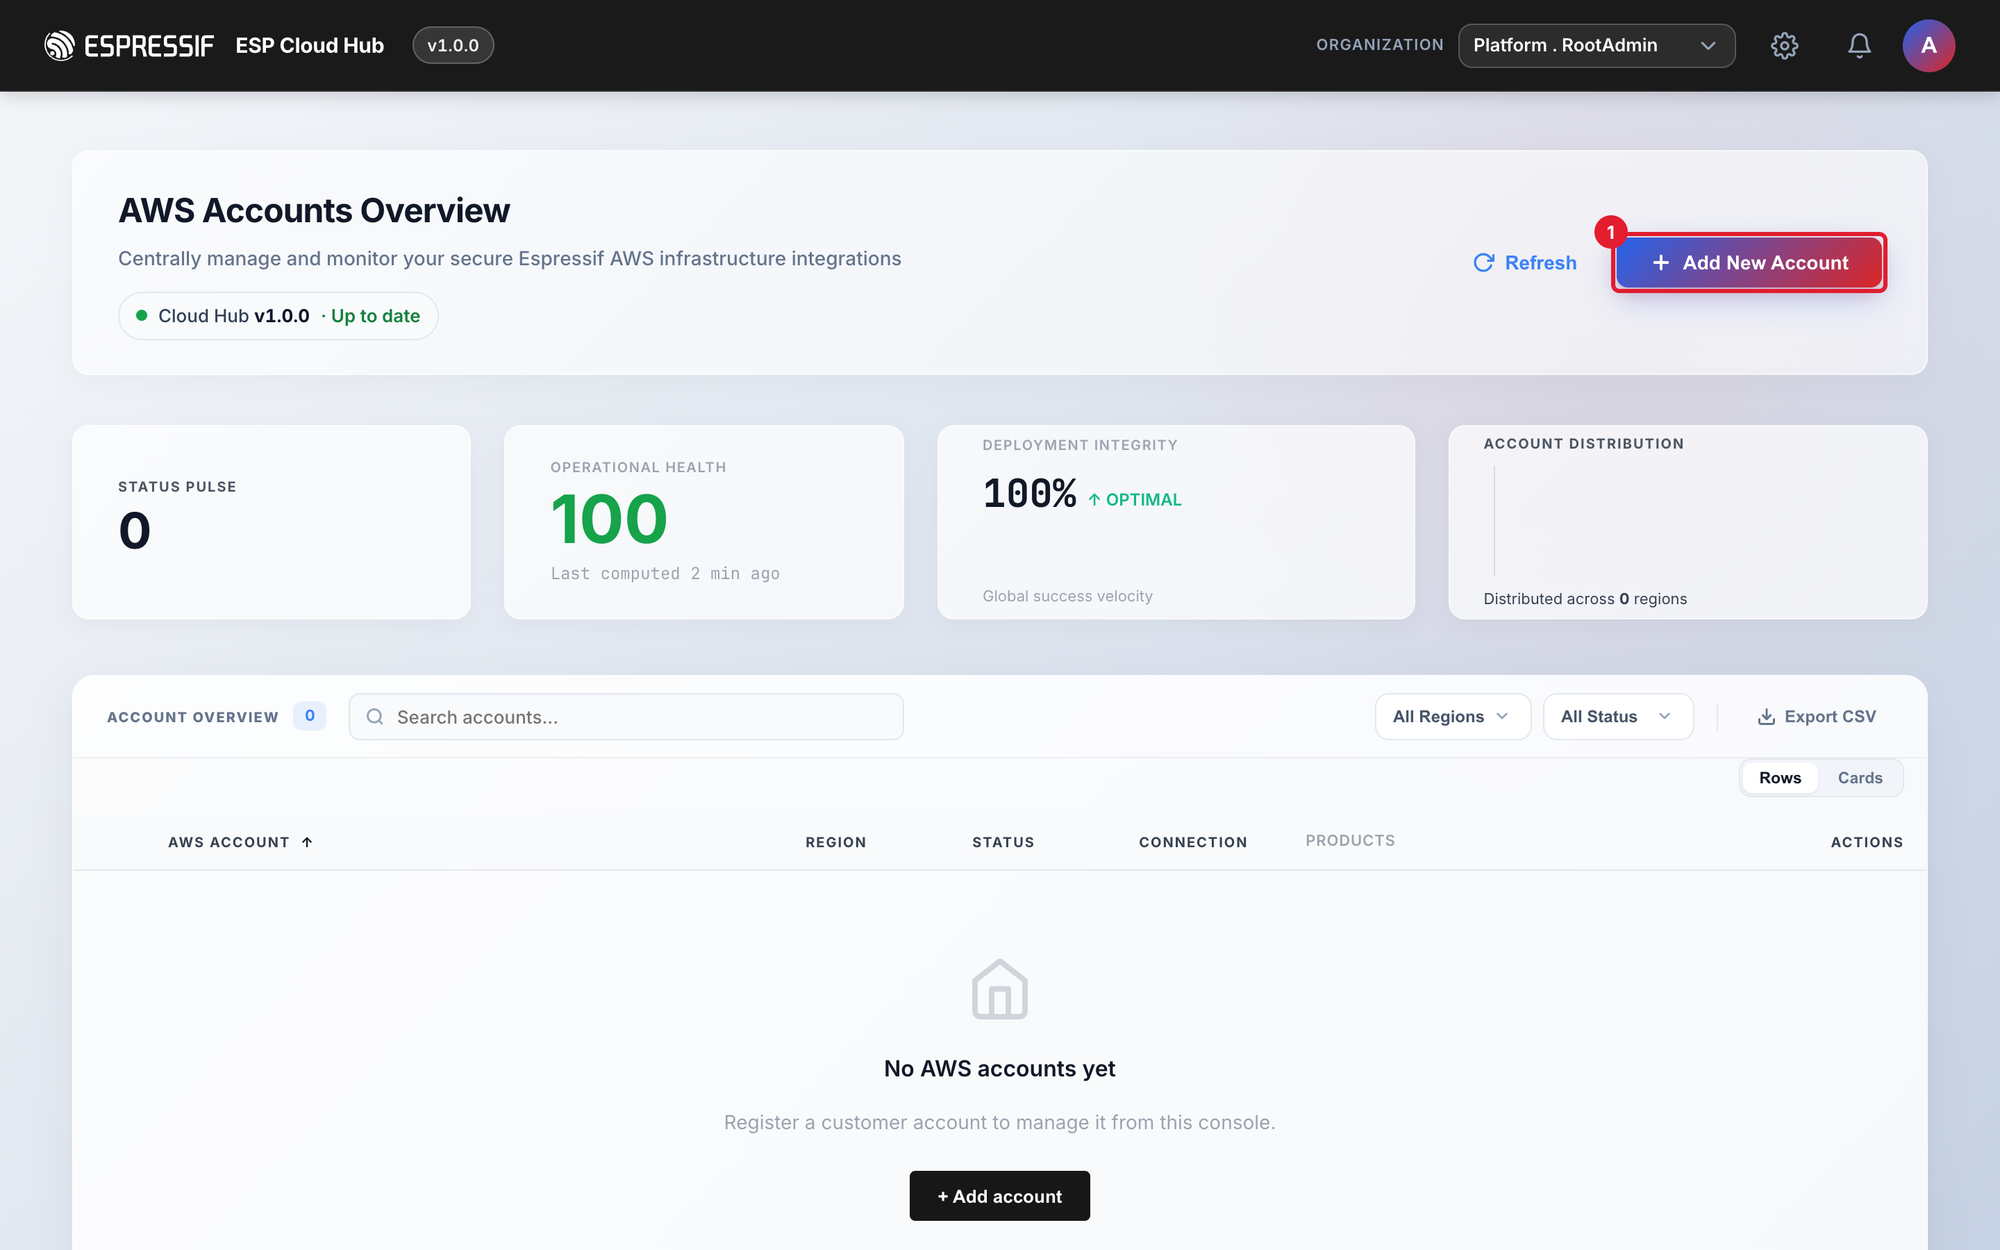
ESP CloudHub does not send invitation emails. Send the other administrators the DashboardUrl address and the temporary password yourself. The temporary password expires after 7 days.
Next: 2. Add your AWS account.
Keep ESP CloudHub up to date
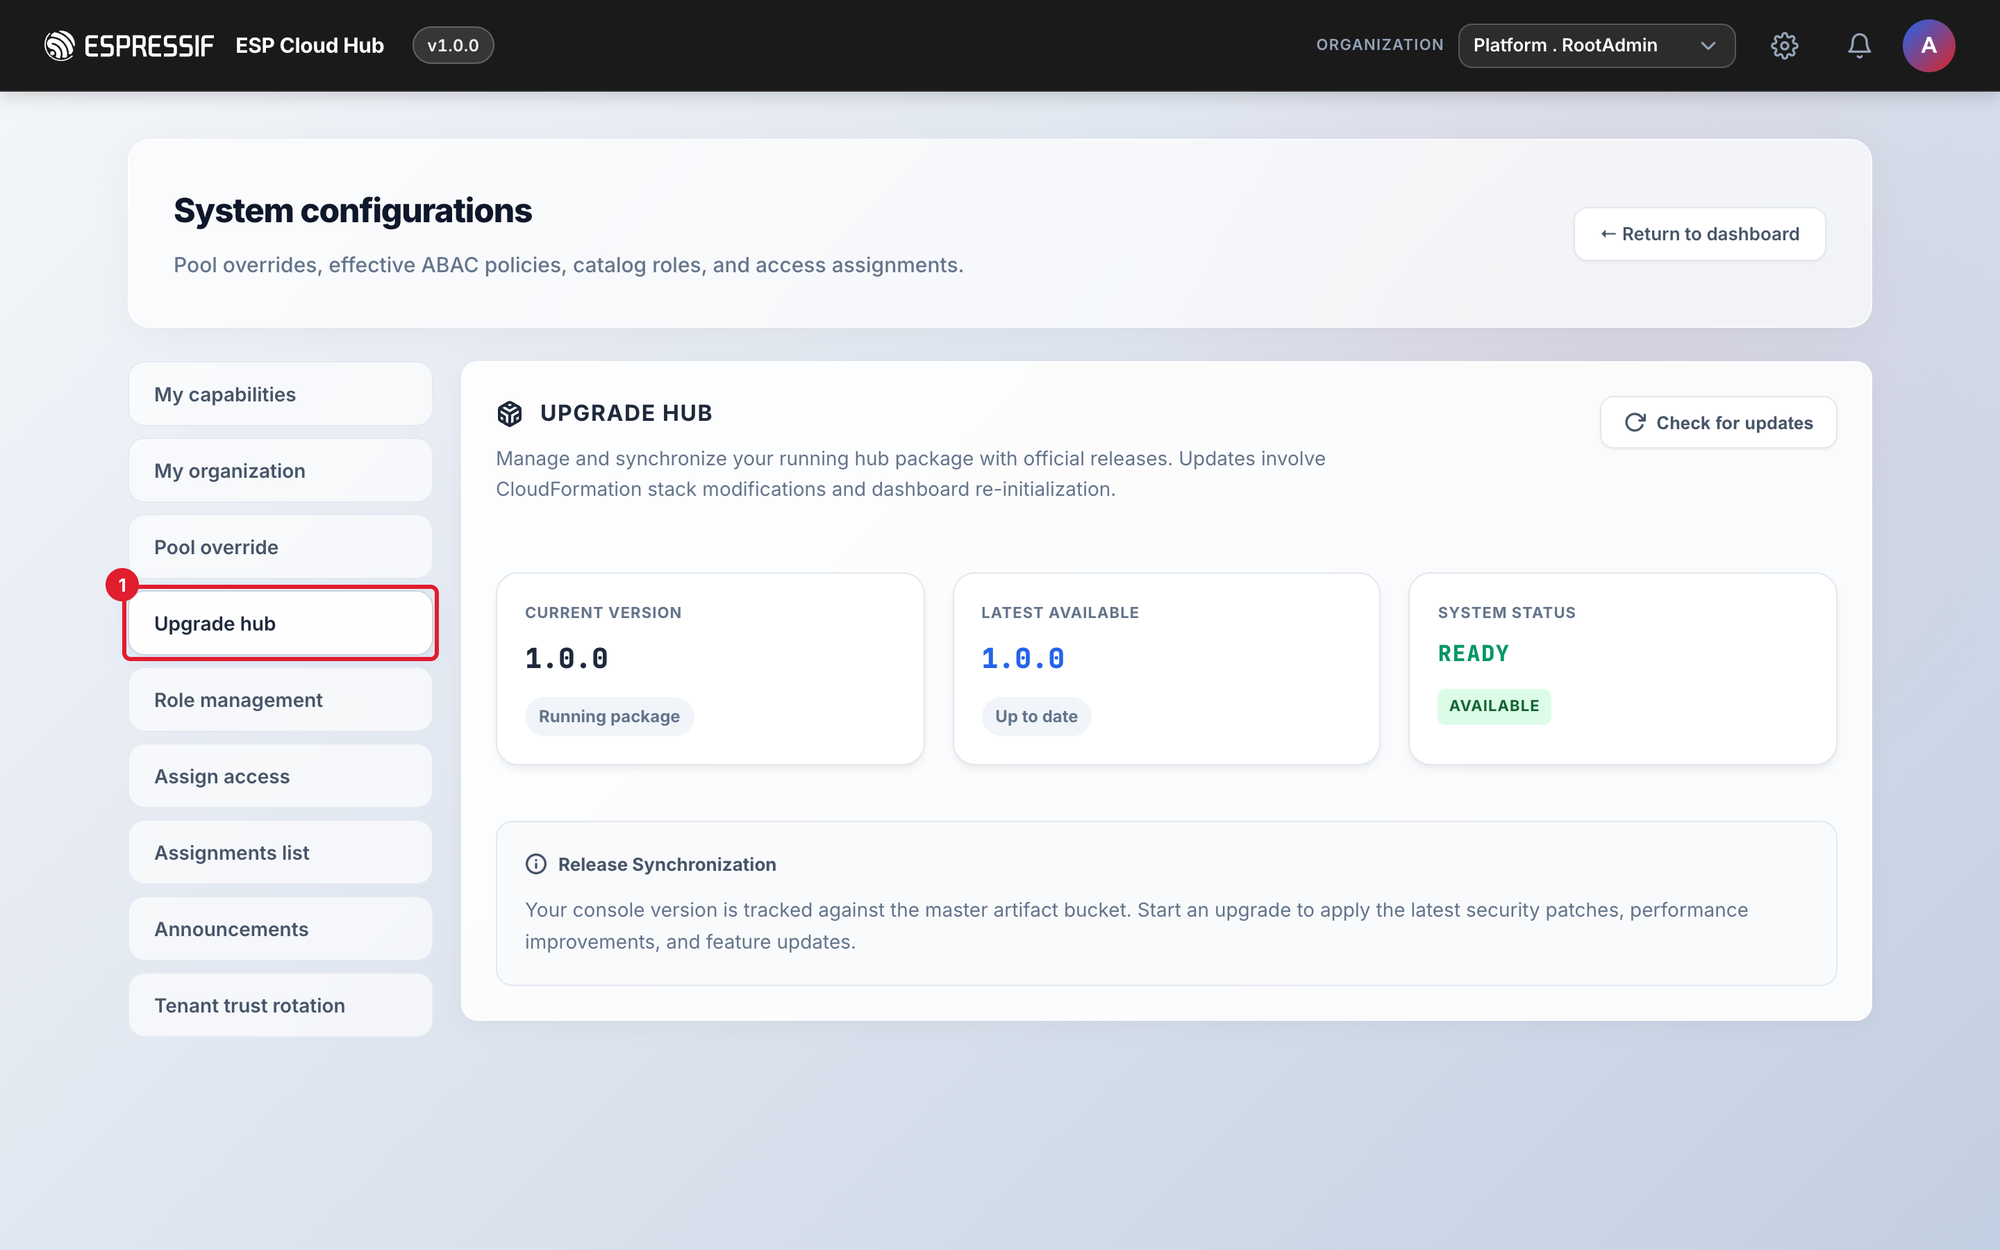
Your current version is always shown next to ESP Cloud Hub in the top bar and on the dashboard, which also tells you when a newer one is available. Don't use a new Quick Create link to upgrade. Instead, click the gear icon (top right) to open System configurations, then Upgrade hub. It shows your current version and the latest available one; start the upgrade from there.