

9. Upgrade the deployment
"Upgrade" covers two things: changing your current deployment (tweak parameters, add stacks) and moving to a newer version. Both start from the same Upgrade Deployment screen and reuse the deploy wizard's Configure step.
Start an upgrade
Open the tenant and go to Upgrade (from the dashboard / current deployment). You'll land on the Upgrade Deployment screen, which begins with 1. Select Upgrade Path.
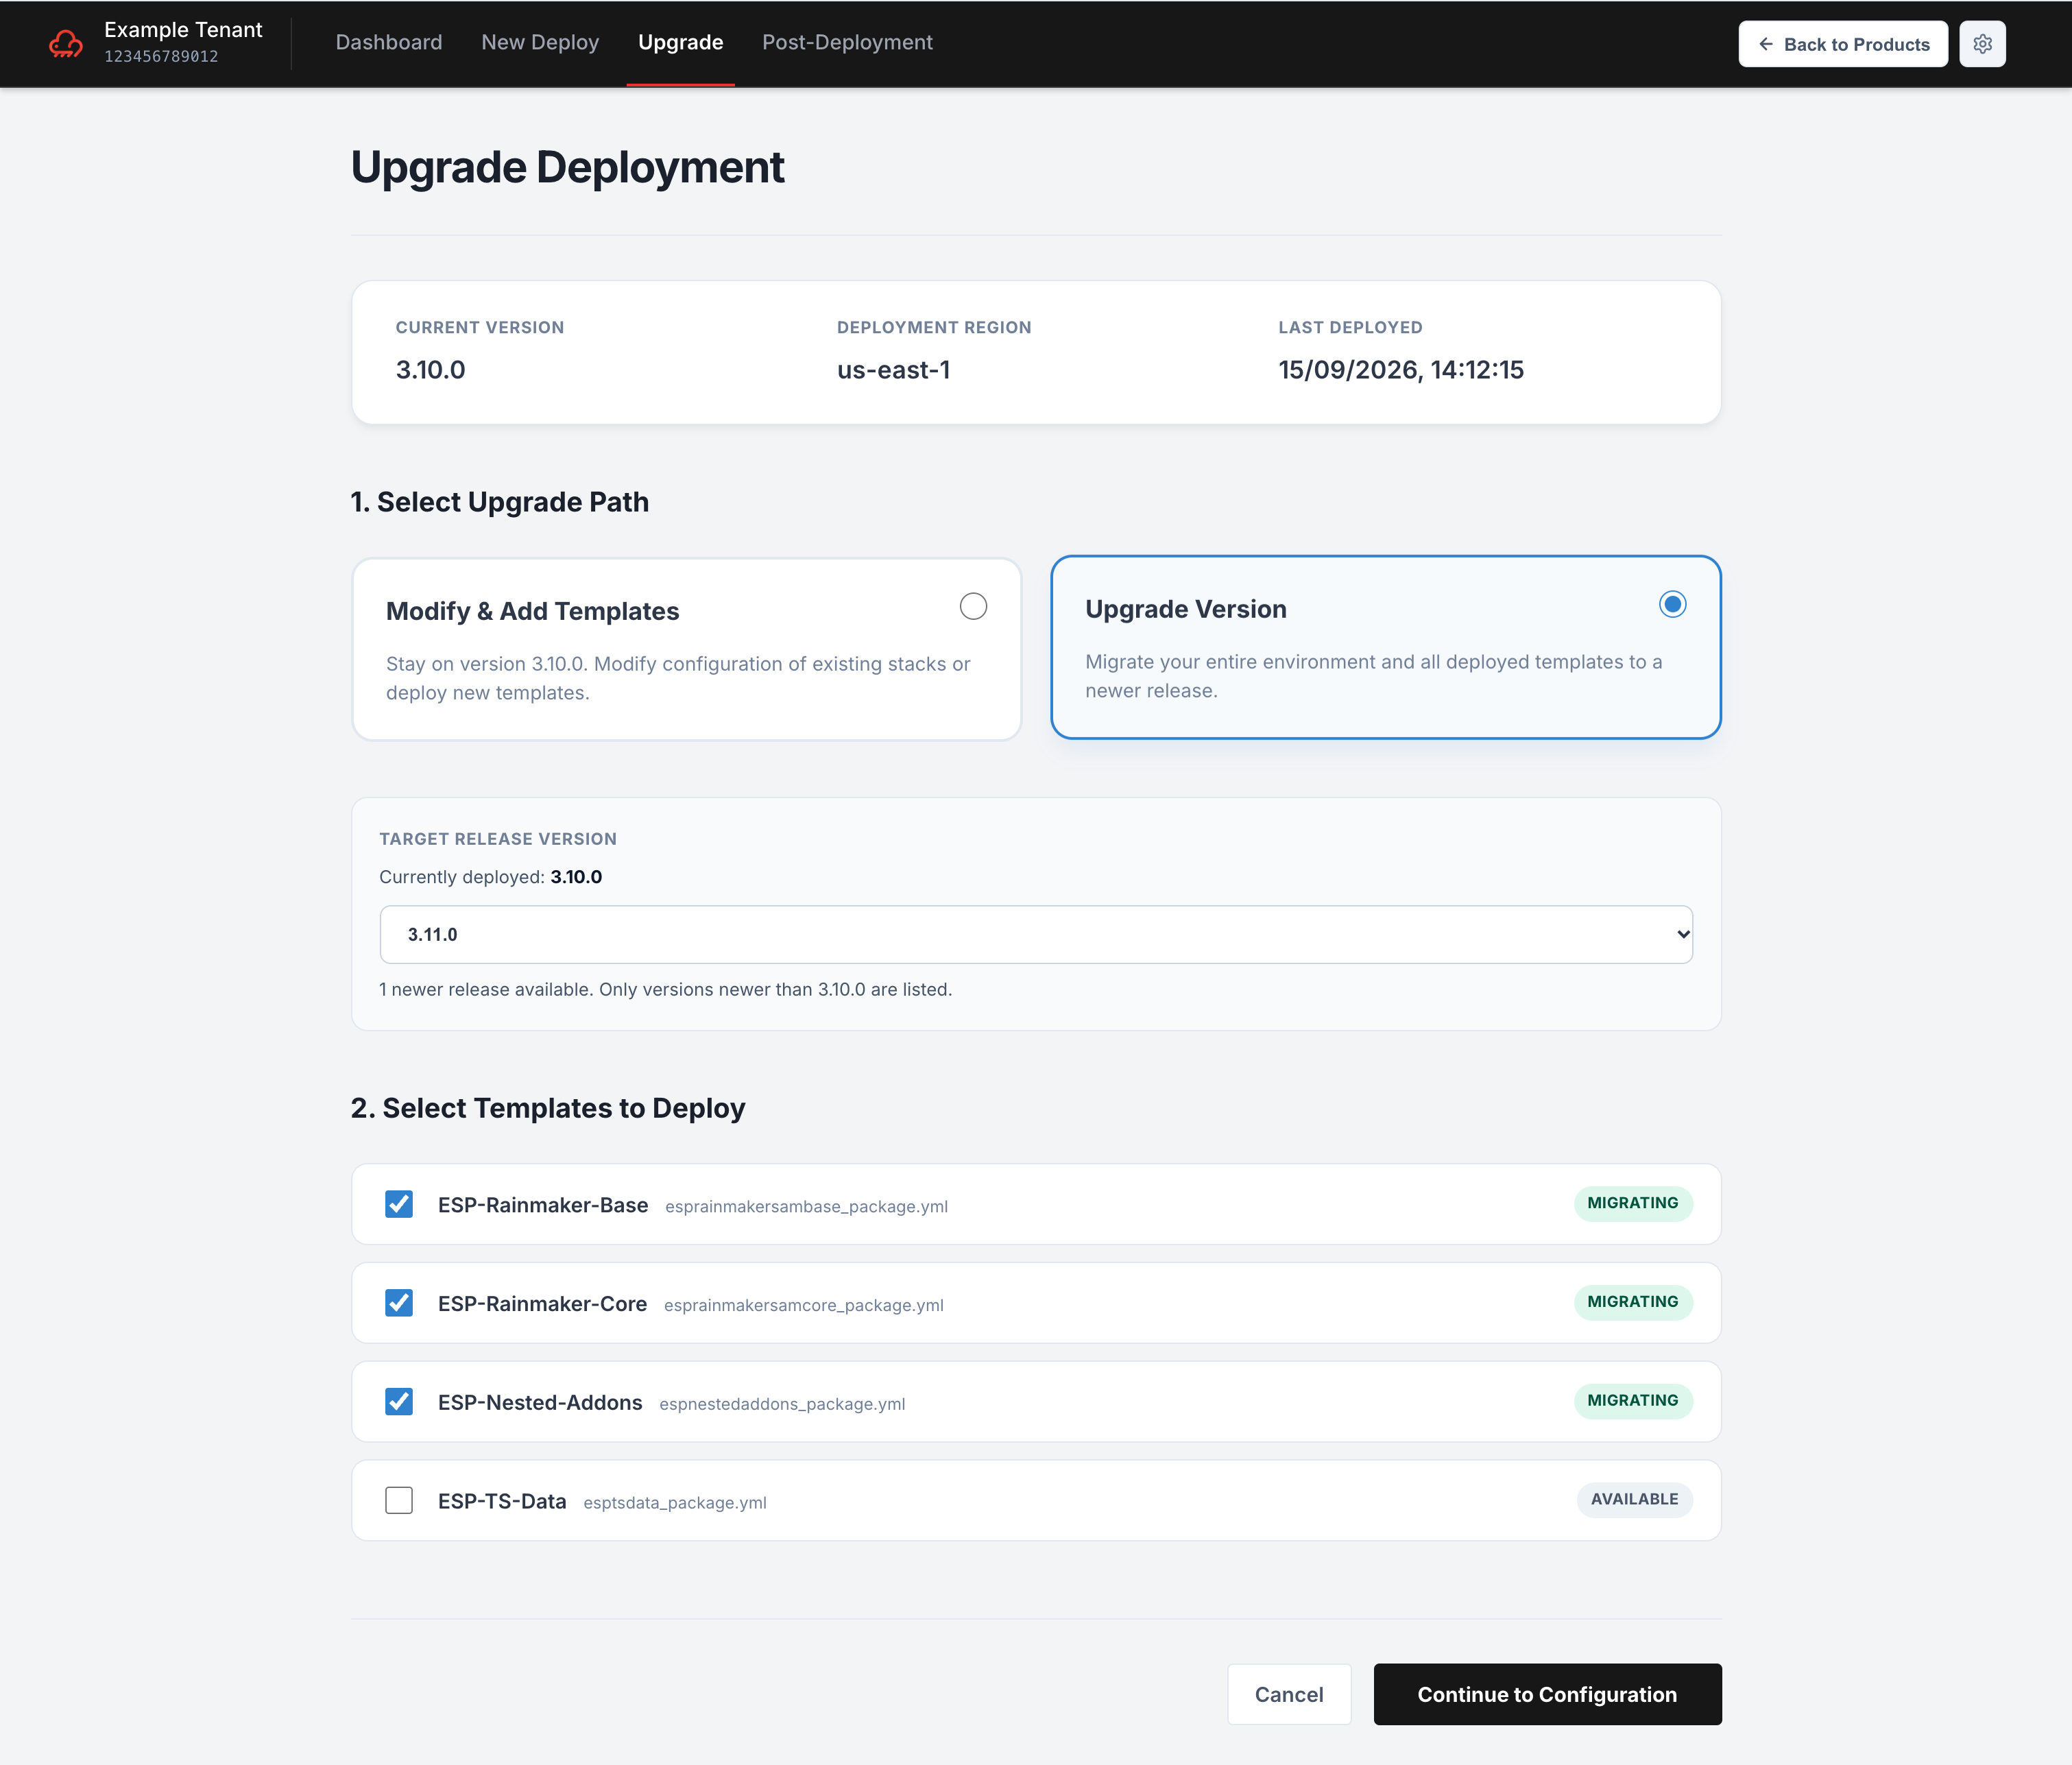
Choose one of two upgrade paths
There are two types of upgrade — pick the one that matches what you want to do:
| Path | What it does | When to use |
|---|---|---|
| Modify & Add Templates | Stays on your current version. Lets you change the configuration of existing stacks and/or deploy additional templates. | You want to adjust parameters or add a stack without changing versions. |
| Upgrade Version | Moves the deployment to a newer version you select from the dropdown. | A new RainMaker version is available and you want to move to it. |
For Upgrade Version, pick the target version from the dropdown. Only versions newer than your current one are listed.
The version dropdown only offers versions newer than your current one. You cannot downgrade — moving to an older version is not supported.
Select templates, then move to Configure
After choosing a path, use 2. Select Templates to Deploy to confirm which stacks are in scope, then continue to the Configuration page. Both paths land on the same Configure step with your existing templates and parameters pre-filled.
Fill in the parameters on the Configuration page:
- Existing stacks arrive pre-filled from your current deployment — review and change what you need.
- If you're adding a new stack, fill its parameters as in a fresh deploy.
Parameter types you'll see
Not every parameter can be changed during an upgrade. The Configure page marks these clearly:
| Marker | Meaning | Can you change it? |
|---|---|---|
| Fixed | The parameter is immutable — "Fixed by the product — this value cannot be changed." | No, ever. The field is locked. |
| Locked after first deploy | The parameter is createOnly — "Set at first deploy — this value cannot be changed during an upgrade." | No for a stack that was already deployed; it's set once, at first deploy. |
| (no marker) | A normal, editable parameter. | Yes. |
Password-type parameters (NoEcho) render as password fields. Some parameters also show inline hints with a suggested value and a caution — for example, the StageName on the base stack warns that you must keep the same value across all future upgrades, because changing it later breaks the deployment. Read those hints before changing a value.
"Fixed" and "Locked after first deploy" parameters are locked on purpose. Attempting to change them (for example the stage name) would break your deployment — that's why ESP CloudHub prevents it.
Review and upgrade
The Review step is the same as the deploy flow once your parameters are set — it summarizes the stacks and the values going in. It shows the stacks carried forward from your existing deployment alongside any new ones.
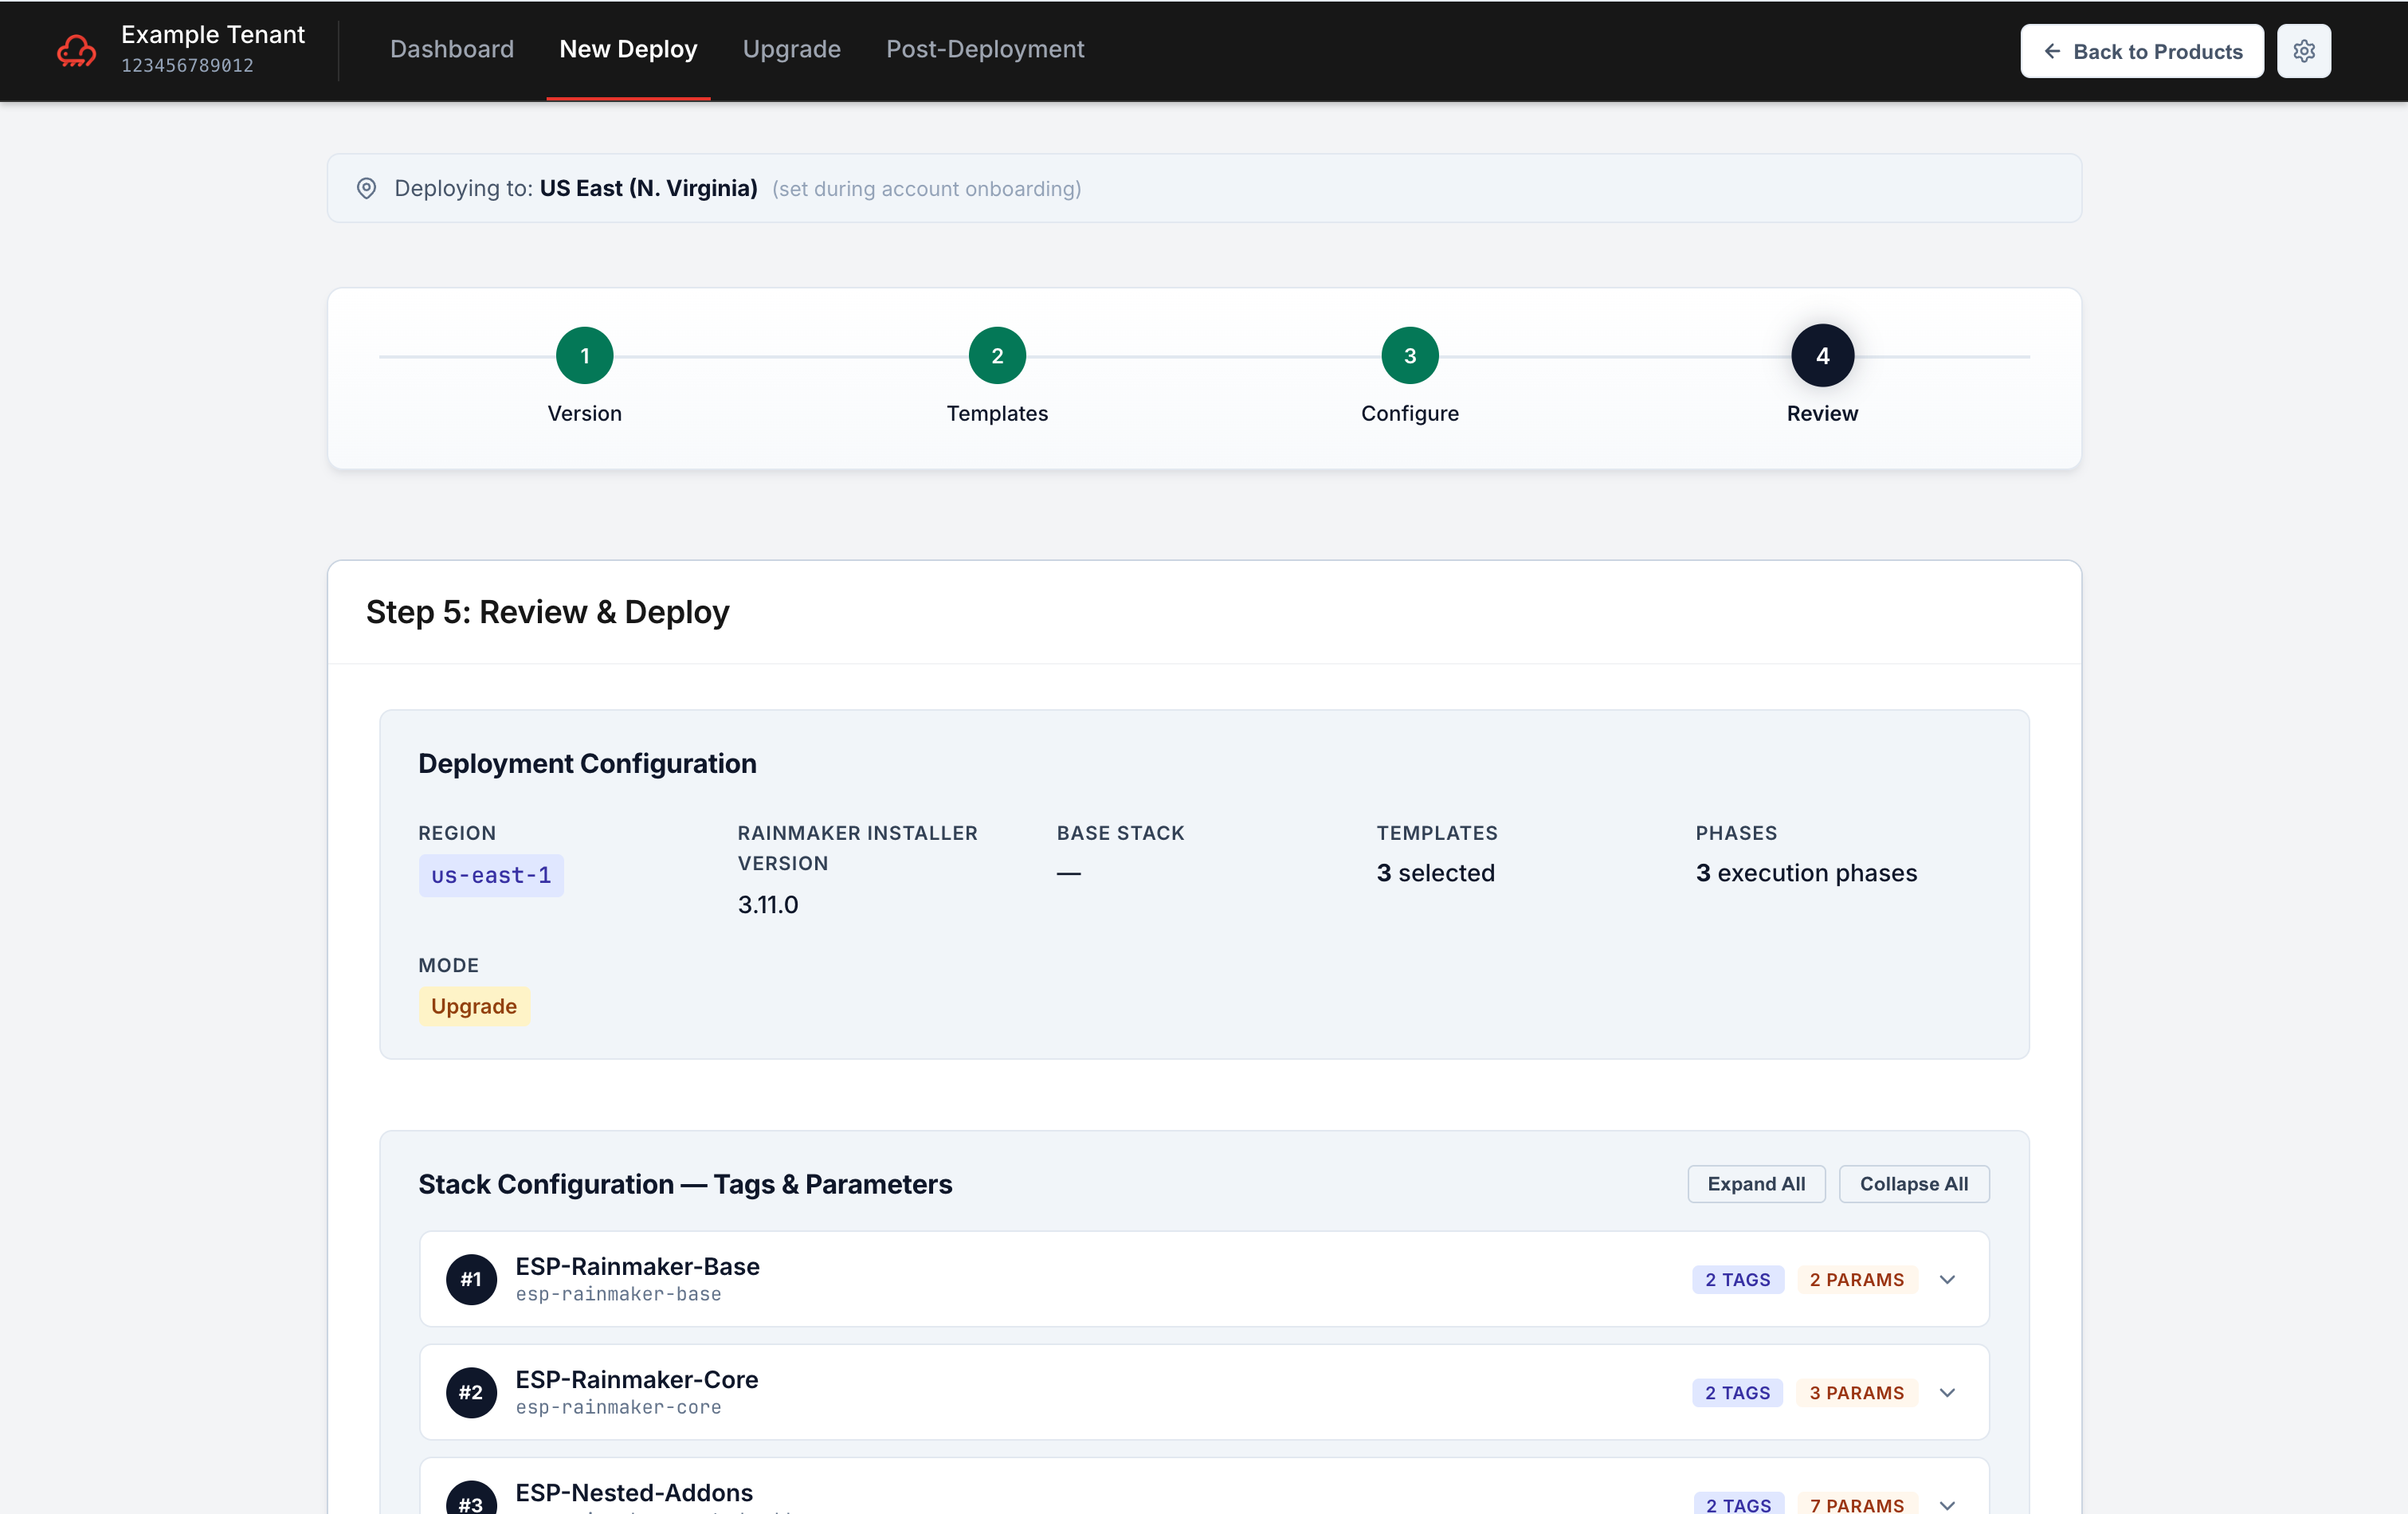
Confirm to run the upgrade. Monitoring is identical to a fresh deploy — see Monitor the deployment.
Confirm the upgrade is complete
When the upgrade finishes, go back to the dashboard and confirm:
- The upgraded run shows the green Active badge — this is now your current, live deployment.
- The previous run is marked Superseded.
- The version (or the stacks/parameters you changed) reflects exactly what you just upgraded to.
If the run shows Failed instead, open the failing stack to read its status reason and see Troubleshooting.