OTA Tasks
After learning how to upload a new version of the firmware, users can upgrade existing devices through remote OTA. In addition, when a problem occurs with the device, users can also try to repair the device through OTA. The following section will review how to create a new OTA work and manage published OTA tasks
Start a new OTA work
Follow these steps to start a new OTA work:
- Check the OTA image that you want to use for your OTA upgrade in the
Firmware Imagelist. - Go to Firmware Images > Select the firmware > Actions > Start OTA
- Fill in the task name > Select the OTA target (device group / single node) >
Select the update type (Force Push / User Approval) > Set the OTA time (optional) > Start OTA
| Start a new OTA work |
|---|
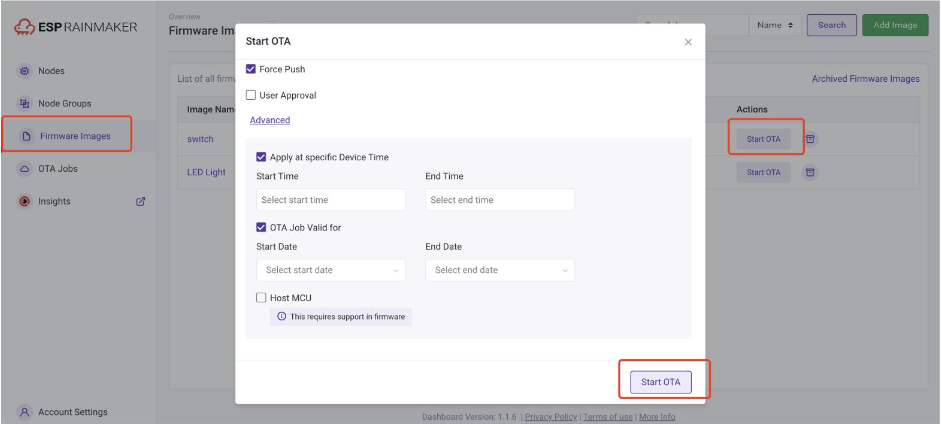 |
For testing purpose, please select the Force Push option, so that the OTA job information is sent to the node right away. Else, the node(s) will get the OTA URL as per the OTA upgrade policy defined by auto fetch configuration.
Advanced Options
While creating an OTA Job, you can also choose some advanced options as shown below:
| Advanced Options |
|---|
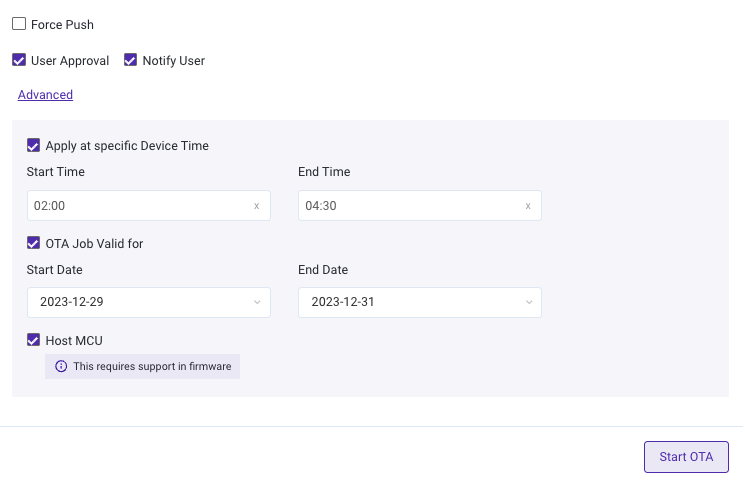 |
- User Approval: End user has to approve the job before it is sent to the node.
- Notify User: Send a push notification to the user indicating availability of OTA, which the user can then approve/decline.
- Apply at specific Device Time: Trigger the Job only during specific hours (like 2:00am-4:30 am).
- OTA Job Valid for: Allow the job to be performed only between the specified dates.
- Host MCU: Use the OTA Image for upgrading the Host MCU instead of the ESP Wi-Fi MCU.
Apart from the user approval, the rest is sent as metadata to the node and is handled by the firmware logic.
Please check out additional information about this metadata here.
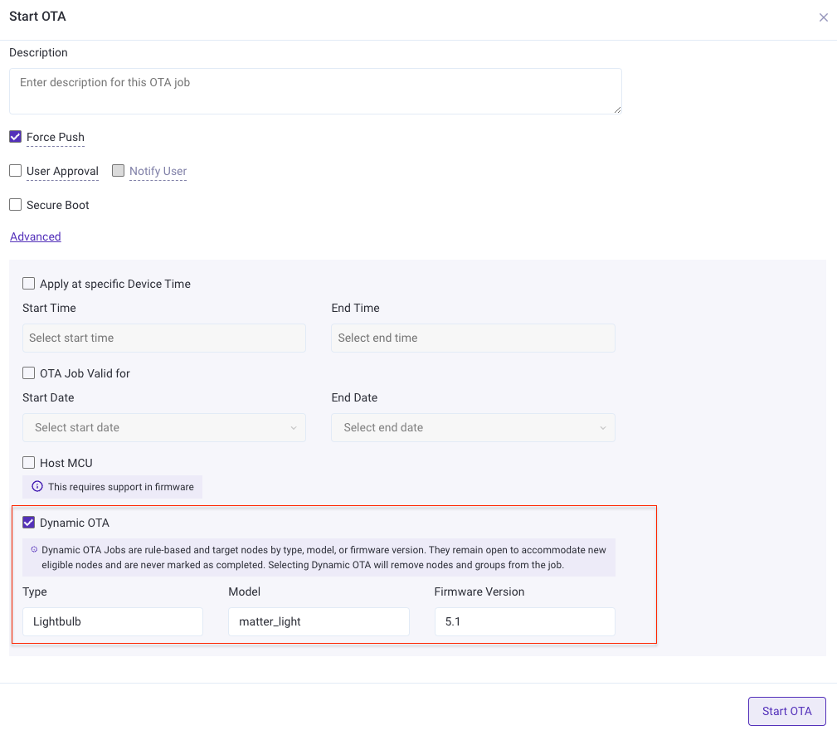
Dynamic OTA
While starting an OTA job, users can choose to set it as a Dynamic OTA. Dynamic OTA Jobs are rule-based and they target nodes by type, model, or firmware version. Dynamic OTA option is available in the Advanced section of the Start OTA Job.
| Dynamic OTA |
|---|
 |
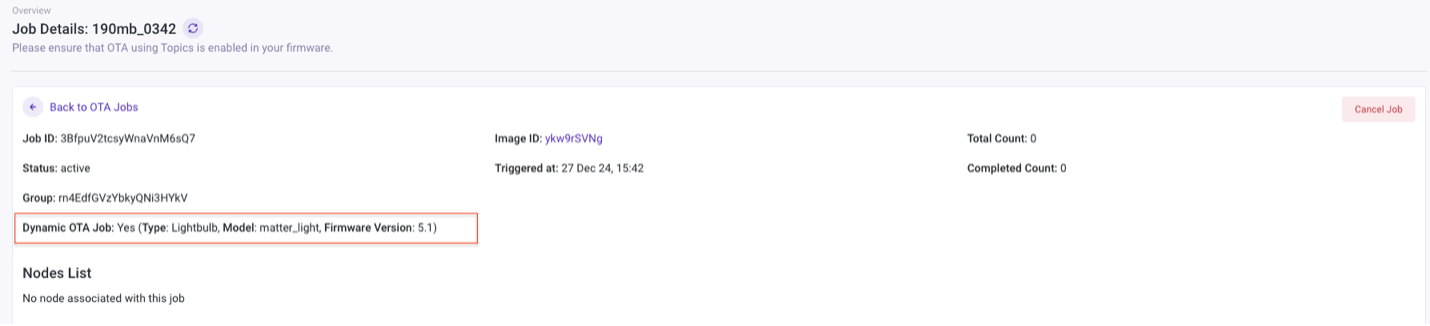
Dynamic OTA details will also be shown in the OTA job details page as shown in the image below.
| Dynamic OTA status |
|---|
 |
Manage Published OTA tasks
Users can view published OTA tasks in the OTA Jobs interface. The interface will display the information filled in when creating a task in Firmware Images. The Status column has four states as compiled on a table below.
| Managing newly released OTA tasks |
|---|
 |
| State | Description |
|---|---|
| Failed | OTA Failure |
| Reject | OTA project not verified |
| Active | OTA project upload completed and can be updated |
| Finished | OTA task has been completed |
Users can cancel a OTA job midway, but the nodes that had already got the URL will continue with the upgrade.
To understand how an OTA job work on the backend, please refer here