RainMaker 3.0.0 Release Upgrade Guide
It is recommended to notify end users about the downtime before proceeding with the upgrade, but it is not mandatory.
Notify End-Users About Downtime Using RainMaker Swagger API
Step 1: Check RainMaker Backend Version
- Verify your current RainMaker backend version here.
- If your current RainMaker version is 2.6.0 or later, proceed to the next step.
Step 2: Send Push Notification Using Swagger API
-
Use the Swagger API Publish Message to send a push notification to all users.
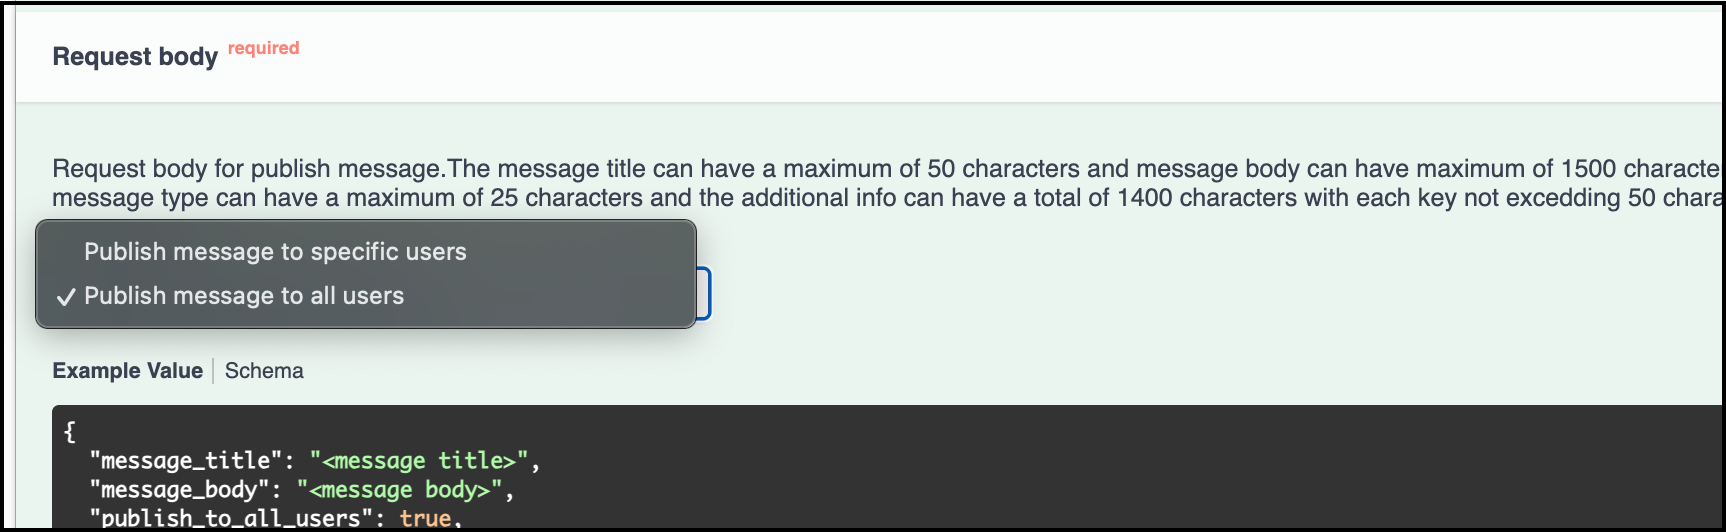
-
Select the
Publish message to all usersoption, add message title and message body and run the API.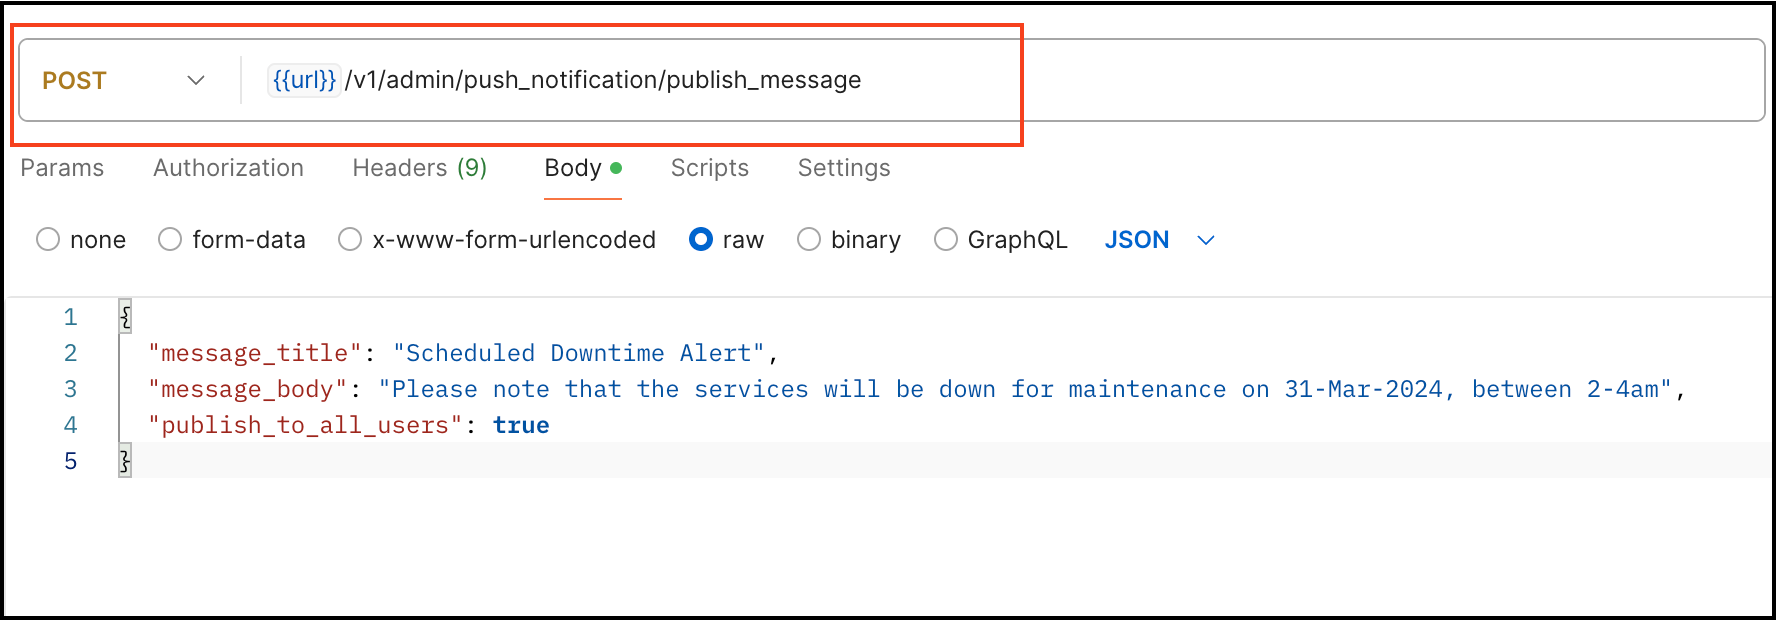
This ensures that all end-users are promptly informed about the downtime and will receive a push notification message on their mobile apps.
Steps to Check if Device Defender is Deployed in Your AWS Account
If you have device defender enabled, you can get flooded with violation emails as the devices in field will keep trying to connect during the downtime. To check if device defender is enabled, follow below steps
Step 1: Access AWS CloudFormation
- Log in to the
AWS Management Console. - Navigate to the
AWS CloudFormationservice.
Step 2: View Deployed Stacks
- In the left navigation pane, select
Stacks. - Here, you will see a list of all deployed stacks.
- Use the search bar to look for the stack name
DeviceDefender.
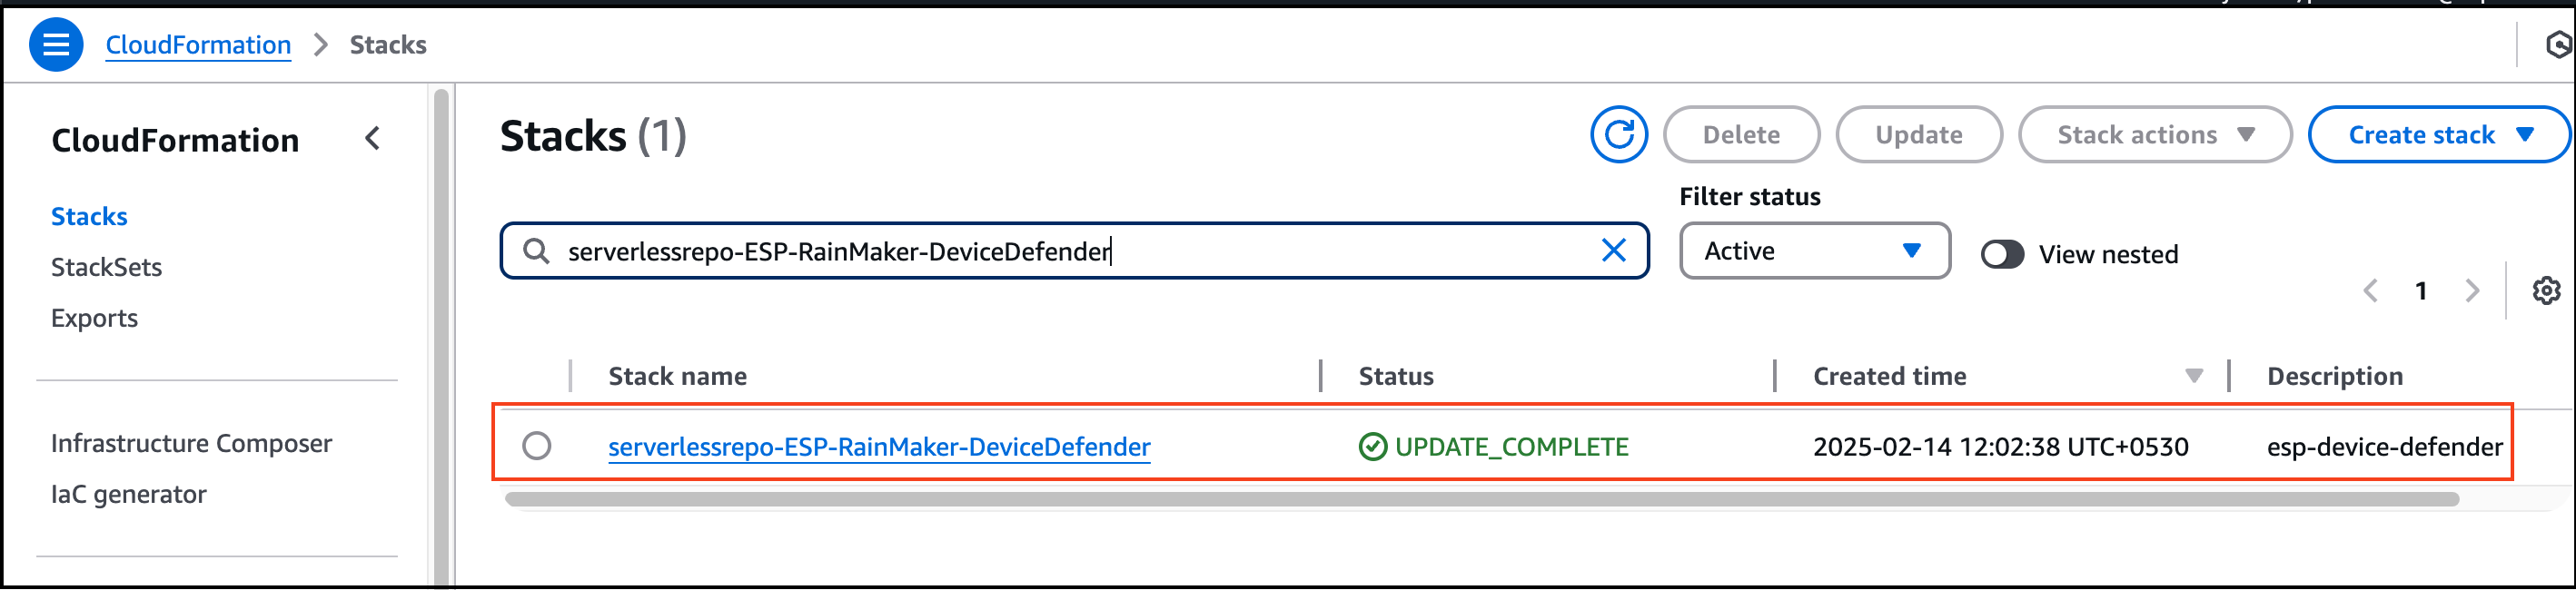
Step 3: Determine Next Steps
- If the stack is found: Device Defender is deployed, and you need to follow the steps below to disable alerts before proceeding with the 3.1.0 upgrade.
- If the stack is not found: Device Defender is not deployed in your account, and you can skip the following steps.
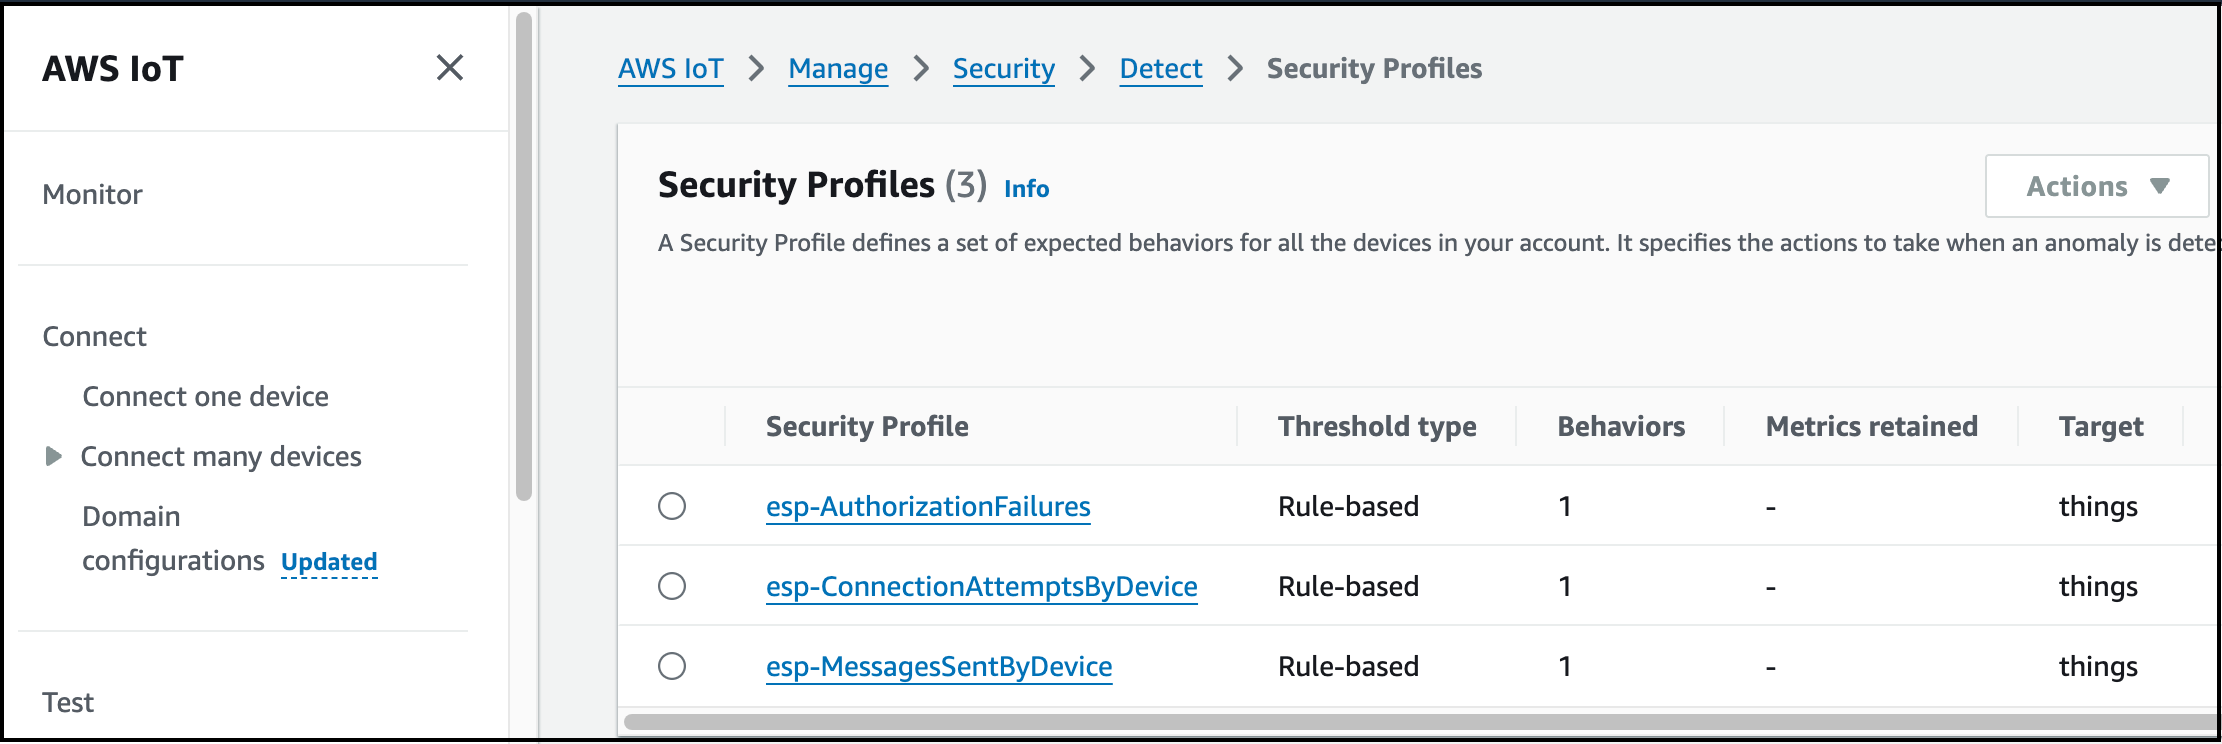
Steps to Update Security Profiles in AWS IoT Core
Step 1: Access AWS IoT Core
- Log in to the
AWS Management Console. - Navigate to
AWS IoT Coreservice.
Step 2: View Security Profiles Created by CloudFormation Stack
- In the left navigation pane, select
Security. - Click on
Detect>Security Profiles.
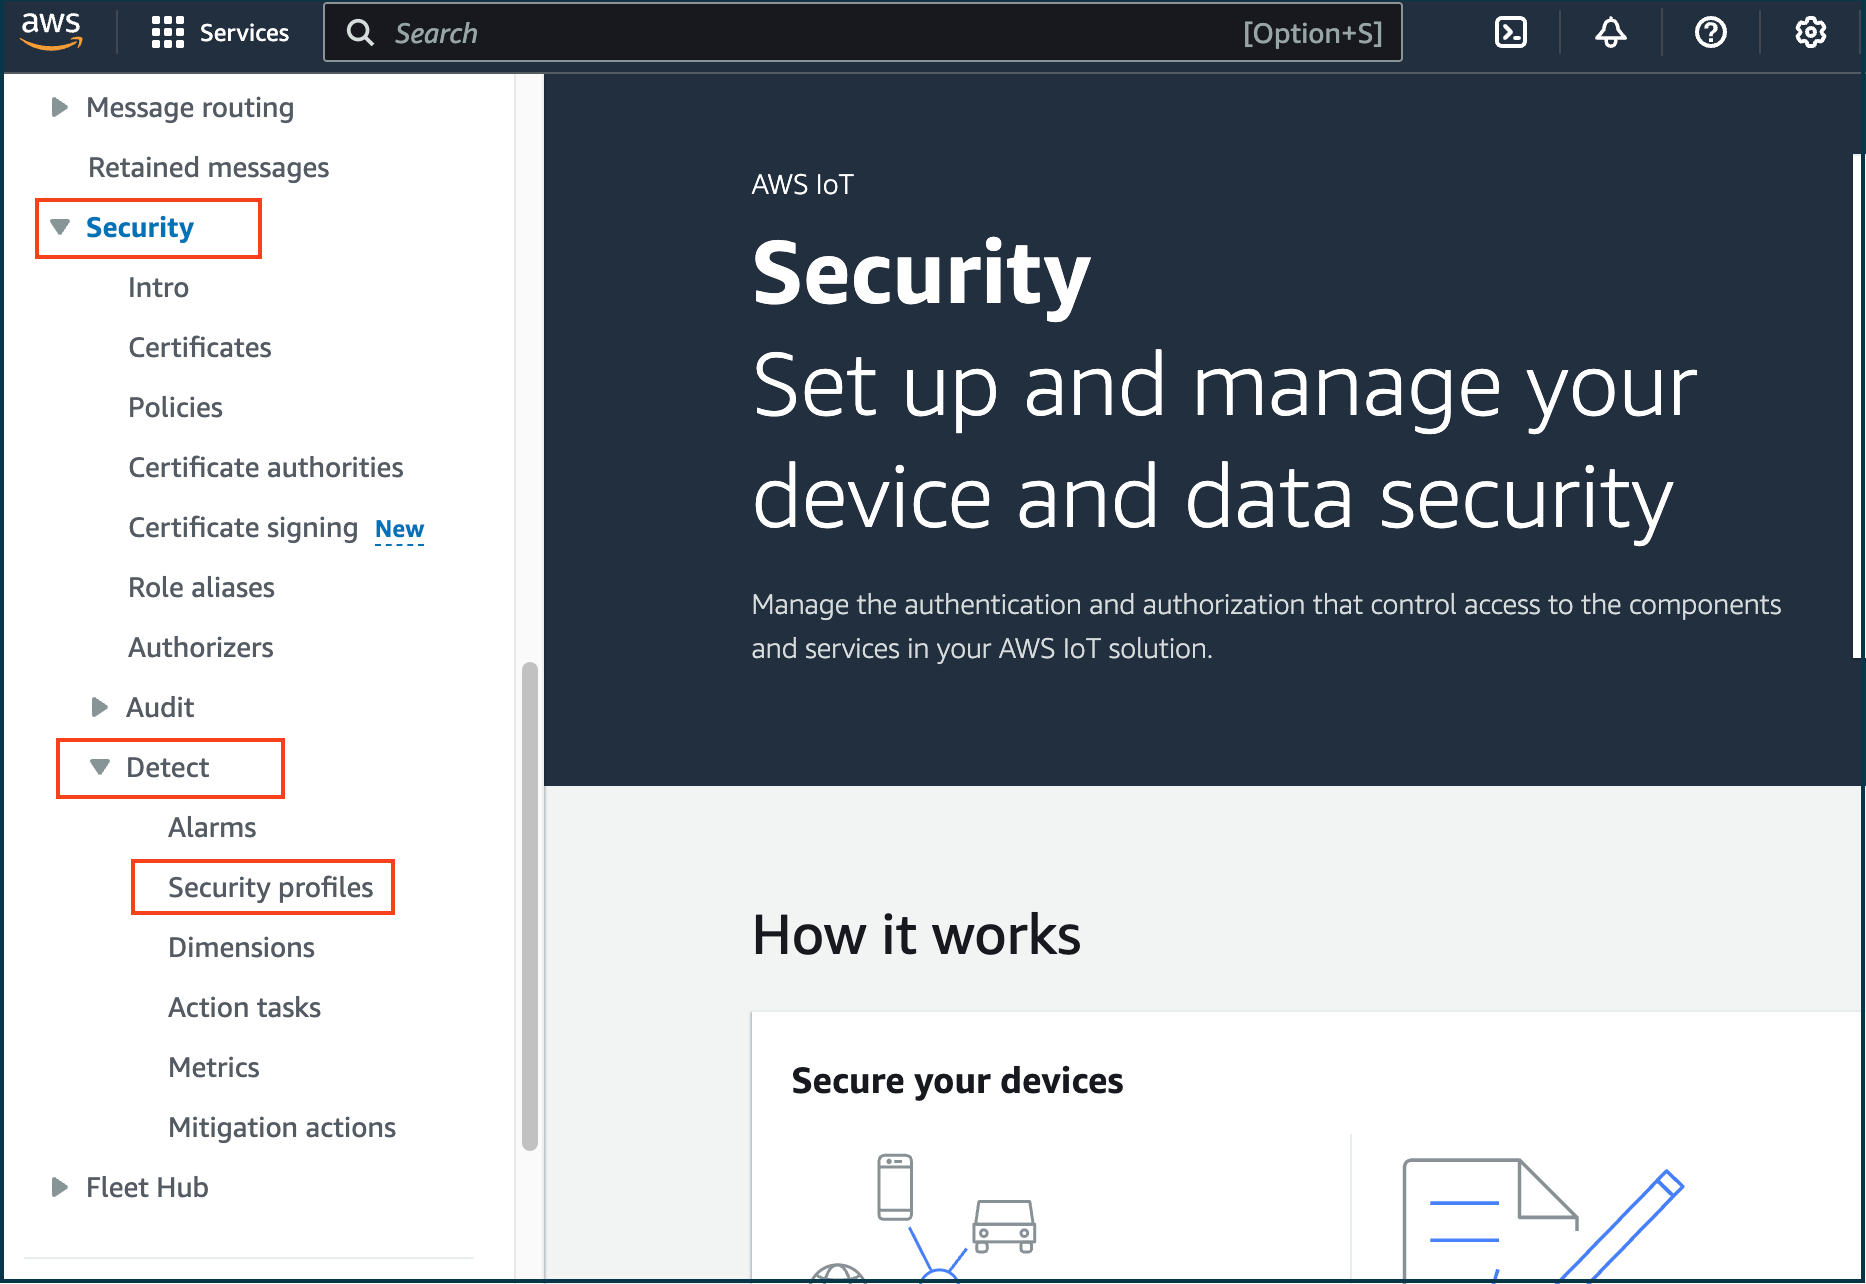
- Here, you will view the list of security profiles created by the CloudFormation stack
serverlessrepo-ESP-RainMaker-DeviceDefender.
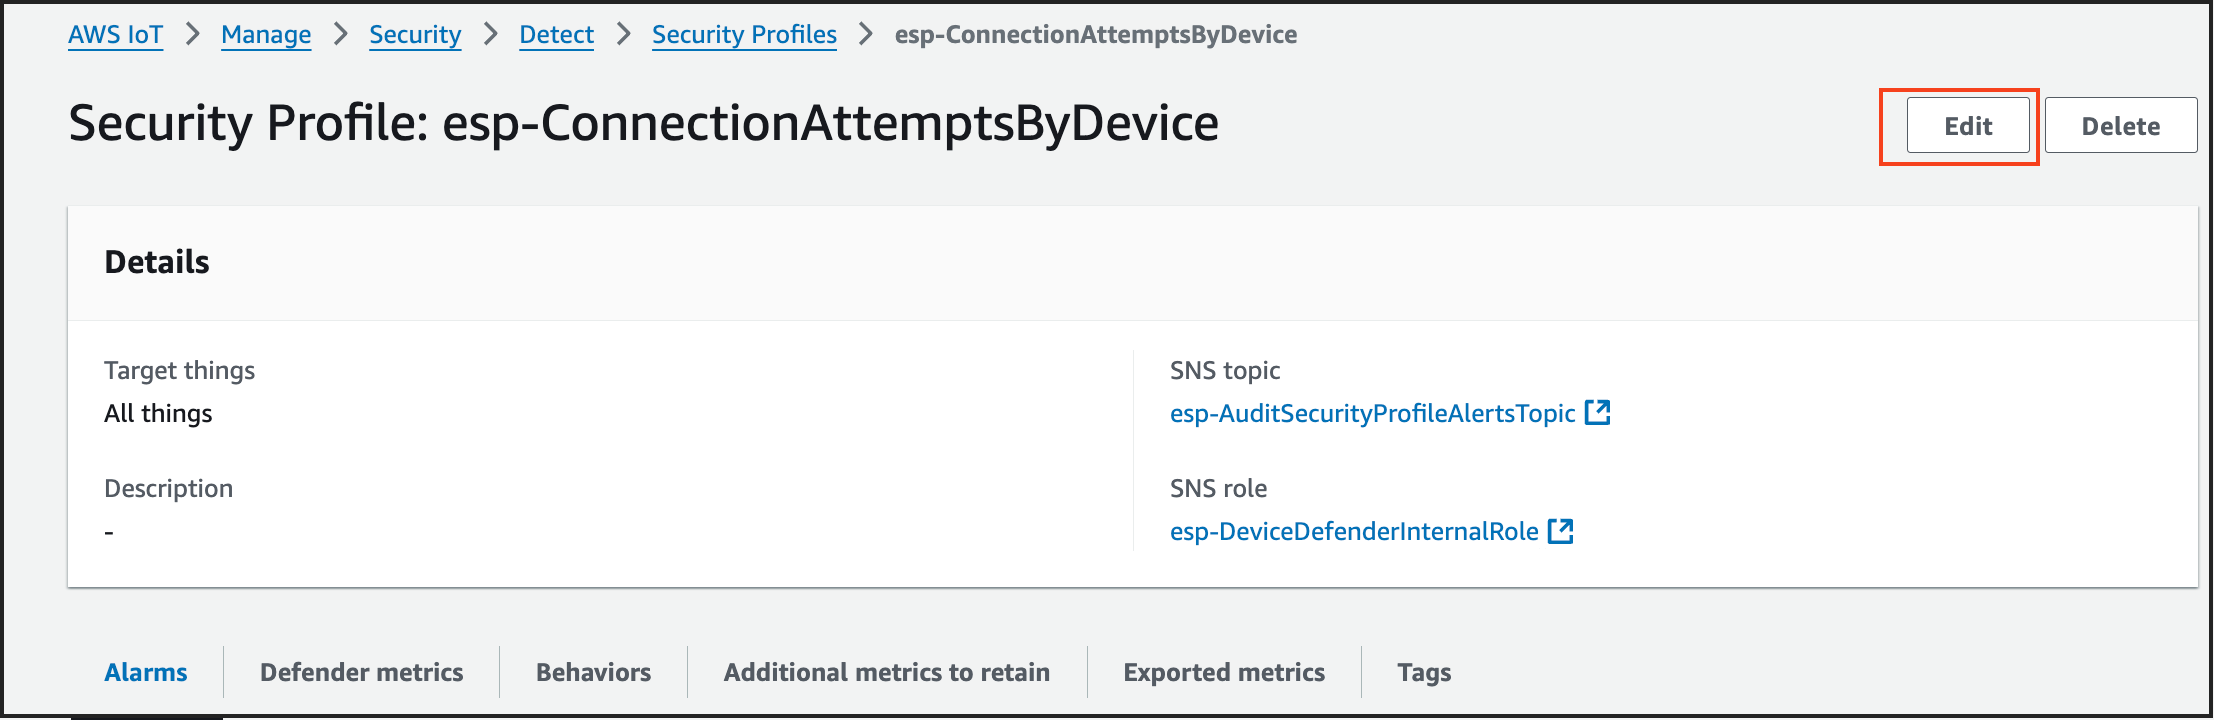
Step 3: Update esp-AuthorizationFailures Security Profile
-
Locate and select the security profile
esp-AuthorizationFailures. -
On the right side, click
Edit.
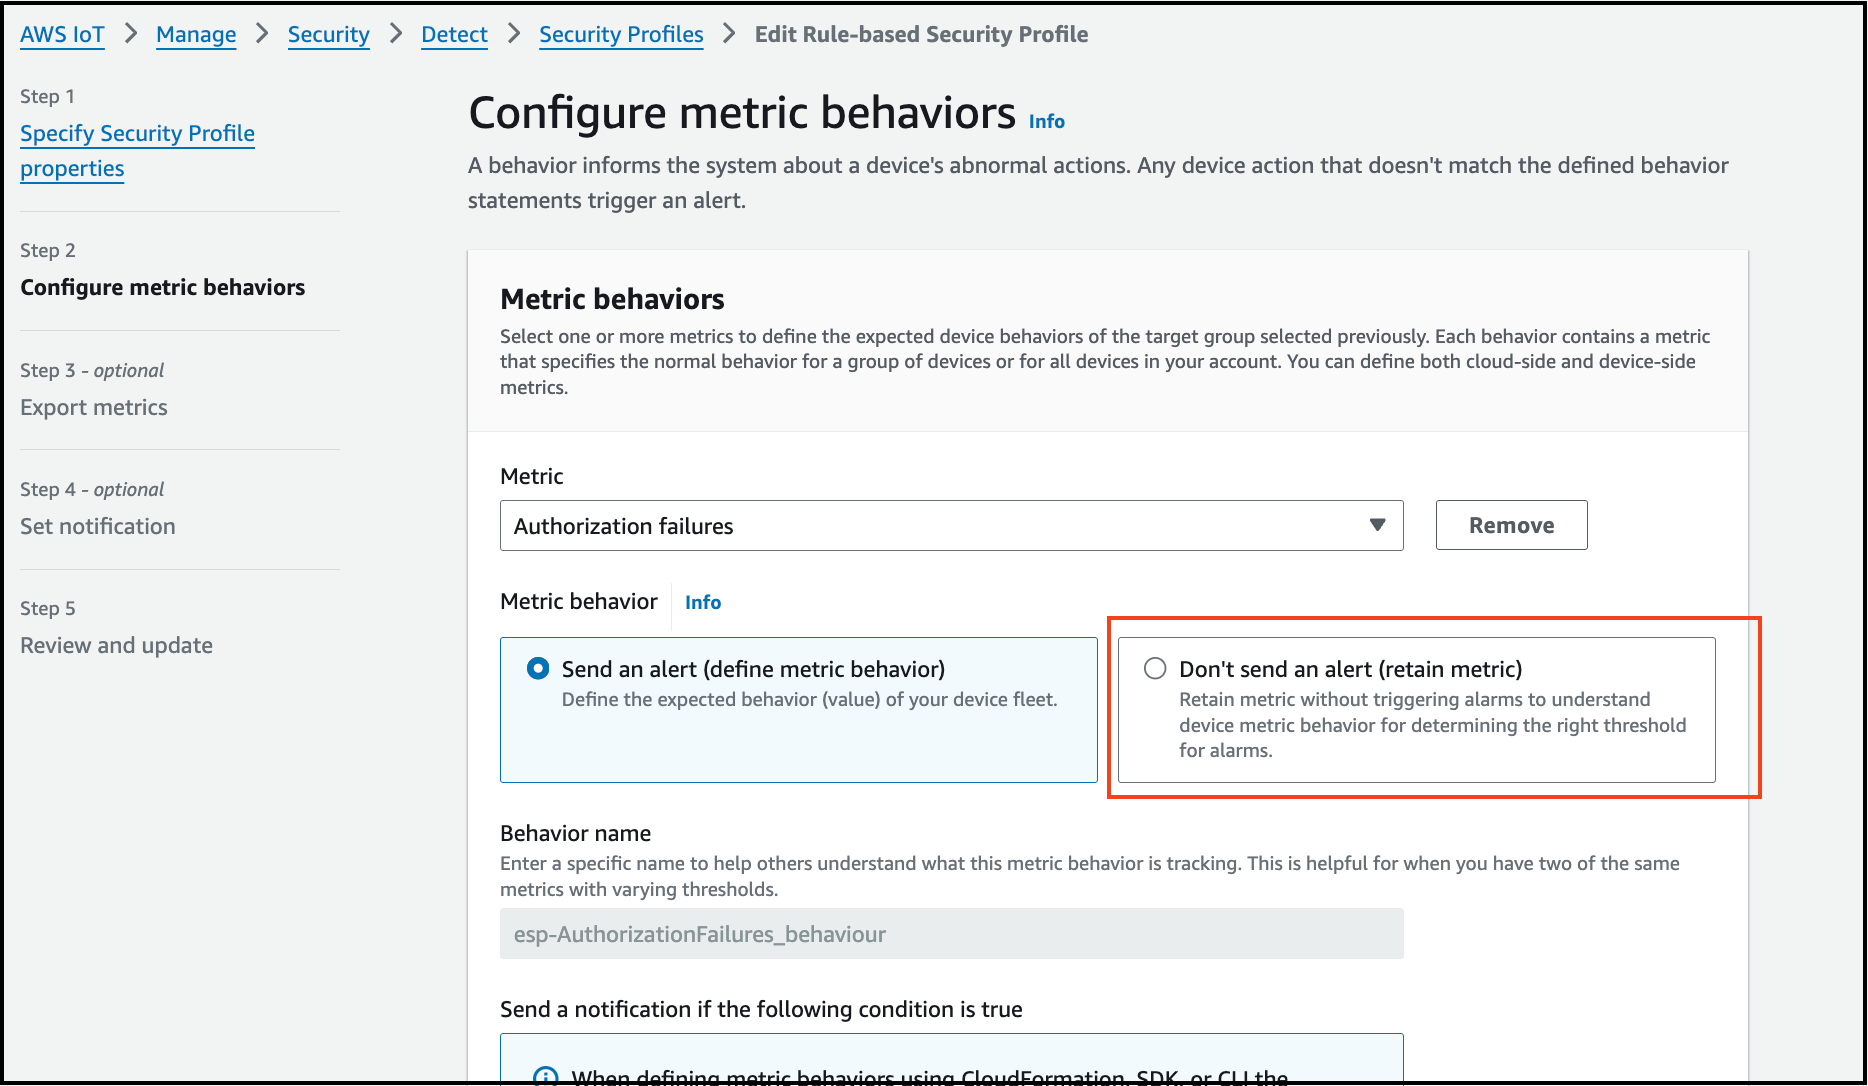
-
Keep
Description, Tags & Targetsas they are (default values). ClickNext. -
Under
Metric Behavior, selectDon’t send an alert (retain metric).
-
Click
Next, and selectTurn off metrics export.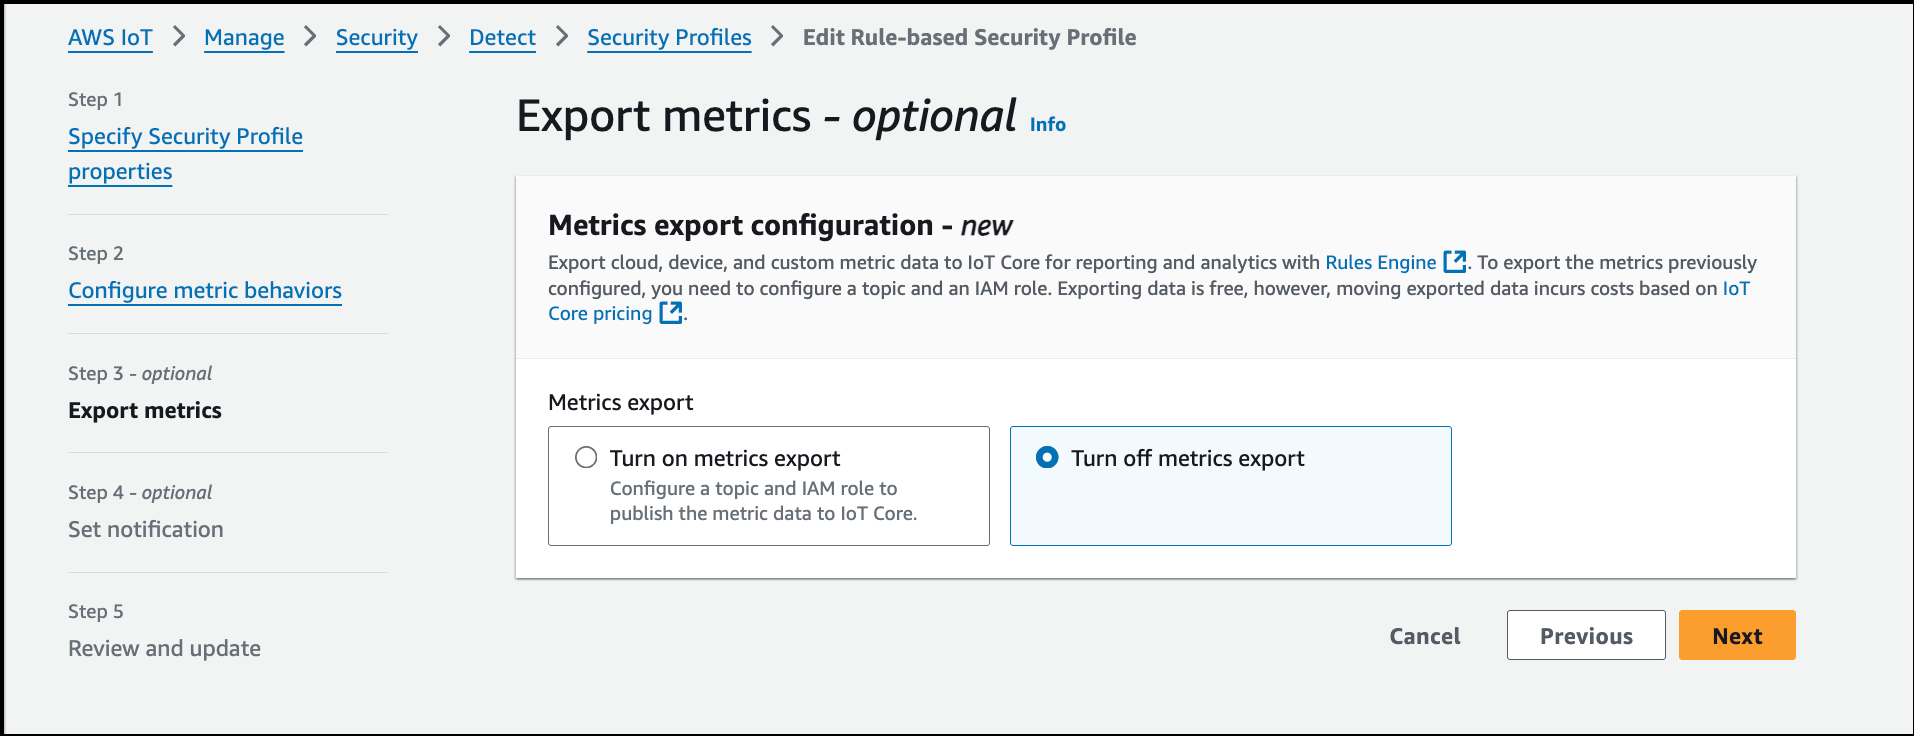
-
Click
Next>Save changes.
Step 4: Update esp-ConnectionAttemptsByDevice Security Profile
- Follow the same steps as above, selecting
esp-ConnectionAttemptsByDevicein step 3. - Click
Edit, keep default values, and proceed. - Select
Don’t send an alert (retain metric)underMetric Behavior. - Click
Next, thenSave changes.
Step 5: Update esp-MessagesSentByDevice Security Profile
- Follow the same steps, selecting
esp-MessagesSentByDevicein step 3. - Click
Edit, keep default values, and proceed. - Select
Don’t send an alert (retain metric)underMetric Behavior. - Click
Next, thenSave changes.
You have now successfully updated the three security profiles in AWS IoT Core.
Steps to re-enable Alerts in AWS IoT Core Security Profiles
Step 1: Access AWS IoT Core
- Log in to the
AWS Management Console. - Navigate to
AWS IoT Coreservice.
Step 2: View Security Profiles Created by CloudFormation Stack
- In the left navigation pane, select
Security. - Click on
Detect>Security Profiles. - Here, you will view the list of security profiles created by the CloudFormation stack
serverlessrepo-ESP-RainMaker-DeviceDefender.
Step 3: Enable Alerts for esp-AuthorizationFailures Security Profile
- Locate and select the security profile
esp-AuthorizationFailures.
Copy the values of SNS topic & SNS role which you will need in the step 5.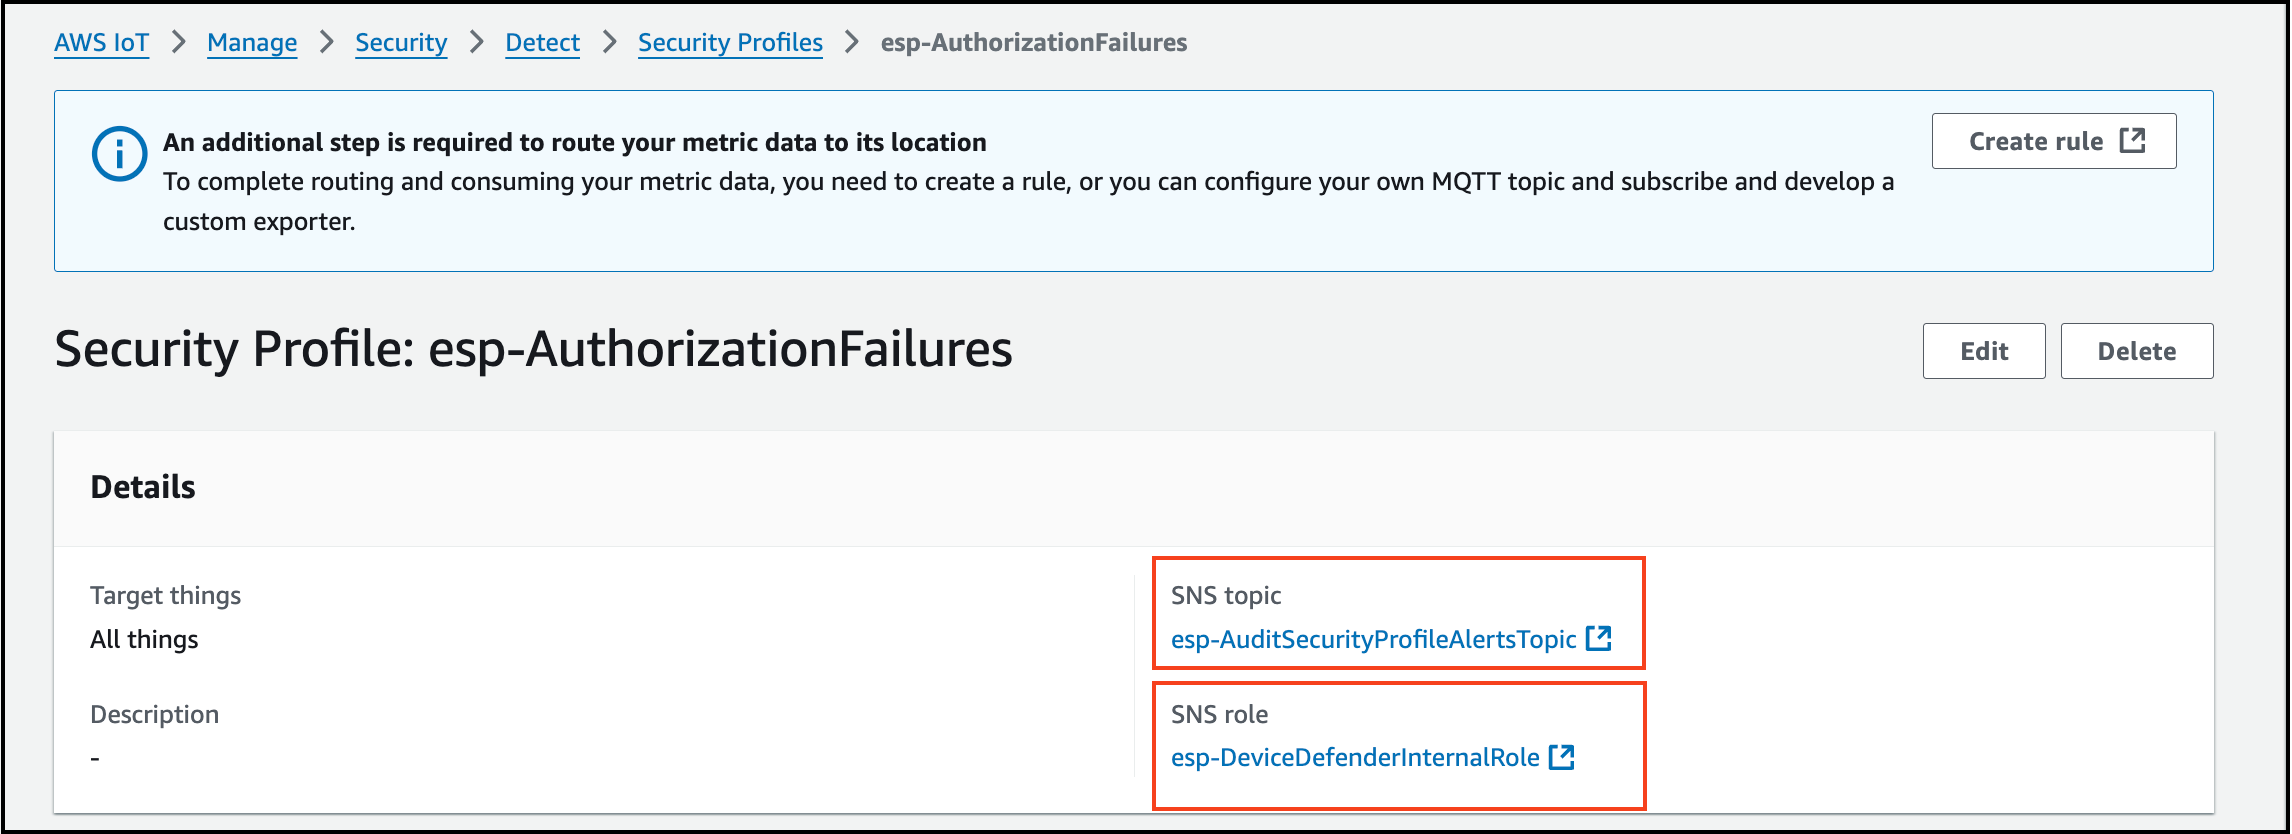
- On the right side, click
Edit. - Keep
Description, Tags & Targetsas they are (default values). ClickNext. - Under
Metric Behavior, selectSend an alert (define metric behavior). and add value 1 by selecting the option the Authorization failure in less than or equals.
- Click
Next, selectTurn on metrics export, and add SNS topic & SNS role which you copied in step 1.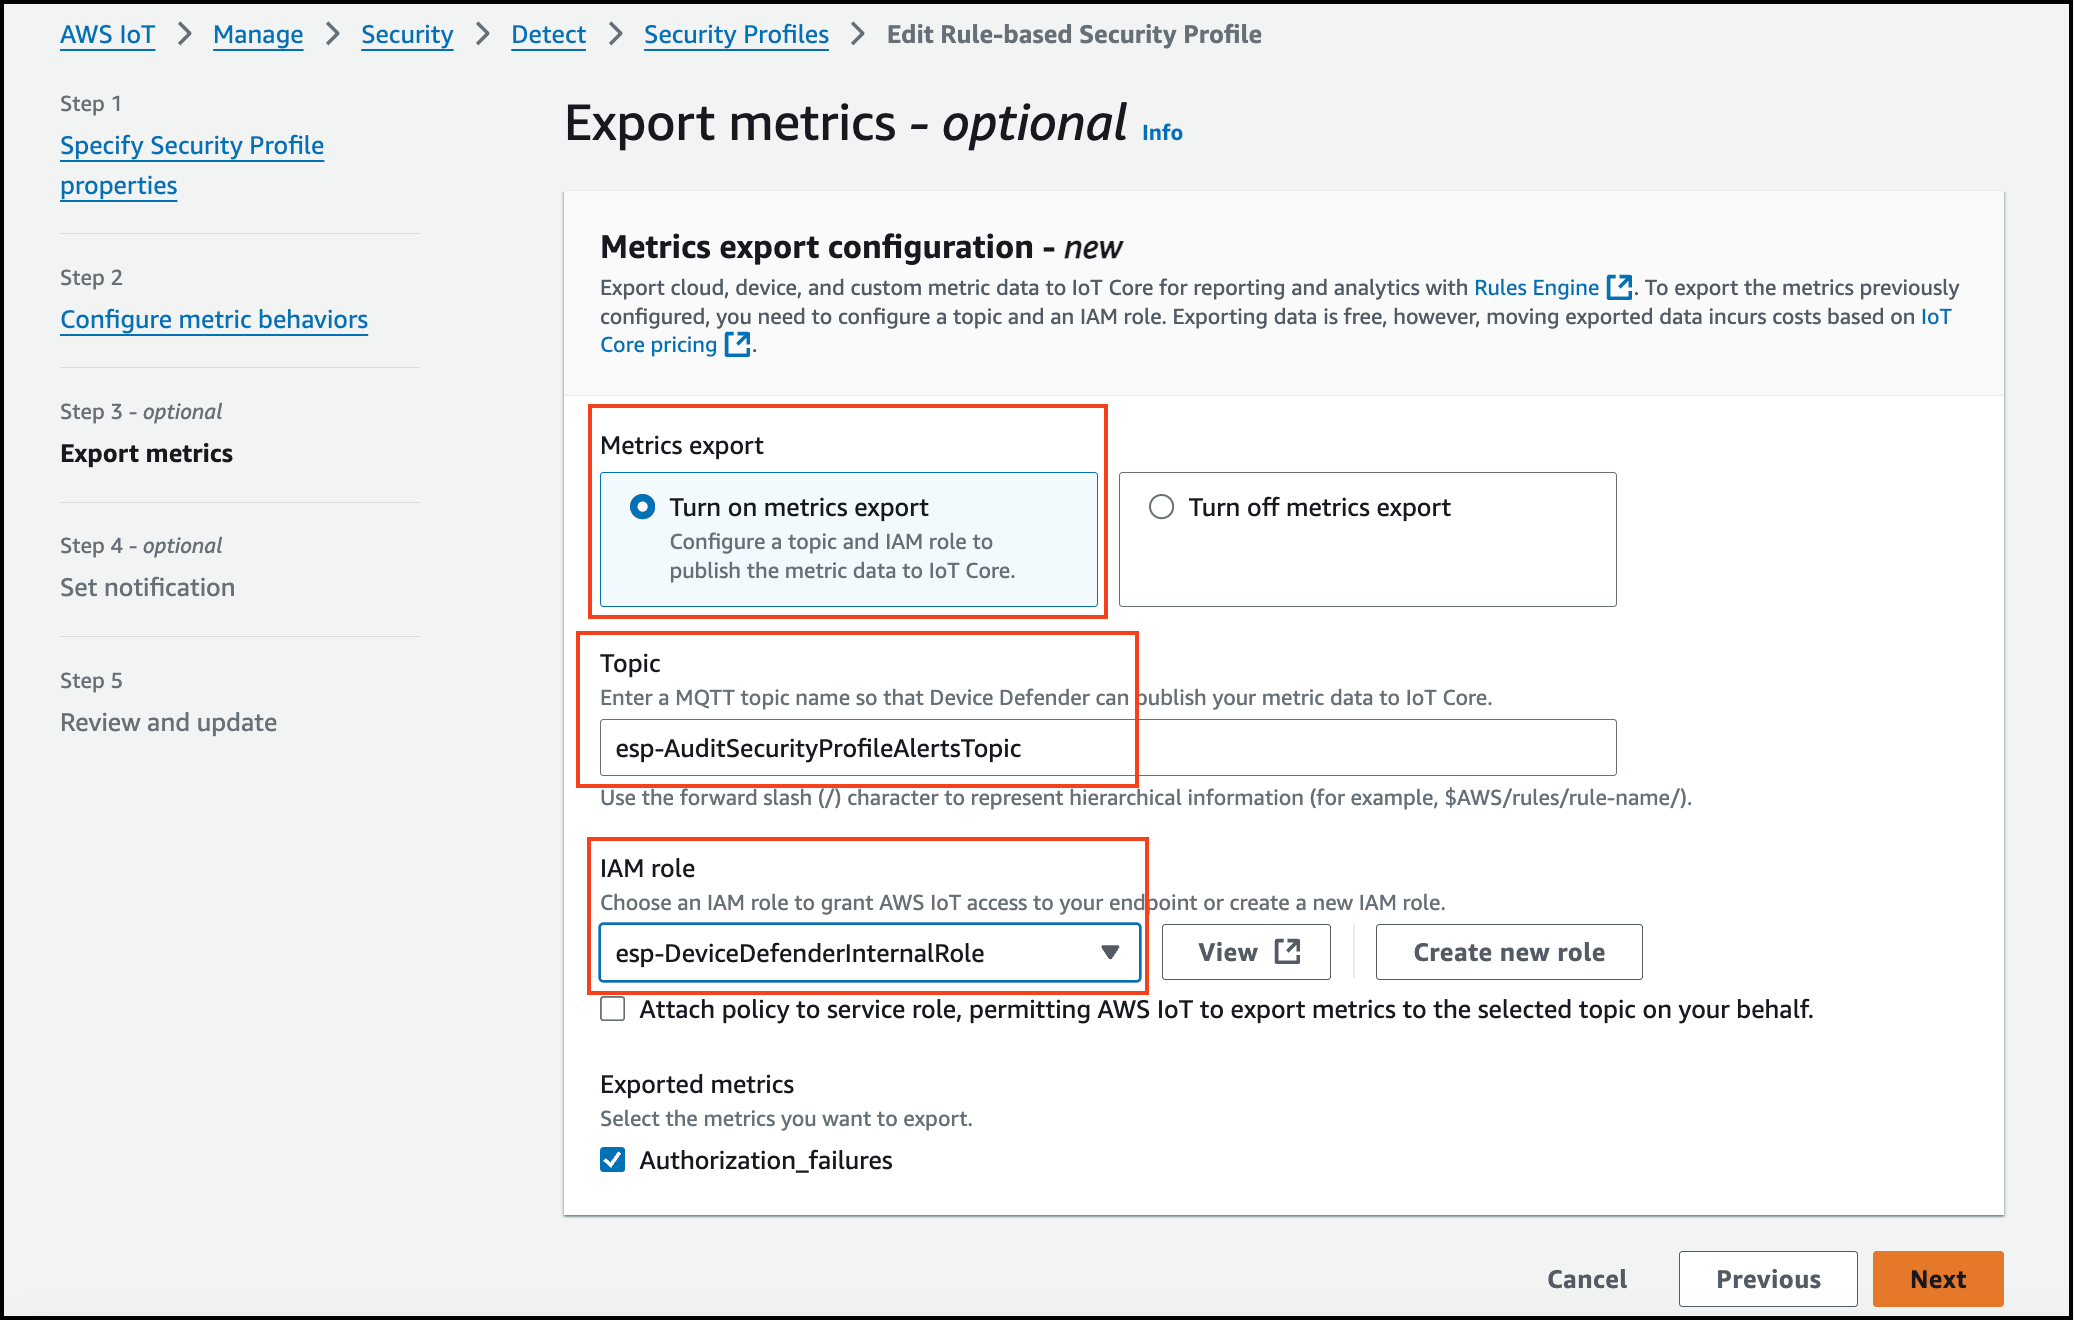
- Click
Next>Save changes.
Step 4: Enable Alerts for esp-ConnectionAttemptsByDevice Security Profile
- Copy the values of SNS topic & SNS role which you will need in the step 5.
- On the right side, click
Edit. - Keep
Description, Tags & Targetsas they are (default values). ClickNext. - Under
Metric Behavior, selectSend an alert (define metric behavior). and add value 1 by selecting the option the Authorization failure in less than or equals. - Click
Next, selectTurn on metrics export, and add SNS topic & SNS role which you copied in step 1. - Click
Next>Save changes.
Step 5: Enable Alerts for esp-MessagesSentByDevice Security Profile
- Follow the same steps, selecting
esp-MessagesSentByDevicein step 3.
Copy the values of SNS topic & SNS role which you will need in the step 5. - On the right side, click
Edit. - Keep
Description, Tags & Targetsas they are (default values). ClickNext. - Under
Metric Behavior, selectSend an alert (define metric behavior), and add value 1 by selecting the option the Authorization failure in less than or equals. - Click
Next, selectTurn on metrics export, and add SNS topic & SNS role which you copied in step 1. - Click
Next>Save changes.
You have now successfully enabled alerts for the three security profiles in AWS IoT Core.