RainMaker 部署相关的问题
我已经完成了 RainMaker 服务的部署,但未收到任何关于部署详情的邮件。我该怎么办?
-
请检查邮件是否被归类到垃圾邮件文件夹中。
-
如果邮件不在垃圾邮件文件夹中,则需要进一步排查。确保已正确配置 RainMaker 区域的邮件发送服务,参考指南:配置简单电子邮件服务。
-
在 CloudFormation 控制台中,检查所有必要的 RainMaker 组件是否成功部署,具体操作请参考部署指南:后端部署验证。
-
如果所有必要的堆栈均已成功部署,可以通过 RainMaker 管理面板重置超级管理员密码。
密码重置步骤:
-
进入 RainMaker 管理面板的登录页面,点击
Forgot Password。 -
输入注册的超级管理员邮箱地址,系统会发送一个验证码到你的邮箱。
-
输入验证码,并设置新密码。
-
使用新密码登录 RainMaker 管理面板。
-
获取 RainMaker API URL(基础 URL)
-
使用管理员账号登录 RainMaker 管理面板。
-
进入
Deployment Settings标签页。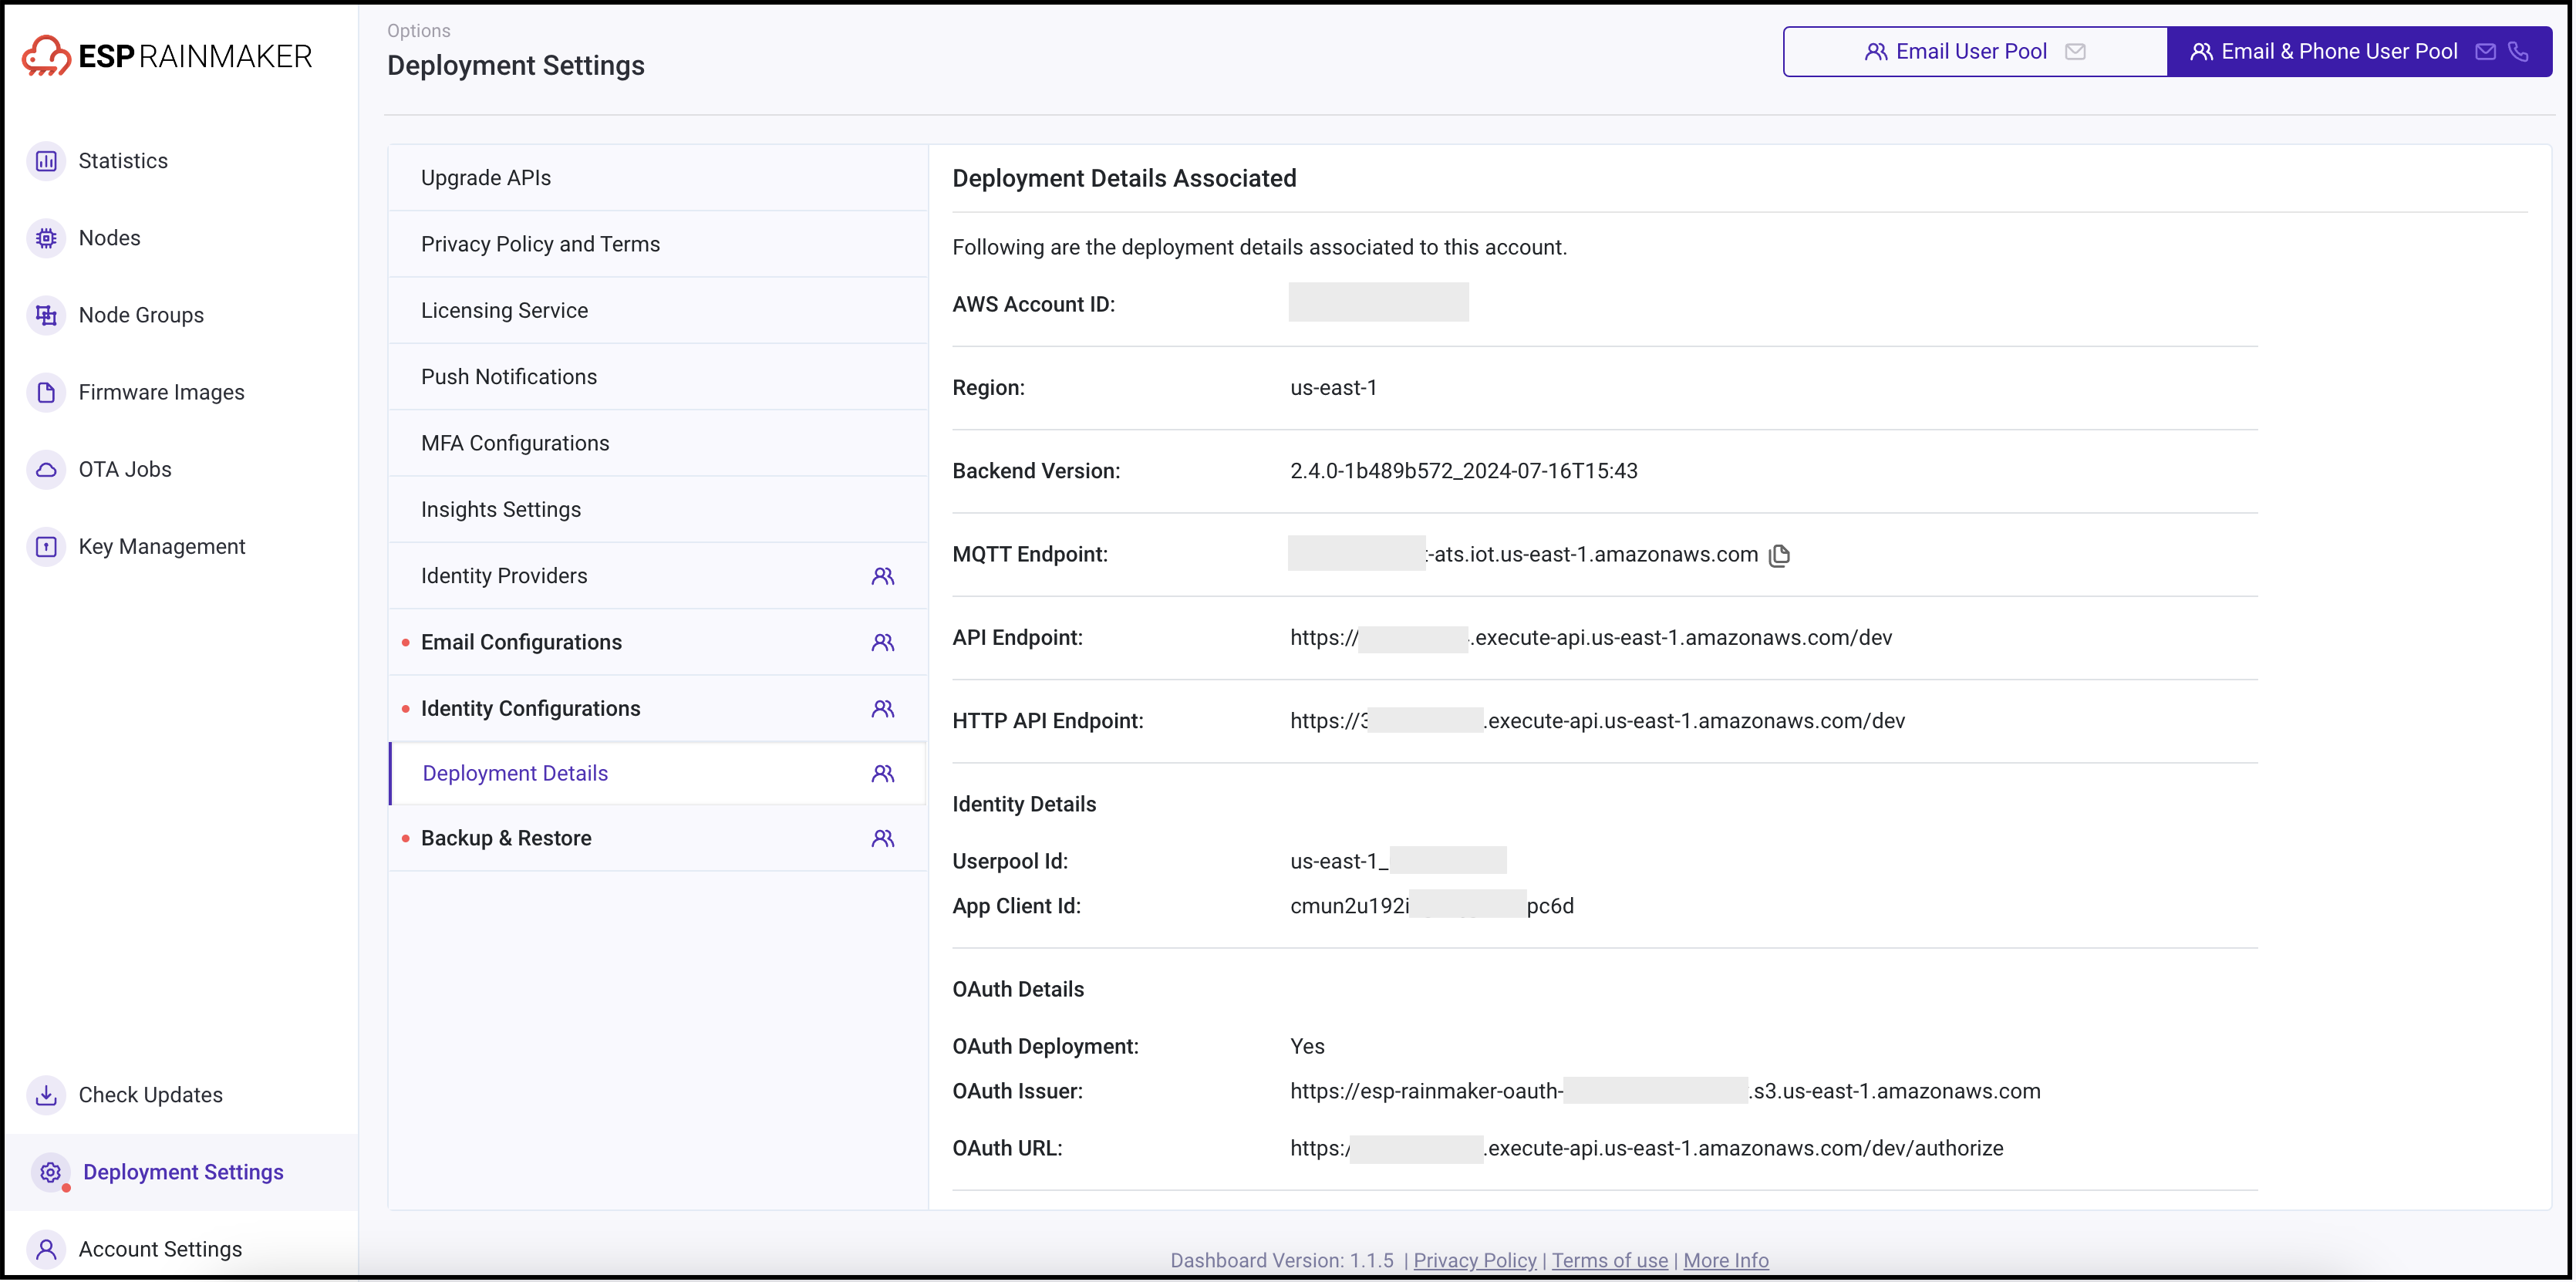
-
确定 API 网关类型:
-
REST 网关:默认的传统网关,适用于所有部署。
-
HTTP 网关:新推出的低成本网关(成本降低约 70%)。
注意:该网关需要用户迁移至新用户池,迁移步骤参考用户池迁移指南。
警告选择 HTTP 网关时,ESP API Rate Limiter不可用,这可能导致 API 被恶意用户滥用。
OAuth-only RainMaker 部署 只能使用 HTTP 网关。
-
-
选择所需的 API 端点。
-
如有任何疑问,请联系 ESP RainMaker 支持团队,邮箱地址为 esp-rainmaker-support@espressif.com。
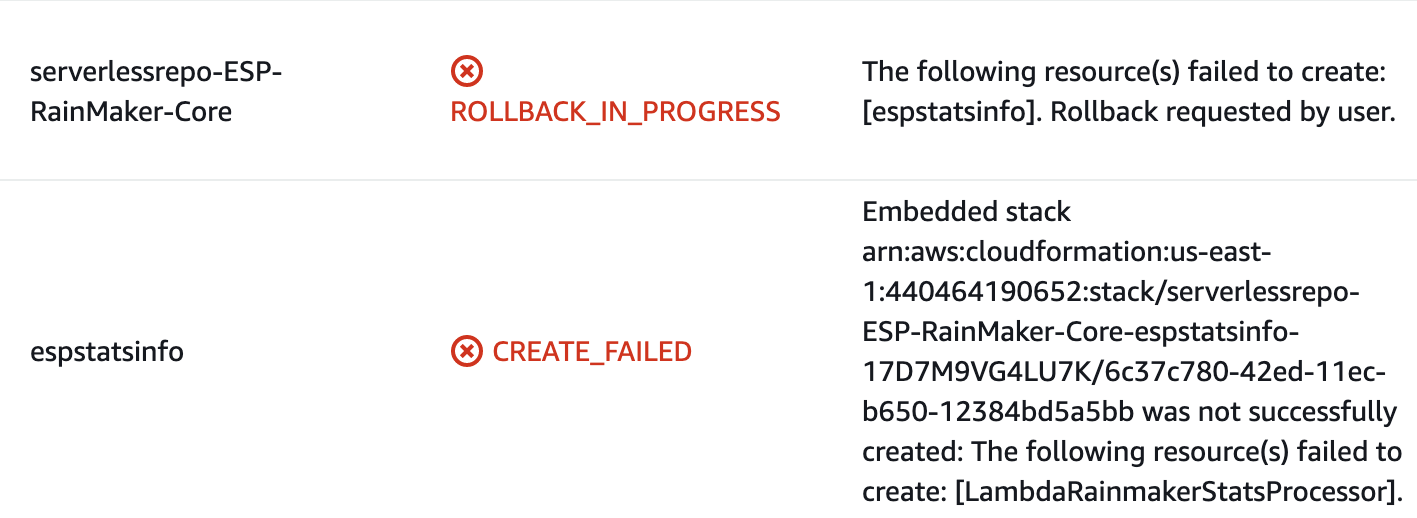
ESP-RainMaker-Core 部署失败,如何解决?
-
登录 AWS 控制台。
-
在 AWS 控制台搜索
CloudFormation,然后选择serverlessrepo-ESP-RainMaker-Core。 -
进入
Resources标签页,搜索espstatsinfo,然后点击相关的堆栈链接。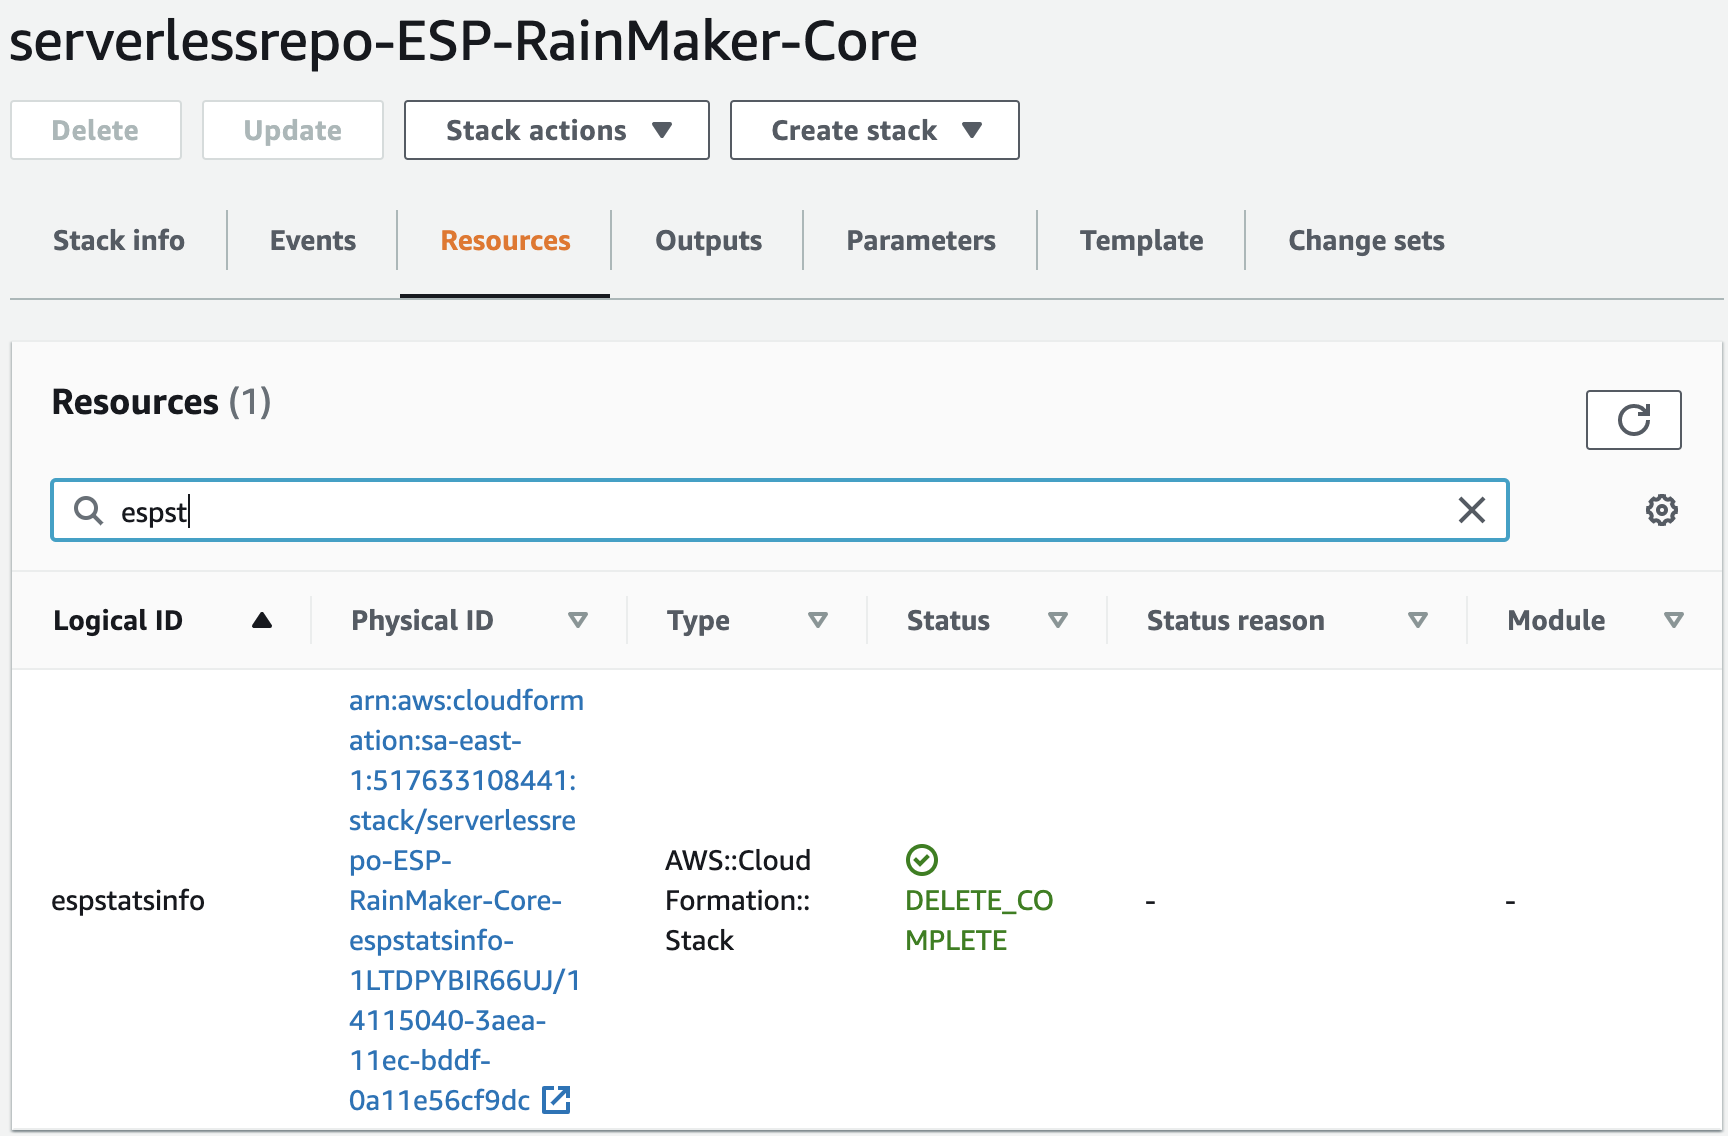
-
打开
Events标签页,查找CREATE_FAILED状态信息。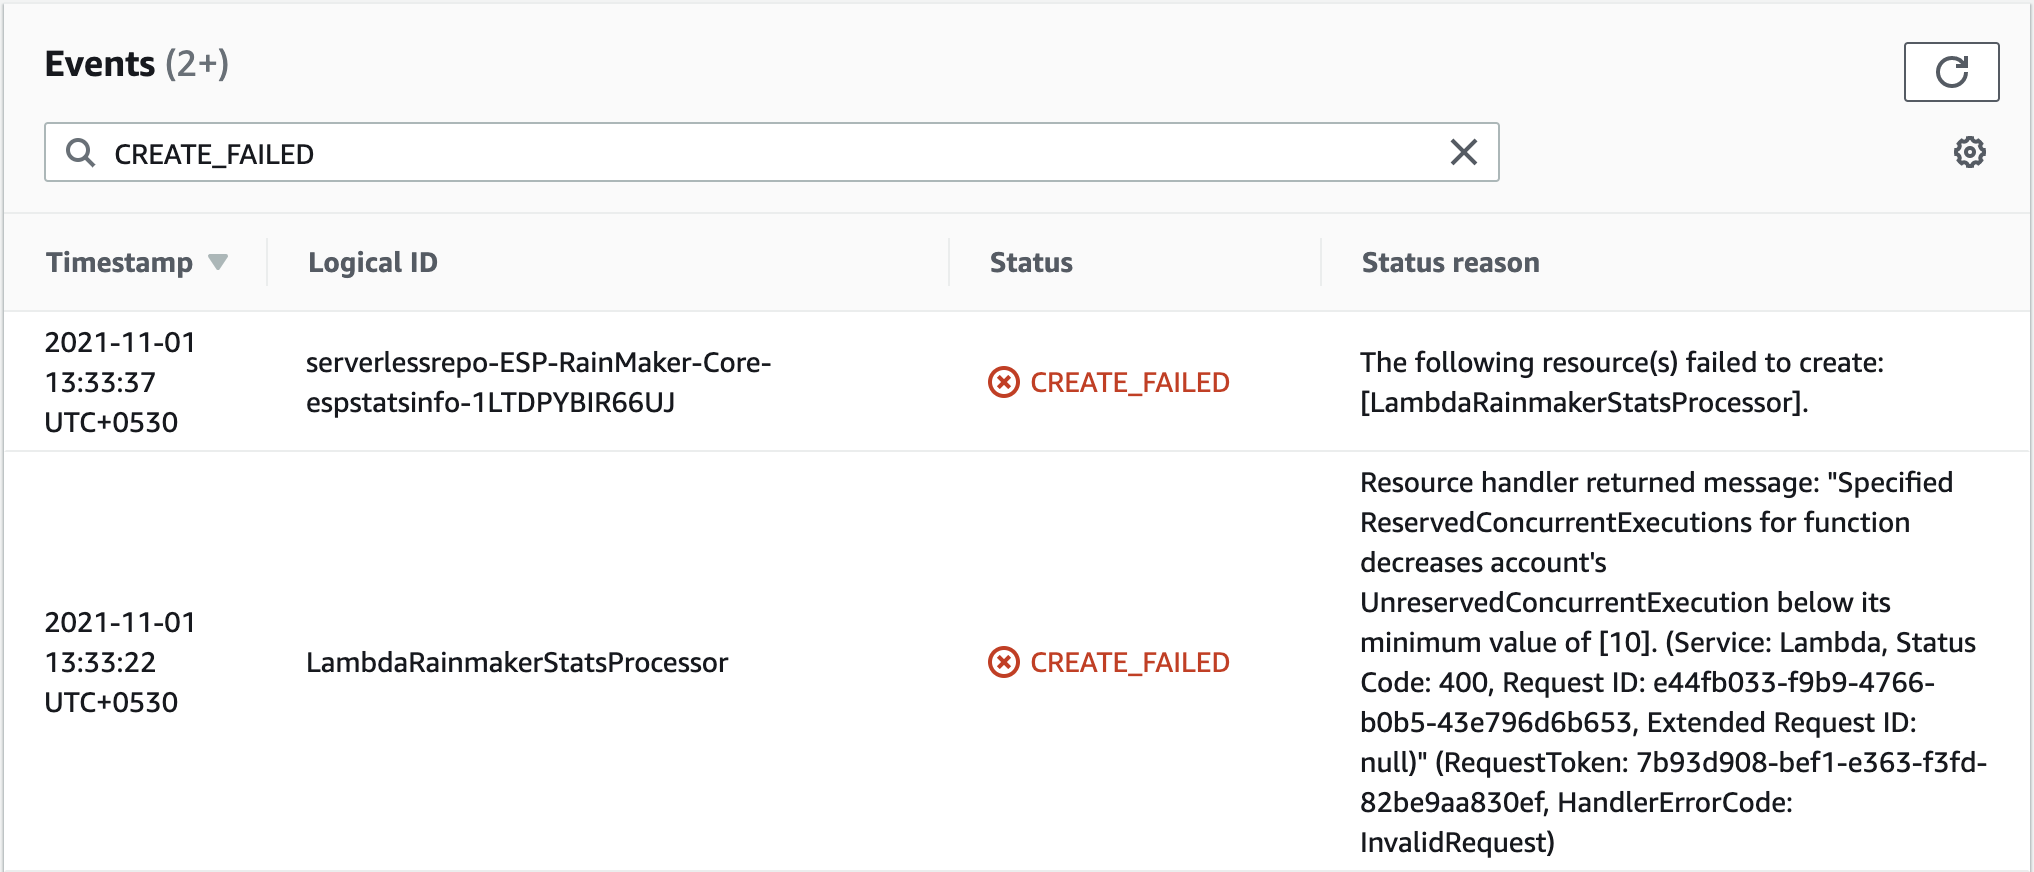
-
如果错误信息与上图类似,则问题可能与 Lambda 并发数配额相关。请向 AWS 提交支持请求以解决此问题。
提交支持请求的步骤:
-
打开 AWS 控制台,搜索
Support。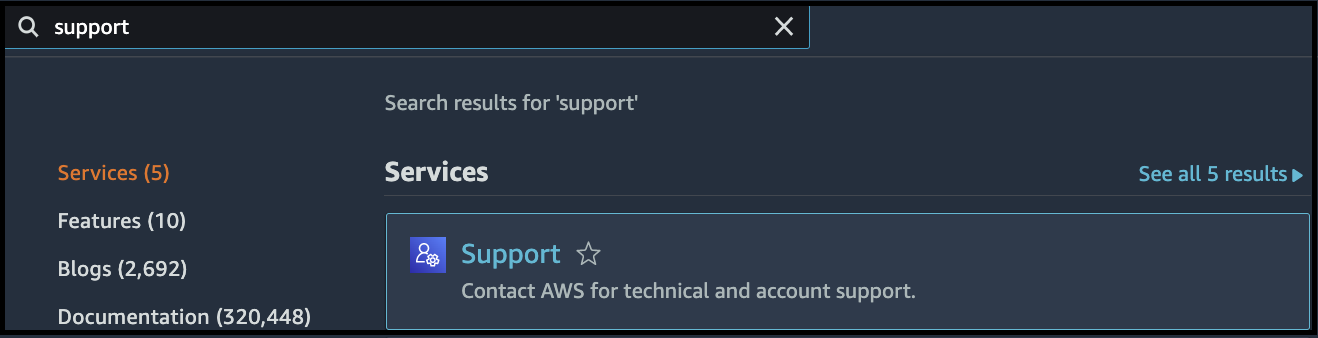
-
点击
Create case。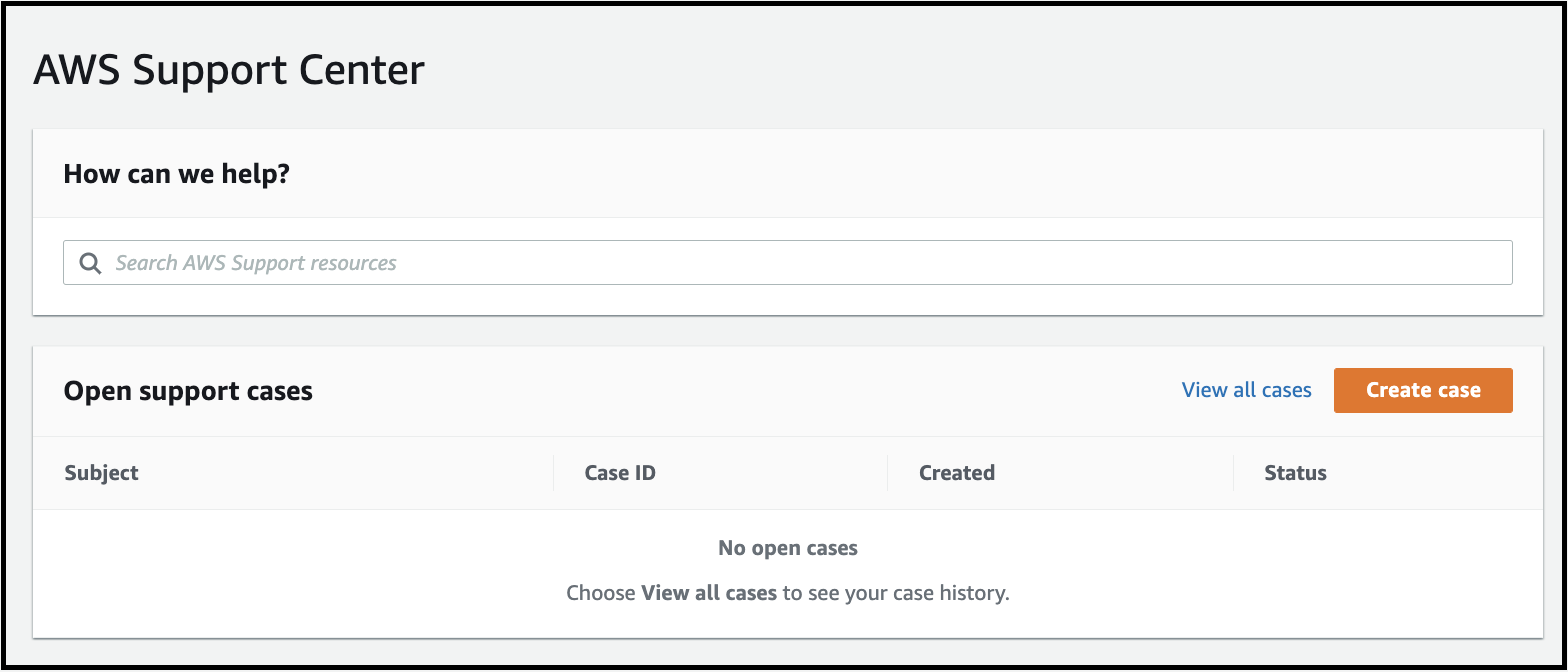
-
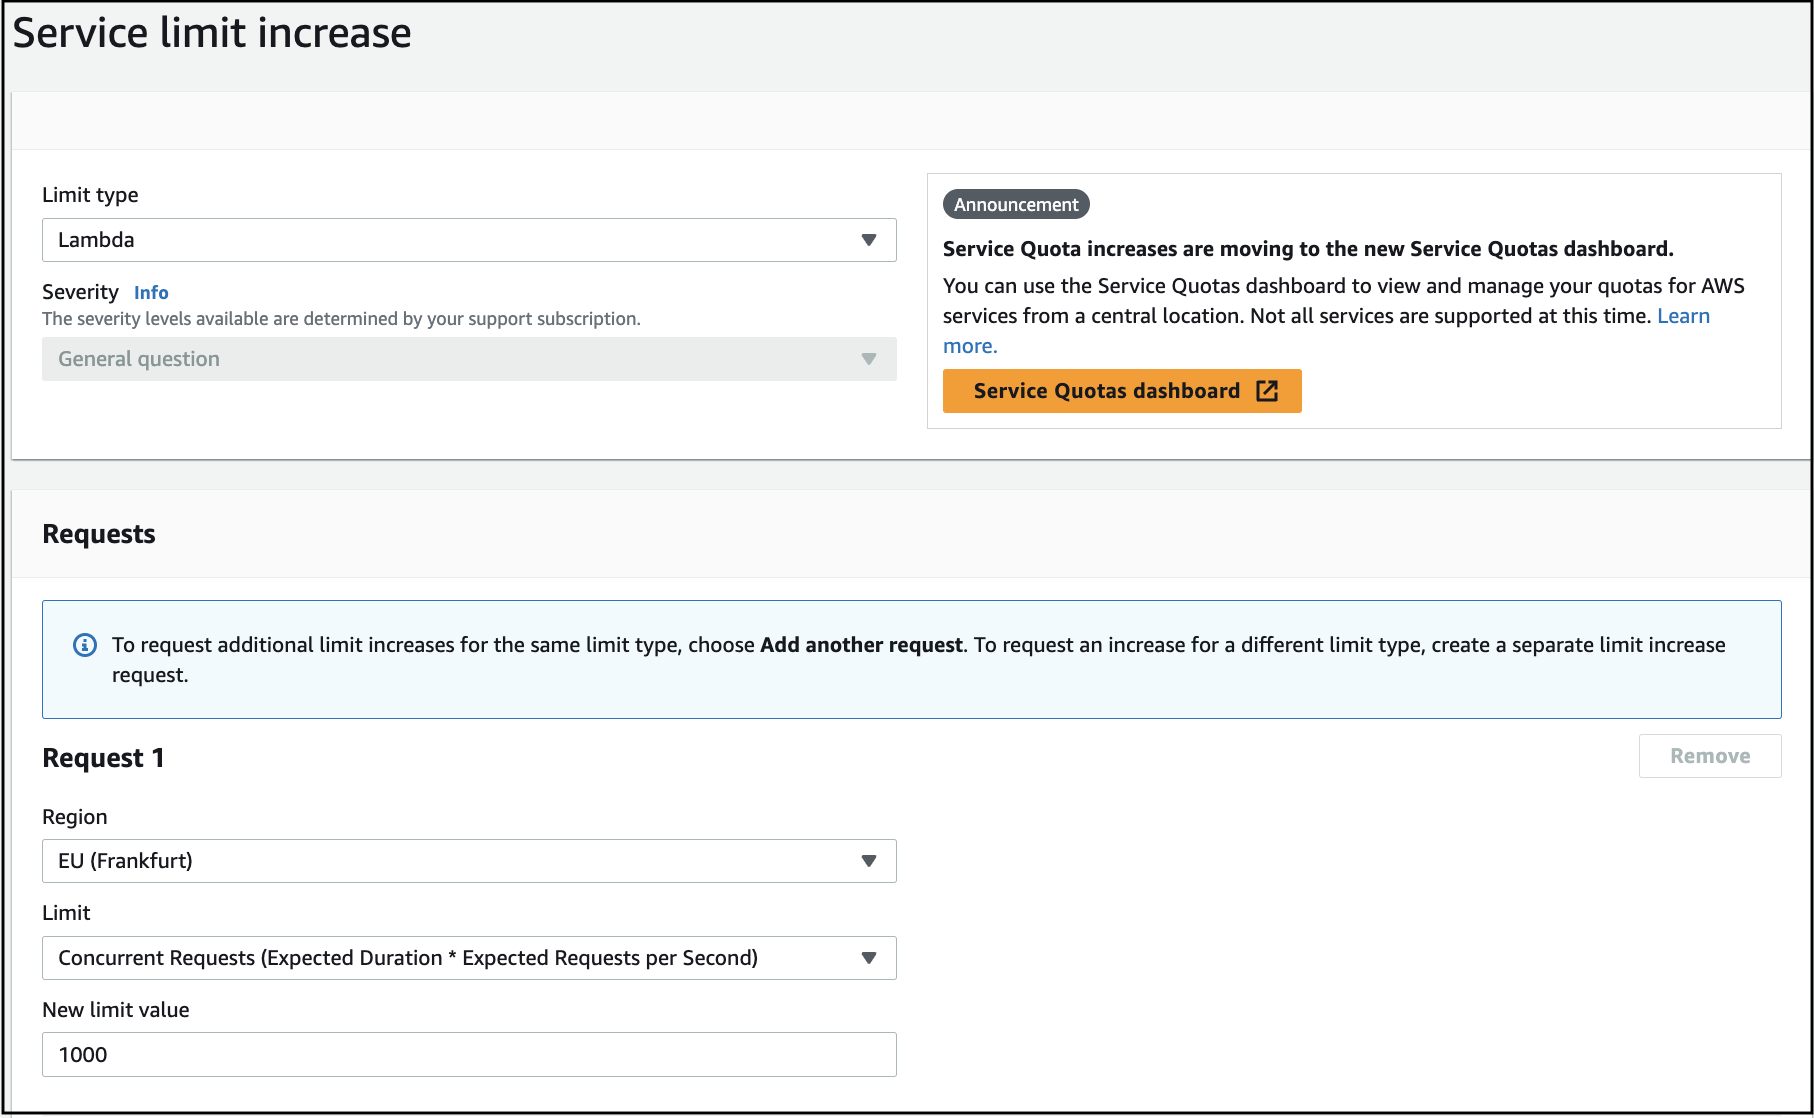
选择
Service limit increase(请求增加服务使用配额),然�后在Limit Type(配额类型)中选择Lambda,如下所示: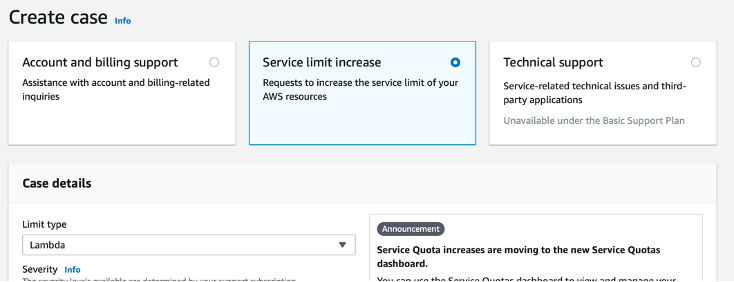
-
填写详细信息:
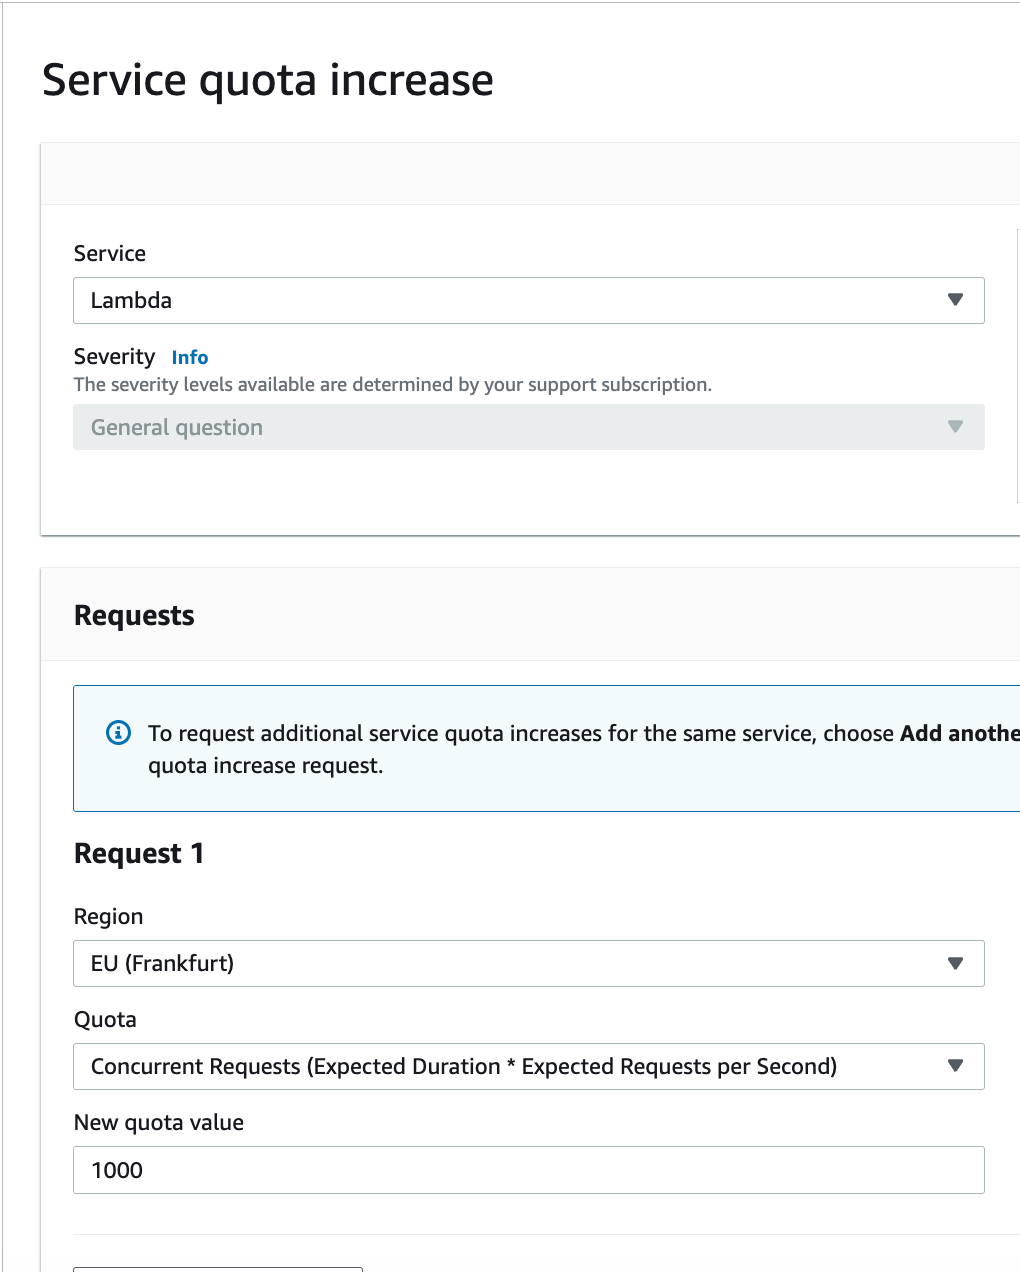
-
添加以下信息:
- 选择你的部署区域
- Limit: 并发请求数(预期持续时间 × 每秒预期请求数)
- New Limit Value: 1000
-
添加请求描述:
我们正在部署我们的产品:https://rainmaker.espressif.com/。 由于当前并发数配额设为 10,无法完成部署。 请将并发数配额提高到 1000。
-
提交请求。
在 CloudFormation 中找不到 ESP-RainMaker-Base-API 堆栈。
- ESP-RainMaker-Base-API 堆栈在 RainMaker 的初始部署后被禁用。
- 如果你需要清理并重新部署 RainMaker,请联系 Espressif RainMaker 团队申请访问权限,邮箱地址为 esp-rainmaker-support@espressif.com。
- 如果仅进行 RainMaker 升级,无需更新 ESP-RainMaker-Base-API 堆栈。
如何确认 v3.1.0 升级停机结束后系统是否正常运行?
-
登录 AWS 管理控制台。
-
打开
IoT Core AWS服务。 -
从左侧菜单中,展开
Security,点击Policies,然后选择esp-rainmaker-iot-policy。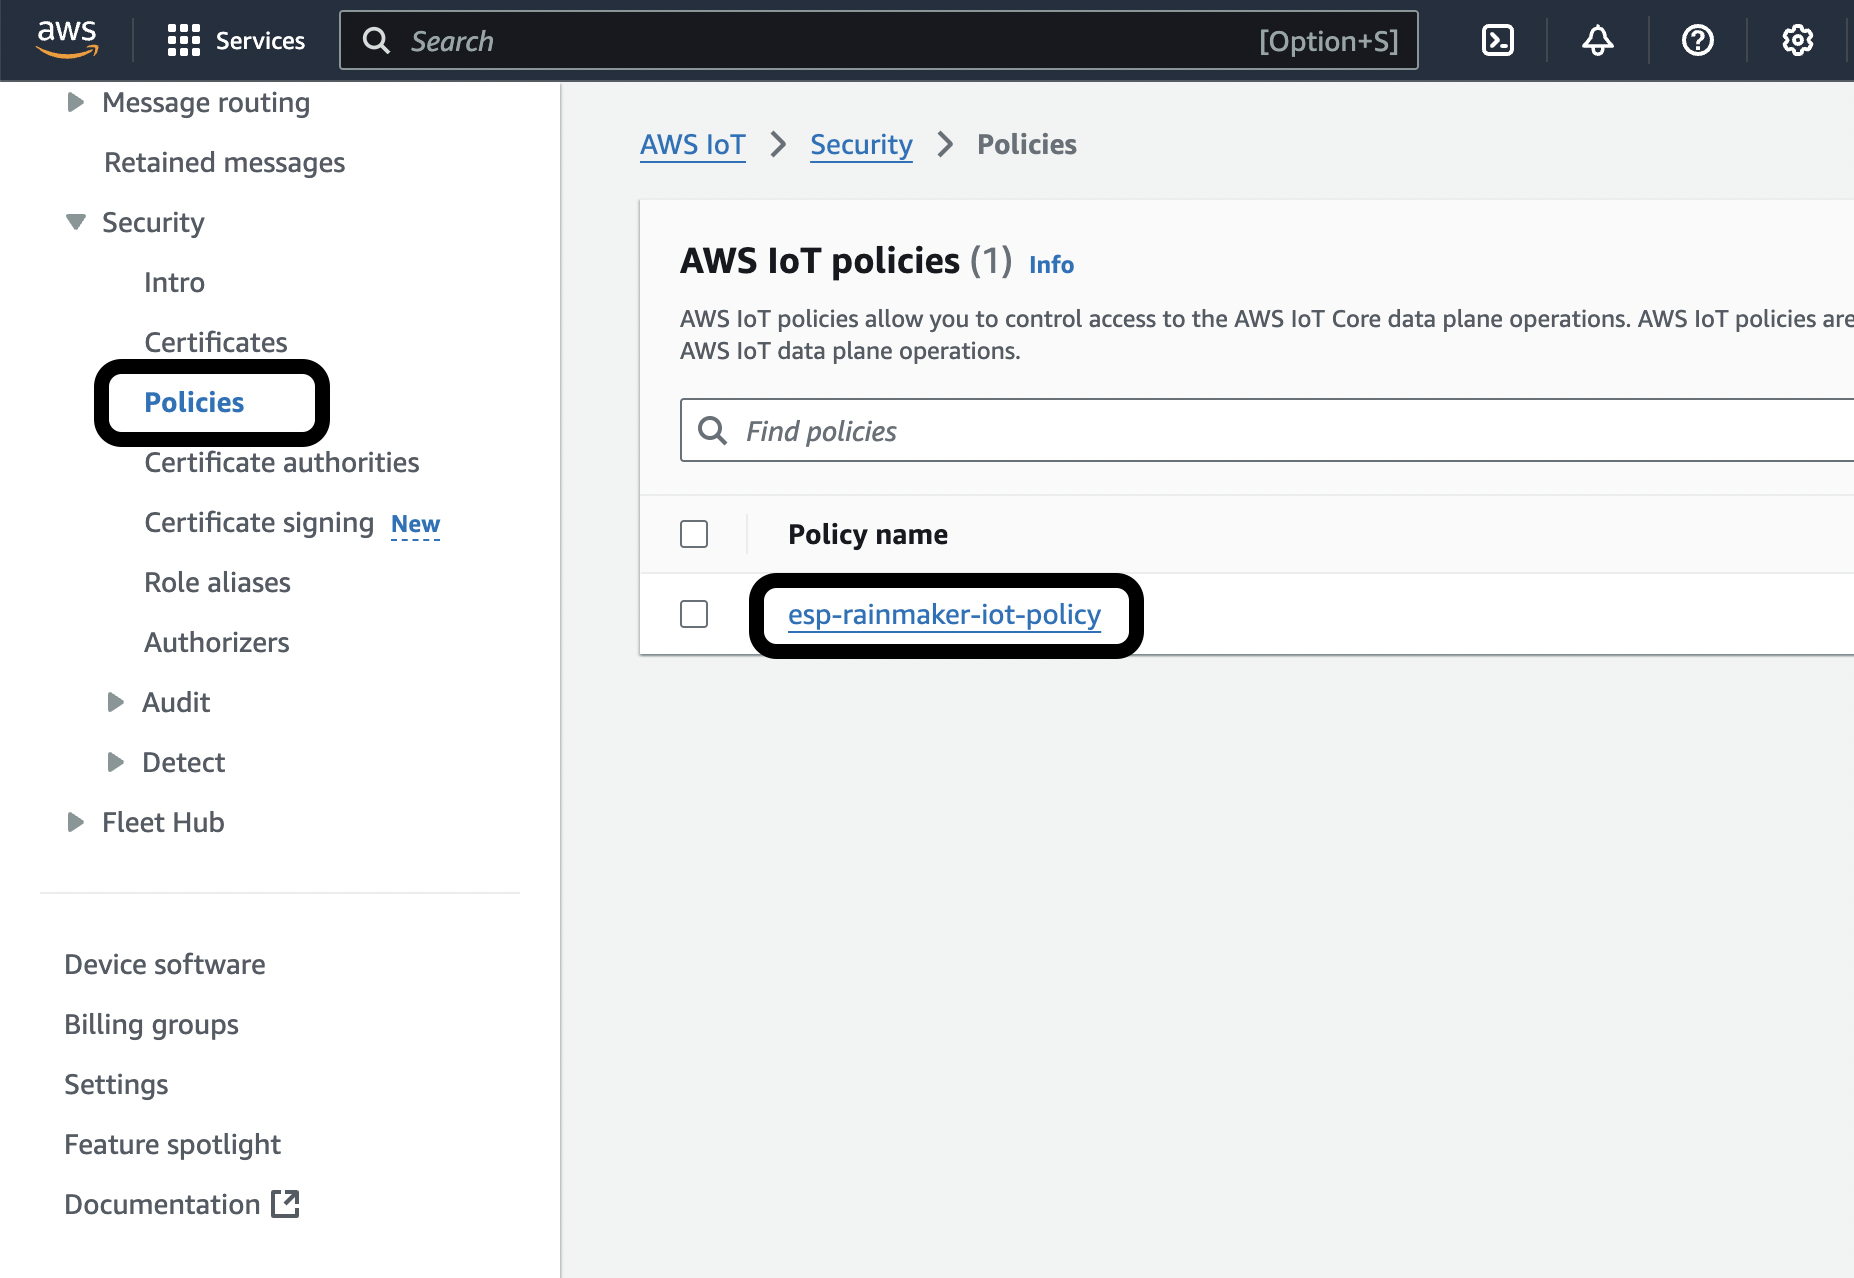
-
如果
Active策略如下所示: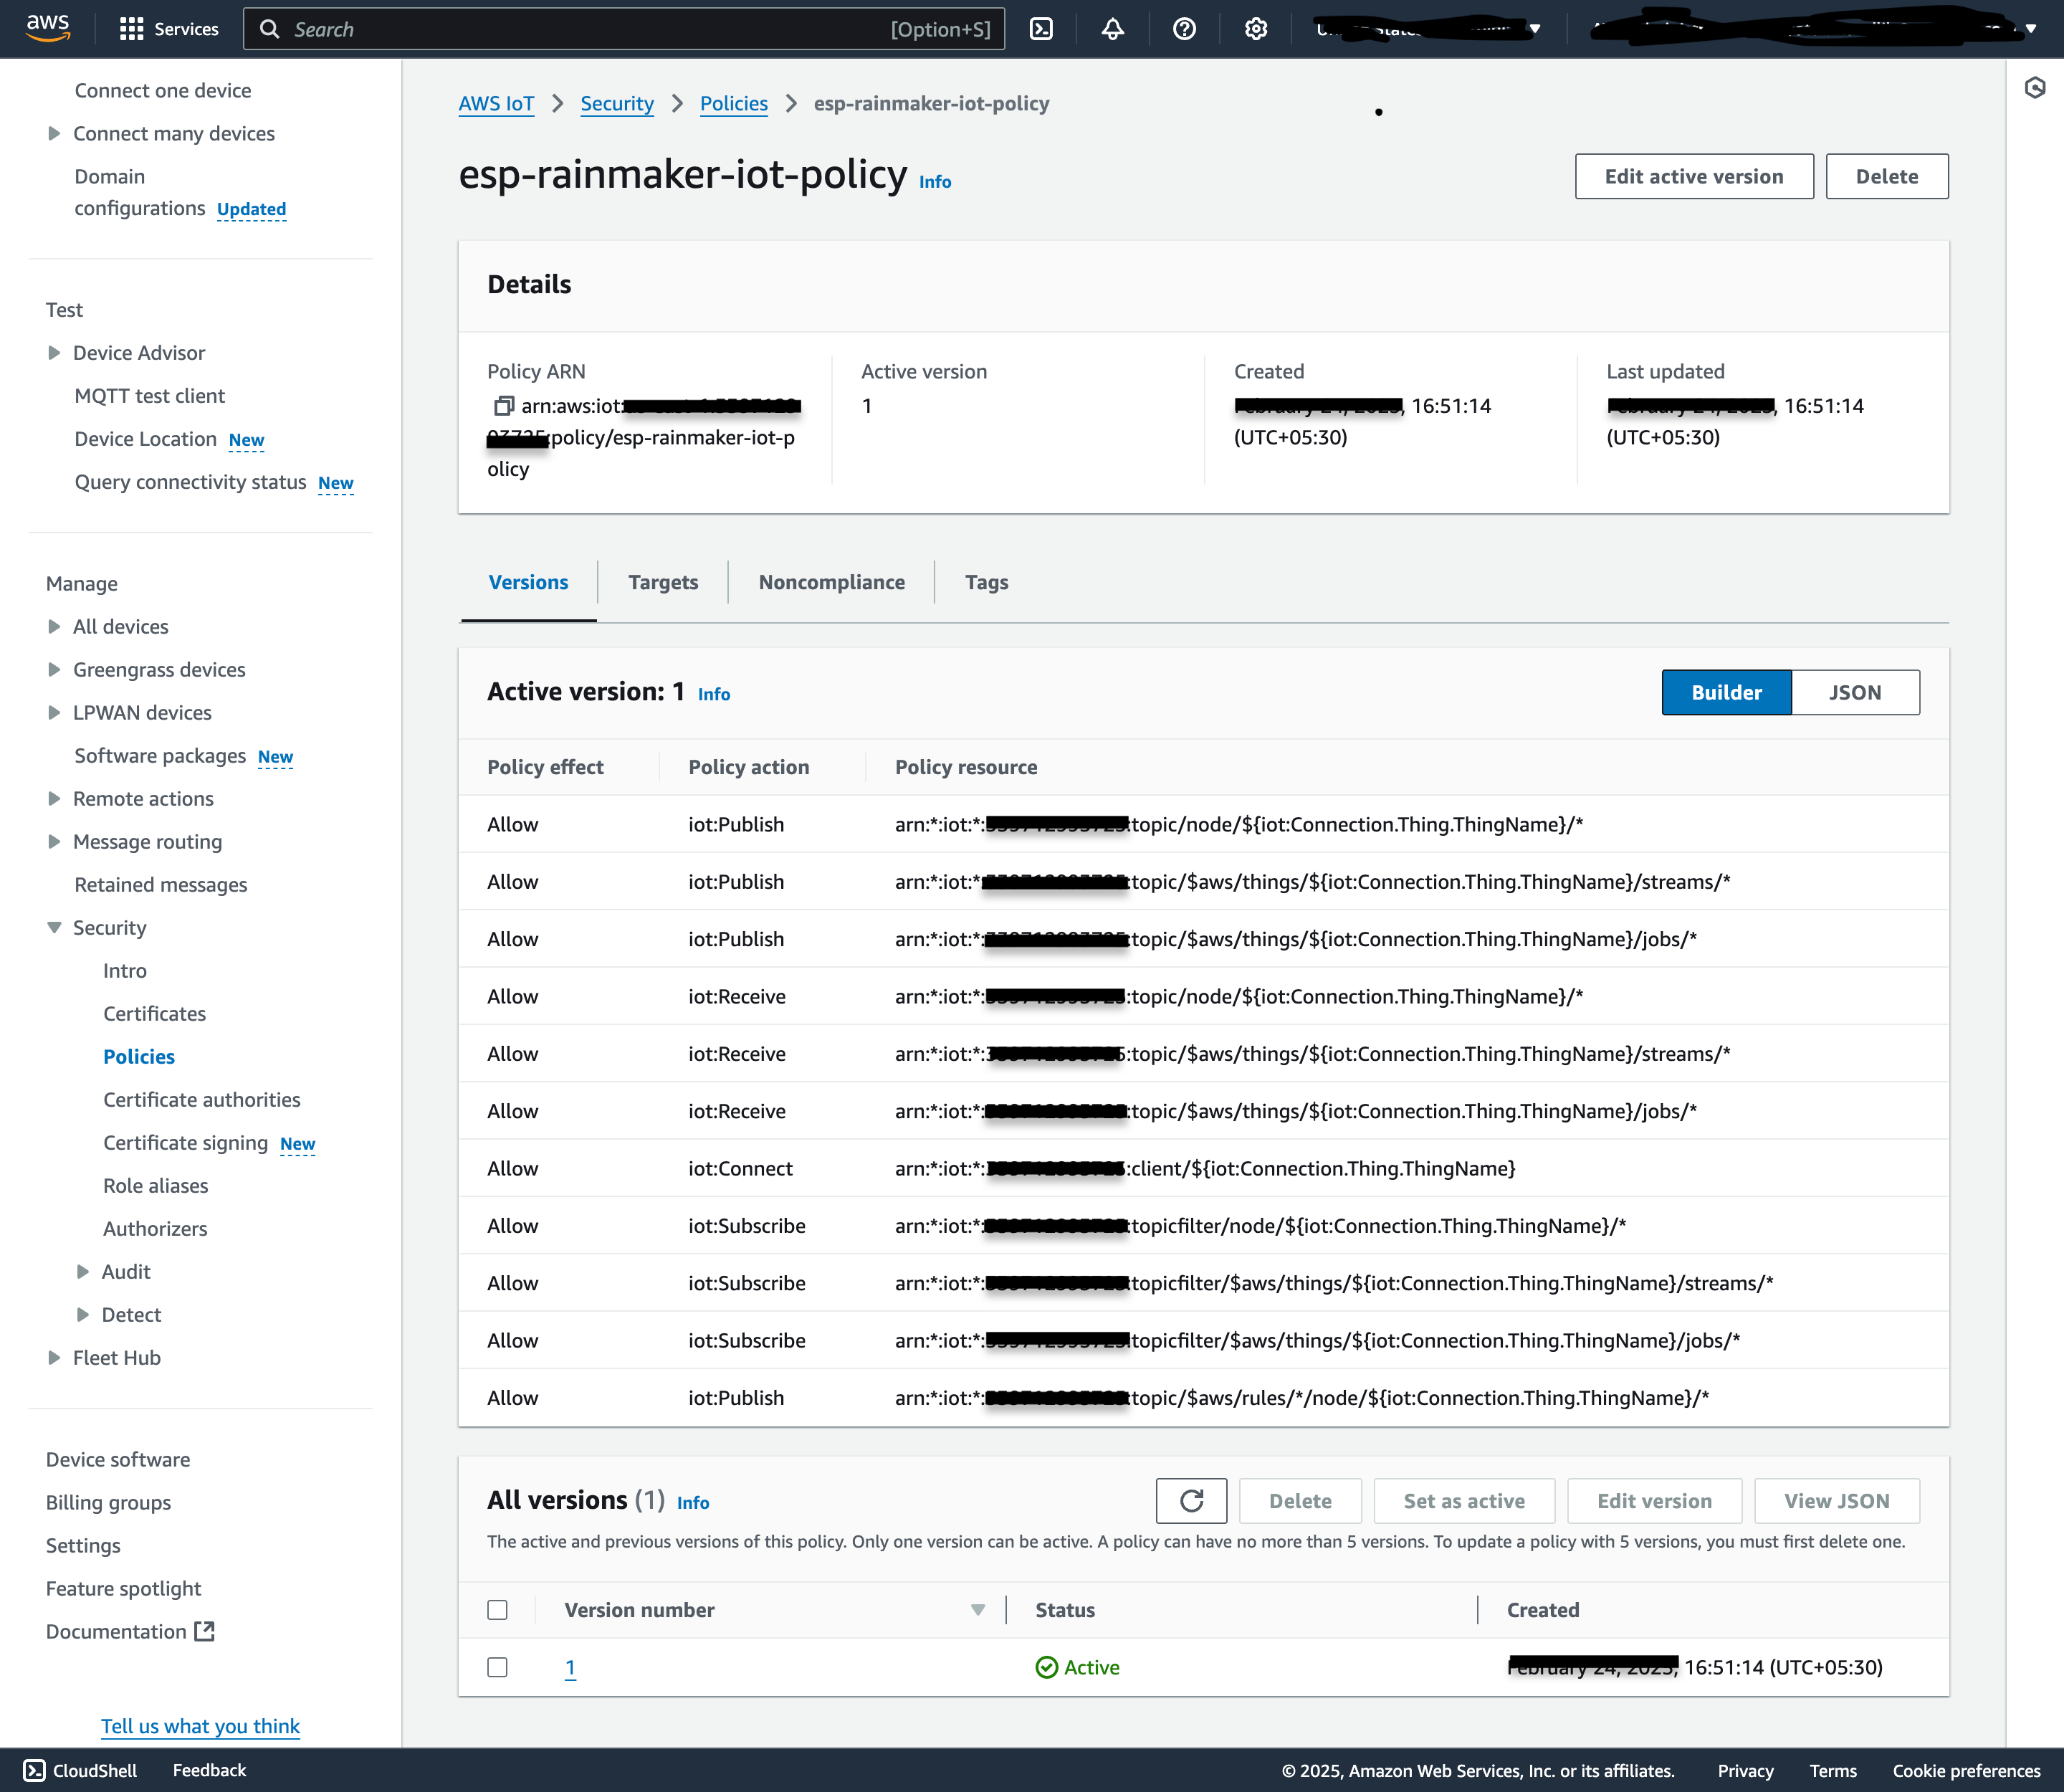
则表示系统正常运行,没有 MQTT 停机,并且设备已连接。
-
如果
Active策略看起来可能是仅连接策略: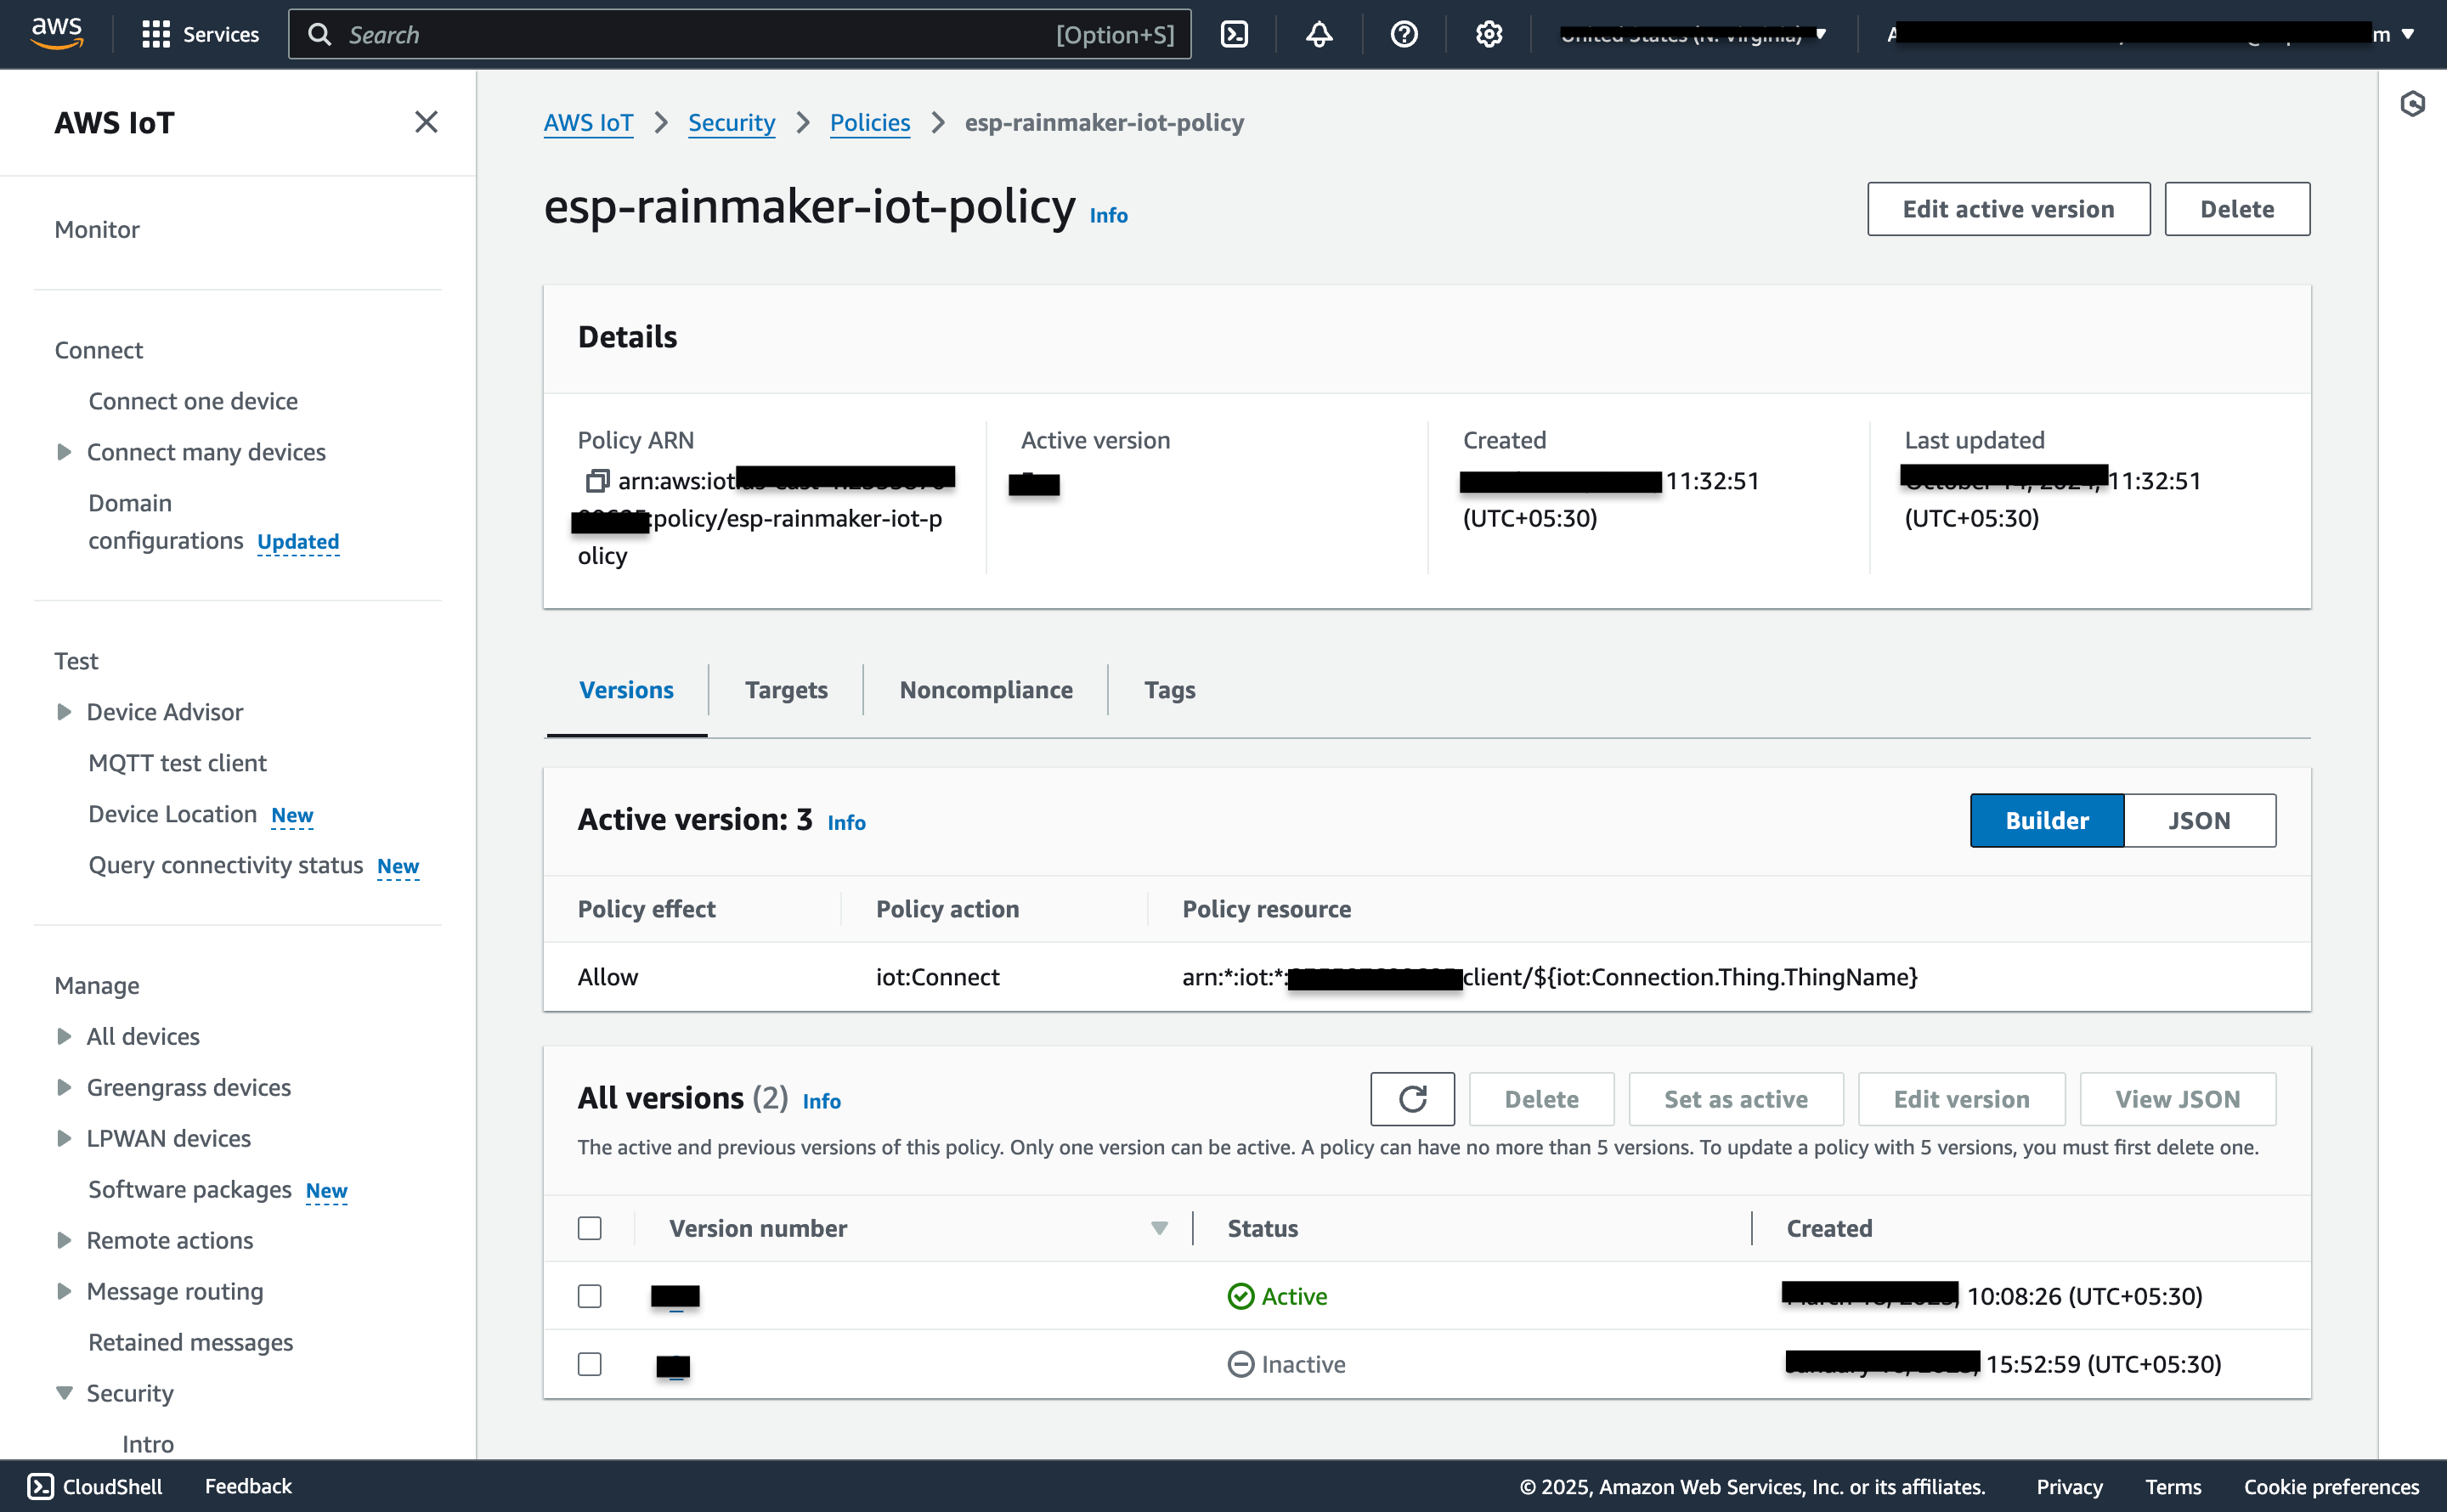
请检查是否有任何
Inactive版本如下所示: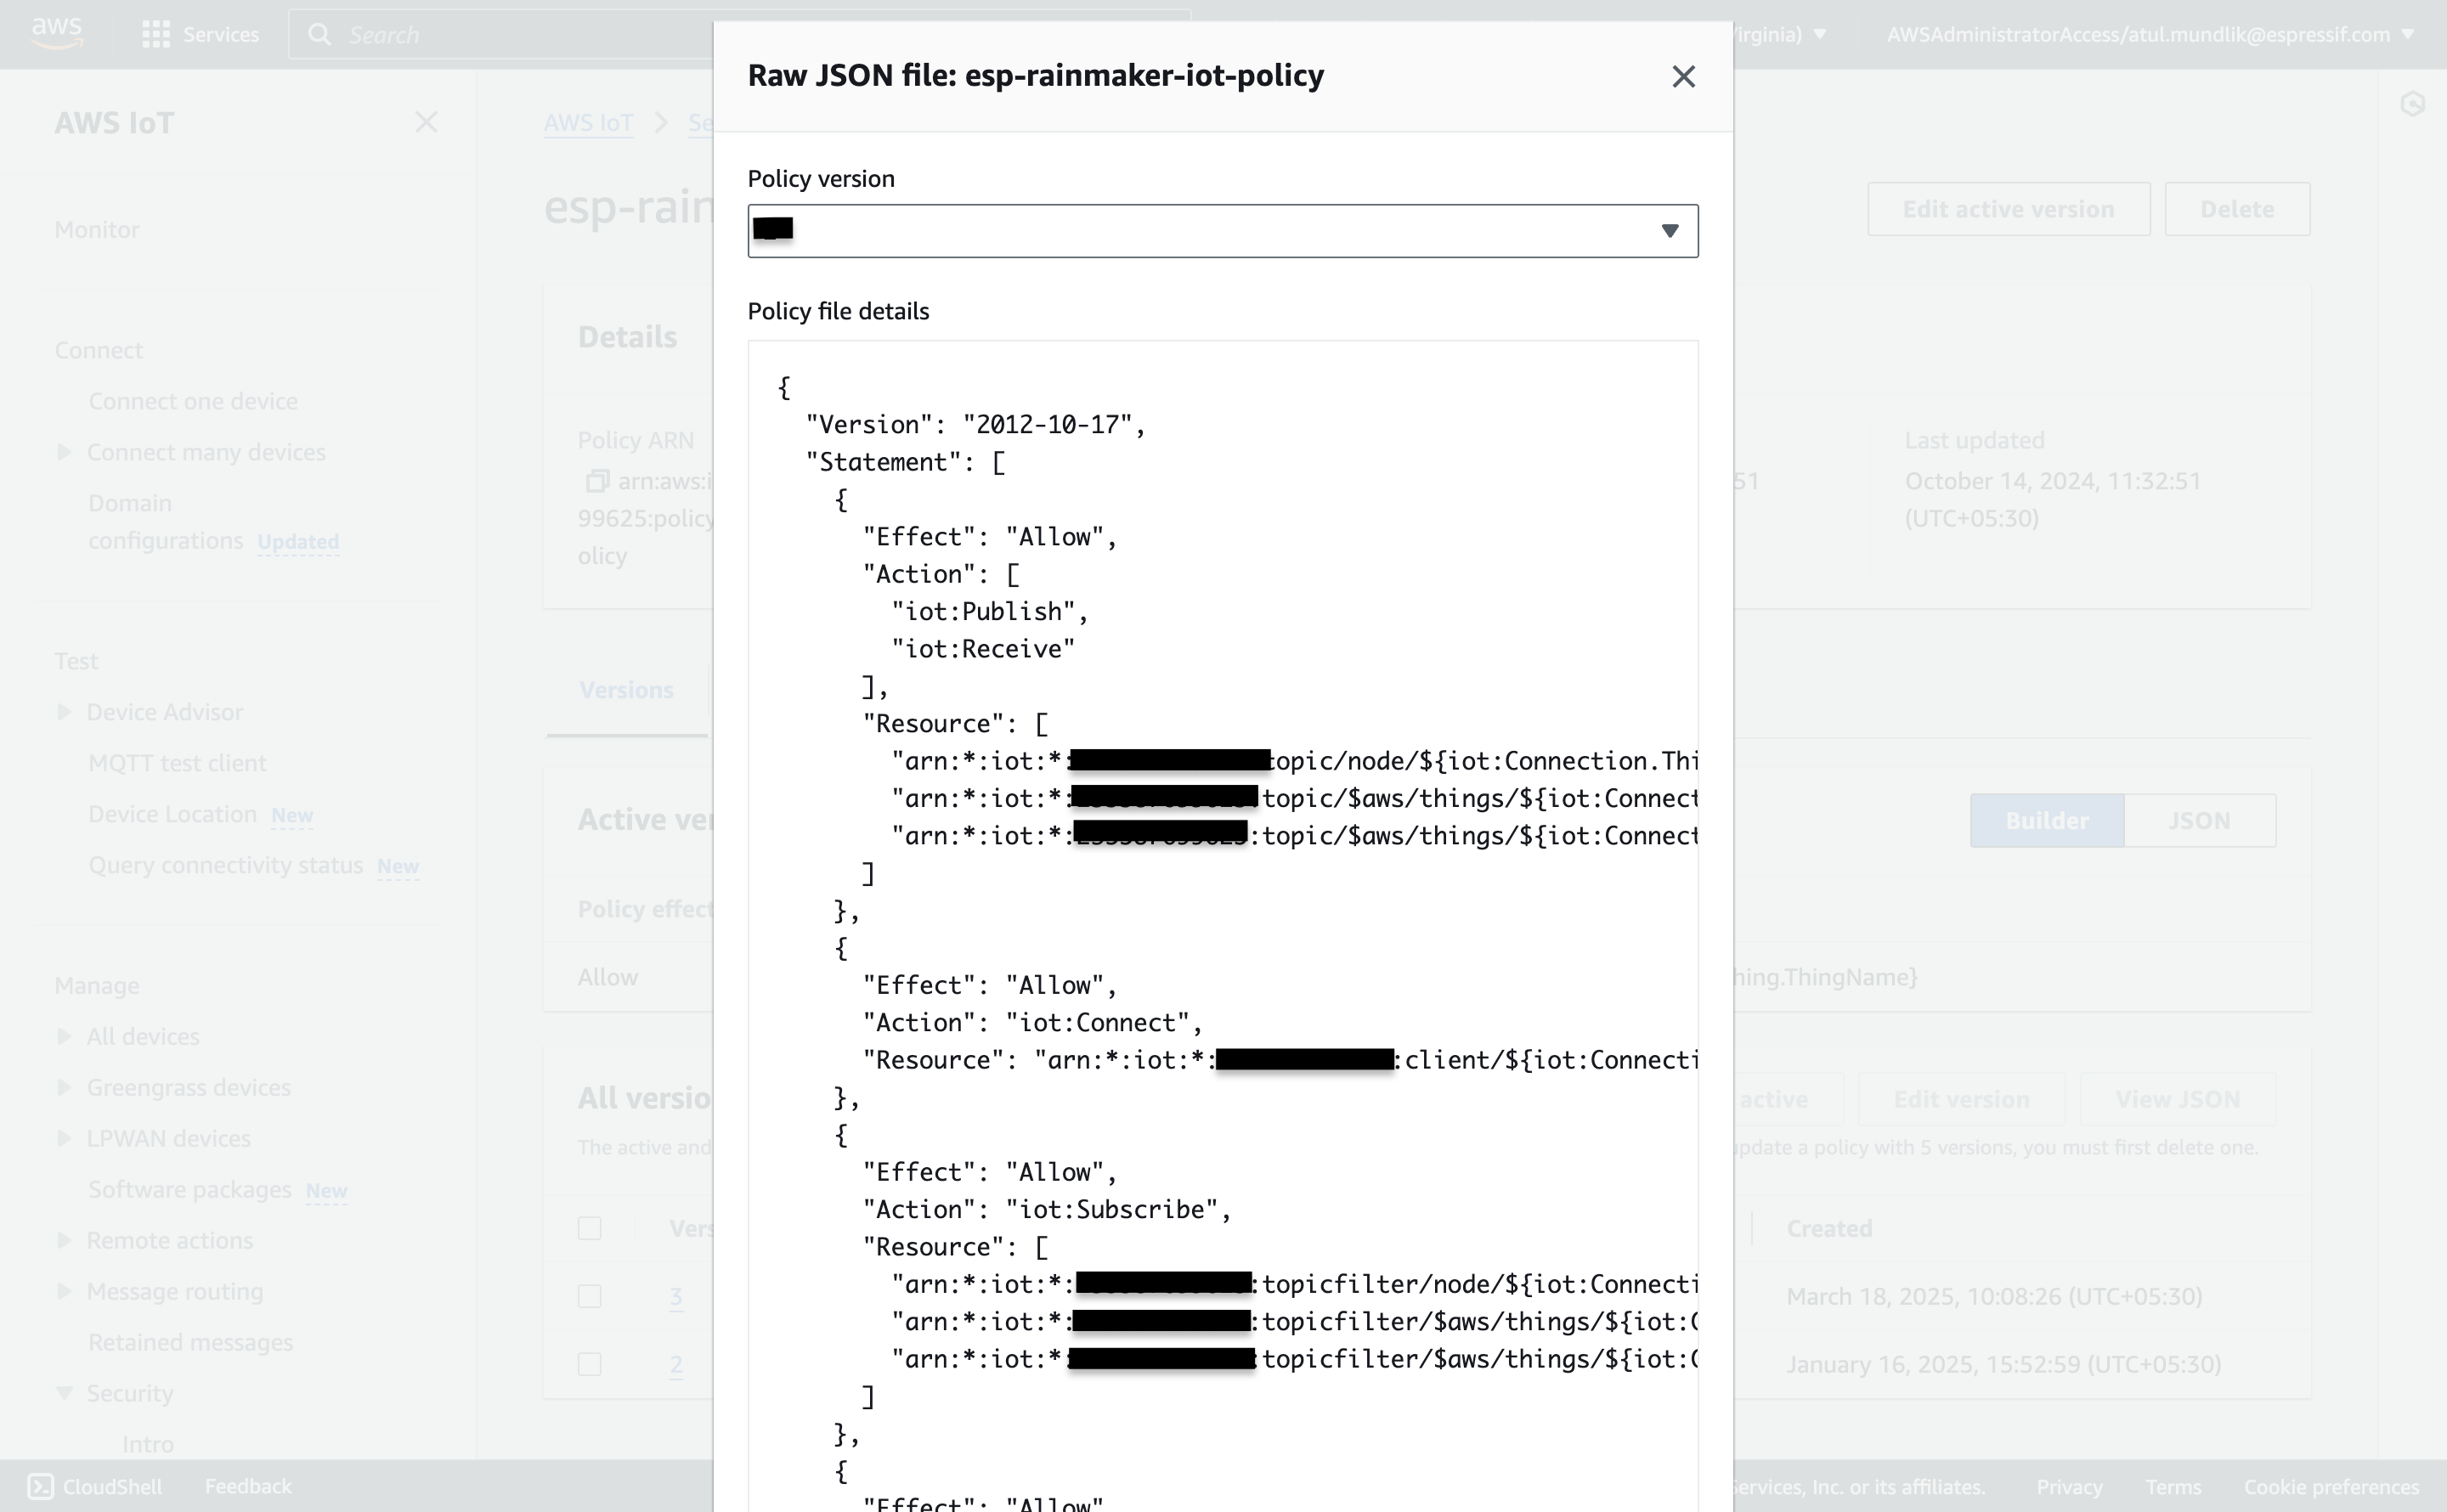
选择该
Inactive版本并点击Set as Active。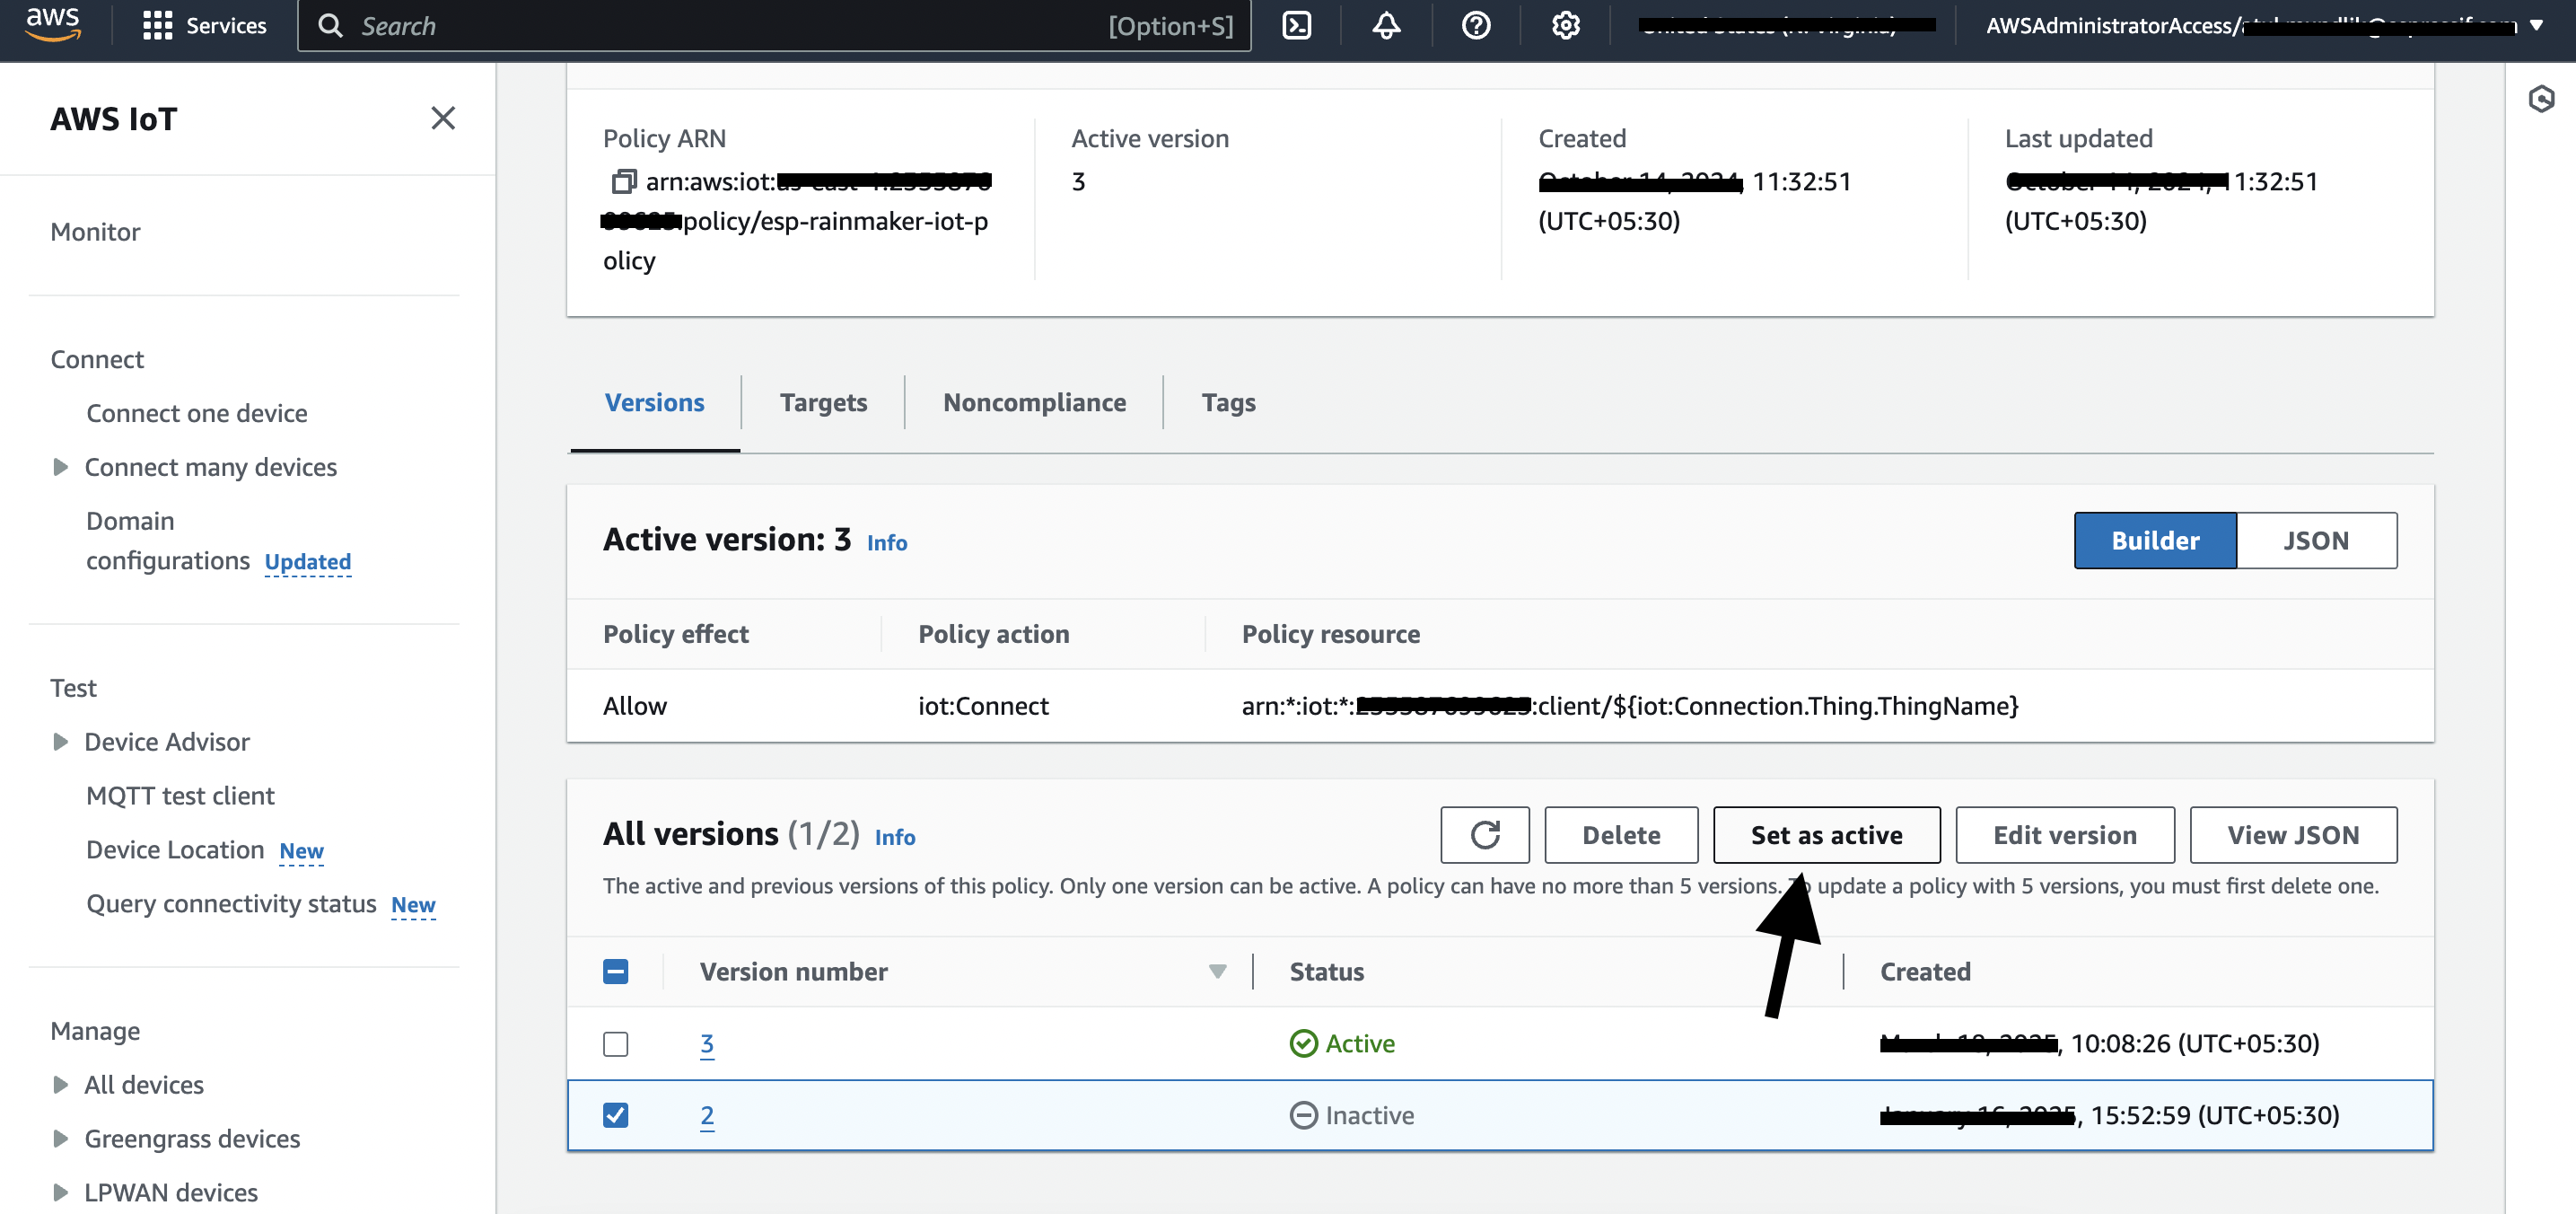
如何恢复丢失的管理员节点组映射?
问题描述
所有早期版本均存在节点重置问题,会错误地将节点从管理员组中移除。如果将 OTA 配置到某个管理员组,此类节点将无法接收 OTA 更新。此问题已在 v3.6.1 中修复。该问题可能在以下情况下发生:
- 节点在连接 MQTT 时重置为出厂设置
- 新用户接管了之前映射到其他用户的节点
由于时间跨度较长且可能发生了手动操作,无法完全确定受影响的数据并进行历史数据修正。
恢复范围
基于节点注册的分组(自 v2.8.0 起):
- 可以恢复从 v2.8.0 版本开始约一年前发生的节点注册的管理员节点组映射。
动态分组:
- 将根据
group_query条件(基于node_type、node_model、node_fw_version)对所有现有活跃节点重新分组,以恢复动态组�映射。
限制
- 五年期间手动修改的分组无法恢复。
恢复脚本
下载脚本:
如何运行 (AWS CloudShell)
# 1. 在 CloudShell 中下载脚本
wget https://esp-rainmaker-generic-315787942180.s3.us-east-1.amazonaws.com/scripts/restore_admin_node_group_mappings.py

# 2. 首先在 DRY RUN 模式下运行(不进行任何更改)
python3 restore_admin_node_group_mappings.py --region <your-region>

# 3. 在 LIVE 模式下运行以恢复映射
python3 restore_admin_node_group_mappings.py --region <your-region> --live
输出
- 控制台仅显示摘要
- 详细日志文件:
restore_mappings_<admin_id>_<timestamp>.log - CSV 报告:
missing_mappings_<admin_id>_<timestamp>.csv
何时应该运行此脚本?
- 升级到 v3.6.1 或更高版本后: 如果从 v3.6.0 或更早版本开始运行 RainMaker,并且拥有包含节点的管理员组用于提供 OTA 更新,应运行此脚本一次以恢复任何丢失的节点-组映射。
- 如果发现管理员组中节点缺失: 运行此脚本检查并恢复映射。
脚本首先在 DRY RUN 模式下运行,以查看将进行哪些更改。要应用更改,请使用 --live 标志在 LIVE 模式下运行脚本。
增加 Amazon API Gateway 限制
在升级 RainMaker 后端(例如升级到 v3.8.0 或更高版本)之前,必须在部署区域将 Amazon API Gateway 配额 Routes per HTTP API 增加到 500。如果此配额过低,在创建或更新 API Gateway 资源时堆栈更新可能会失败。
- 打开 AWS Service Quotas 控制台 并选择部署区域
Region。 - 选择
AWS services>Amazon API Gateway。 - 找到
Routes per HTTP API并选择Request quota increase(或等效选项)。 - 在
Request quota increase对话框中,输入 500 作为新的配额值。此配额的 AWS 默认值通常为 300;请求的值必须大于当前应用的配额。提交请求。
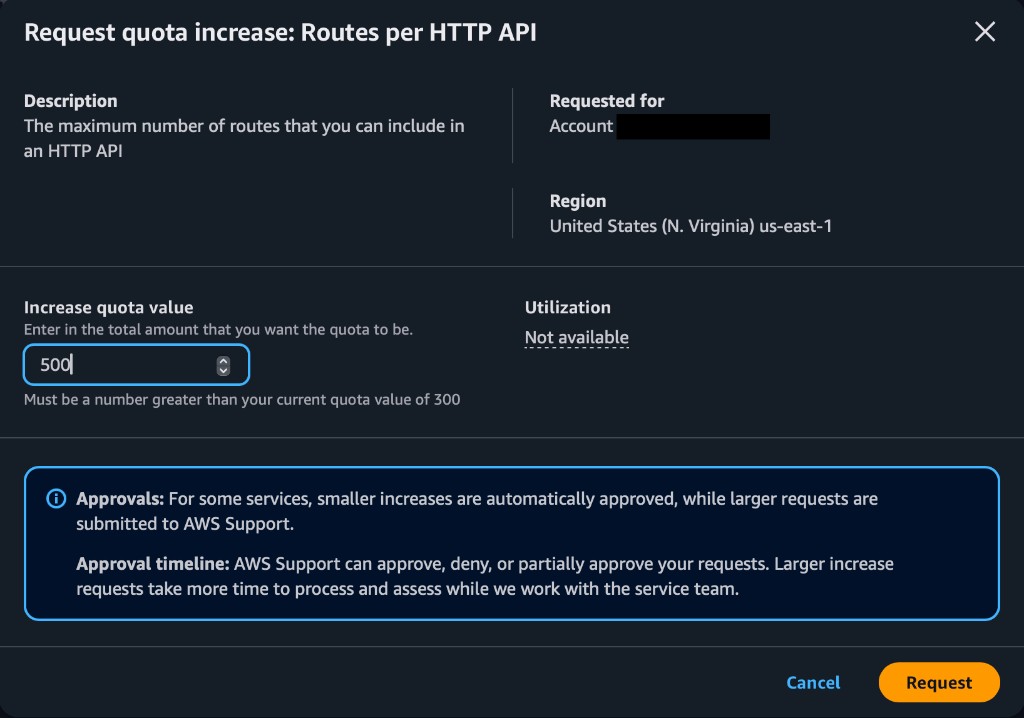
可以在 Service Quotas 的 Recent quota increase requests 下跟踪请求。以下示例显示了此配额已批准增加到 500:

如果升级失败并出现 API Gateway 配额错误,请增加错误消息中指定的配额,然后重试升级。如需进一步帮助,请联系 esp-rainmaker-support@espressif.com。